
If you’ve spent any time on Pinterest, you know that sometimes photo links there can be broken. This can be really annoying, particularly when you see something intriguing and want to learn more about it.
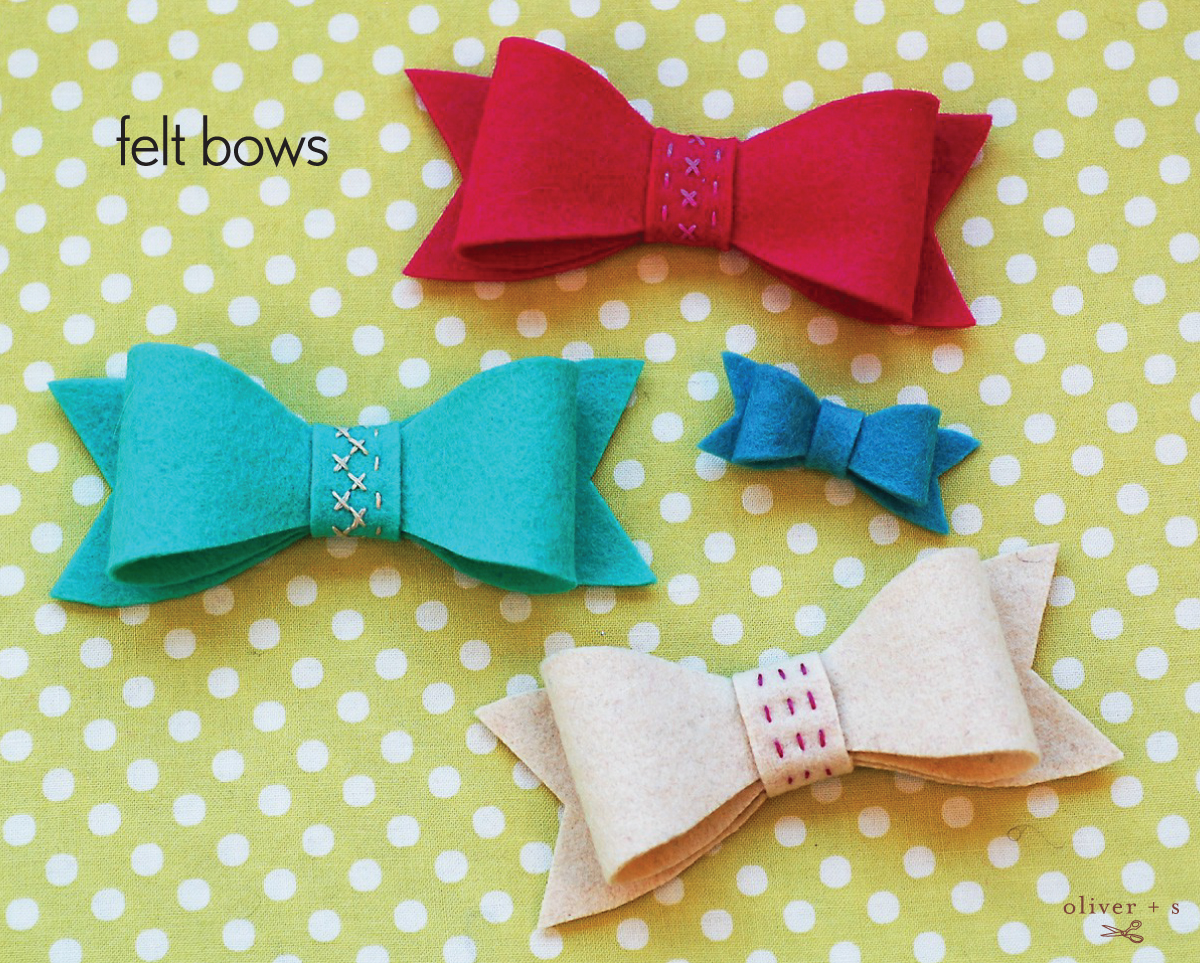
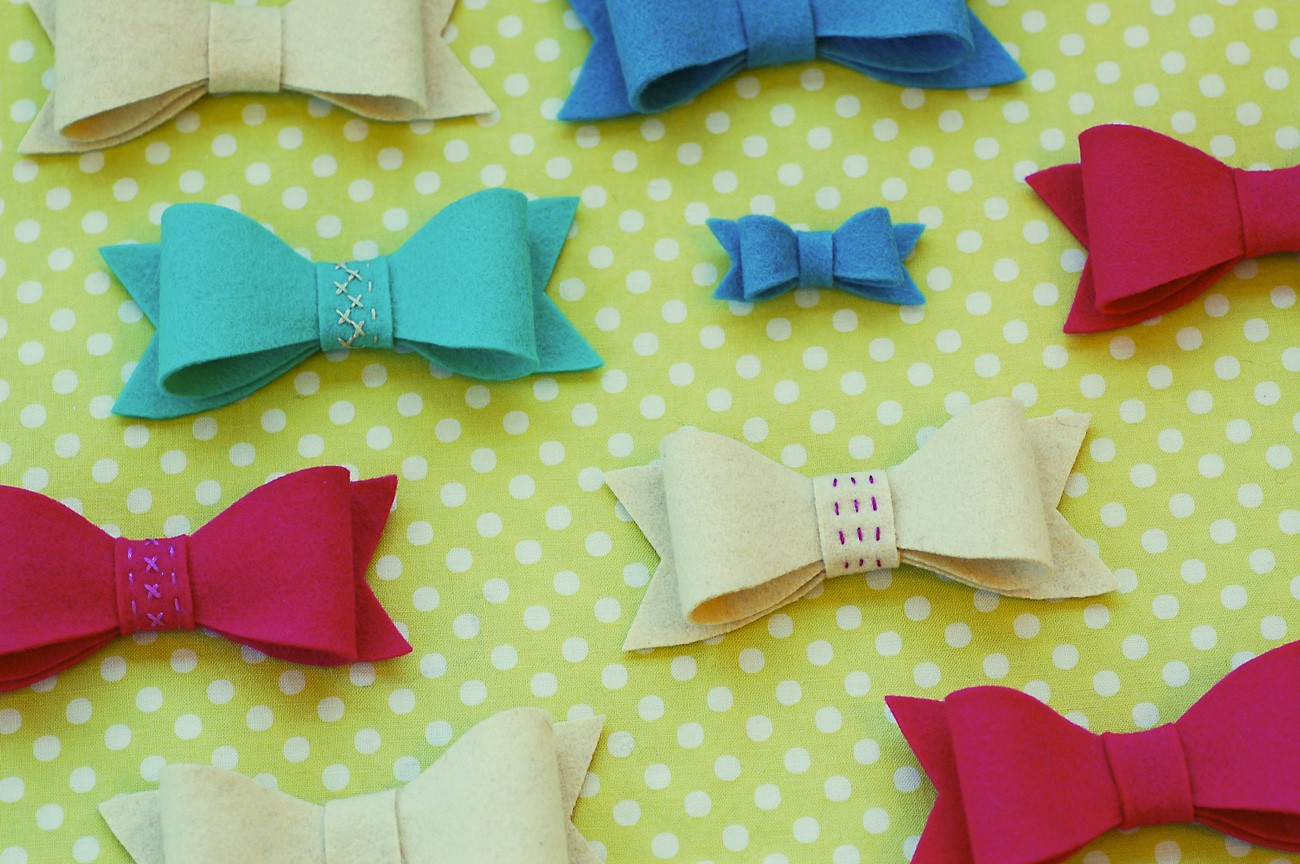
That was the case for me a while ago when I saw some adorable felt bows like these that seemed to originate from a Japanese website, but the photo had a broken link. I searched and searched and couldn’t figure out where the photo had come from (which could be blamed, in part, on my lack of Japanese skills), and finally decided that it would be pretty easy to figure out how to make them myself. So I did. And I made some. And then I went ahead and made a free pattern that you can download to make your own as well.
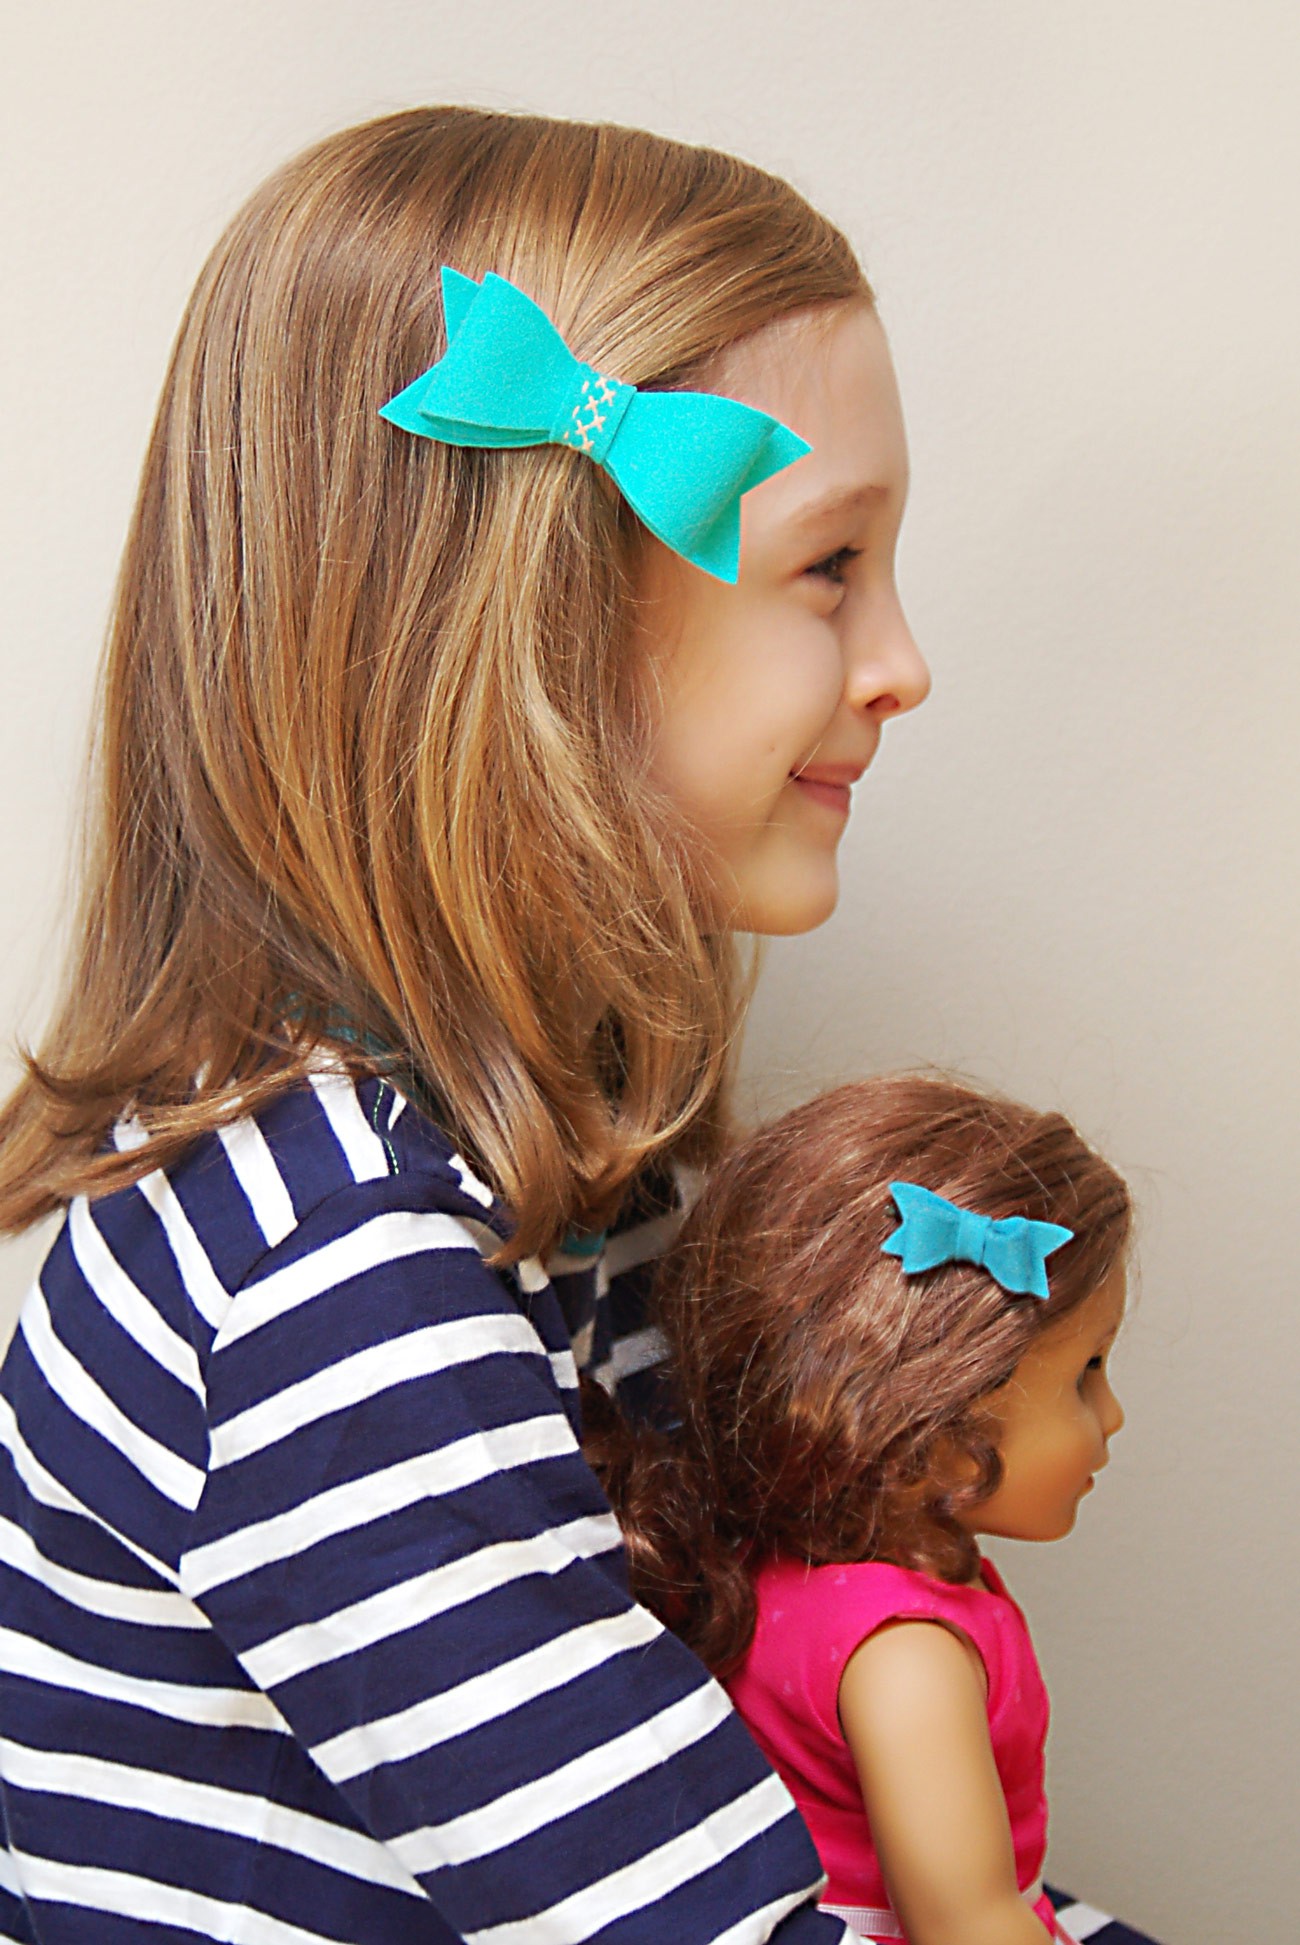
The shaping of the tie is similar to a classic men’s bow tie, so that’s where I started for this project: a basic bow tie. The bow itself has three pieces and a really quick and easy assembly that can done mostly by machine if you want. Enlarge it or reduce the size as desired. I used it at 100% for S and reduced it by about 60% to make bows for S’s doll. Once you’ve assembled the bow, whipstitch it to a little barrette or a bobby pin for a cute hair ornament, or sew it to a safety pin or locking pin (from the craft store) to wear on your coat or dress
I added a little bit of cross-stitch to the center piece using waste canvas before assembling, just for the fun of it.
We made these as favors for S’s birthday party the other day. All the girls got a hair bow tie and a felt bow barrette in their favor bags. (I hoped that the hair ornaments would make it up to their parents in exchange for all the candy sushi we made at the party and sent home with the girls. Sugar overload!)
Here’s what you need to do to make your own felt bows.
Supplies Needed
For this project, you’ll need felt, leather, suede, or some other non-woven material that doesn’t ravel. This pattern works best with something that has a little body so it doesn’t collapse on itself too much. You’ll also need thread, a sewing machine or hand-sewing needle, a pencil or tailor’s chalk. Also select a barrette or safety pin or something to attach to the back of the bow so you can clip it somewhere. (You’ll probably want to remove the bow for cleaning, so I wouldn’t recommend sewing it directly to clothing unless you don’t mind removing it and re-stitching each time you wash that item.)
Download and print out the pattern template here.
How To
1. I like to glue the paper to an old file folder before cutting out the pieces so they can be traced around easily. You can use a pencil or tailor’s chalk to trace the pattern pieces onto your fabric. Non-woven fabrics don’t have a grain, so you can squeeze the pieces together tightly to conserve space. Then cut out all three pieces of the pattern.
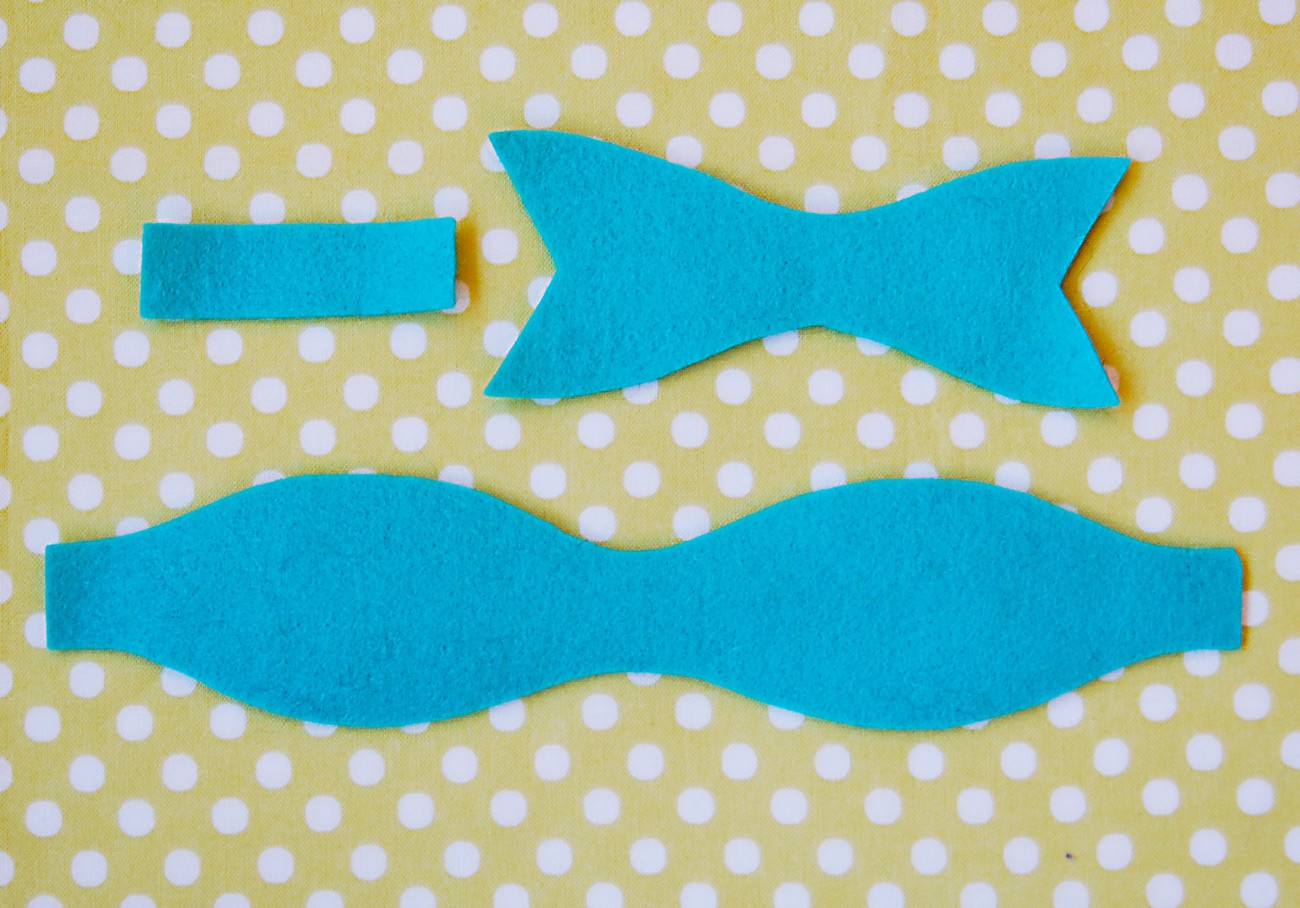
2. Start by bending the two ends of the bow loop toward the middle so they overlap. Stitch the three layers together by machine or by hand like this:
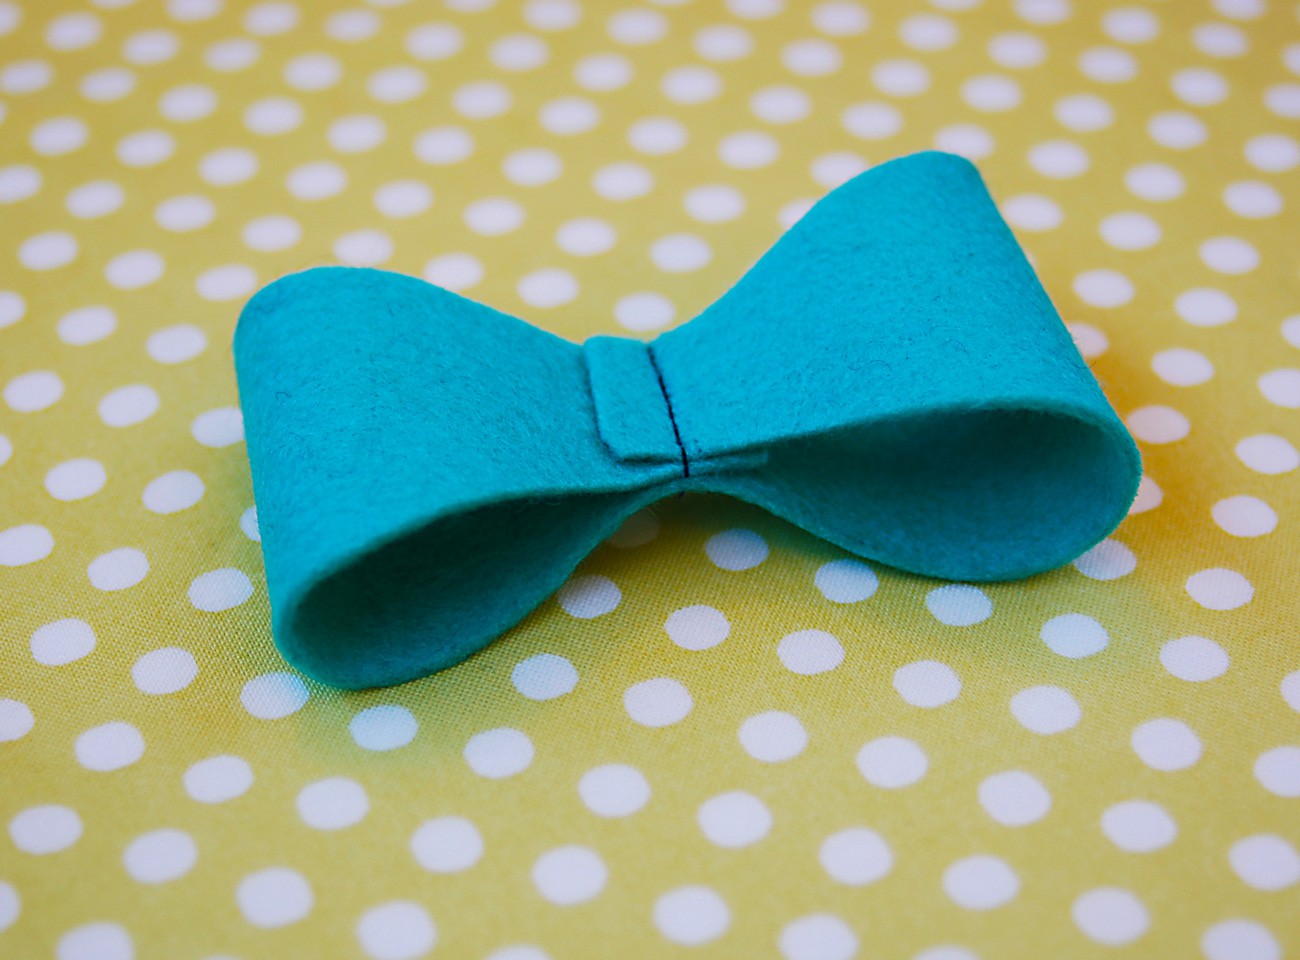
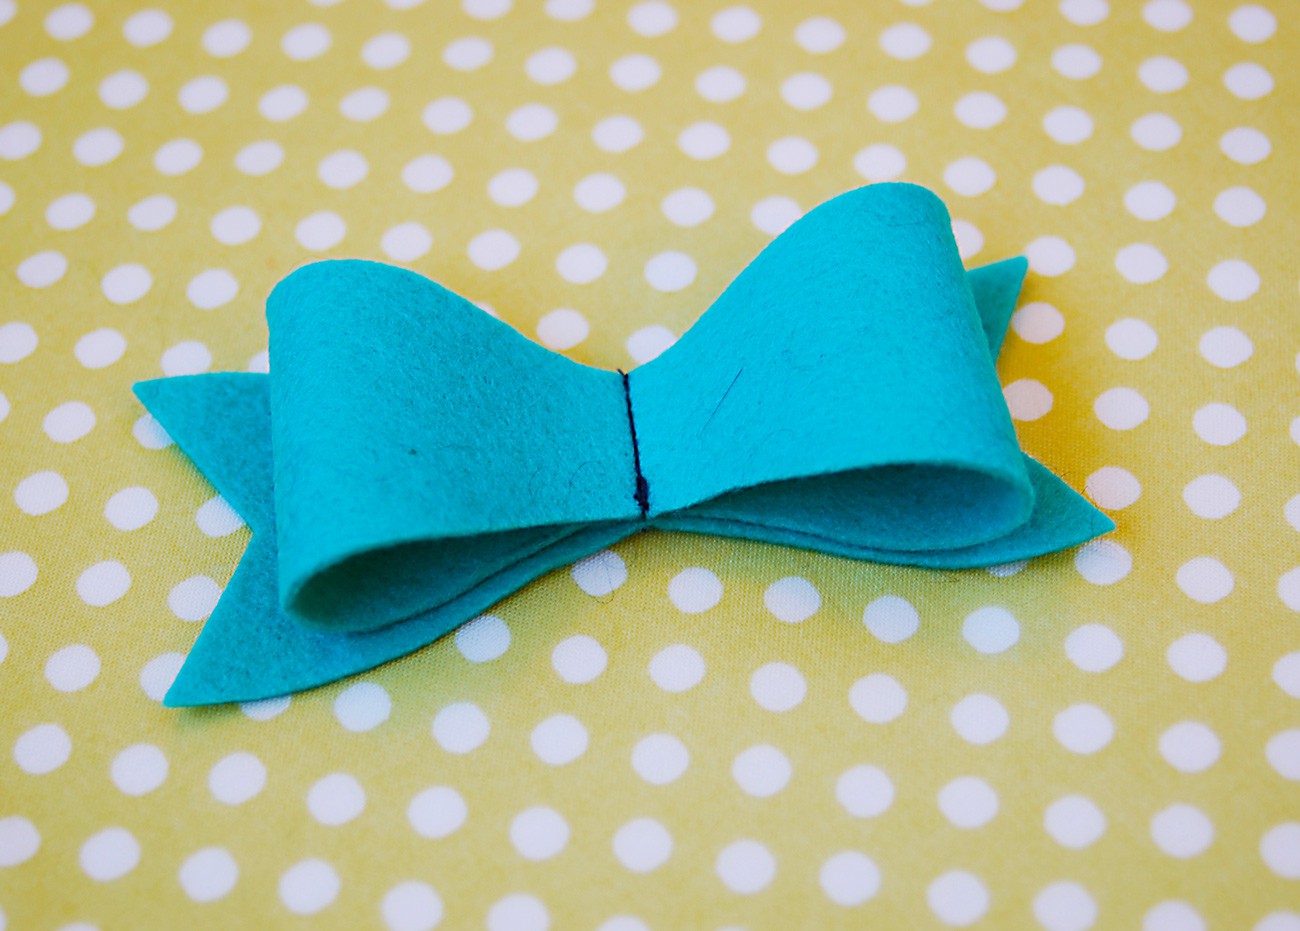
3. Turn the stitched bow loop over so the middle portion is face up, and position it over the base, centering the pieces so the narrow portions match. Stitch through all the layers down the center to hold them in place as shown:
4. If you want to embellish the center piece, do that before you attach it. Then wrap it around the narrow center of the assembled bow snugly and pin the ends at the back so they don’t show.
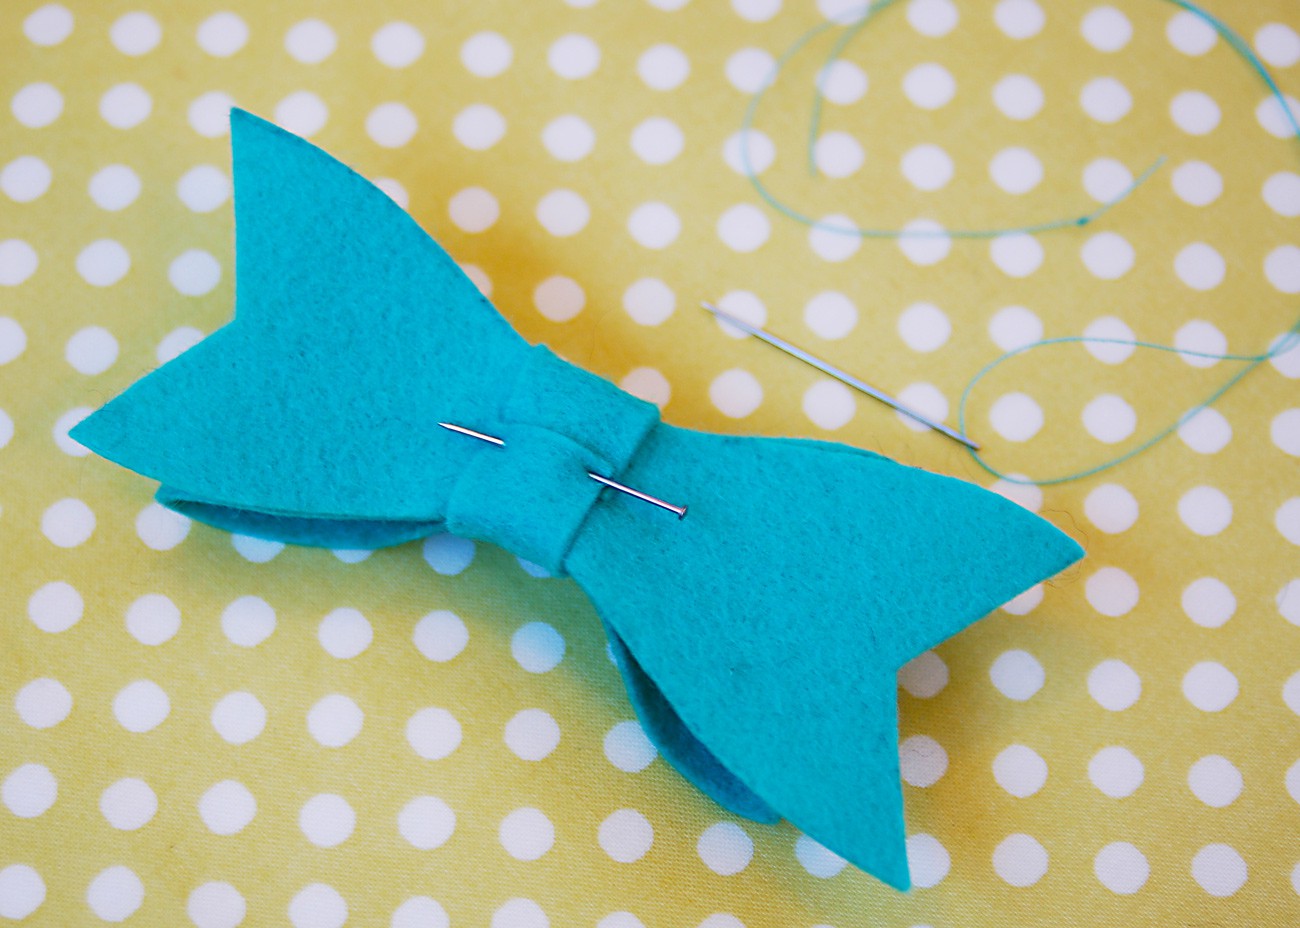
5. Hand stitch the ends of the bow center together, taking a few stitches through at least a couple of the other layers to keep everything in place. Slip a safety pin under the loop and stitch it in place, or whipstitch a barrette to the back of the bow.
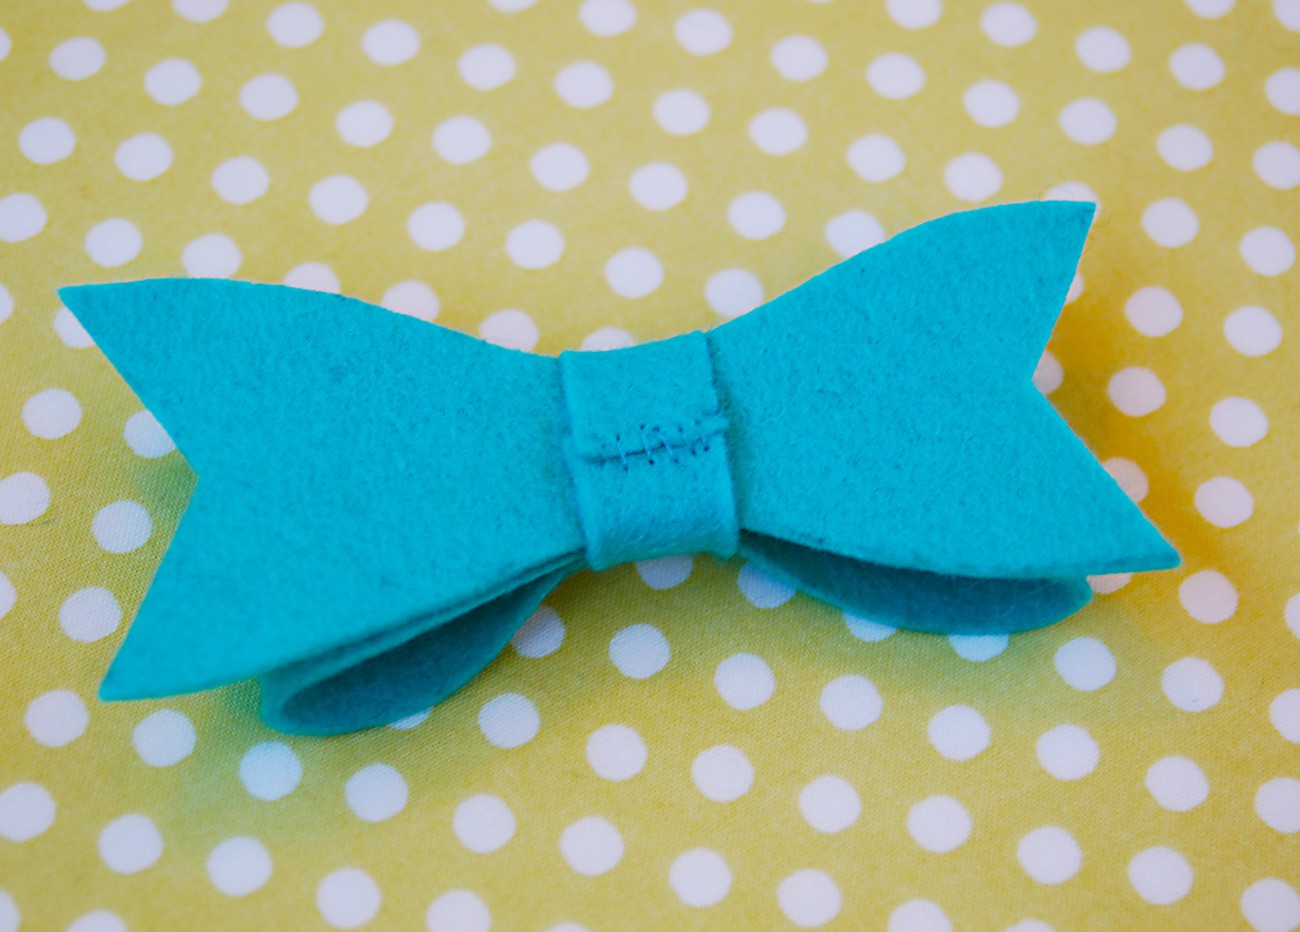
6. Finished! What are you going to embellish with these bows? They could be a cute addition to a spring or Easter wardrobe!

If you enjoyed this blog post, why not sign up for our newsletter? It’s free, and you can opt to have new blog posts sent to you by email too!