
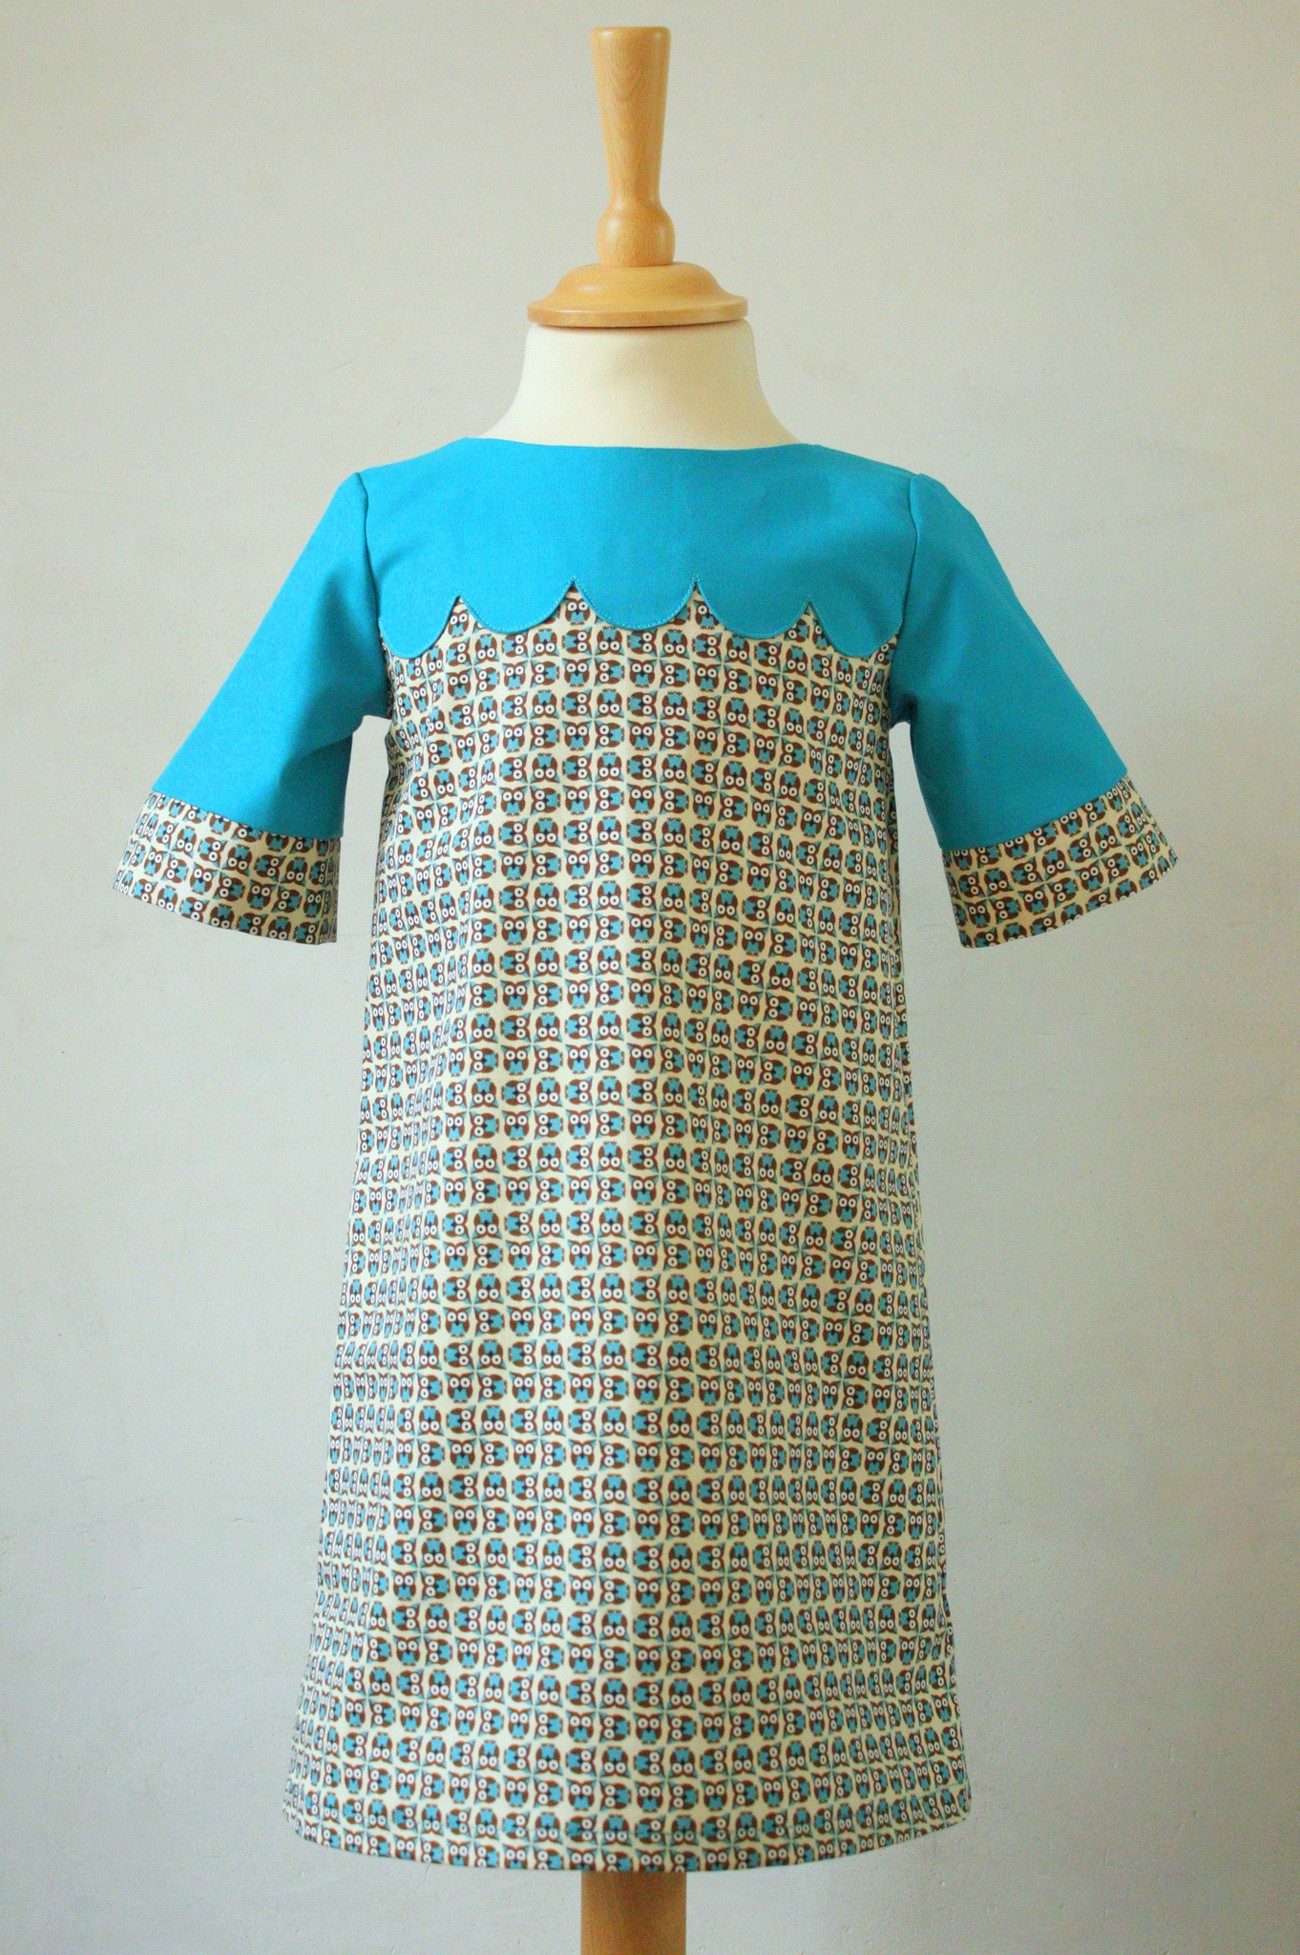
If you keep an eye on the Oliver + S Flickr group, you may have seen this dress show up a while ago. I think a lot of us sort of freaked out when we saw it. The idea to add a scalloped yoke to a School Photo Dress is such a wonderful detail.
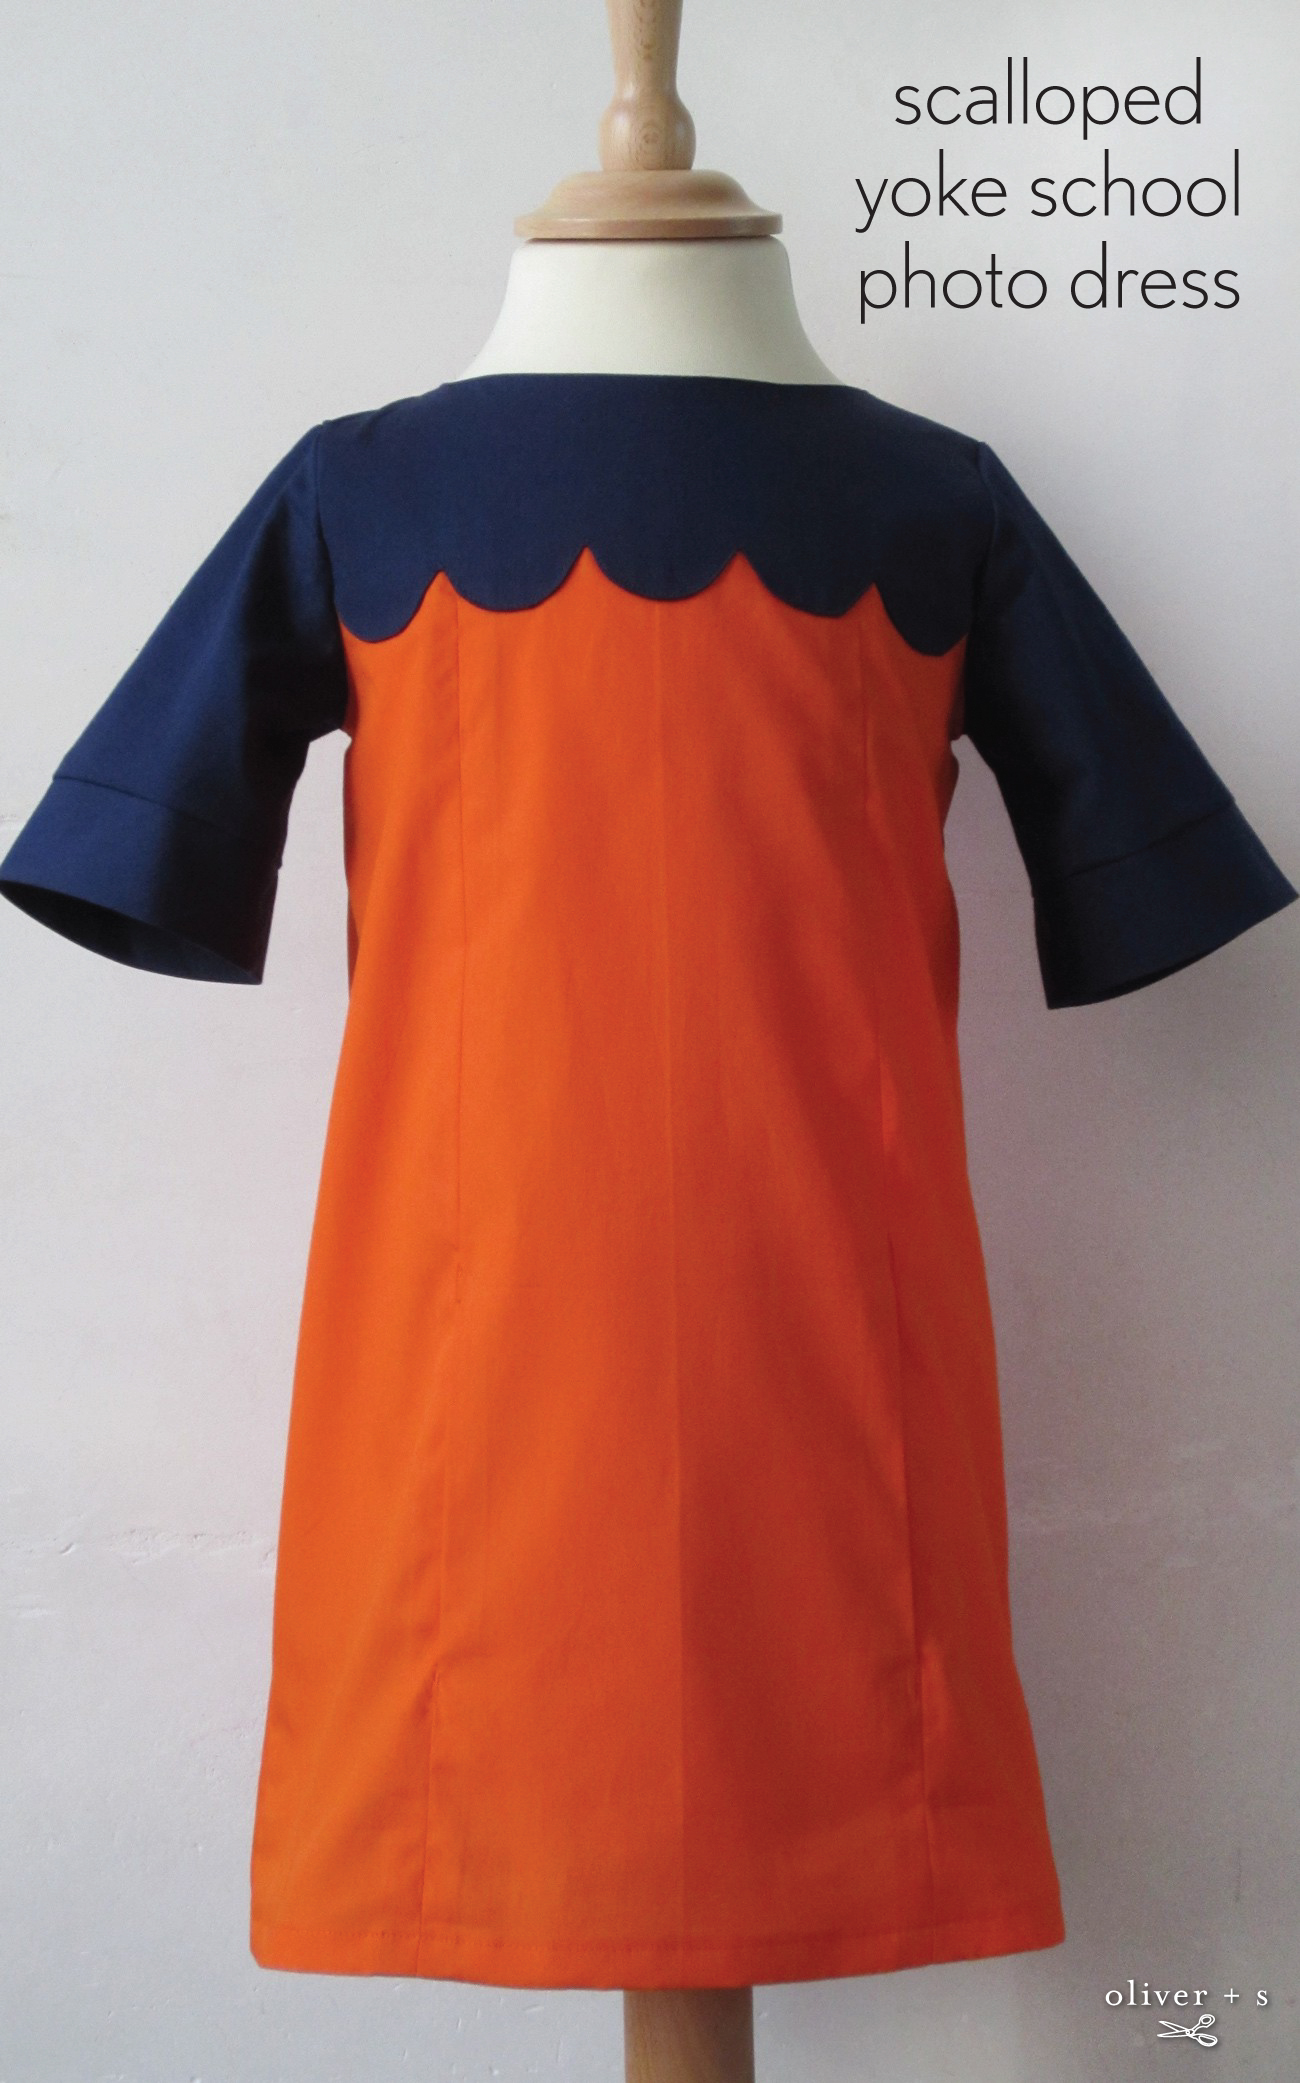
After I saw it, I contacted Nele (who made the dress) to see if she might be interested in telling us more about how she customized the pattern. And Nele was so generous, she even sewed up another version of the dress so she could take photos to show us! So here she is with a really nice tutorial for you. Our first Customizing with Oliver + S post for 2013. Thanks so much, Nele!
Hello there! I’m Nele from Ghent, Belgium. I blog at Spiegelstiksels about my sewing, mostly for my four children, sometimes for my husband (and little for myself, too). I’m honored to be invited here to show you how to customize the school photo dress into this scalloped version.
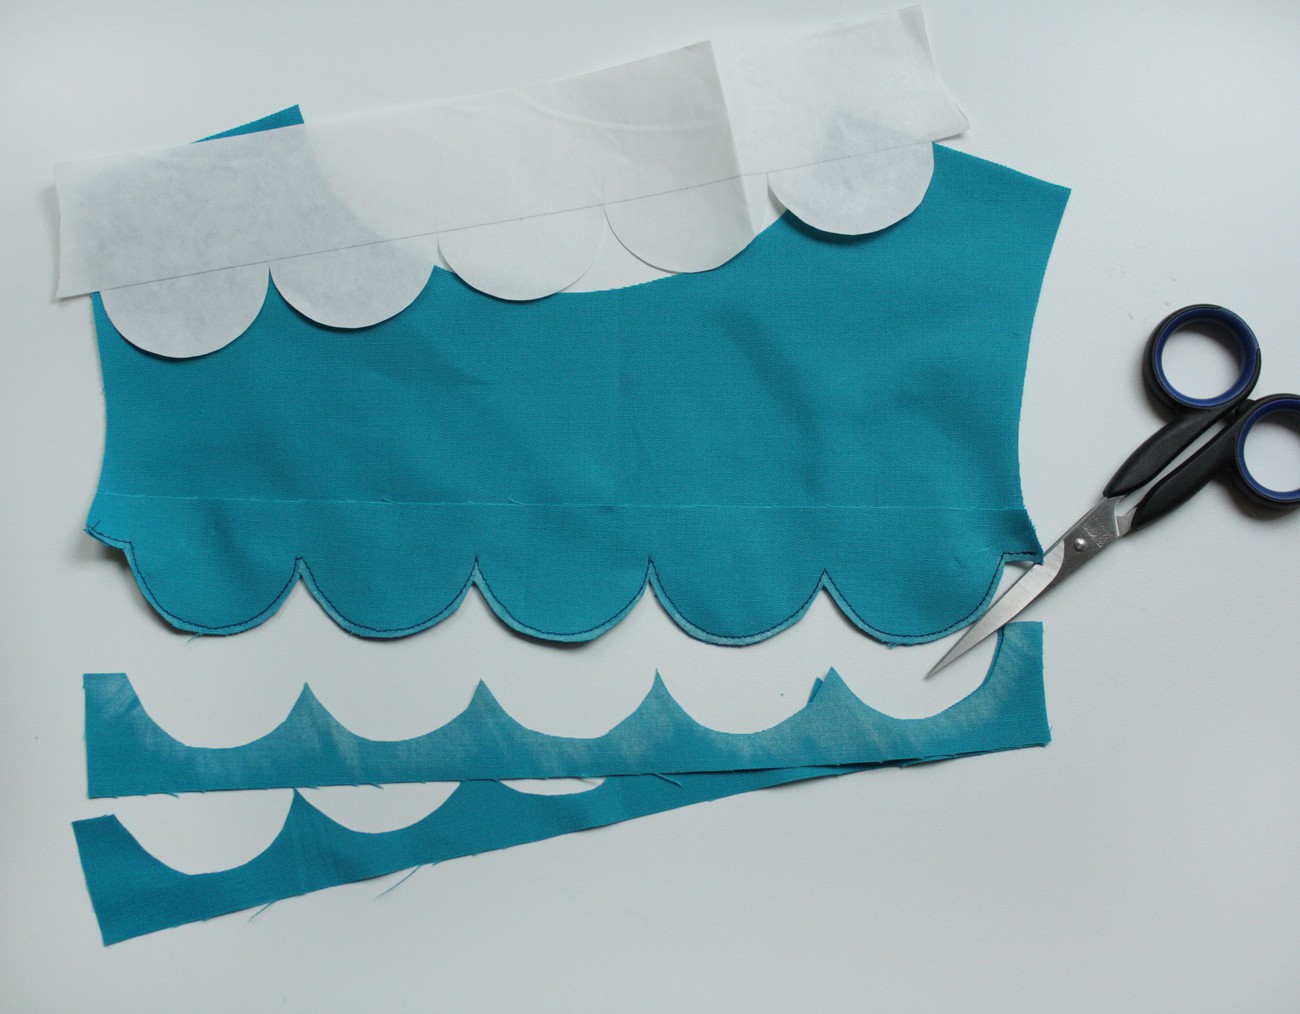
Let’s start by getting a better look at the pattern. The only piece we’ll be adapting is the front yoke piece.
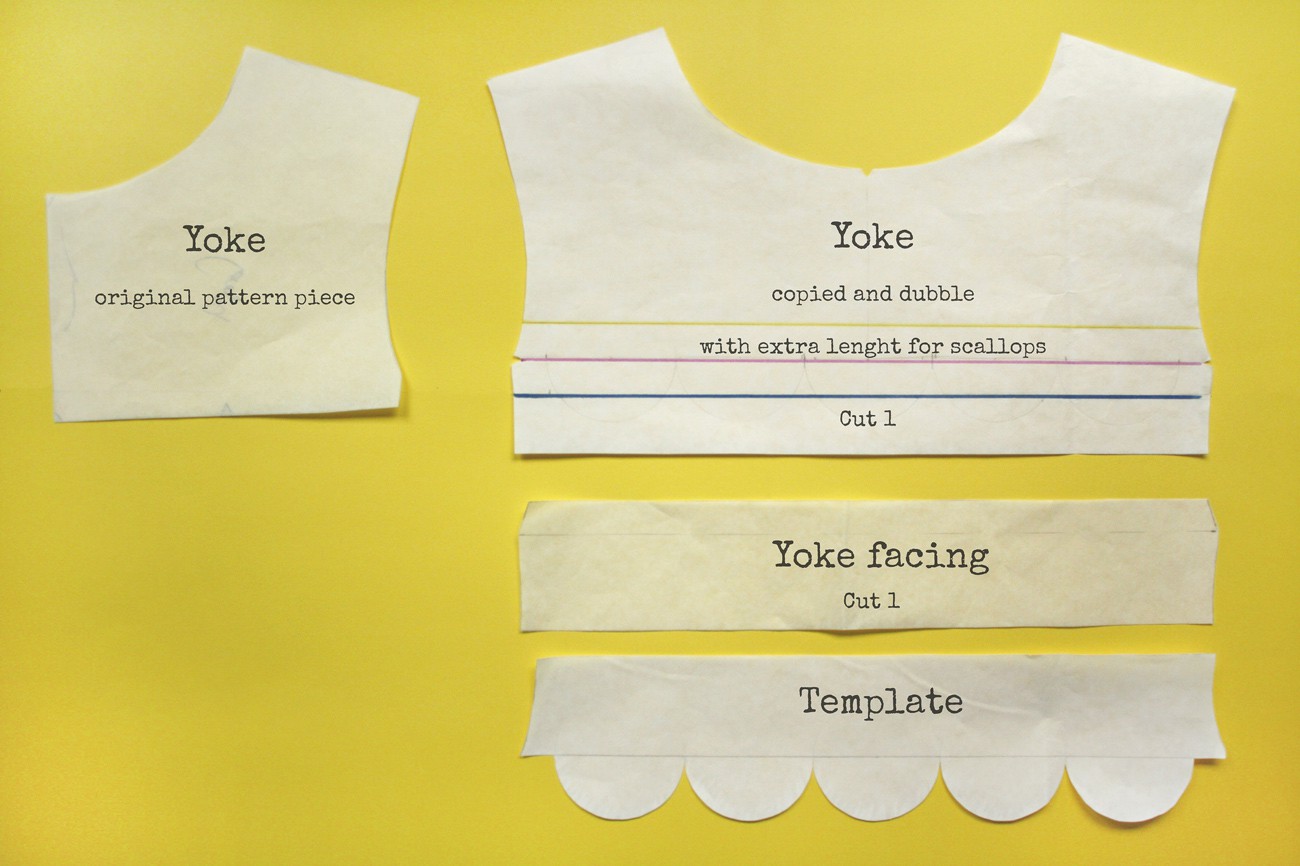
As you can see on the picture, I copied the pattern, adding a little length (+/- 1 inch) for the scallops. I also find it useful to work with a double pattern (opened out instead of cut on the fold), which makes it easier to get an idea of the result in advance.
On the picture you see three lines on the new pattern piece. The blue line is the original edge, the pink line is the original sewing line and the yellow line is where the front panels will match when attaching.
You will also need a little facing for the scallops. This is a copy of the bottom of the yoke pattern piece: it matches the yellow line.
The last piece is a template for taking over the scallops onto the fabric. To draw these you measure the pink line, minus the 1/2″ seam allowances and divide by 5.
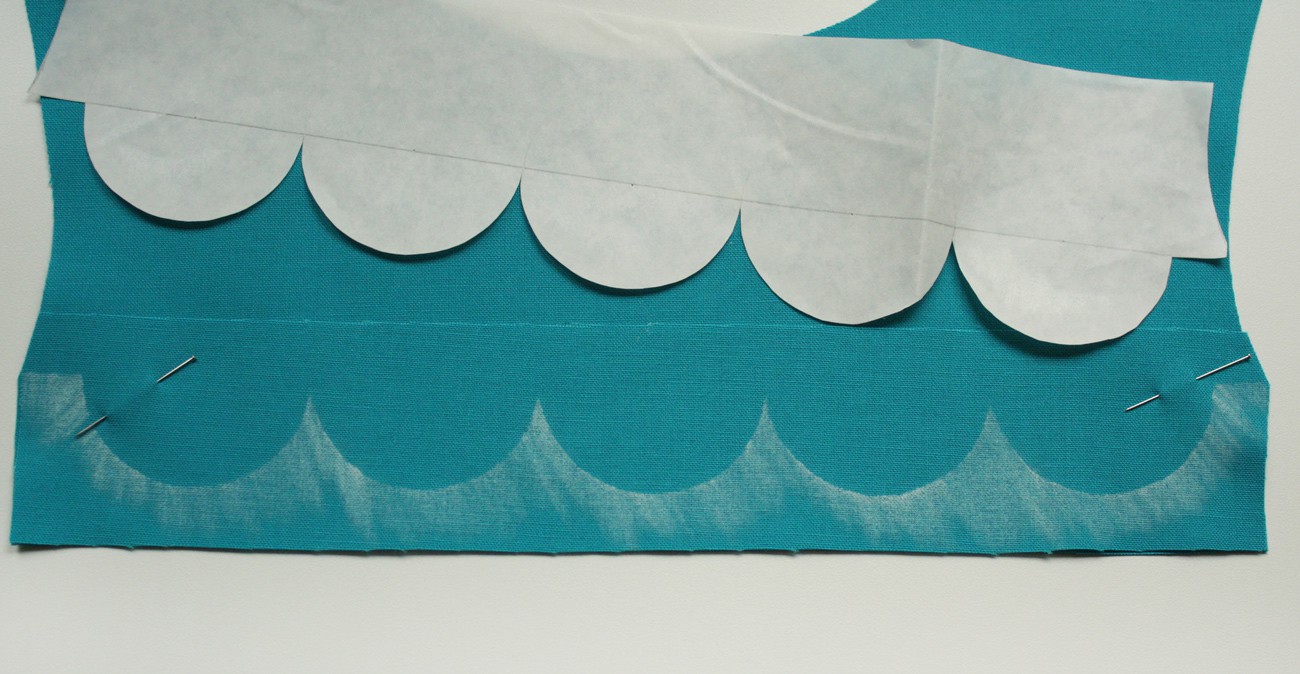
Now let’s get sewing. Pin the facing to the yoke, and mark the stitch line for the scallops with tailor’s chalk.
Stitch along this line. Of course, you could also pin your template to the fabric and leave it there while sewing. When you get to the point between two scallops, pivot the needle and take one horizontal stitch (something I forgot). Then trim the seam.

Turn, and give it a nice press.

Pin the yoke to the front panels. On the back side, the edges of the yoke facing and the front panels will match.
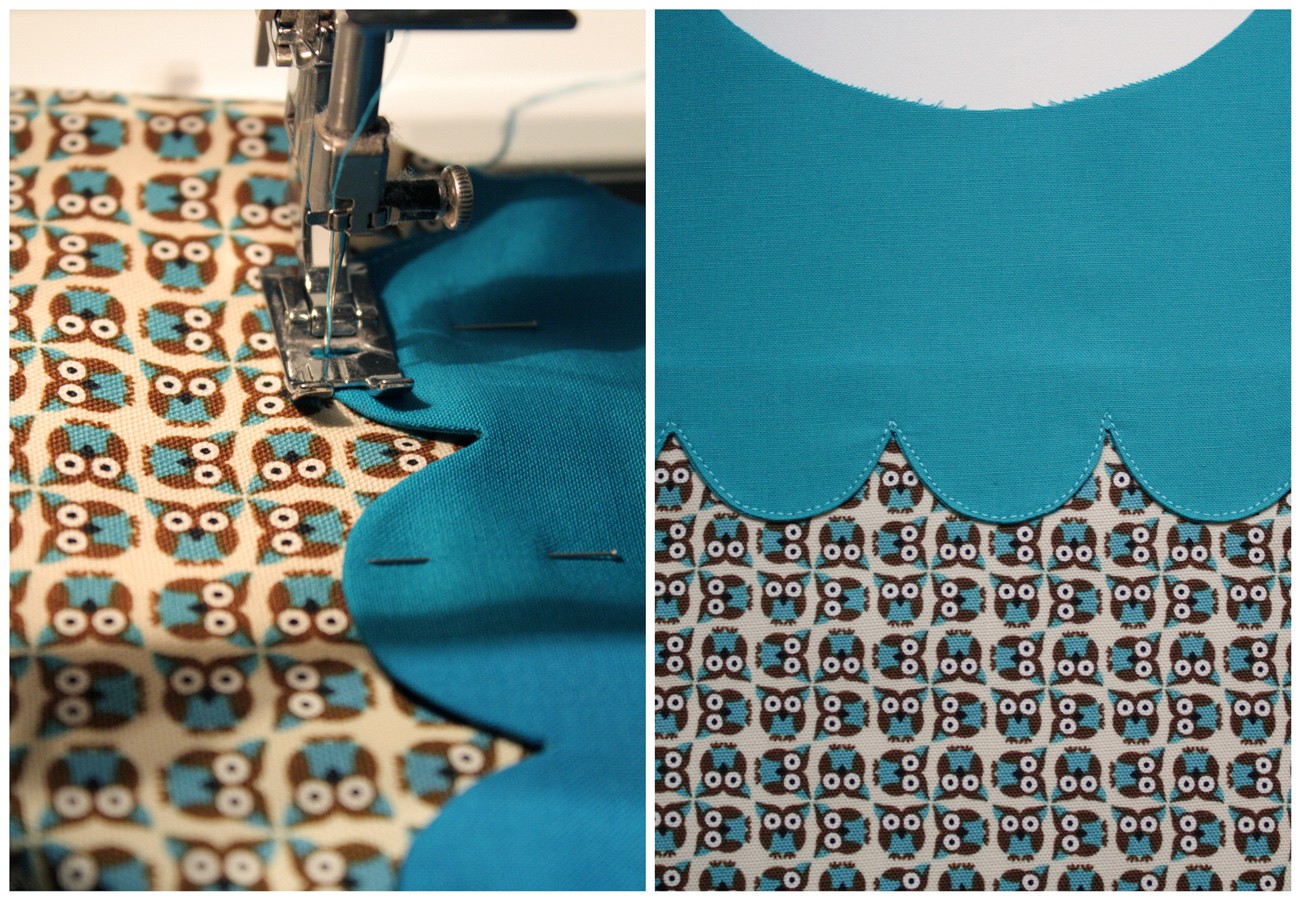
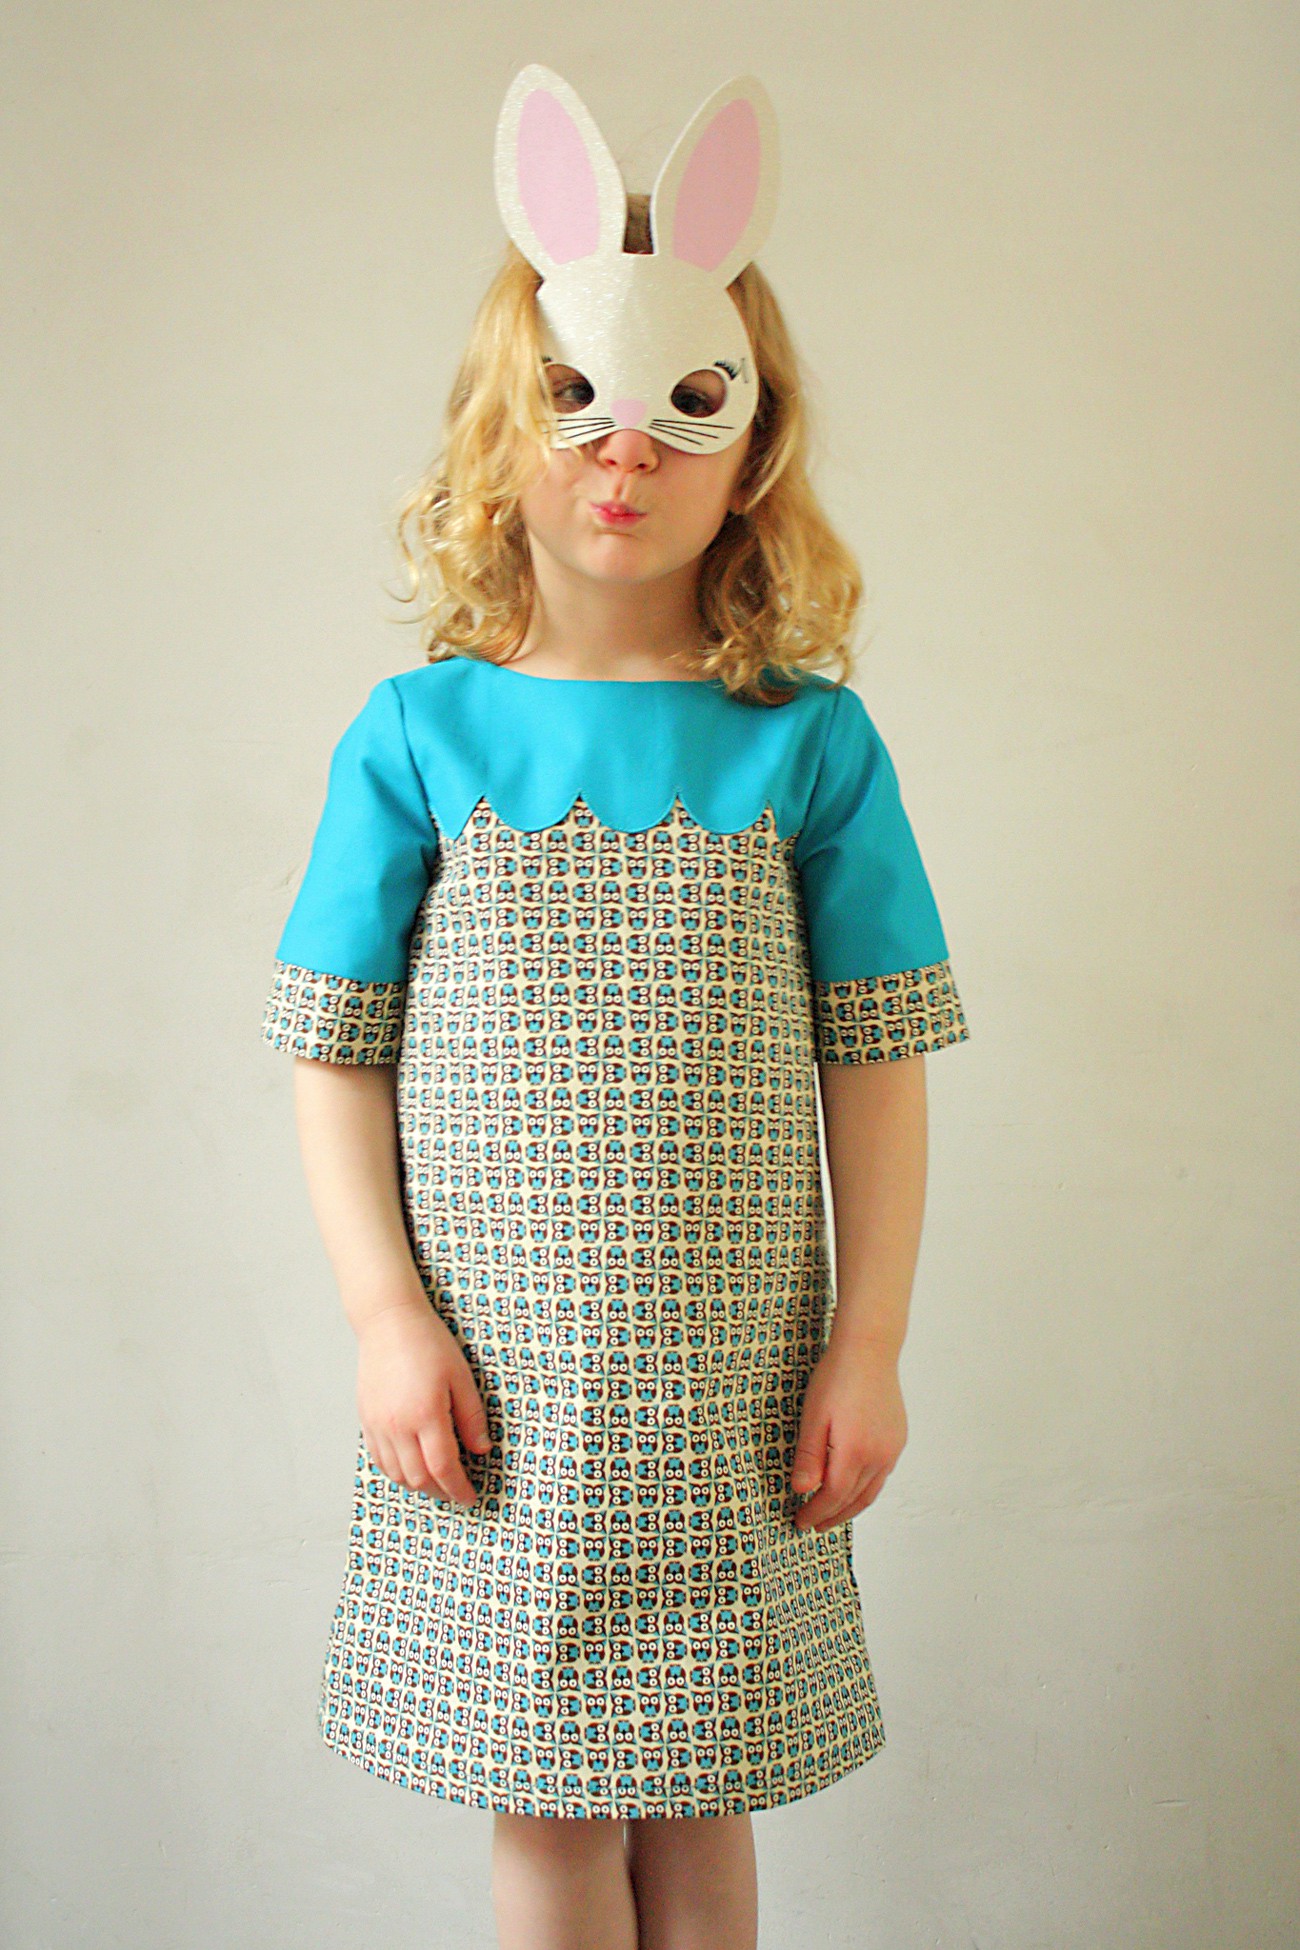
Edgestitch through the three layers of fabric and you are done with the front side of the dress. Finish the dress following the rest of the pattern. For this version I skipped the collar.
That’s it. I hope it inspires you to get customizing. Have fun!
Thanks a lot, Liesl, for inviting me over. It was a great honor!