The Playtime pattern has been a popular one and many of you already own it. If you are looking for another example of how to sew it up, Brienne has got a clever idea to get your creative juices flowing. She’s going to show us how to add an iron-on transfer image to the knees of the Playtime Leggings. Thanks Brienne for sharing your amazing project with us!
Hello there! I’m Brienne, a sewer and a knitter of handmade things for my two children. I occasionally blog at Handmade by Brienne and frequently post photos of my making adventures on Instagram. You can find me here.
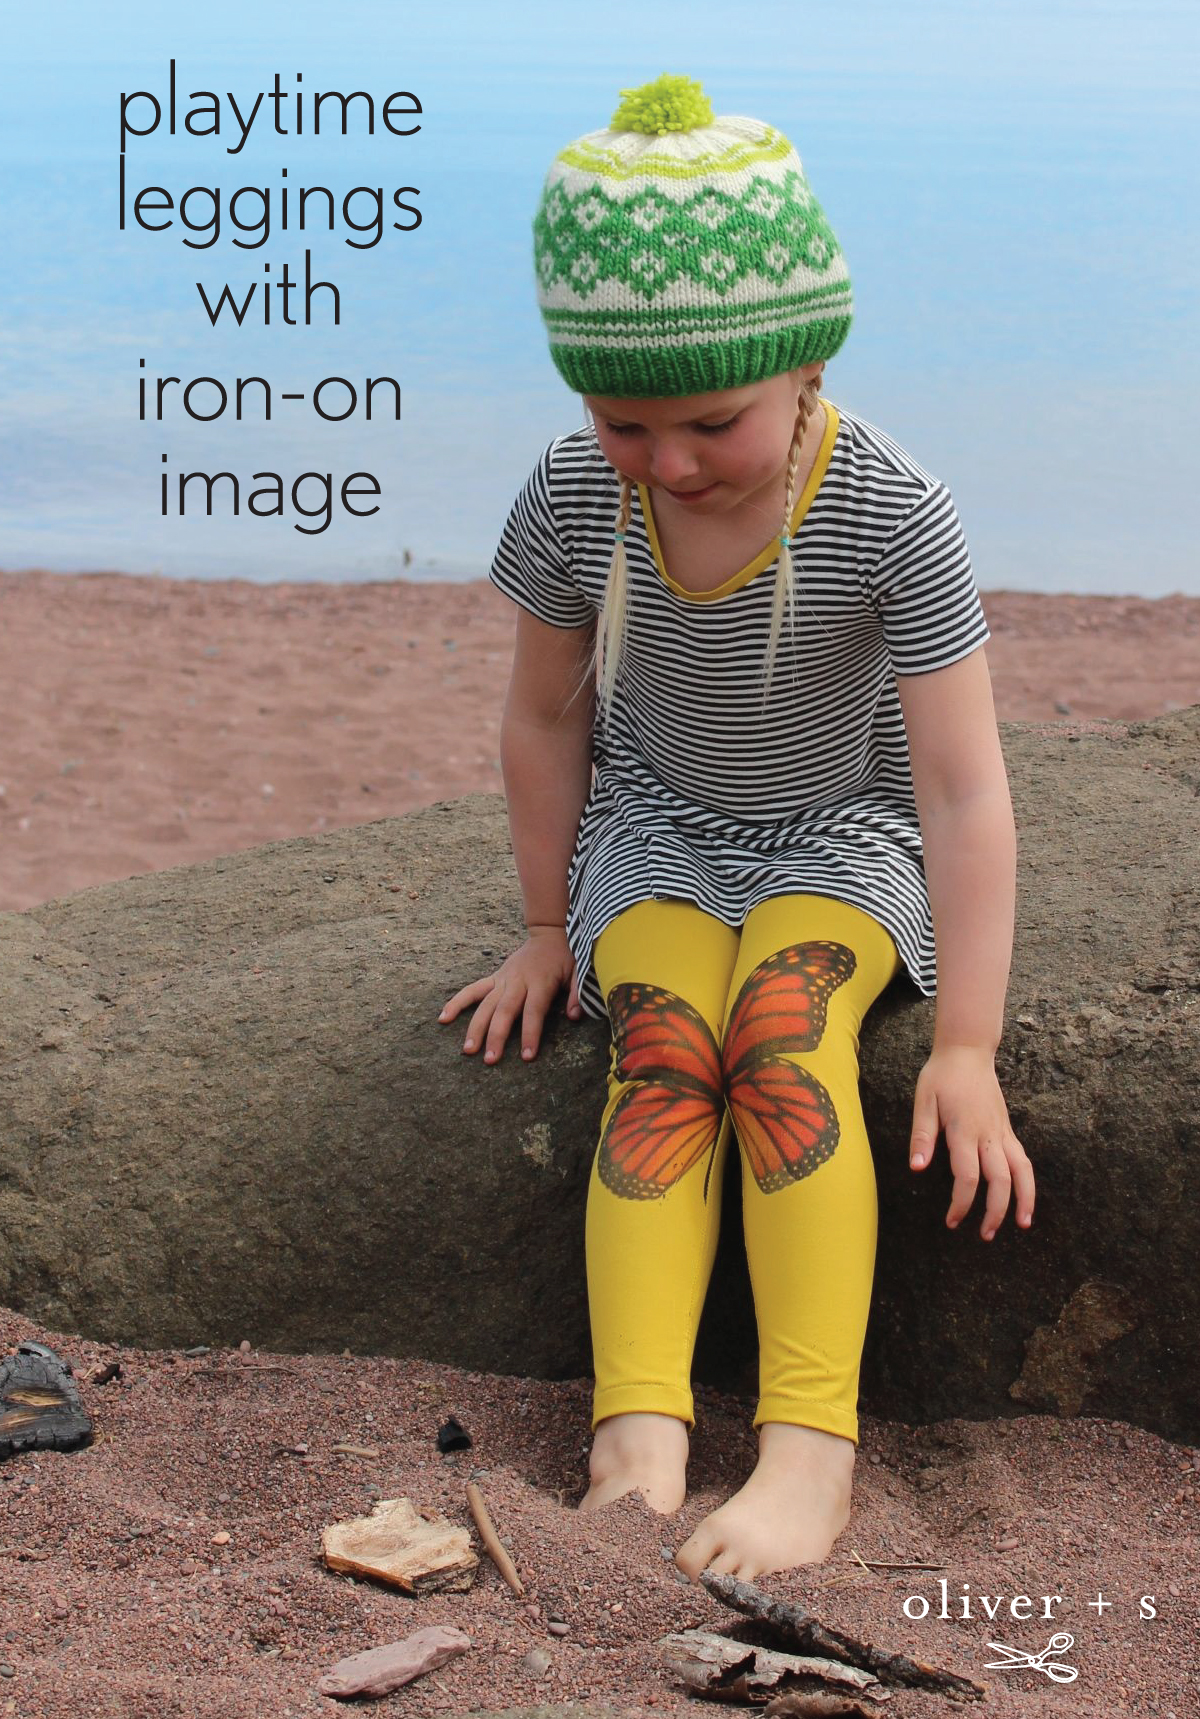
I’m so very pleased to be included here as a guest poster. If you’re here, I’ll bet that you appreciate the distinct quality of Oliver + S patterns. Maybe you turn to their patterns when you’re trying to understand the best way to approach a sewing technique. Me too! I’ve been especially excited to see the more casual collections emerging from Oliver + S including the Playtime Leggings. The leggings, though quick and easy, still include surprising details and professional finishes. For this tutorial, I’ll be using the Playtime Leggings pattern as written and applying an iron-on transfer image to the knees. Mine took a little less than an hour from start to finish, leaving plenty of time for us to watch ships at the beach.

Ready to make some art?
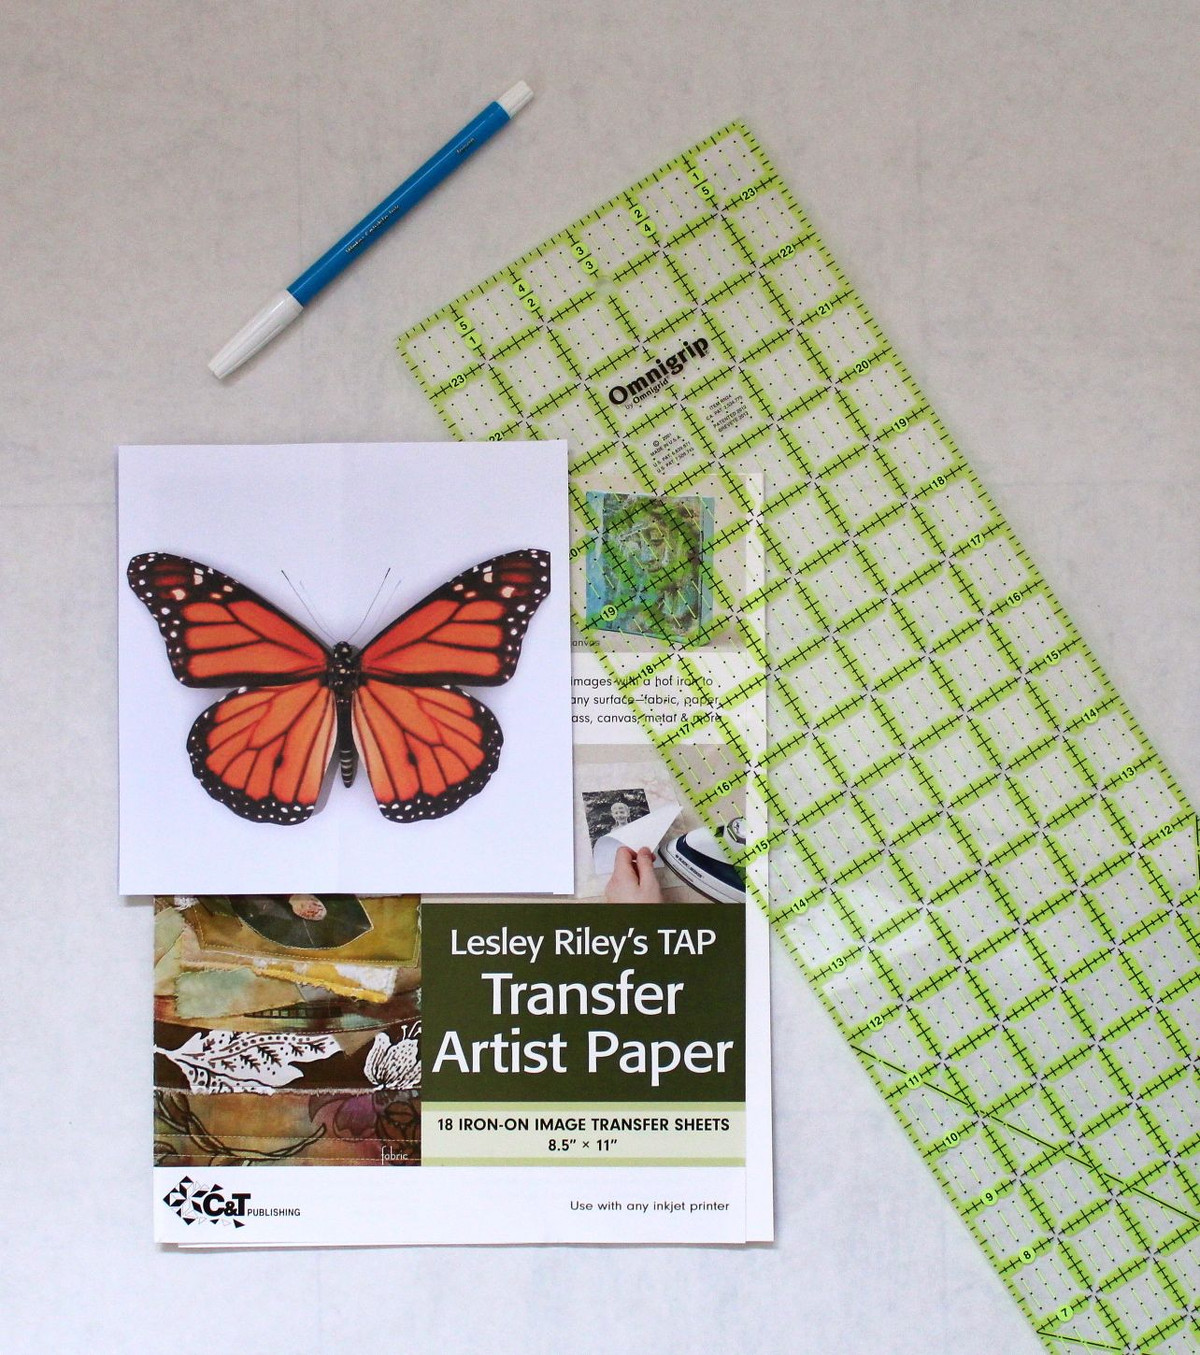
First, we’ll need to gather a couple of supplies in addition to your pattern pieces. You will need: a ruler, a marking tool, iron-on transfer paper that is compatible with your printer and a suitable image for printing. Look for a photo that has bold colors and that has a symmetrical shape. For this tutorial I’ve chosen an image of a monarch butterfly. I’ve also used a panda bear’s head. Experiment with what interests you! I find that images that feature bold contrast and few details work the best.
Once you’ve chosen an image, scrutinize it a bit. Could it benefit from a color boost? Does it need to be cropped? Make sure that it is centered on the page before you print. That will make it easier to cut into two equal halves later.
Plan to print one test page on plain paper before printing on the image transfer paper. No need for the test print to be in color, we’ll just use it to check the placement on the leggings.
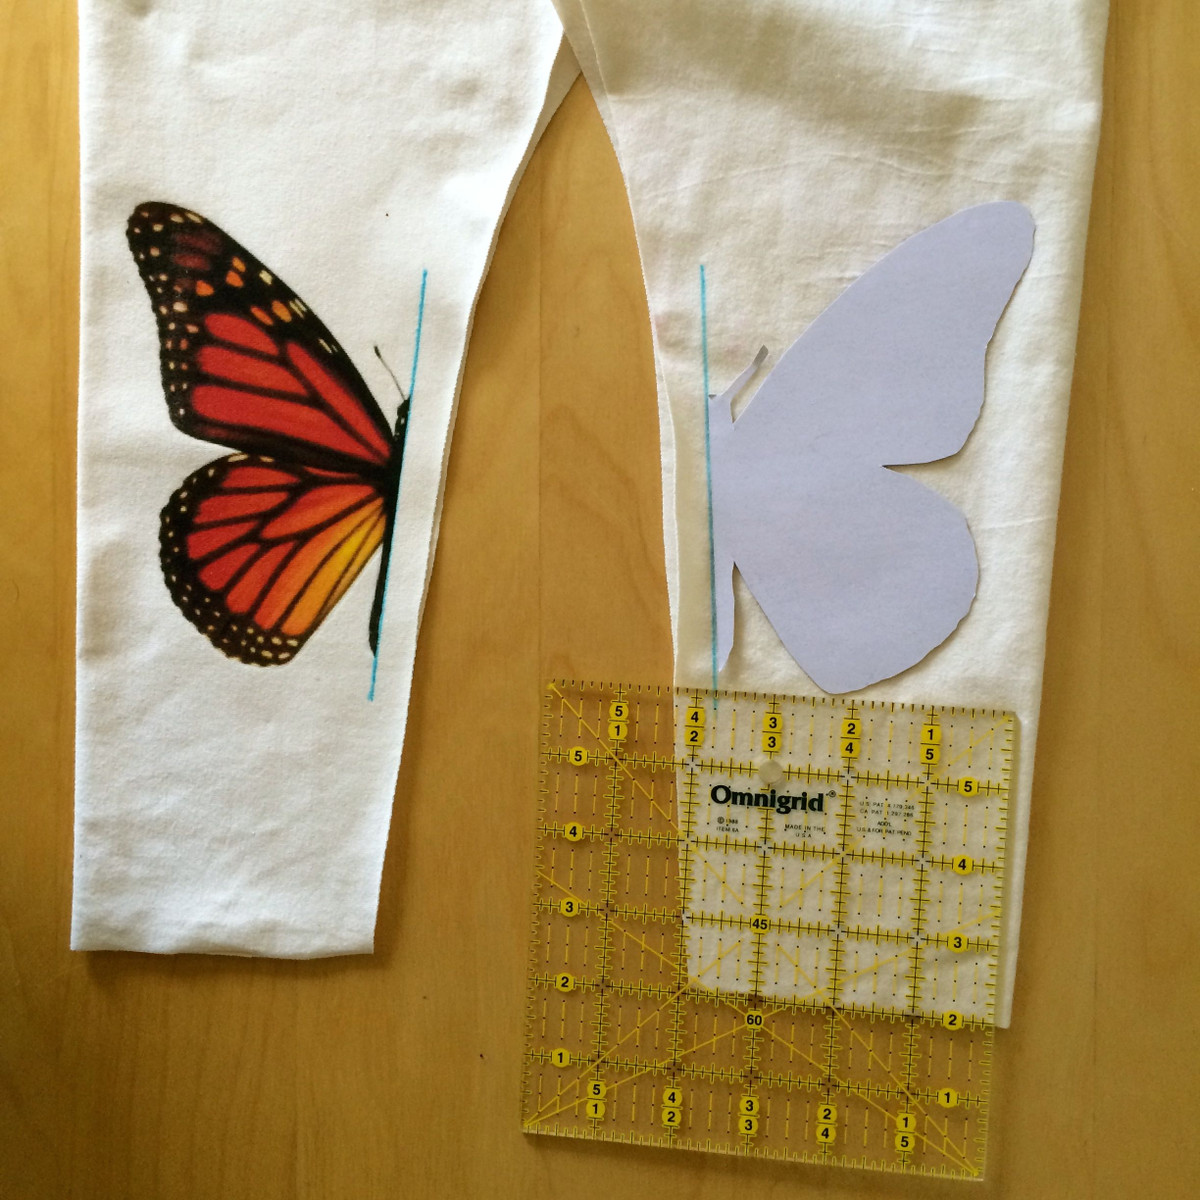
Now we need to prepare the two legs to be printed on. If you haven’t already, cut out the two mirrored leg pieces called for in the pattern. Fold them in half, wrong sides together with the front of the leggings facing up. Draw a line with your disappearing ink marker 1/4” from the cut, interior edge of the leggings. This line indicates the seam allowance. We’ll iron the image on using this mark so that part of the image doesn’t get lost under the seam.
You’ll also need to decide where your child’s knee is if you want the image to be centered over the knees. I find the center point between the leggings front rise and the bottom of the leggings and use that as a guide. You could also use your disappearing ink pen and a pair of your child’s existing leggings. Put the leggings on your child and make a mark where their knee is. Then use the marked leggings as a guide for placement on the ones that you are sewing.

Roughly cut out your test image, fold it in half and place it on one of the folded legging pieces. Check to see if the image fits well or if the size of the image needs to be adjusted. There’s quite a bit of room here for artistic preference. I like the image to be relatively large, but I don’t want it to bleed around to the back of the leggings.

Once you are satisfied with the image size, print the image, in color, onto the transfer paper according to the manufacturer’s instructions.
When the ink on the image is completely dry, cut the image in half. I use my rotary cutter to do so.
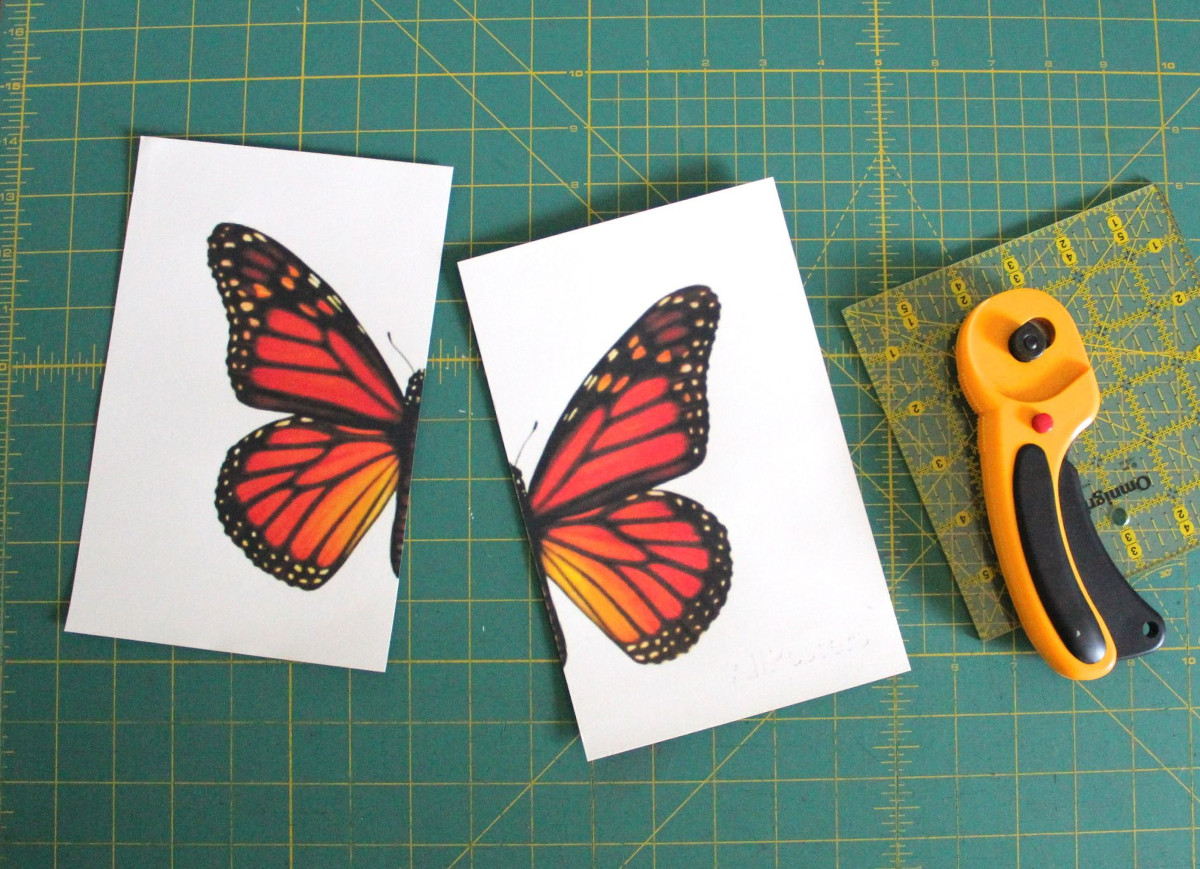
Now, carefully cut around the edges of each image half and line it up, colored side down with the line that you drew earlier. Remember that the image that transfers will be a mirror of what printed.
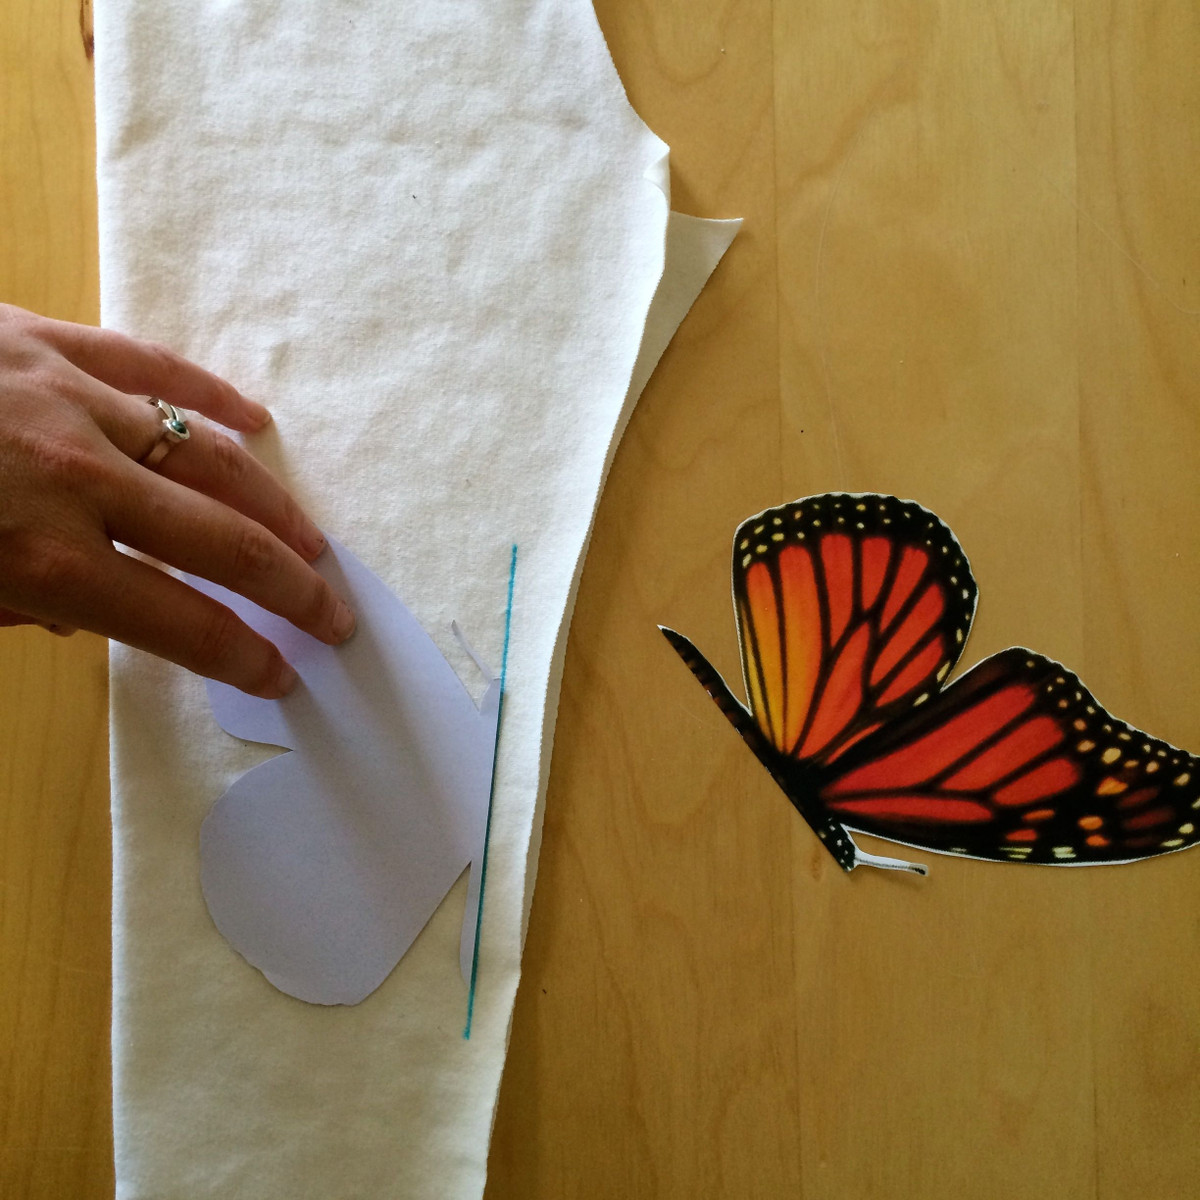
Following the manufacturer’s instructions, iron the image onto your legging piece. Take your time with this step. When you think that you’ve ironed enough, carefully begin to lift the edges, if you find that a portion of the image has not completely transferred, fold it back down and iron it again until the color has transferred properly. Repeat for the other leg, making sure to place the opposite half of the image in the same place on the corresponding legging piece. The bottom of my butterfly wing began about six inches from the bottom of my unhemmed legging piece. When it came time to transfer the second half, I used this measurement as a guide.
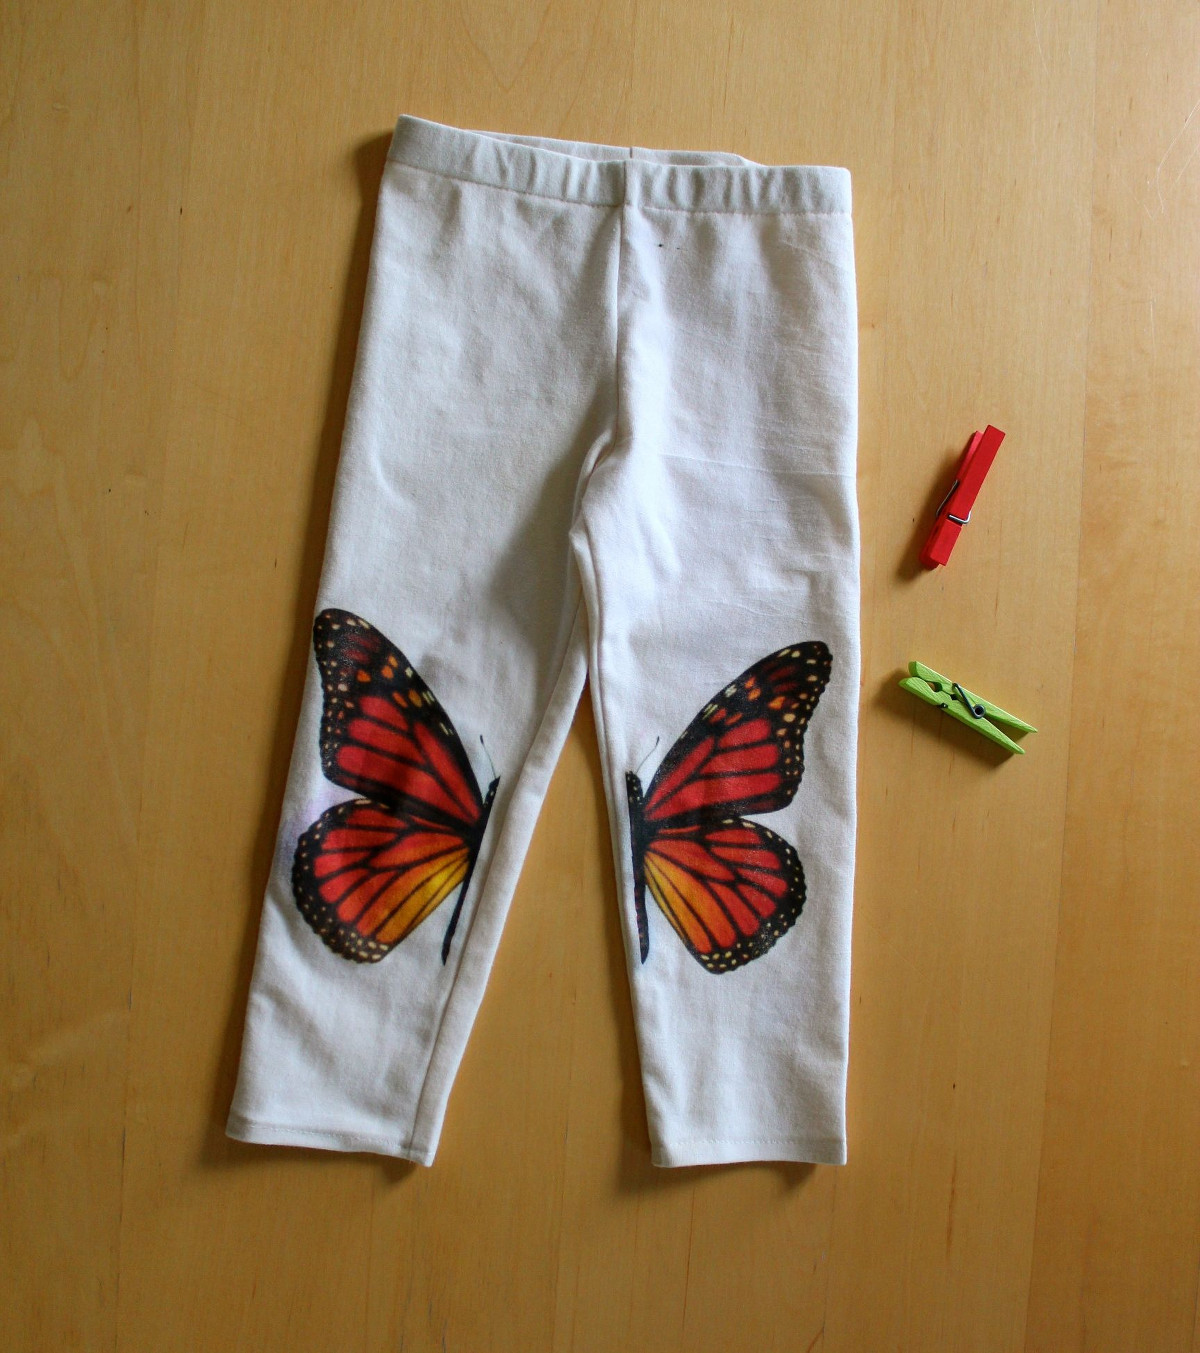
Now you should have two legging pieces, each with half of an image transferred, ready to sew. Notice that the two pieces are mirror images of one another.

Time to sew! Complete the instructions for sewing together the leggings according to the pattern’s instructions.
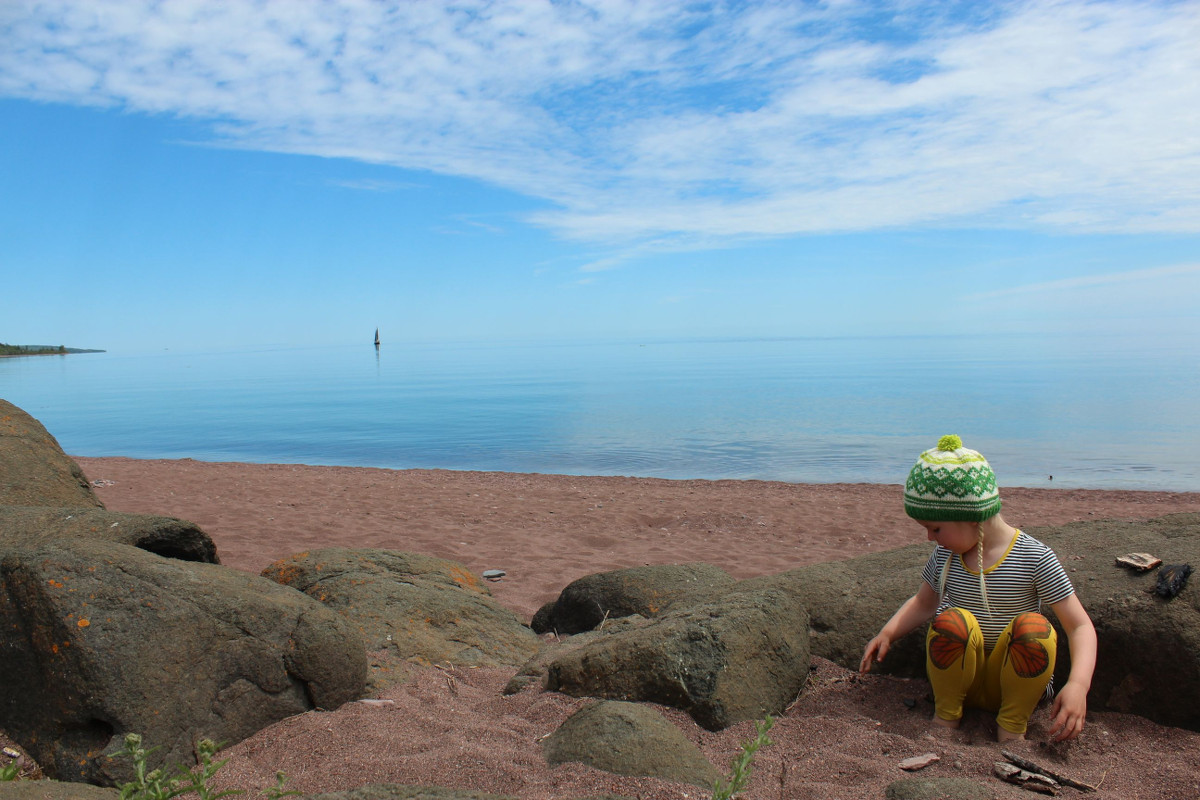
And here’s a pair of leggings in action.


Thank you for having me! I look forward to seeing what you make!
Oh Brienne, seriously you’re the coolest mom ever. That is such a cool idea! Love it!
How incredibly cute! Such a fun idea Brienne.
Very cute! I’m sure my daughter would love these.
Brilliant, Brienne! Thank you so much for taking the time to write this post. Your daughter is adorable! And that scenery!
This is so cool! Any idea how well it holds up in the wash or with them rubbing up agains things with their knees?
Very very neat!
Thanks for the support, dear friends!
Regarding the washing/wearing… Good question! The image will fade with washing a bit. But if the image has been transferred properly it will be long lasting. I made a shirt for my daughter a couple of years ago that she still wears. The image was simple with very few lines and still looks great.
Also, if the leggings are worn with negative ease, it would improve the longevity of the image to stretch the fabric before transferring by using a cardboard or something inside the legs while you transfer. My daughter’s leg is exactly 6″ around, which is very close to the measurement of the leggings around. So I didn’t stretch them before transferring.
I hope that this helps!
Hi Liesl,
What a great honor it was to contribute! Thank you for having me. And yes, the scenery around here is not bad! A great place to raise little people:)
The timing on this couldn’t be better — my daughter JUST asked me for something like this (socks, but I am not up to making socks at home just yet!) this very morning. She will be totally thrilled to have a set of these!
WAY COOL . . . YOUR GOLD LEGGINGS WITH 1/2 MONARCH BUTTERFLY on both inner legs for your young girl! It’s certainly a UNIQUE idea, clever indeed, Brienne! Vivid orange & black wings highlight these leggings, an Oliver + S pattern! Your step-by-step instructions are easy to follow & FAB photo shoot! Thanks for inspiring many Moms! Sarah in Minneapolis
What a clever and inspiring idea!
These leggings are brilliant! I absolutely love this. You’re so clever for coming up with an affordable pair of those cute leggings that designers were selling last year. And the butterfly is perfect.
These leggings are so cute not to mention absolutely beautiful! I have the pattern from Oliver&S but so far have been chicken to sew them, even though my granddaughter lives in leggings! I will have to try this. Did you find the butterfly picture online or from a book?
Thank you for posting and for blogging. Have a good day.
Thanks for the tutorial Brienne – the leggings are so cute with the transfer on them! And I love the photo that looks like the ship is sailing off into the sky!
What a clever idea! You could also do the same thing on the bum for baby leggins!!! Squeal 🙂
Brienne and Oliver & S team thank you for this tutorial. I just made these for my daughter this weekend and she loves them. I reviewed them here
http://sewing.patternreview.com/review/pattern/113288
This is a lovely idea Brienne, and well executed. Can you tell me what marker you used on the fabric? I have a wash-away marker that looks like that but ironing on it sets the mark permanently, so it would be very tricky to use for this project.