Today Asmita has joined to share her newly sewn Peckham Trousers. We always love Asmita’s thoughtful approach to fitting, and her new trousers are no different. Take it away, Asmita!
Sewing pants always brings along part excitement and part trepidation. It is the one type of garment that I wear consistently throughout the year and yet the one area in my sewing experiments that remains the most underrepresented. I make a lot of tops and dresses, but when it comes to pants, I tend to rely on the same RTW pants that I have had for years. When the Peckham trousers pattern was released, I knew that it was time that I try making something for myself that I hadn’t done for almost two years. The last “proper” (meaning one with a zipper fly) pants that I had sewn for myself had been the Hollywood trousers. Since then, there have been a lot of elastic-waisted pants, including pajama pants but nothing of a three-scissor level. I was particularly interested in trying the Peckham trousers because the waistline is partly elasticated, and of late, it is the part of my body that I have found I could do with a little more ease built in.
Sizing and modifications
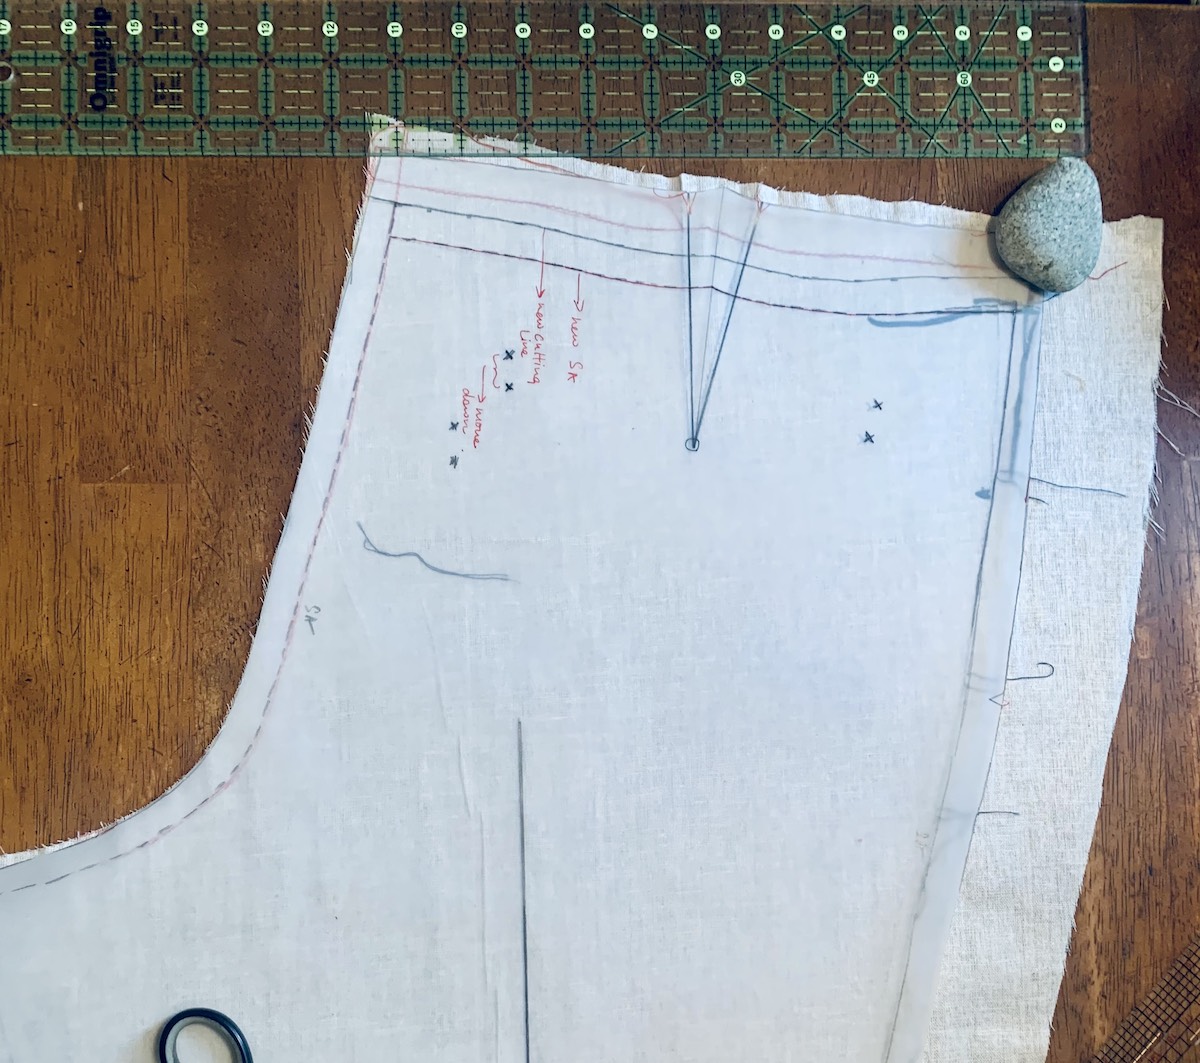
To begin with, I cut out a size 10 for both the waistband and pant legs. I am a recent convert to trying out the #topdowncenterout method, and after making a pair of pants for my daughter using this, I wanted to give it a serious try for myself.
1. I started by reducing the length overall at the L/S line by 1.5” and then took off another ½” from the bottom in the muslin.
2. The main modification that I realized I needed was taking out about ¾” all the way on the top of the back leg, tapering it to about 5/8” where the back leg met the front leg. For the front leg, I took out about the same.
3. I needed a smidge more on the sides, so took in about ¼” on both sides where the front and bag leg meet.
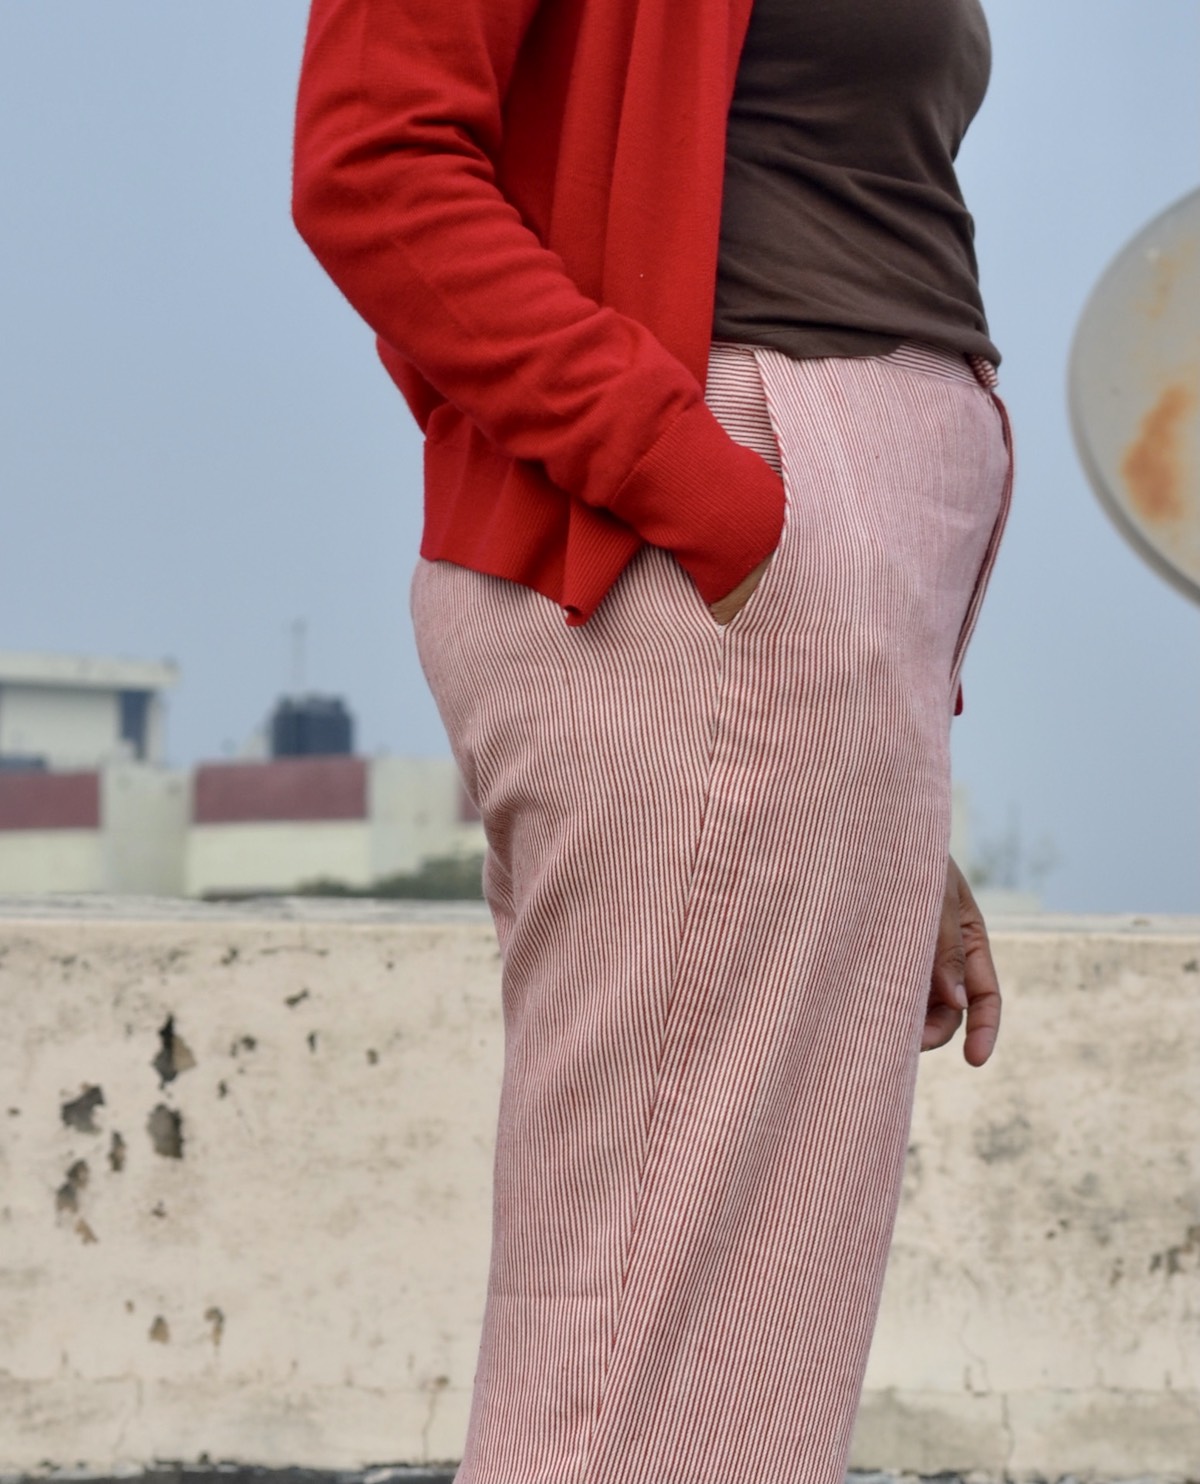
4. I did not use the pocket-facing piece as I did not make a coin pocket and found it unnecessary.
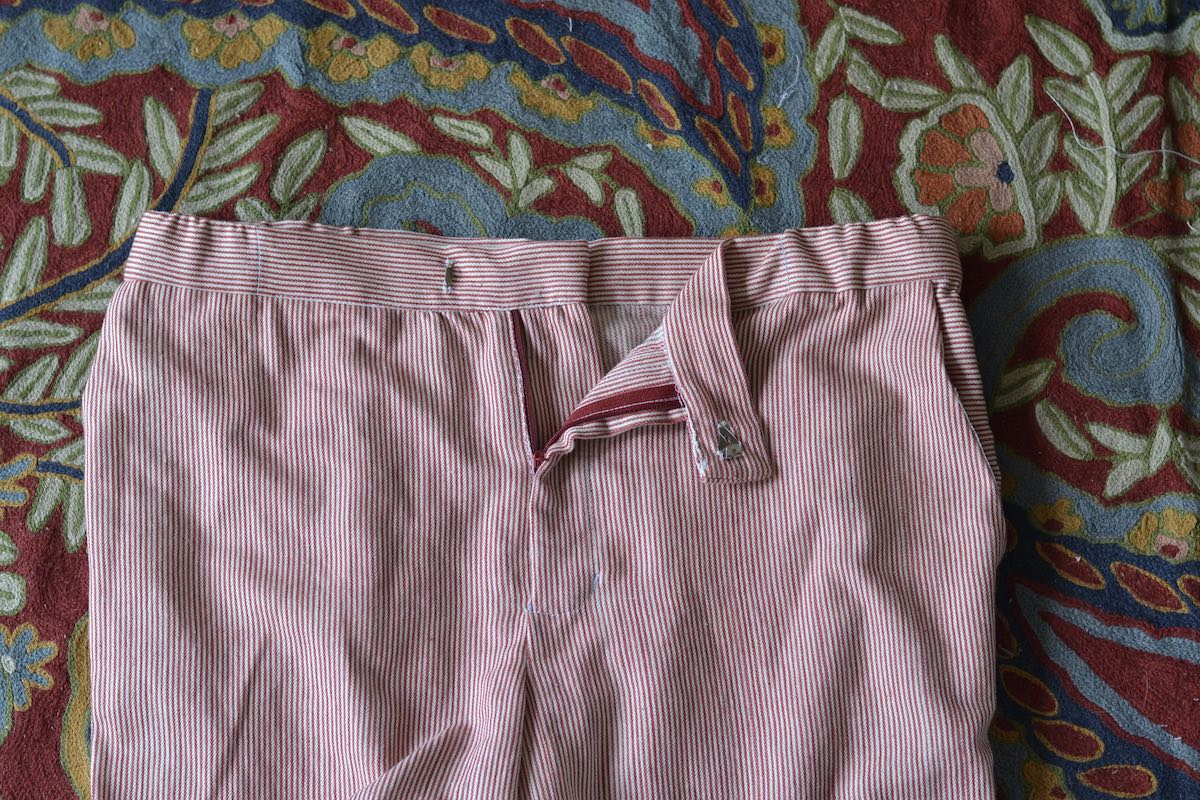
5. Because my fabric was on the thinner side (more on this below), I first interfaced the entire waistband pieces with woven interfacing. I also had only 1.5” width elastic, so I increased the waistband width by ¼”.
Fabric
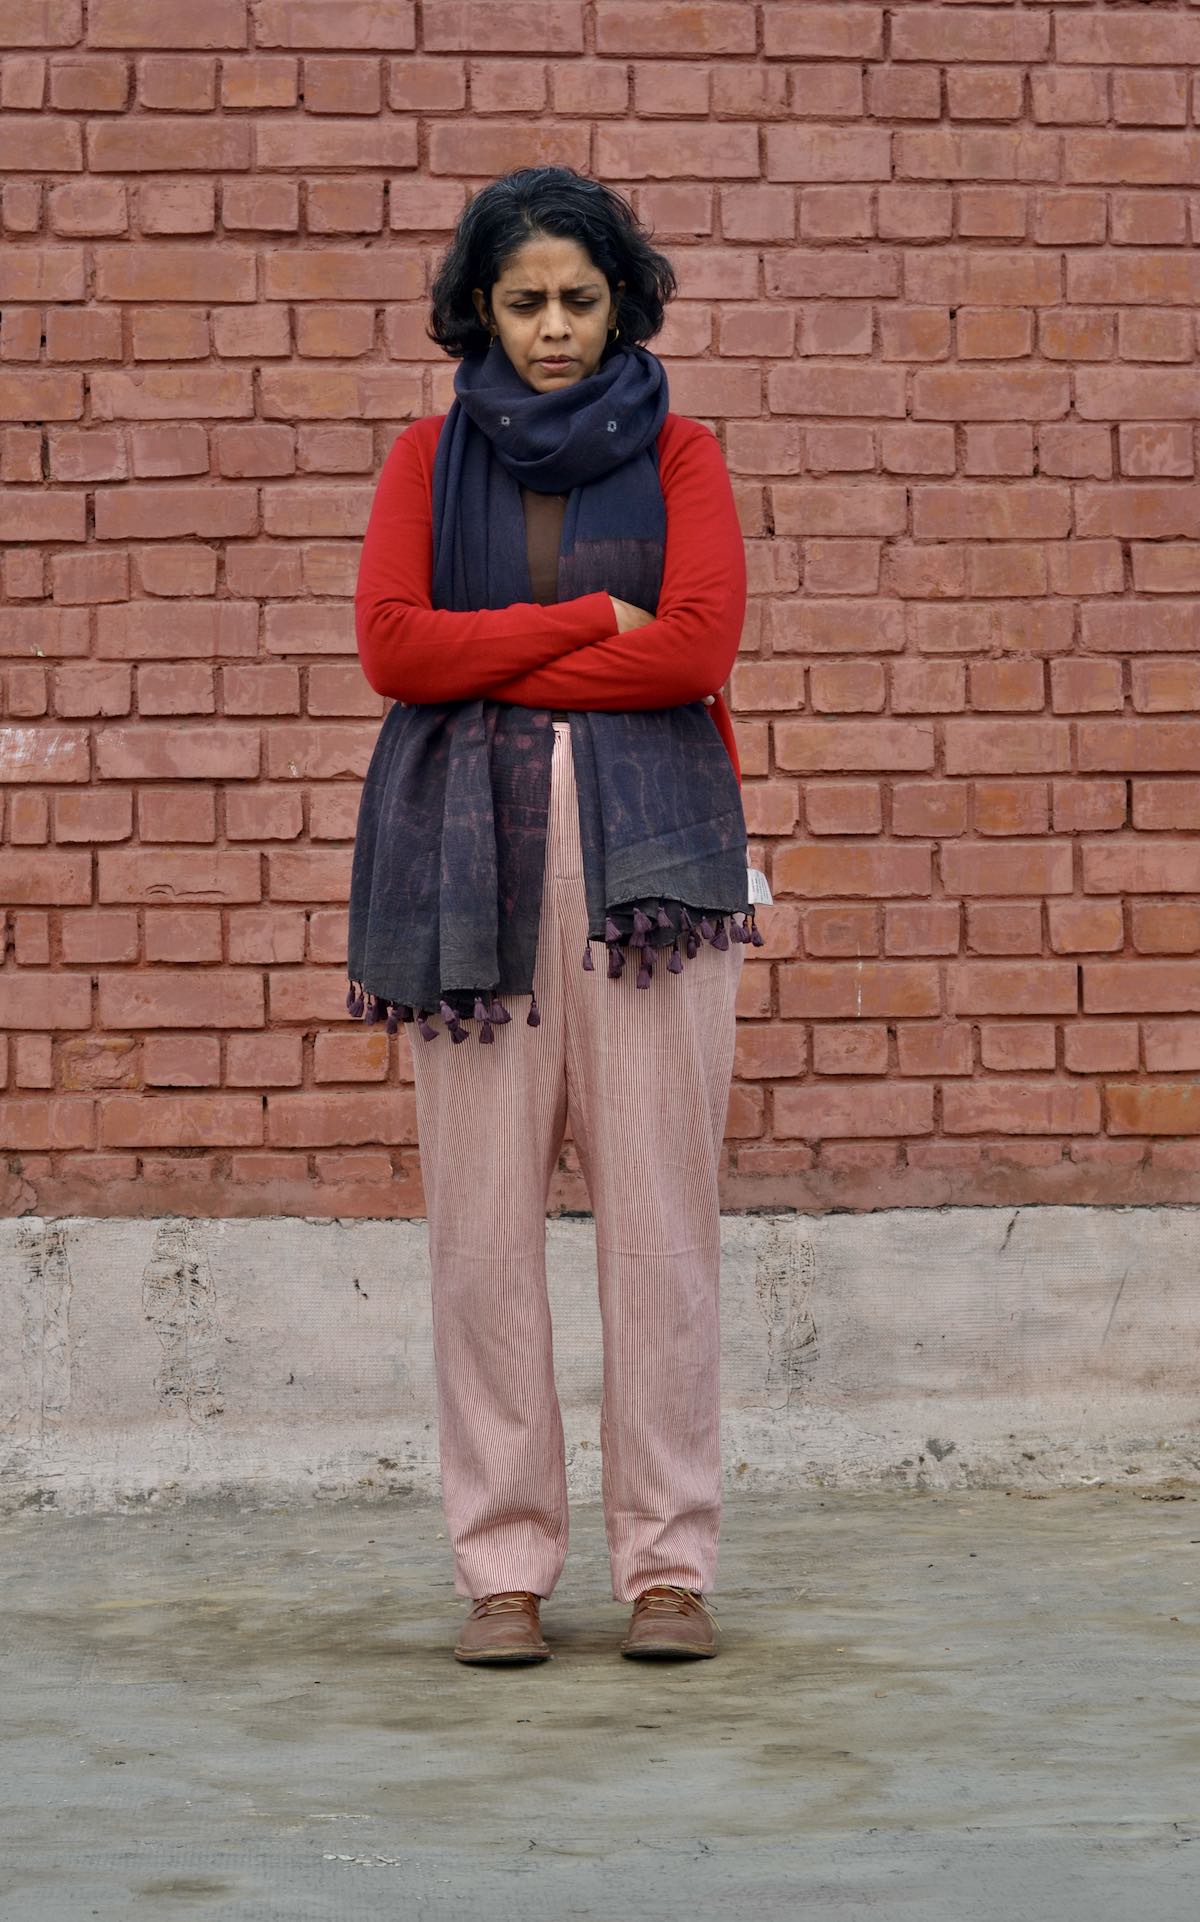
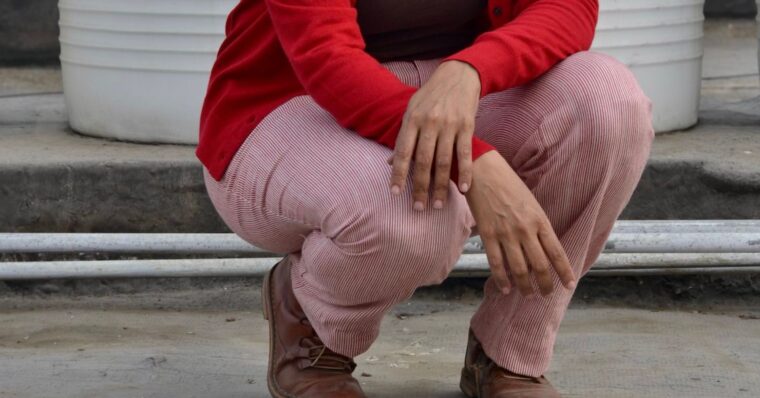
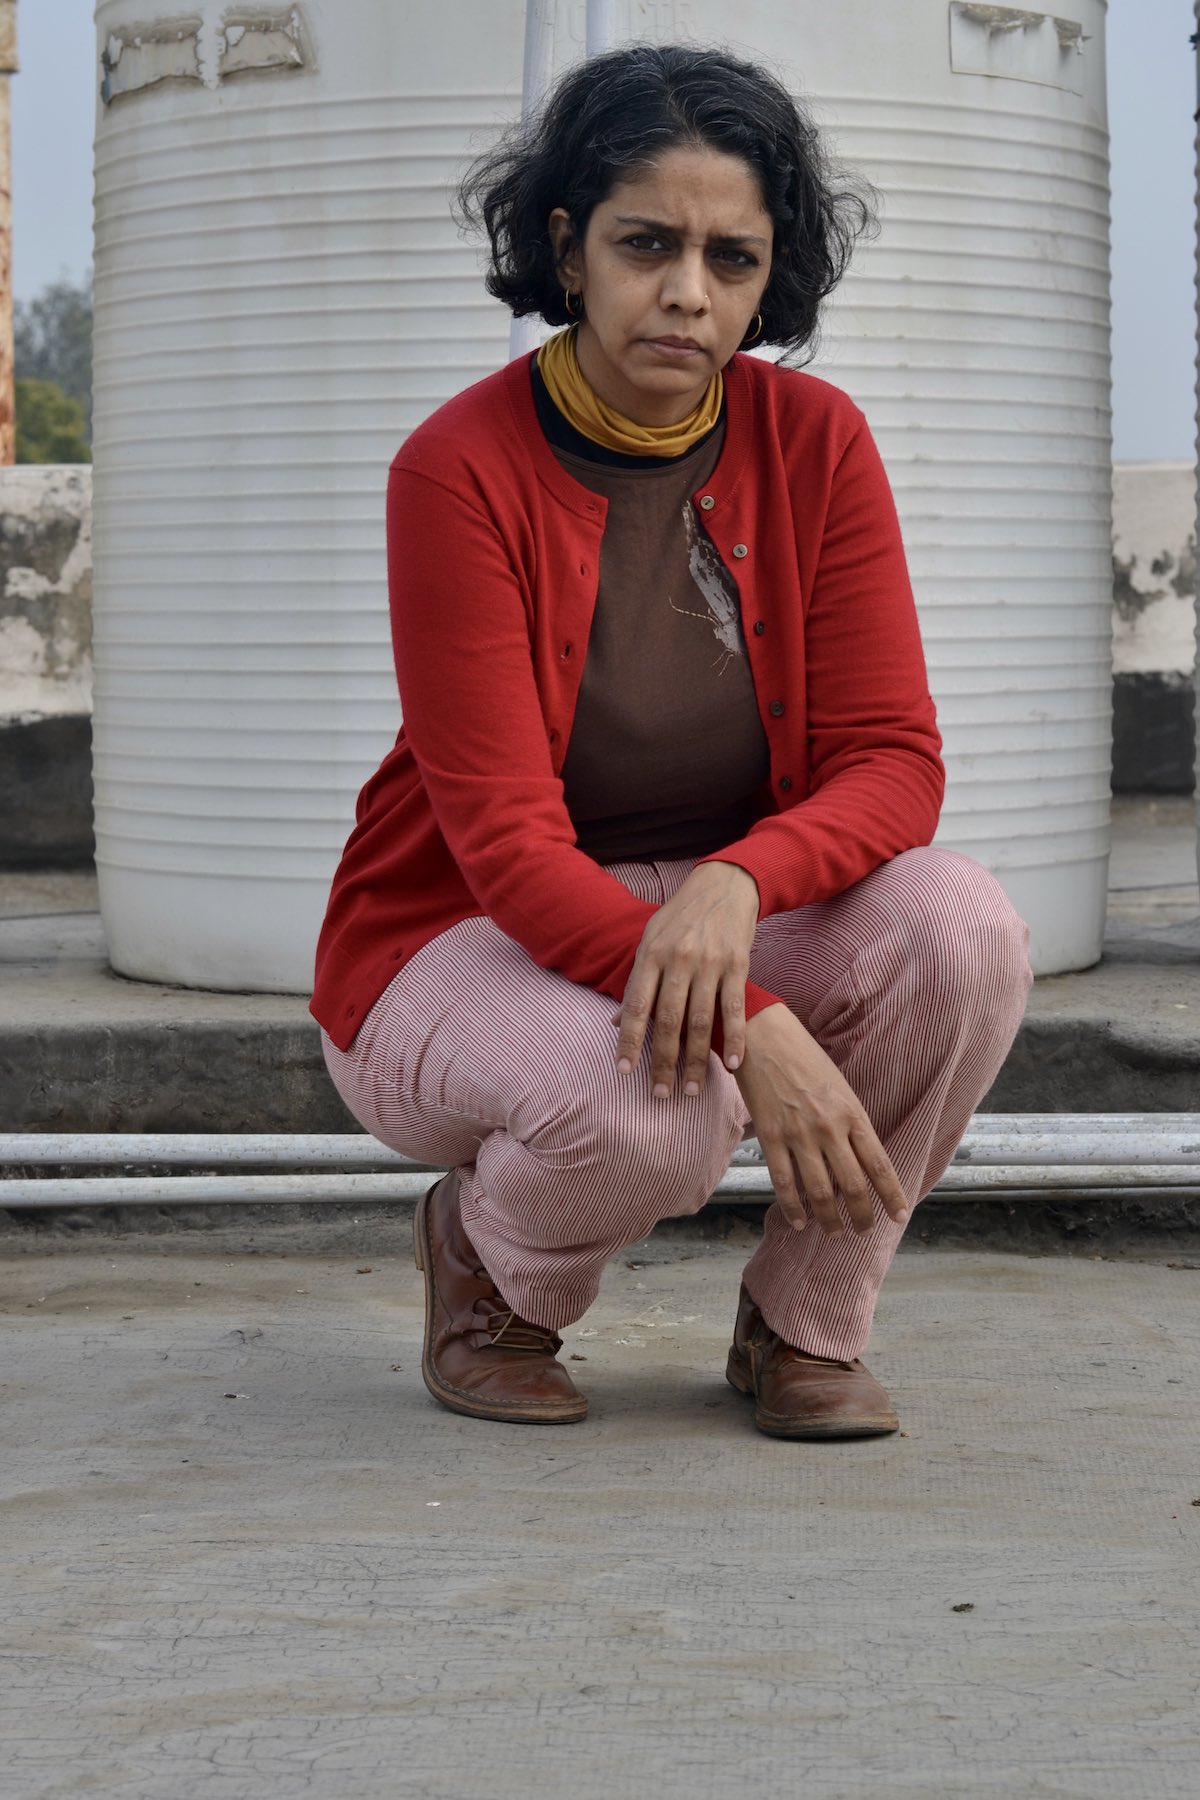
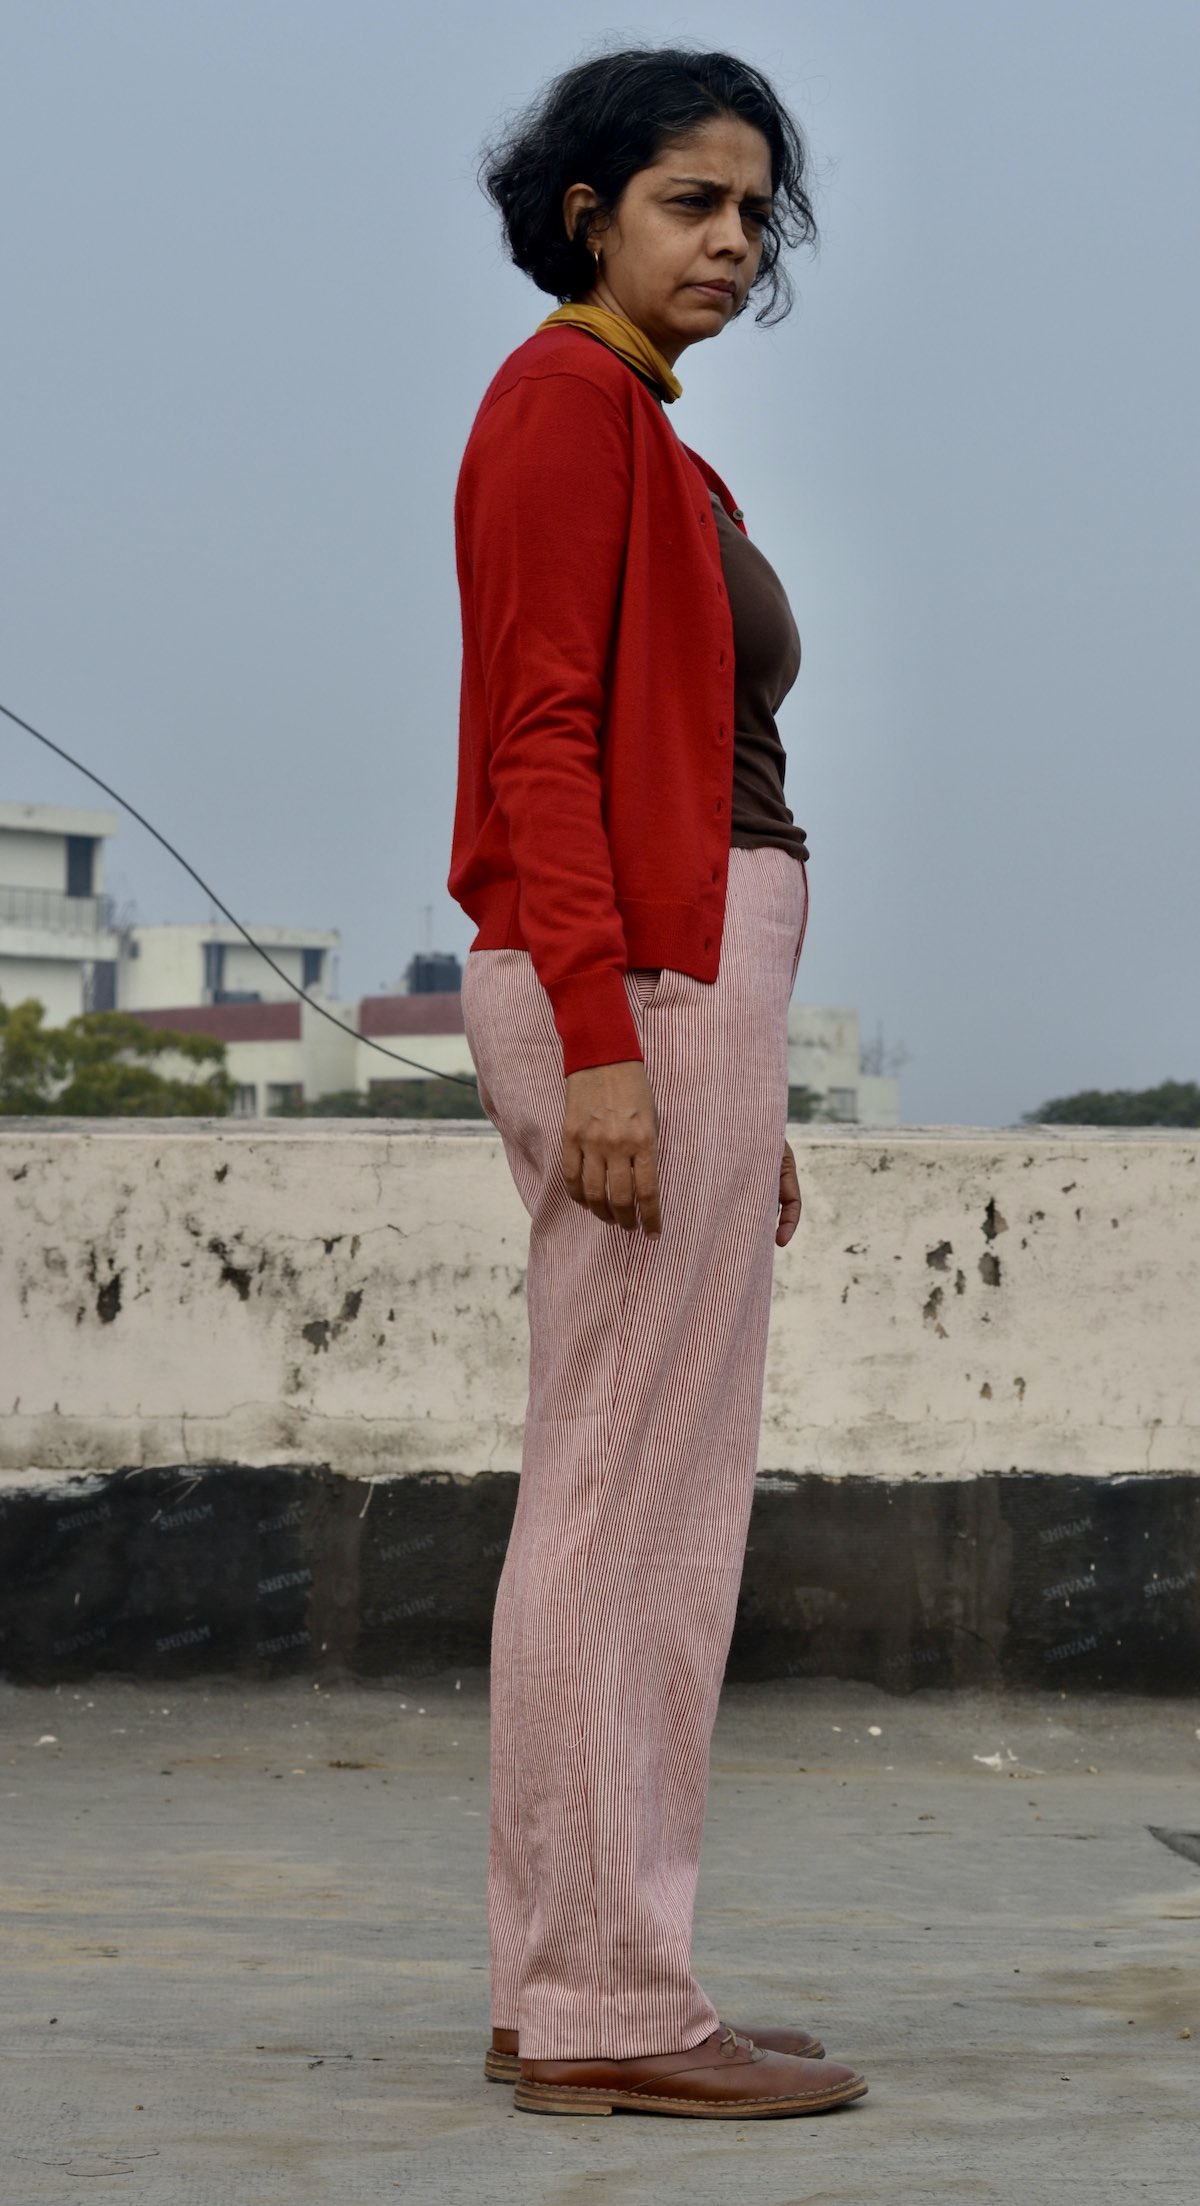
While the pattern recommends a fabric with a slight stretch, I found this quite difficult to source where I live. When looking for fabric about a month ago or so, I chanced on this gorgeous pinstripe cotton. Upon further inquiry, I was told that this is denim khadi (hand-spun cotton) which was good for pants-making—or so the shopkeeper told me! On the cutting table, I found it more lightweight than I had first thought. I skipped the welt pocket because I was afraid it would sag. The waistband, lined in its entirety, was also so that the band could hold the pants up properly.
Results: Pros and cons
- I think because of my fabric choice, I have less a structured pants than I was anticipating. This means, though, that I can wear them through the year rather than only in the cooler months (very few where I am, so that’s a plus). More significantly, though, the “look” is slightly different than what other photos suggest. My tendency is to sew with fabric that really appeals to me, but in the future, I think it might be also worthwhile considering which fabric I pair with a specific pattern.
- The top-down center-out method (by Ruth of @ithacamaven) gave me a lot of confidence in terms of fitting. Plus, it is always worth making a muslin and mulling over it for a few days before cutting the final fabric. This is not the best fit I can have, but then again, I don’t expect it after making two pairs of pants in my life. I think it’s a process, and I am okay with that.
- Techniques: this is by far the best zipper fly that I have sewn (and the fastest one since I didn’t need the seam ripper even once). But that has come from practice, which is as true for specific techniques as well as for the entire garment.

I love these pants; I like the casual look (more casual than what I intended), and I will most certainly make at least one more (because I still want that welt pocket!) I hope you try it too.