

Do you have broad shoulders? If your tops feel tight across the shoulders, you may need a broad shoulder adjustment.
A garment that is too narrow in the shoulders can pull at the armhole seams. The sleeves may look distorted, and if it’s a short-sleeved garment, they may flare out at the hems instead of sitting close to your arm.
Luckily, there’s a very simple fix.
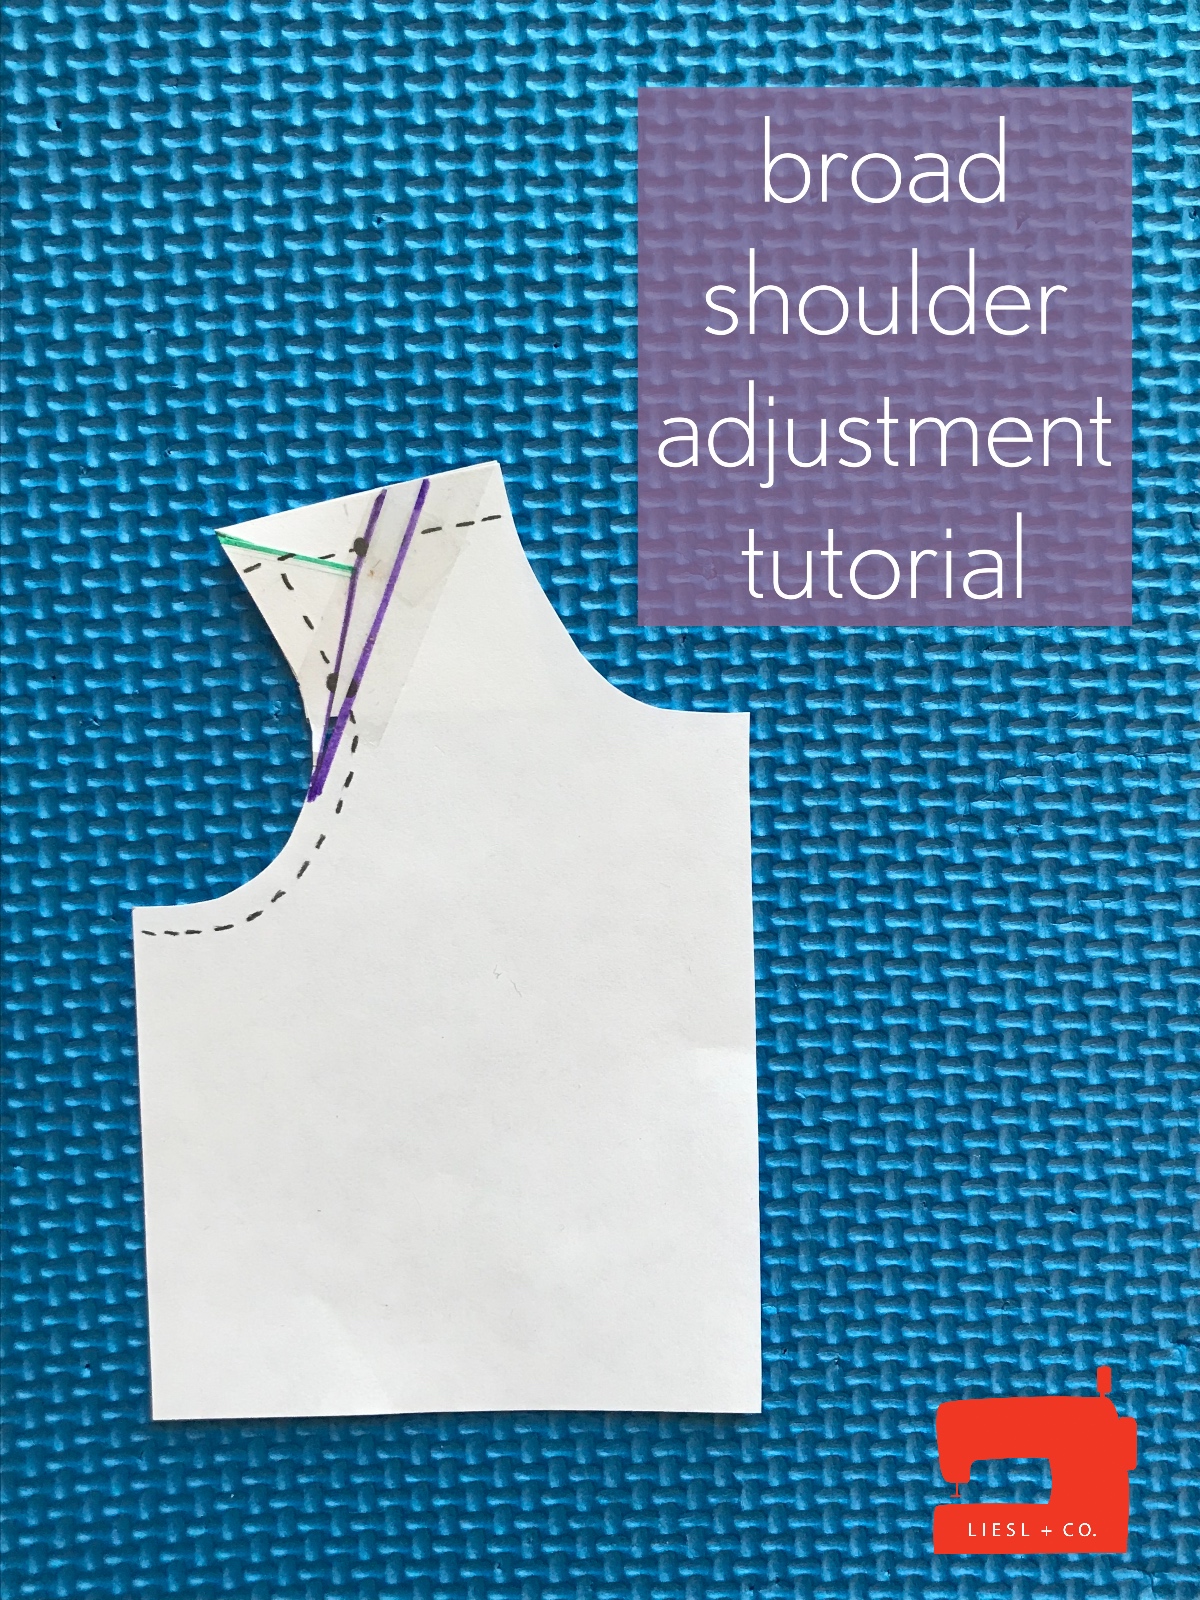
Broad shoulder adjustment tutorial: How do you know you need one?
I have been mulling over how to demonstrate fit issues that I don’t personally have. While browsing an online store, I came across a garment image that perfectly illustrates the need for a broad shoulder adjustment.
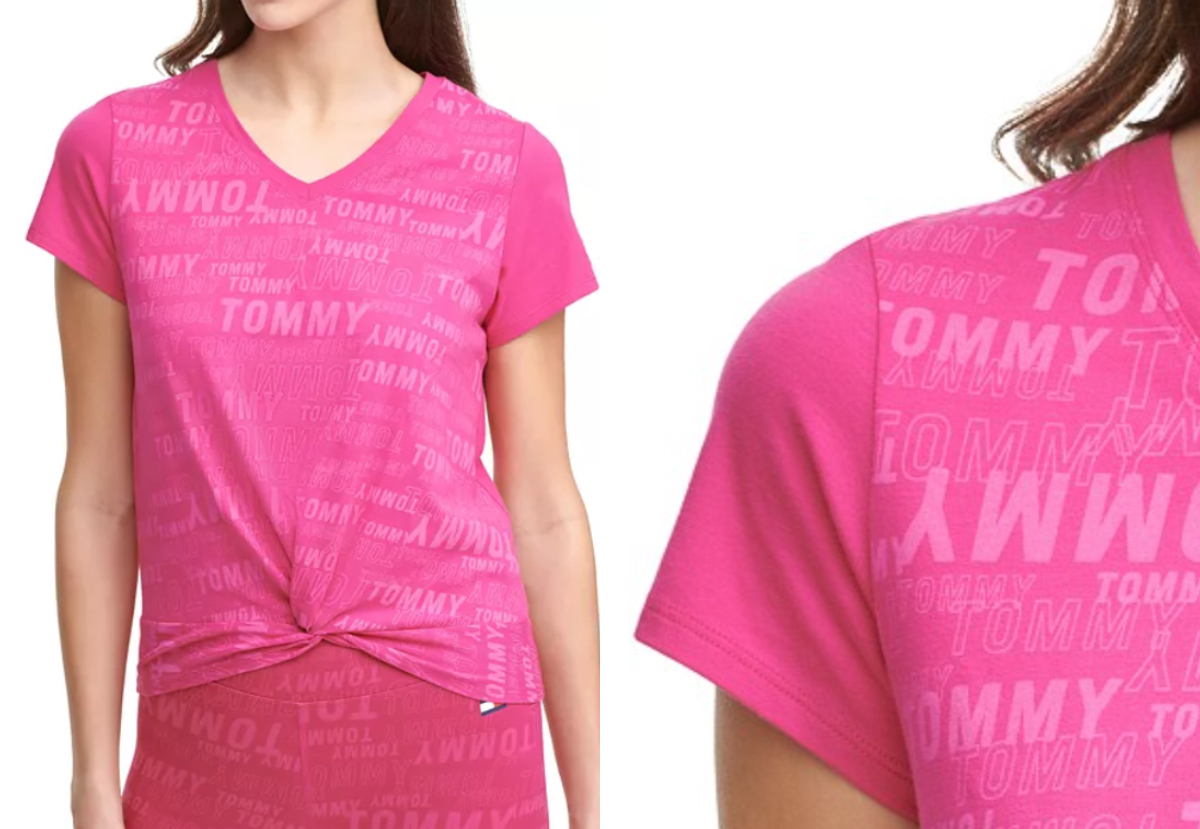
The first clue for me was the way these t-shirt sleeves flare out at the hem. They don’t lay nicely because too much of the fabric is curved over the shoulder. If the shoulder were dropped, the hem would fall properly and the sleeve wouldn’t stick out.
My second clue was in what appears to be a drag line that was retouched. On the model’s left side, there is a dark spot that I suspect is a Photoshopped wrinkle that points to the shoulder. I’ve pointed it out in the image below. This type of drag line indicates that the shoulder is too narrow.

Determining how much to adjust
Generally speaking, the shoulder seam on a pattern with a regular (not intentionally dropped) shoulder should hit at about the ball of your shoulder, where it hinges when you lift your arm. You can measure the difference by making a quick muslin and seeing where the shoulder seam falls on you. Or you can eyeball it by holding up the pattern piece to your body. Once you know how big your adjustment should be, it’s time to mark and slice your pattern.
Broad shoulder adjustment tutorial steps
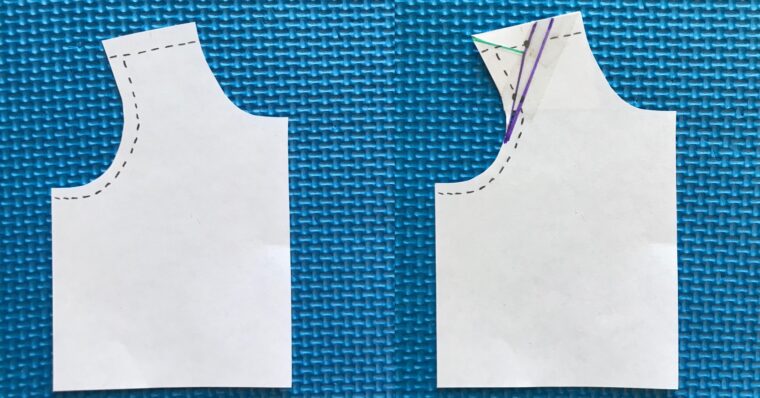
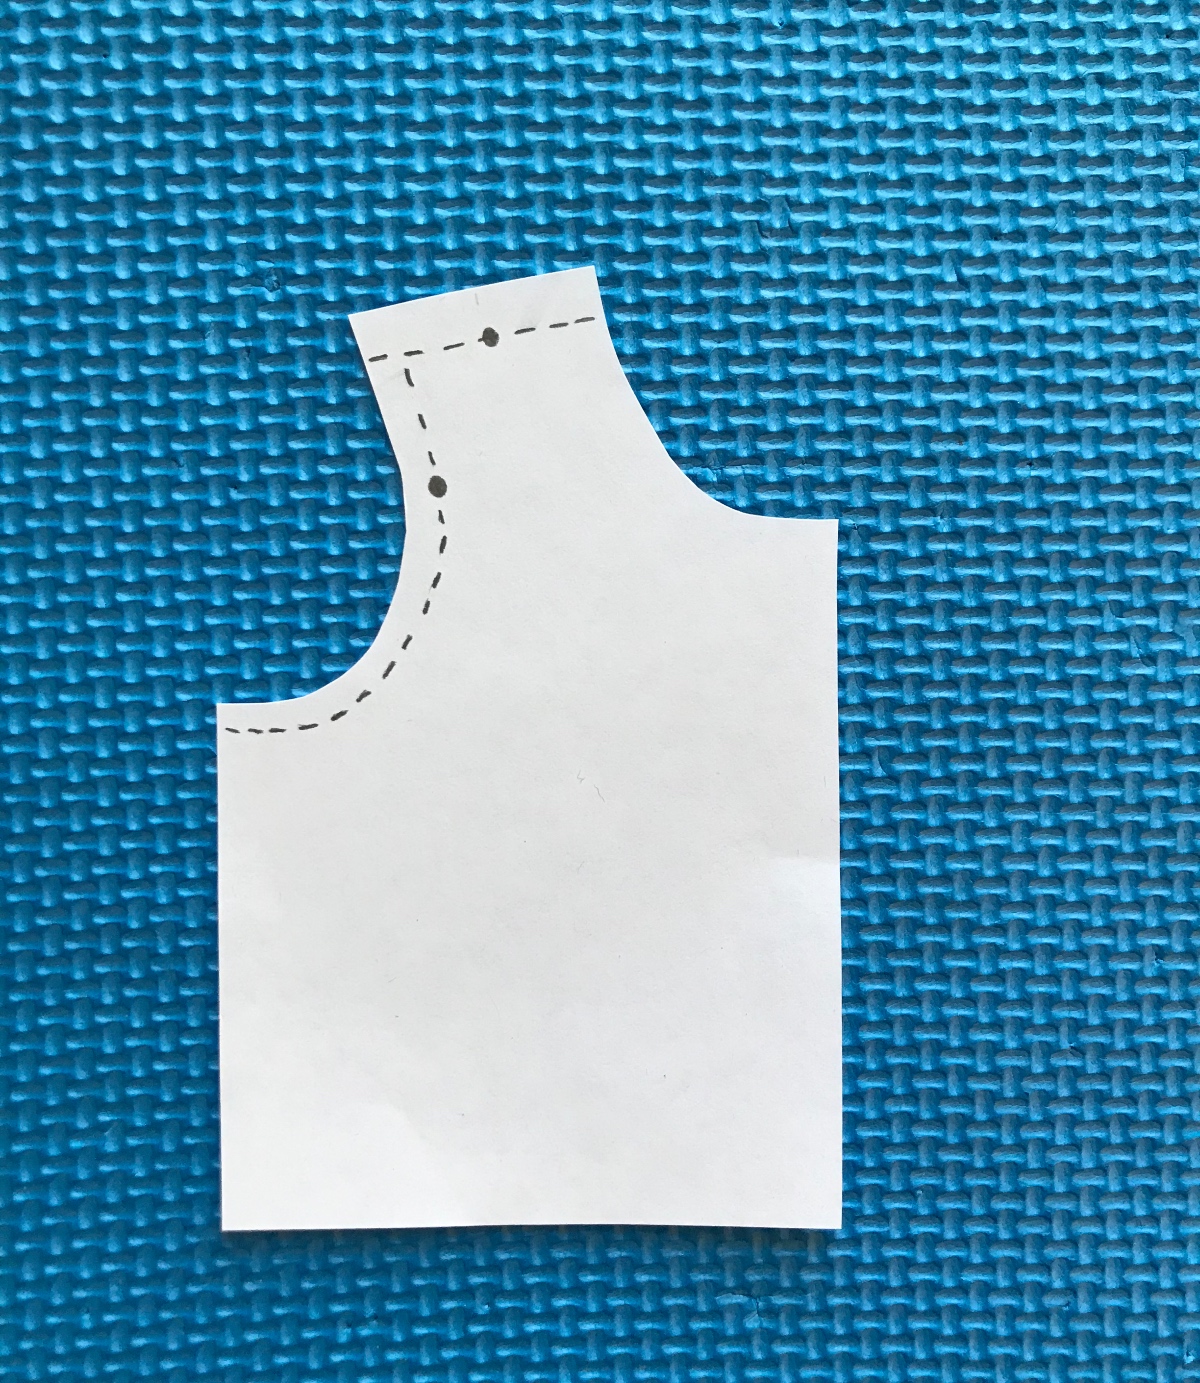
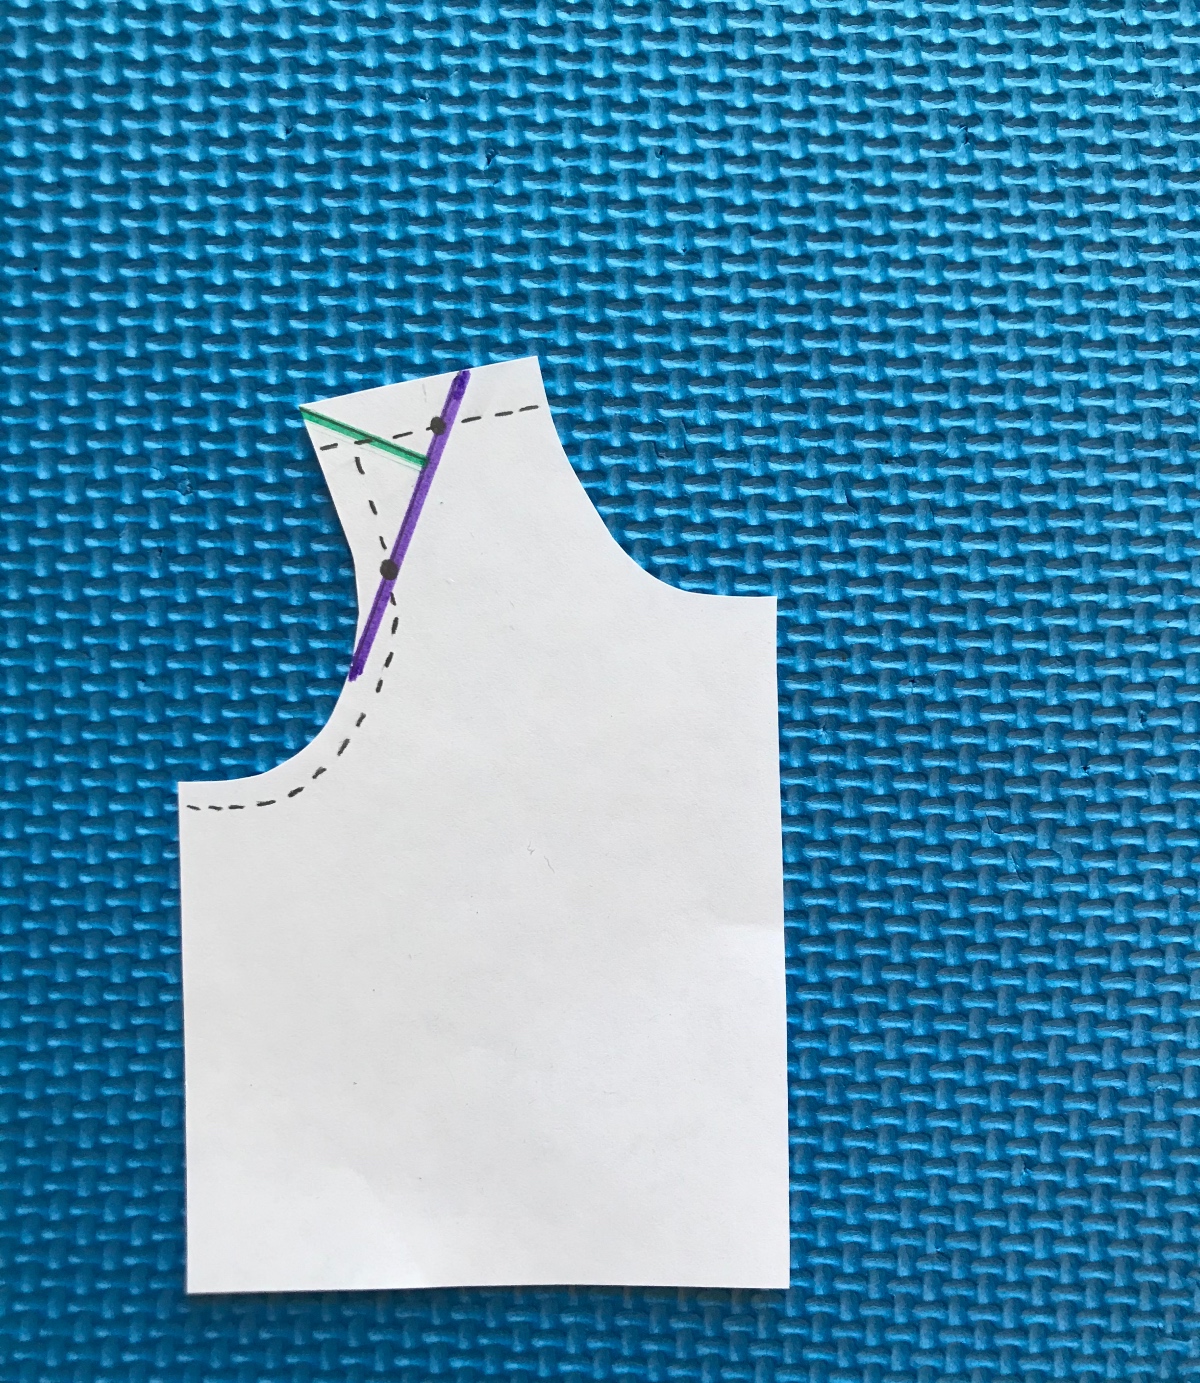
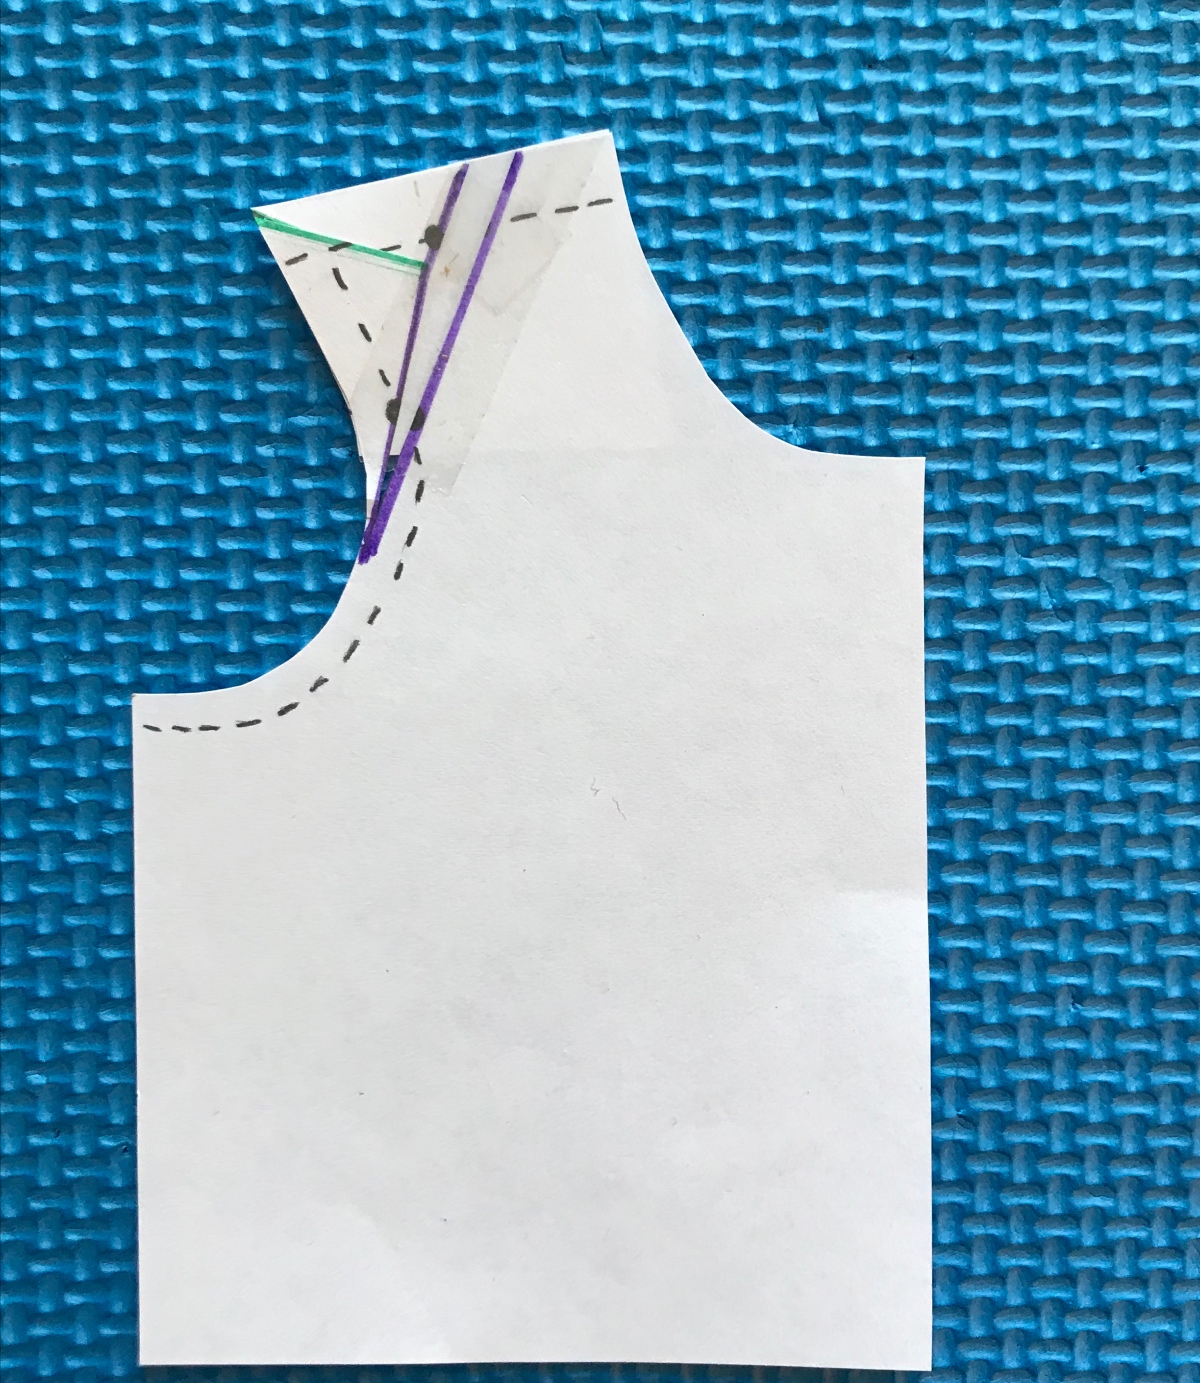
Step 1: Prepare your front bodice piece for cutting. To do this, mark the center point of the shoulder seam with a dot on the seam line. Make another dot on the seam line about 1/3 of the way down the armscye.
Draw a line along the dots from one edge to the other (indicated by the purple line below). Draw another line from the corner to the line you just drew (indicated by the green line below). This line should be perpendicular to the first line.
Step 2: Next, cut along the purple line, starting from the shoulder seam and cutting to, but not through, the armscye. Leave a small paper “hinge” so that you can pivot the pattern in the next step.
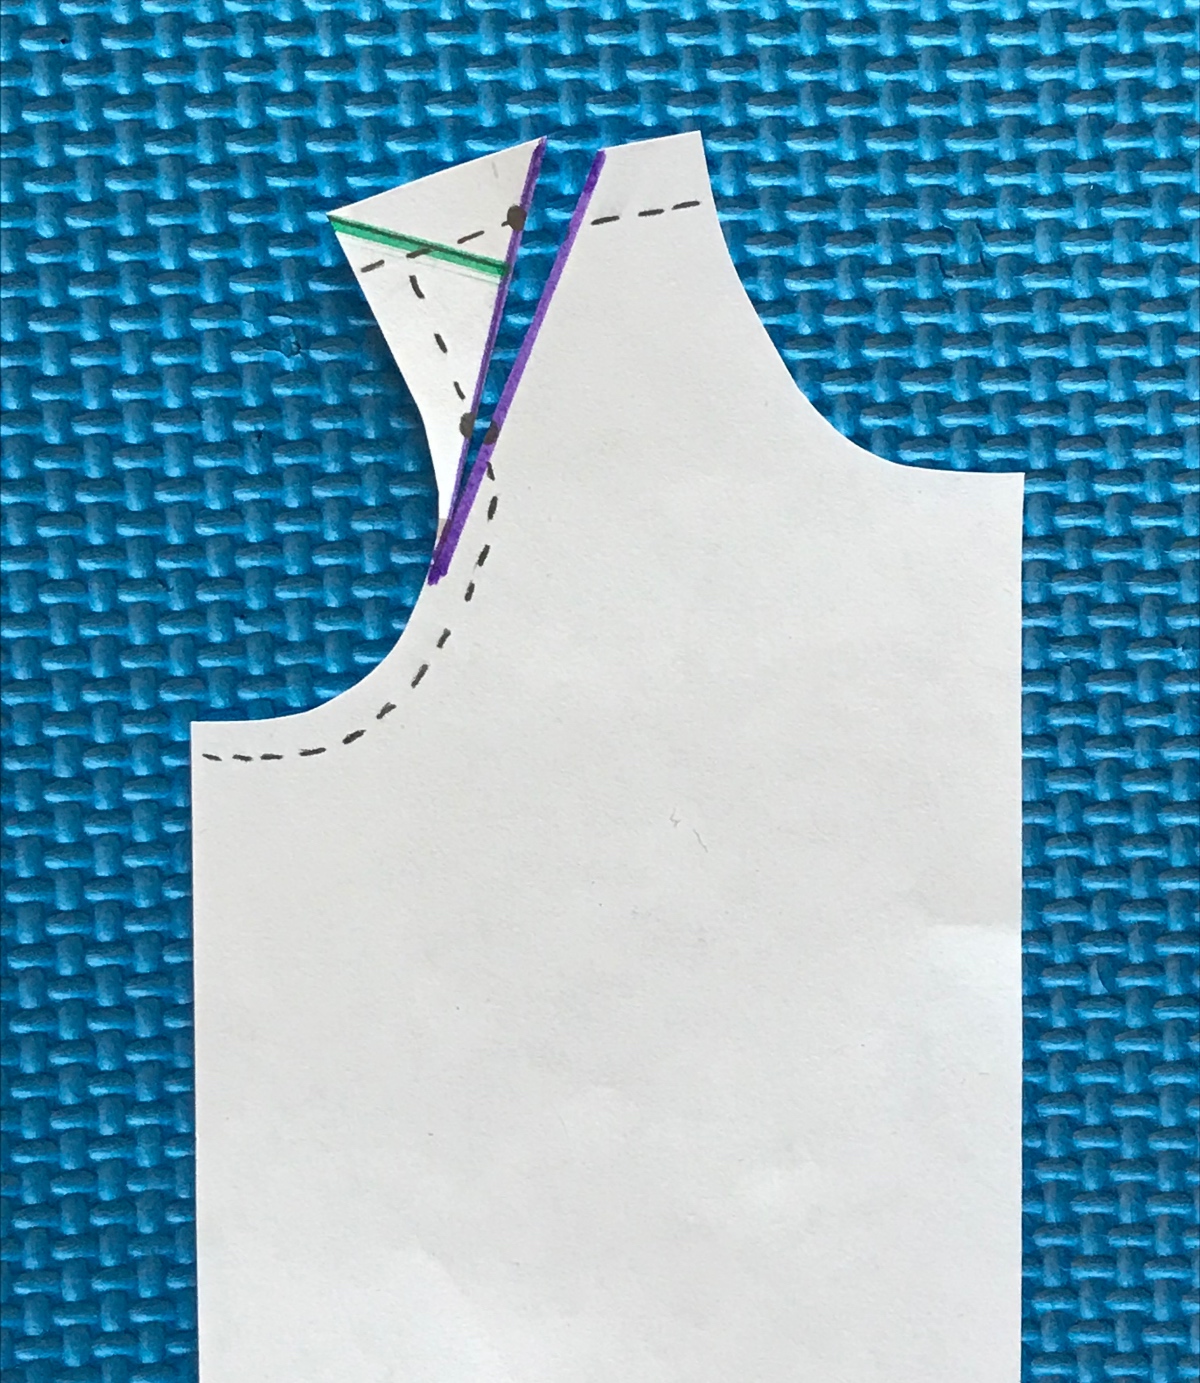
Step 3: Next, cut along the green line, starting from the cut you just made and ending at the outer corner of the shoulder seam. Cut to, but not through, the outer corner, again leaving a paper hinge.
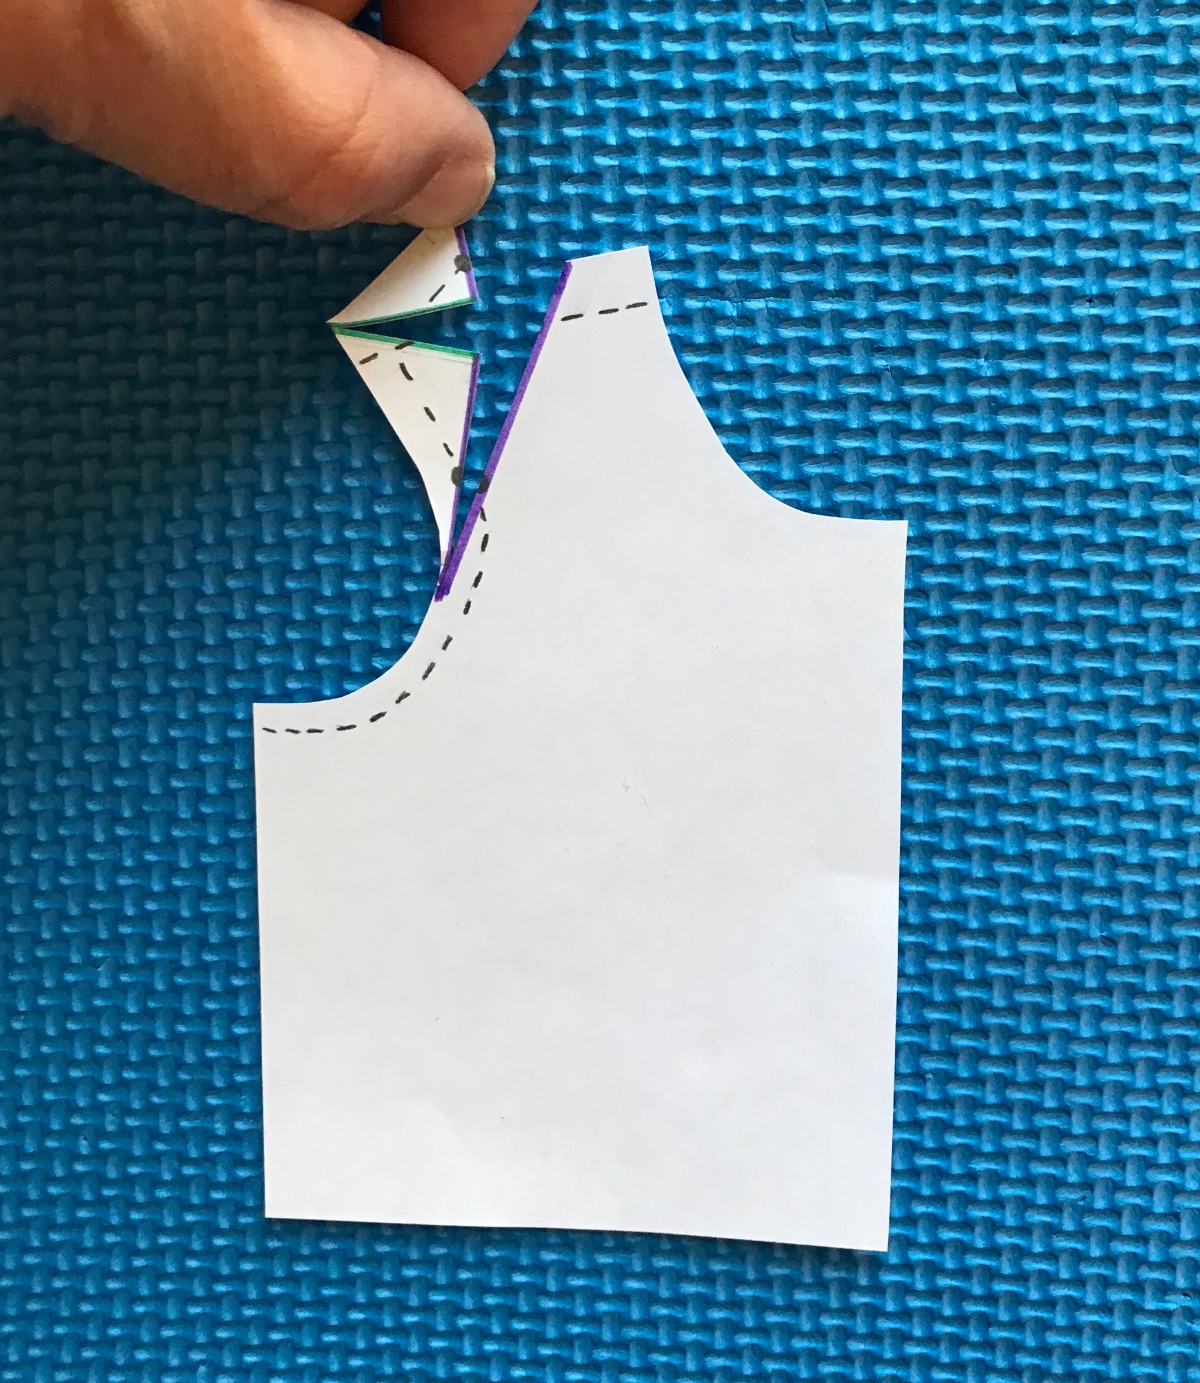
Step 4: Slip a piece of paper under your pattern. A scrap is fine for this purpose. We are going to spread the pattern piece along the cut purple line. The distance we spread it will be equal to the amount of your adjustment, measured on the seam line. (Hint: It helps to spread it a little, and then tape down the pattern piece on the side of the purple line that is closest to the neckline.)
In this case, I made a mark on my scrap paper that was 1/4″ from my cut, shifted towards the armscye. I made sure to keep it even with the seam line.

Step 5: Connect the dots. Move the slashed pieces away from the neckline, widening the shoulder, until the edge of the cut purple line meets your new dot and the shoulder edge makes a straight line. The slash in the corner of the shoulder will overlap a bit as you do this. The end result is to widen the shoulder seam while keeping the armscye length intact so you don’t have to adjust your sleeve.
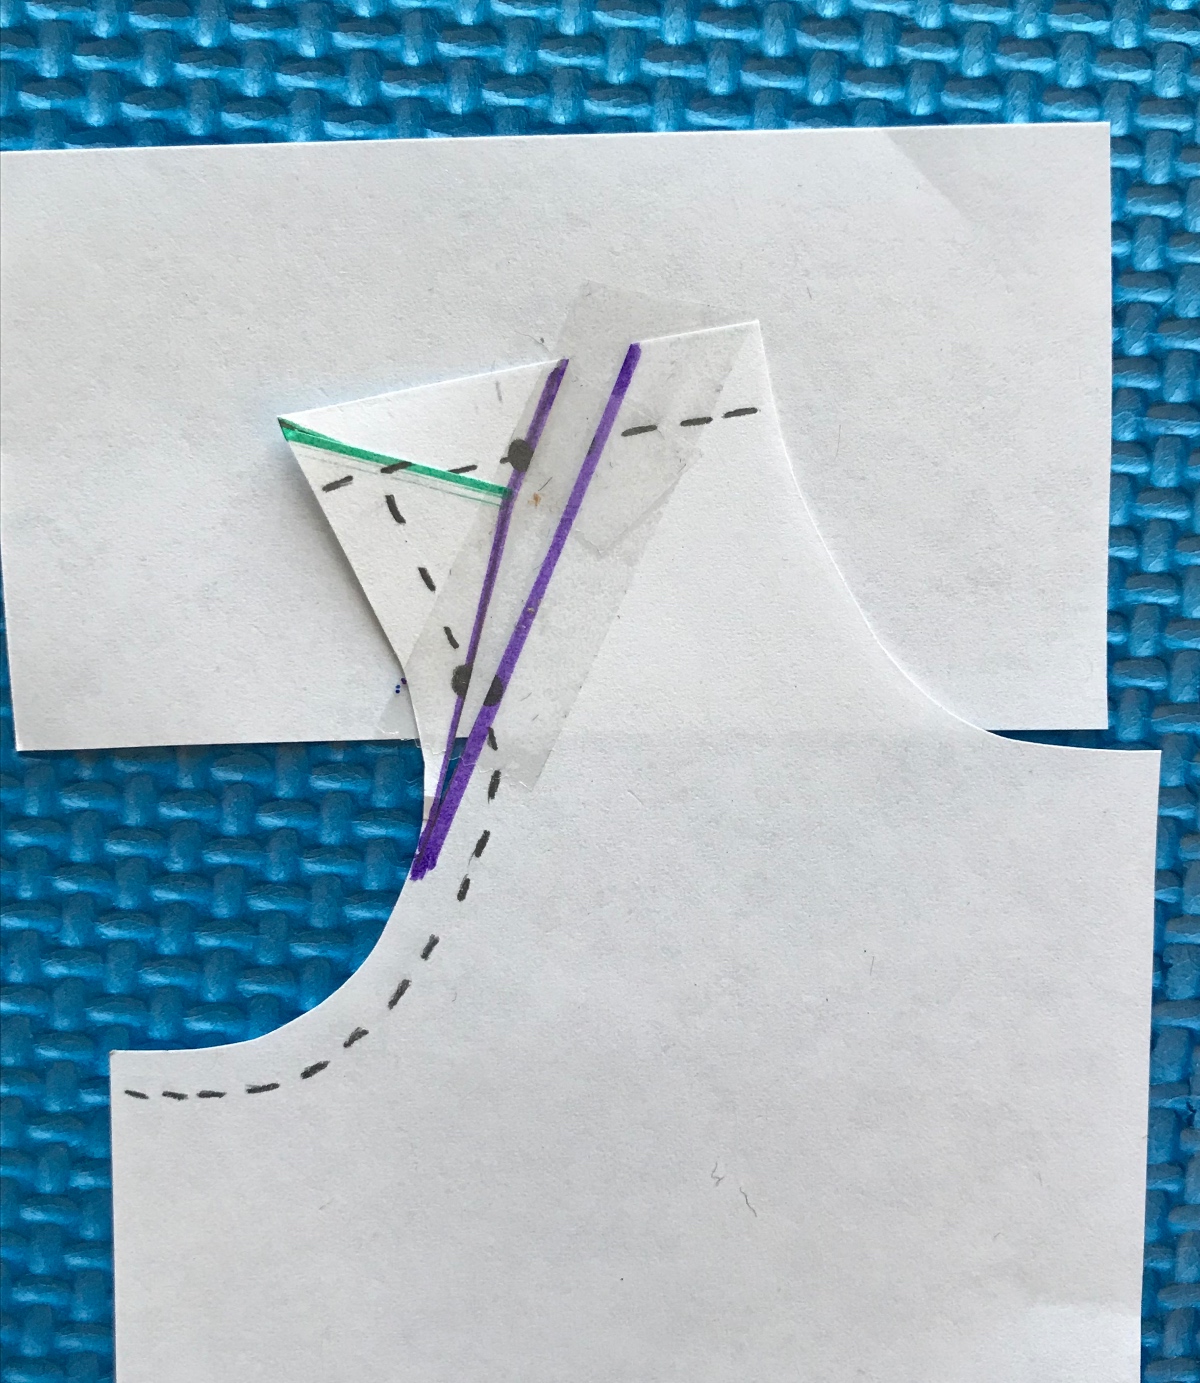
Tape the pieces in place. Now repeat this procedure on the back bodice, and you’re done!
And that’s all there is to it! If you’re interested in more fitting tutorials and general fit-related geekiness, check out our library of fitting resources and our tutorials tag. Happy fitting!