
We are delighted to welcome back Mathew. He is such a talented weave guru. Today he’s stopping by to share a fantastic fabric weaving tutorial. Take it away Mathew!
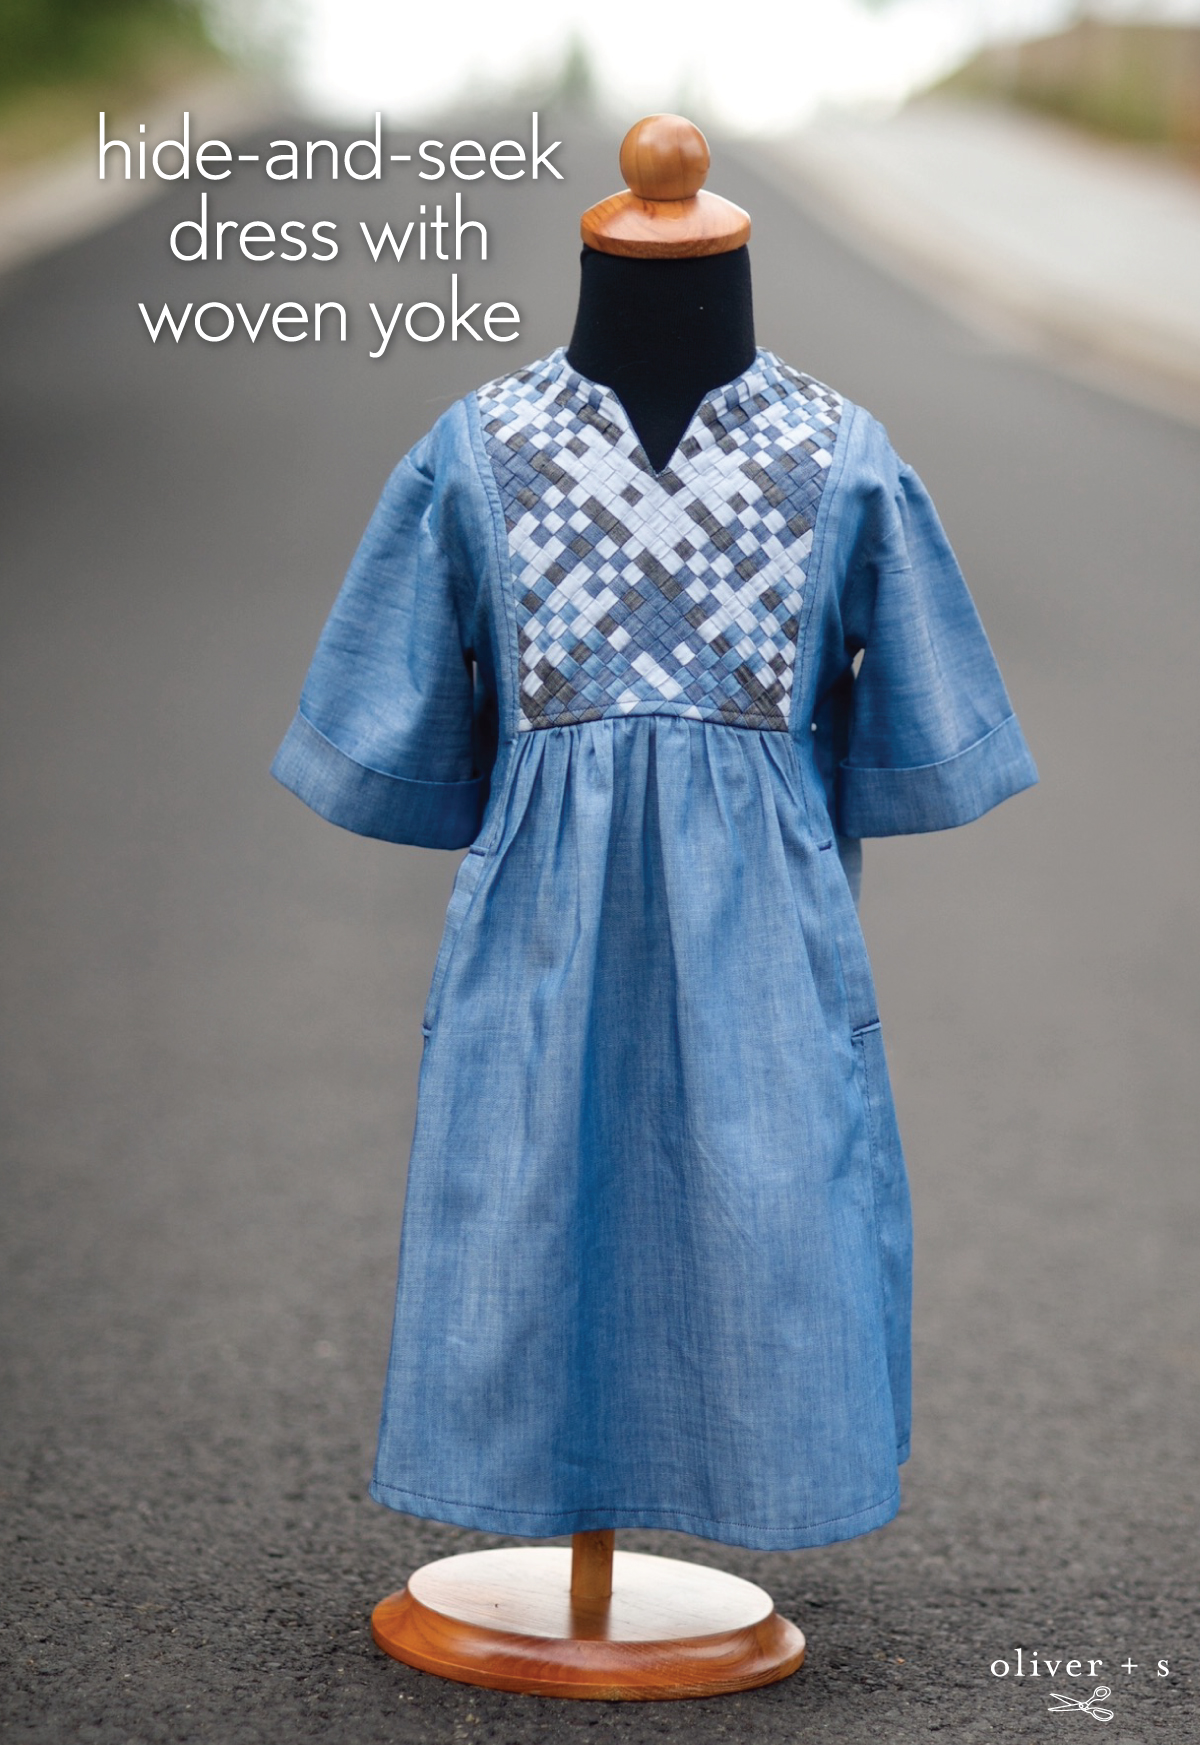
Howdy! Howdy! This is Mathew Boudreaux (AKA Mister Domestic) here again to, hopefully, provide y’all with an approachable way to introduce weaving into your garments. In the comment section of my Oliver + S blog post on the Woven Denim Secret Agent Trench Coat, Sarah had the wonderful idea to weave the inset of the Hide-and-Seek Dress, so here I am to provide the tutorial. Seriously, awesome idea Sarah!
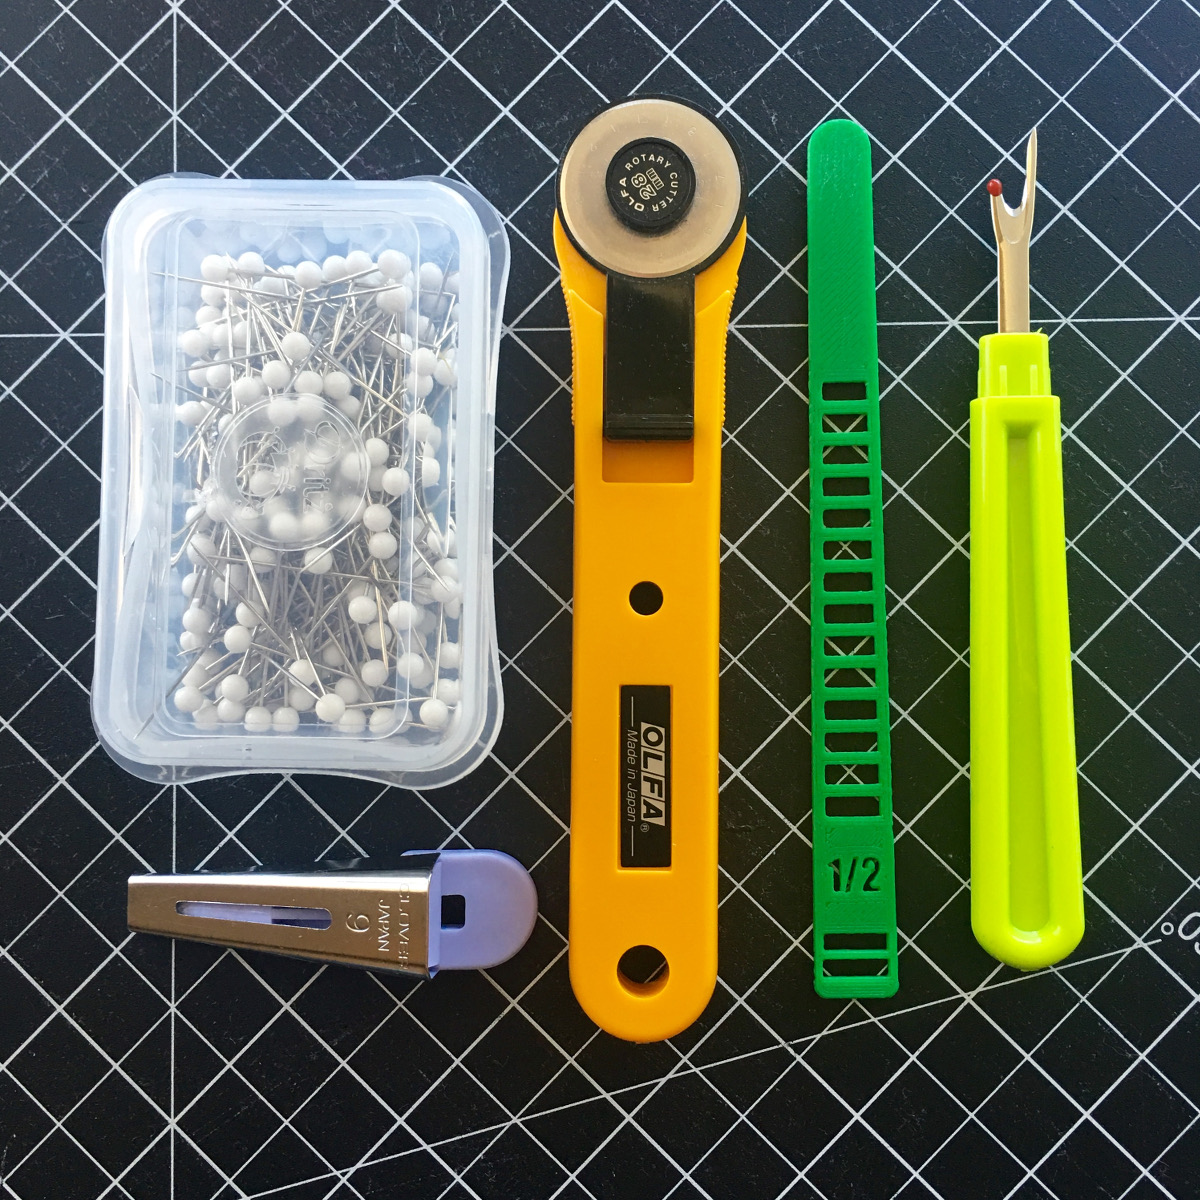
So the first thing you need to do is buy the fabric and necessary tools. I once again reached for the trusty Art Gallery Fabrics Solid Smooth Denim because (1) it’s awesome and (2) it’s lightweight at 4.5 oz. The woven part of the garment will be about four times the weight of the rest of the garment, so the lighter the fabric, the better. For this weave, I used a little bit more than an eighth yard of each of these four colors of denim: Wicked Sky, Indigo Shadow, Afternoon Sail, and Infused Hydrangea. You don’t need to use four, that’s just what I chose, but try to have a little more than a half yard of fabric and a fat quarter of a lightweight fusible interfacing just for the weave inset. In addition to the fabric, these five tools are always by my side during any weave project: (1) lots of pins, (2) rotary cutter, (3) my WEFTY Needle, (4) a seam ripper with a dull point, and (5) my bias tape maker. Also make sure to have either foam board or cardboard and a Sharpie.
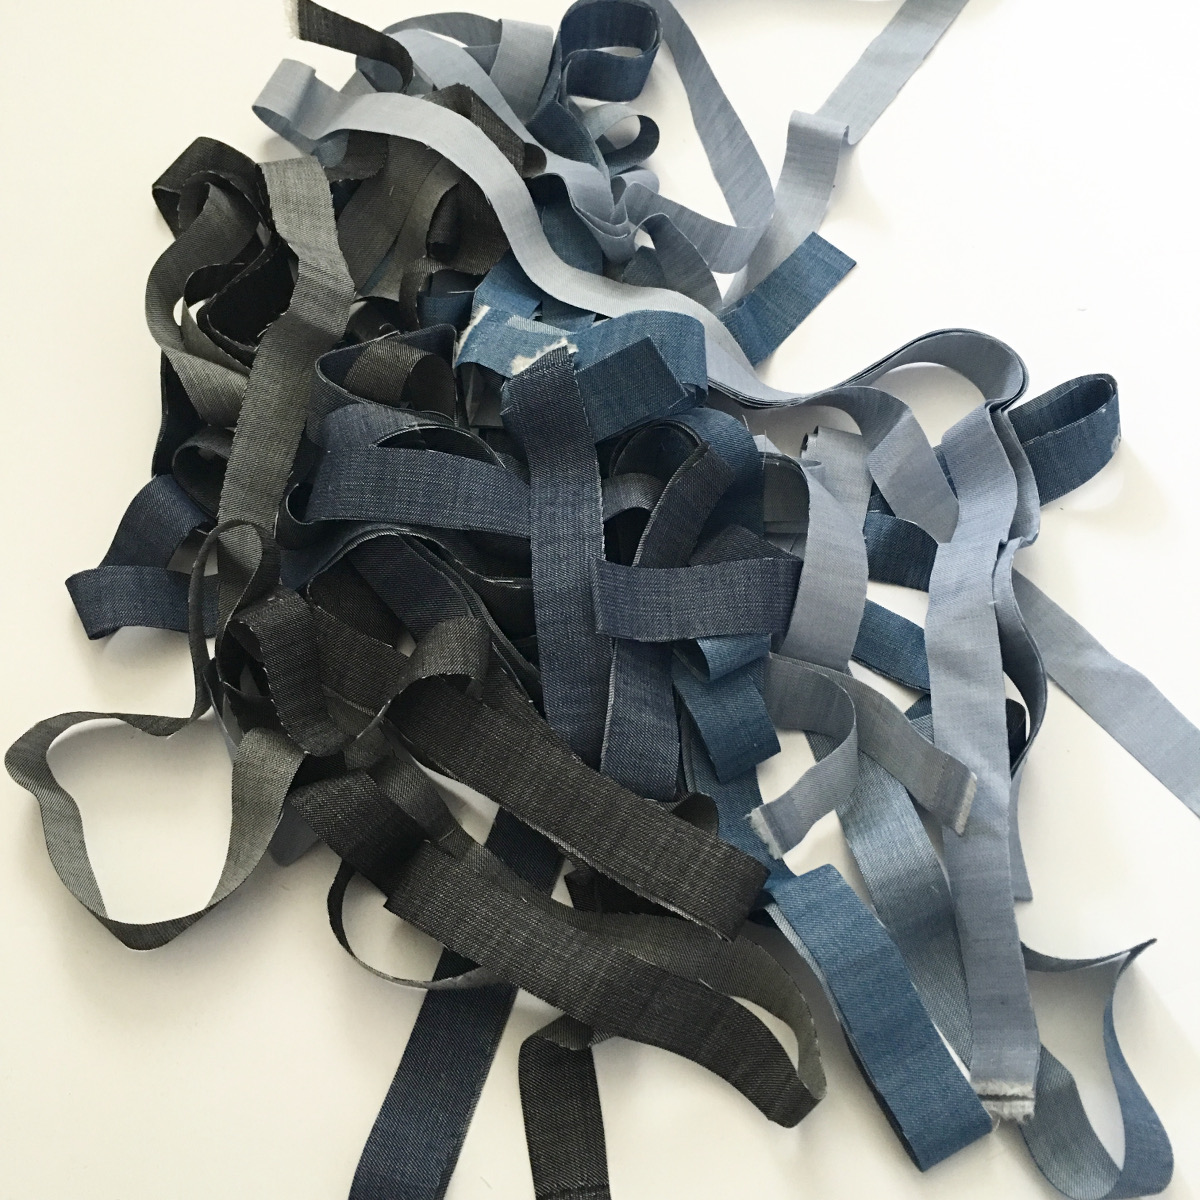
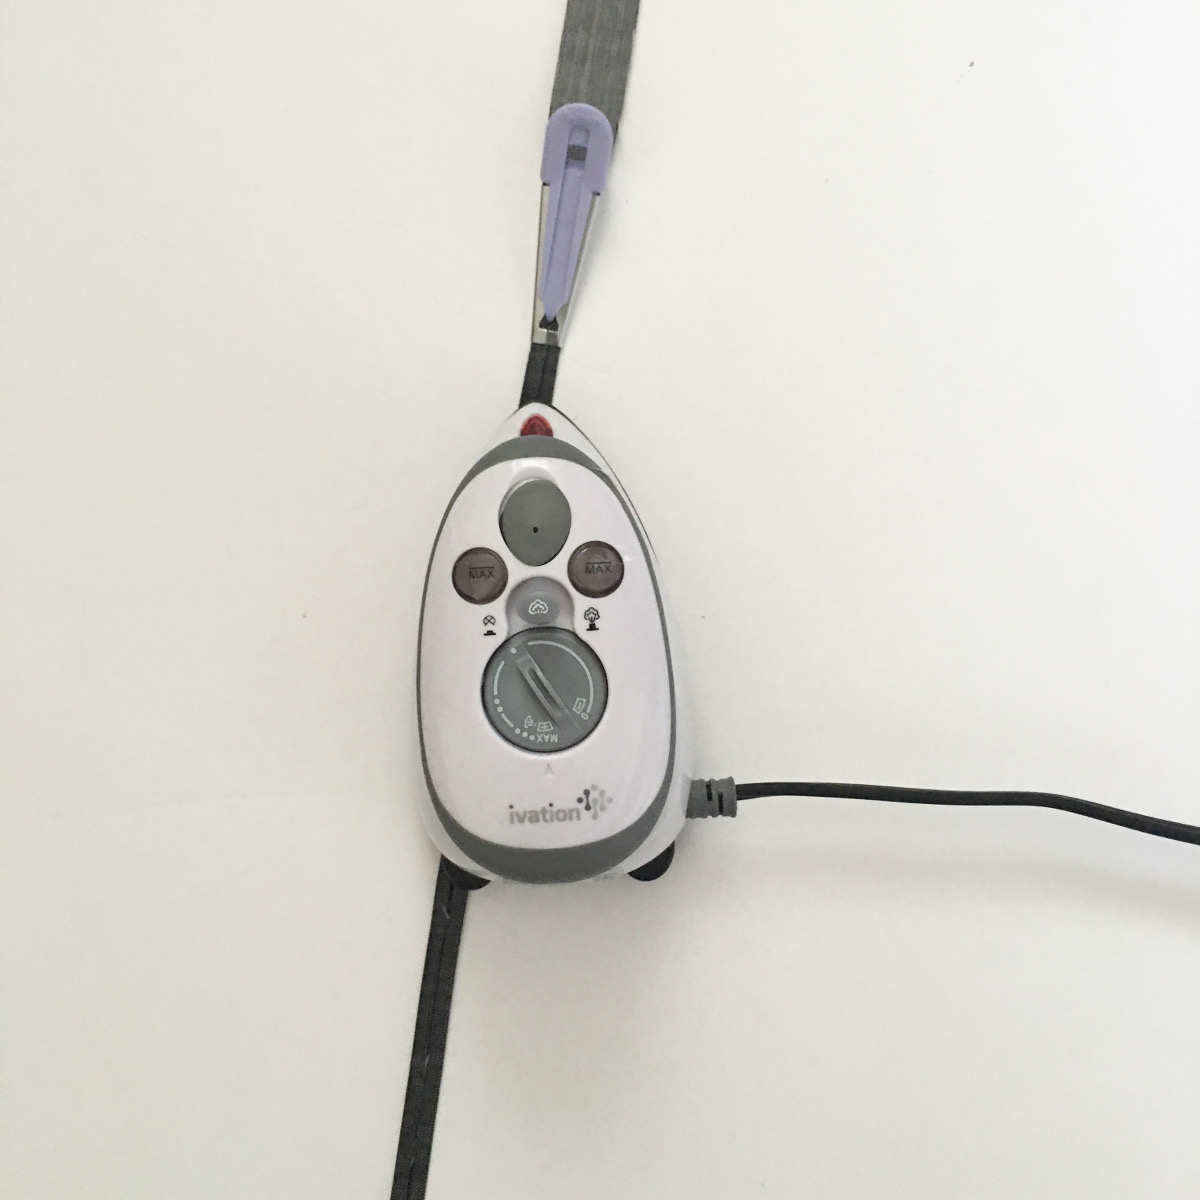
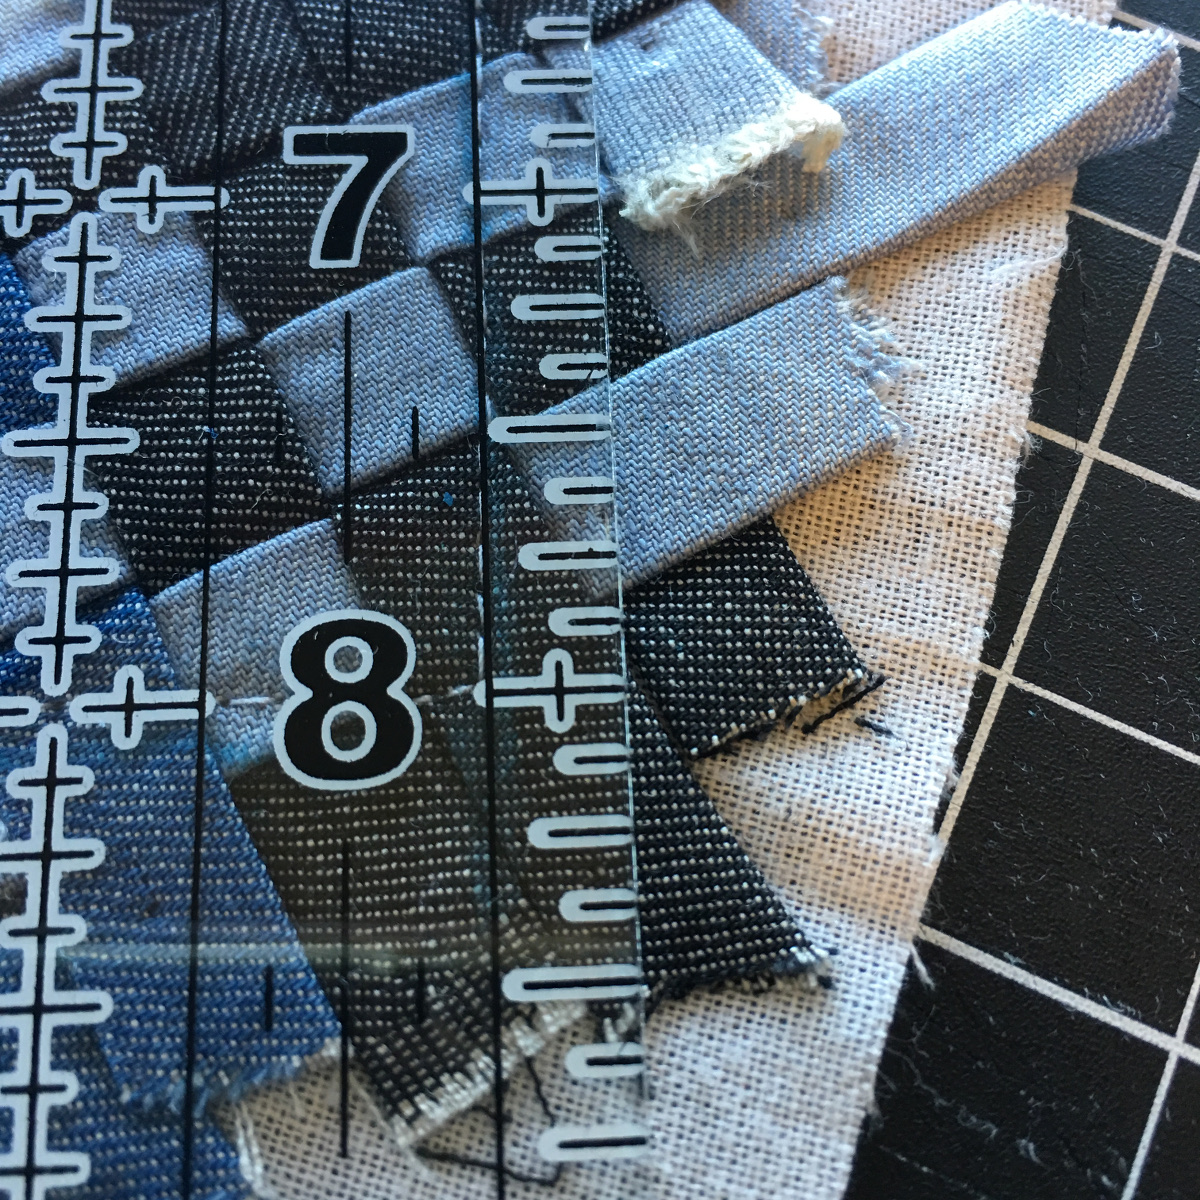
Now once the fabric has made it home to your sewing room/area, the next step is preparing the fabric strips. I like the look of 3/8” strips in garments, but 1/2” strips might be best if this is your first go at fabric weaving. Trust me, that 1/8” makes a huge difference in time-to-completion and it’ll still look super cute at 1/2”. Then, following the instructions of the bias tape maker, make your strips. I cut my strips from selvedge to selvedge and totally know that I use the bias tape maker upside-down, but here’s a picture to show how I make them.
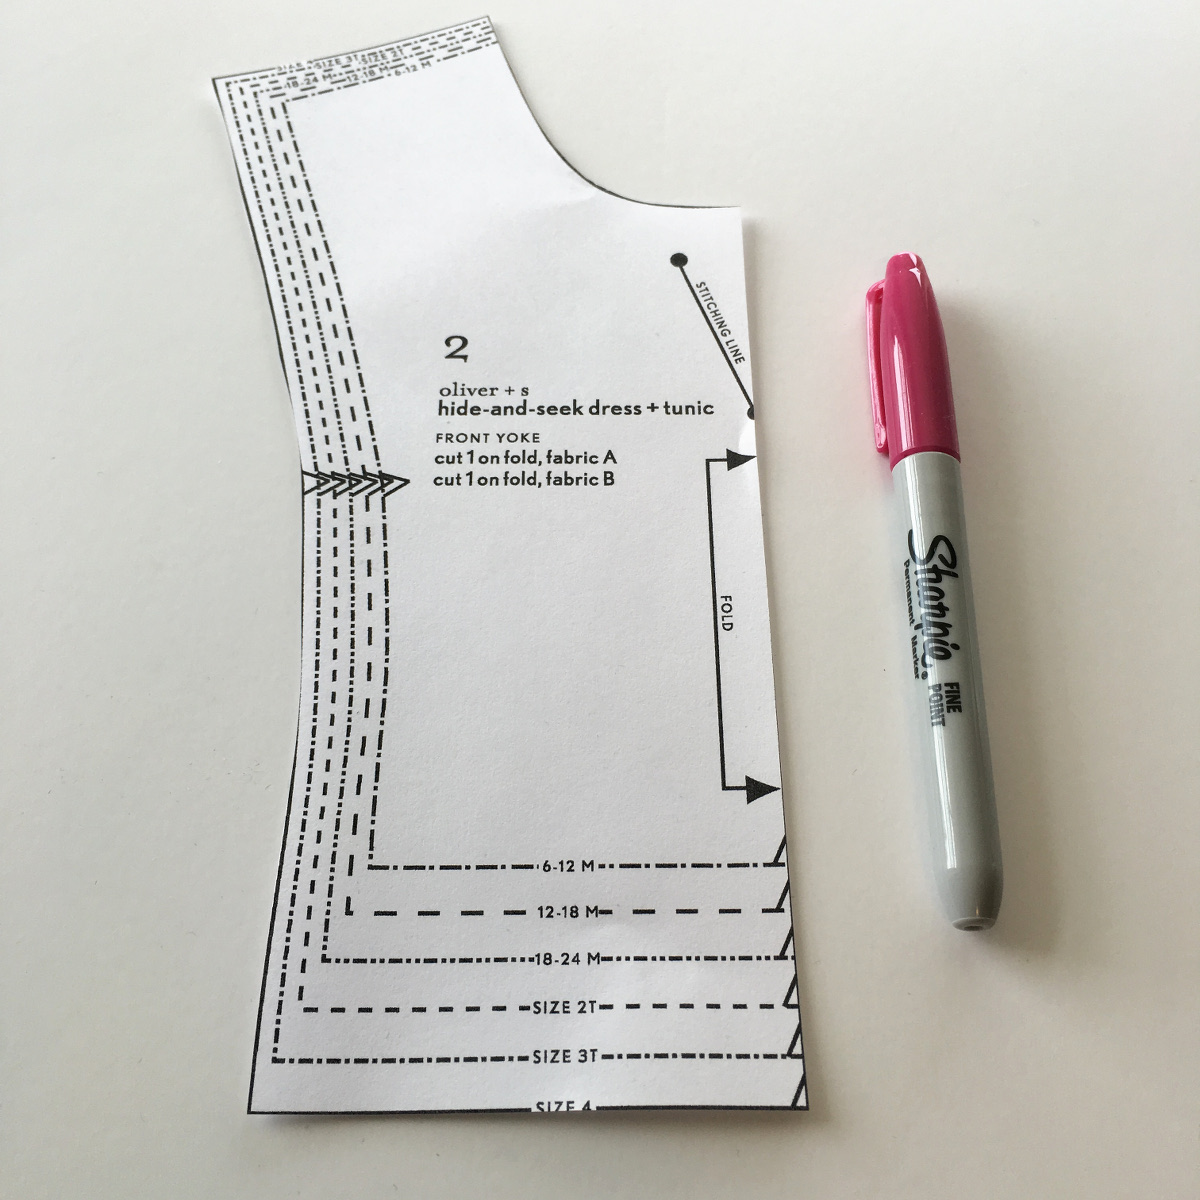
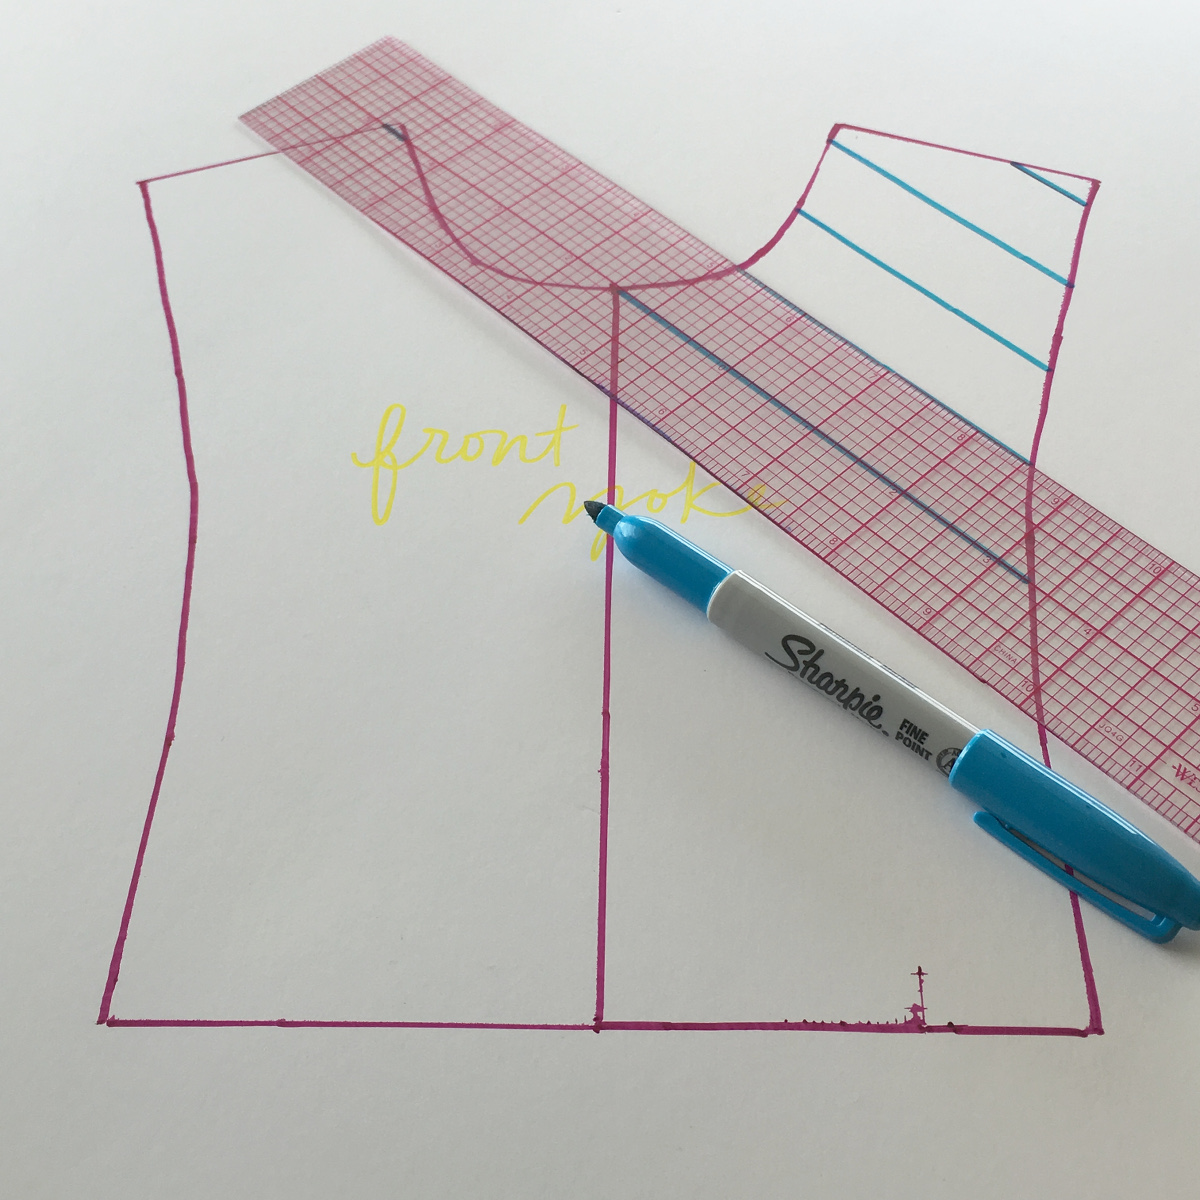
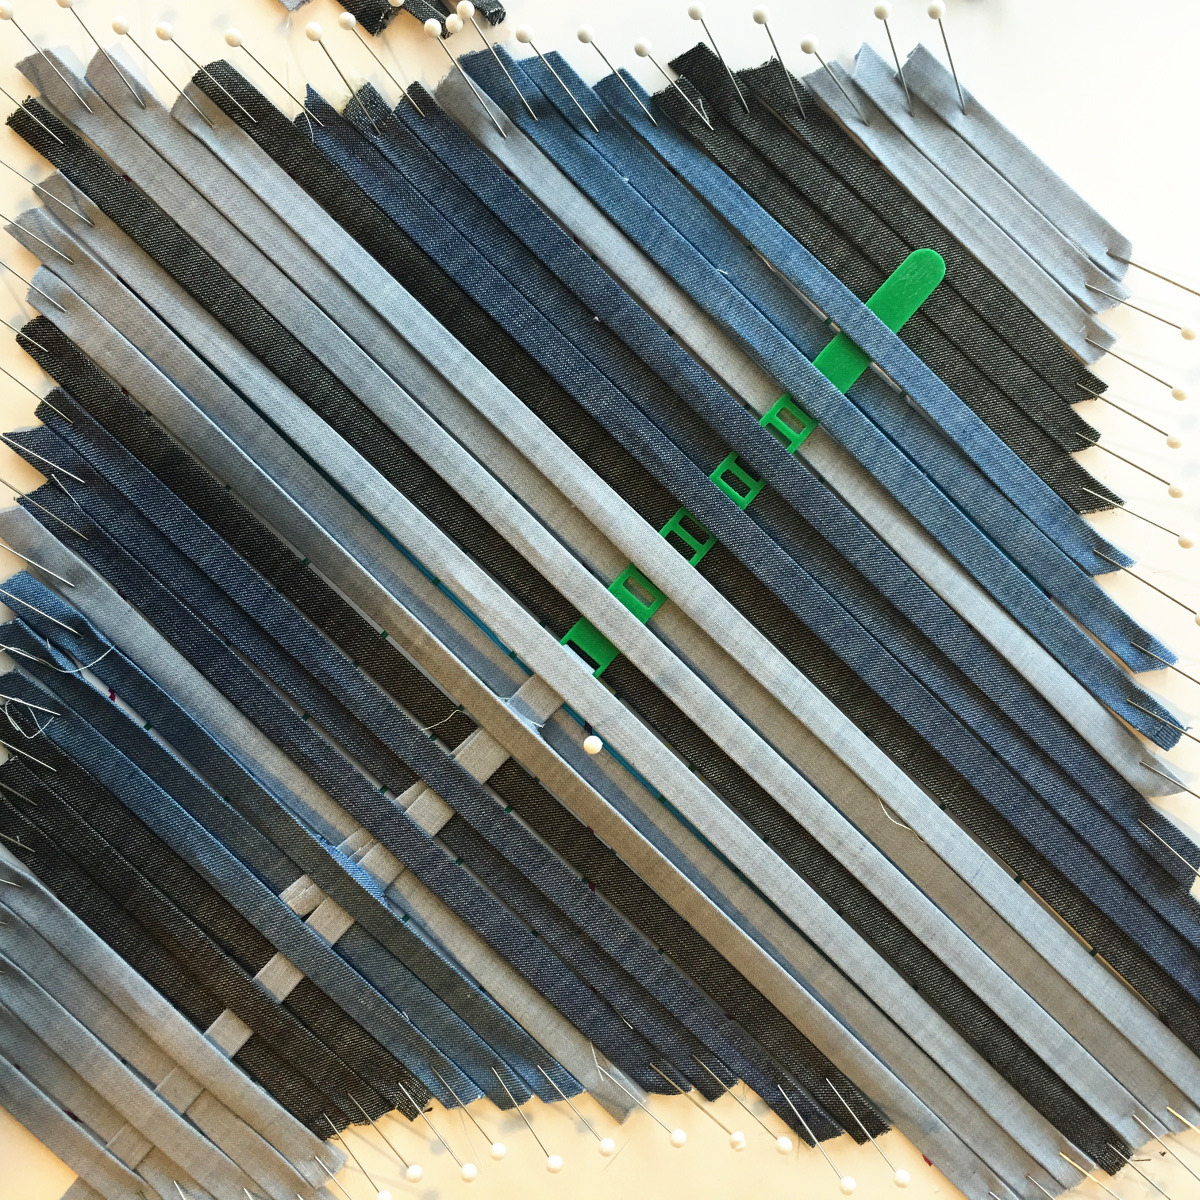
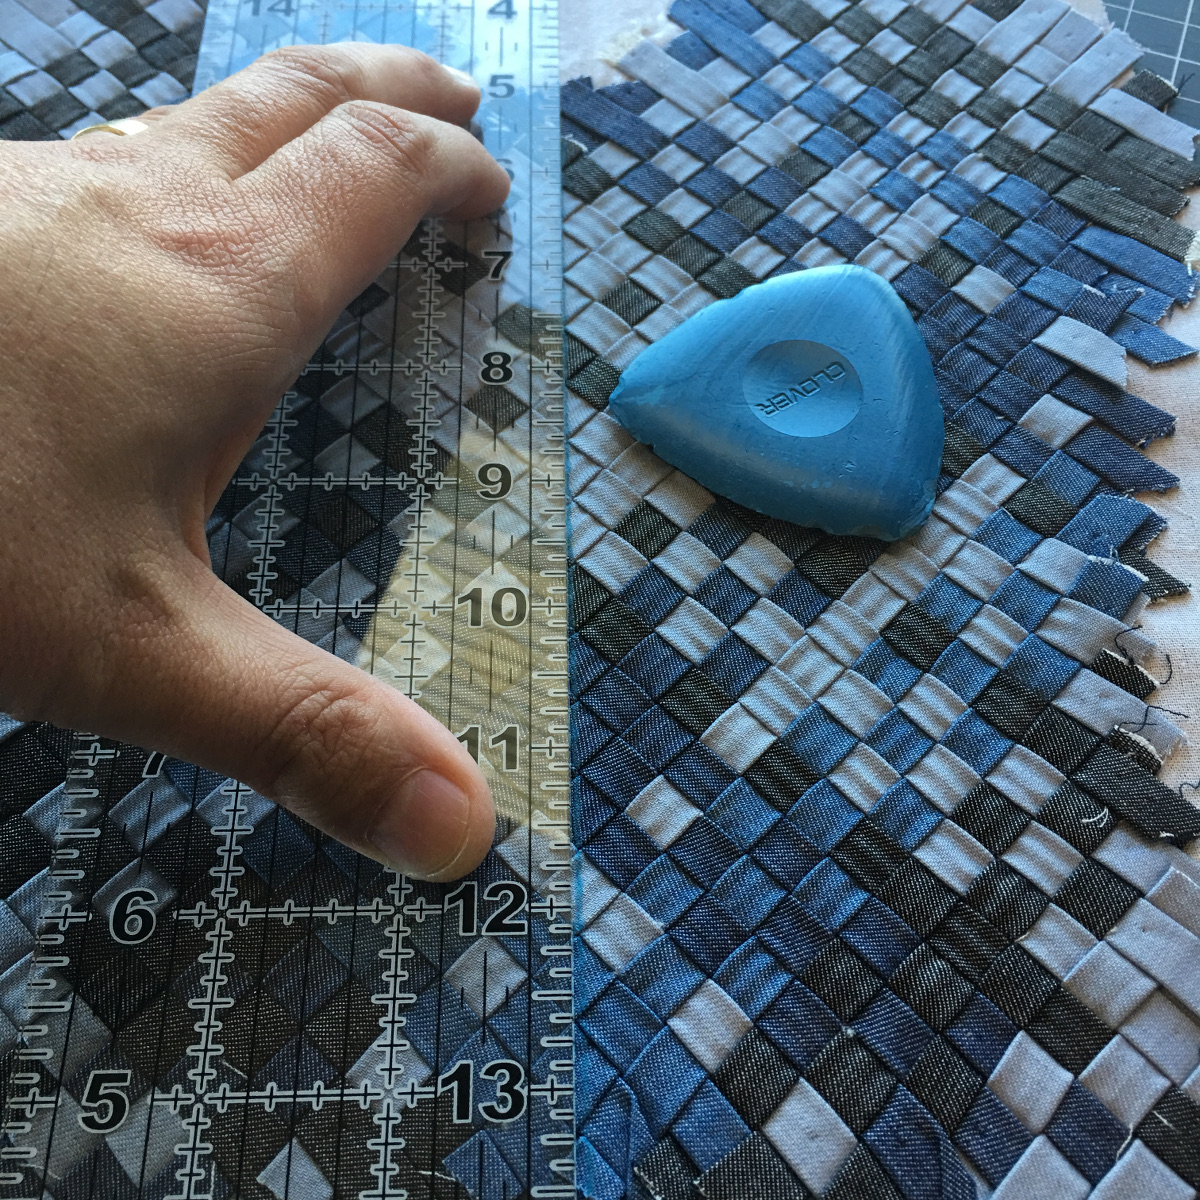
Once the strips are prepared, take the front and back yoke pattern pieces and trace the outline of the paper and its mirror right next to it on the foam board. I also like to draw the center line so that I can make sure that the weave is centered as I go. Now once the full yokes are traced, make a 1” grid at a 45 degree angle using the center line as an anchor. Hopefully, the following pictures will help you out if my words have lost you.
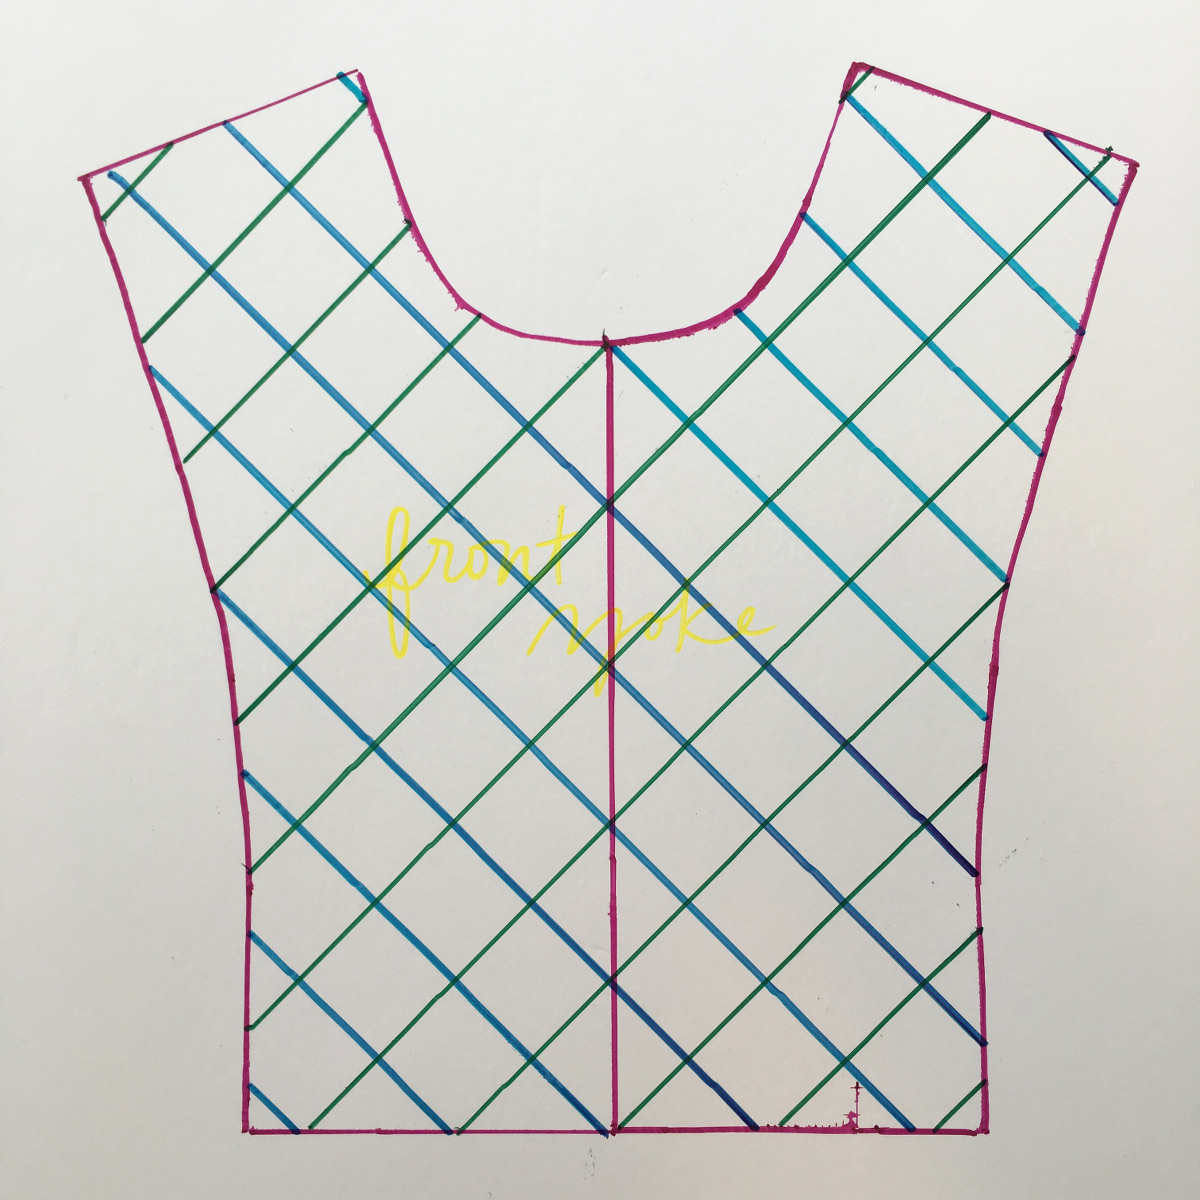
Then start pinning down your strips one after the other with the strips extending at least 1/2” past the edge until the pattern piece is filled up. A couple notes on this process:
The strips don’t necessarily have to stay inside the gridlines, I just use these lines to make sure that my strips remain parallel and to ensure symmetry on the other side as I begin to weave.
There’s no right or wrong pattern for weaving. I based a lot of mine off of plaids, but you can totally go to town here or make it monochrome. If you need help, I have a pretty nifty Pinterest Board with a lot of ideas.

Now, once you have one direction pinned down, this is when the magic happens with your WEFTY needle. I like to find a center point first to make sure I’m doing a mirror image of the other side, so I find a random spot on the center like and stick a pin in it to use as a guide. Once this is done, I get going with the traditional over-one/under-one weaving, alternating with each strip that I do.
I’m probably about 100% sure that anyone reading this was like “Why does he need a seam ripper with a dull point” when you read it. Well, this is the step that I use it. With each new strip that I do, I use the point of the seam ripper to get it as close as I can to the previous strip.
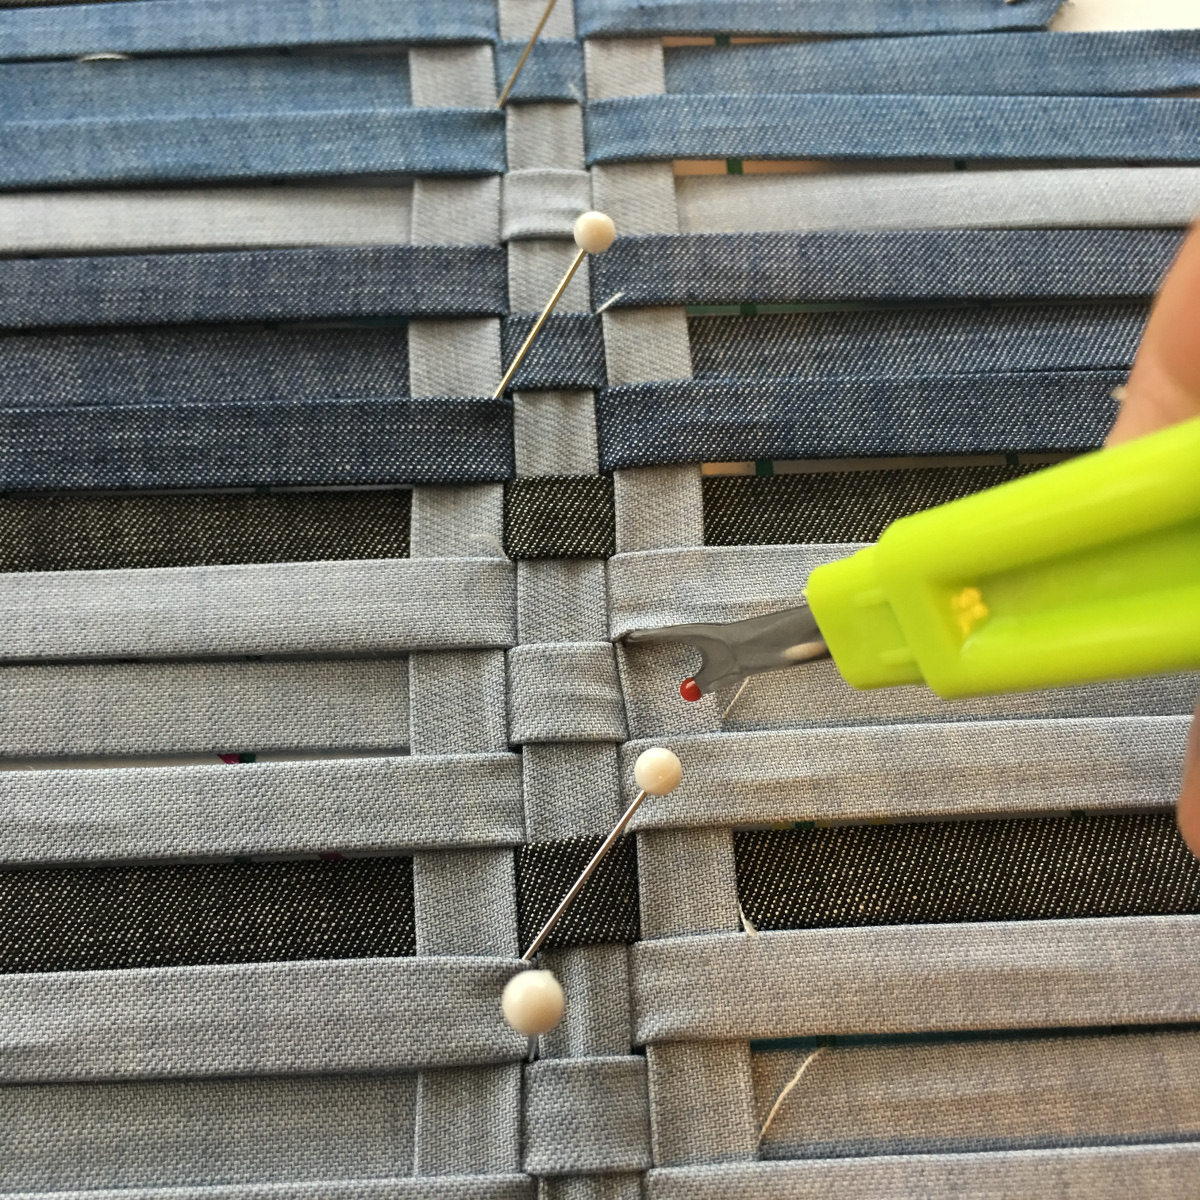
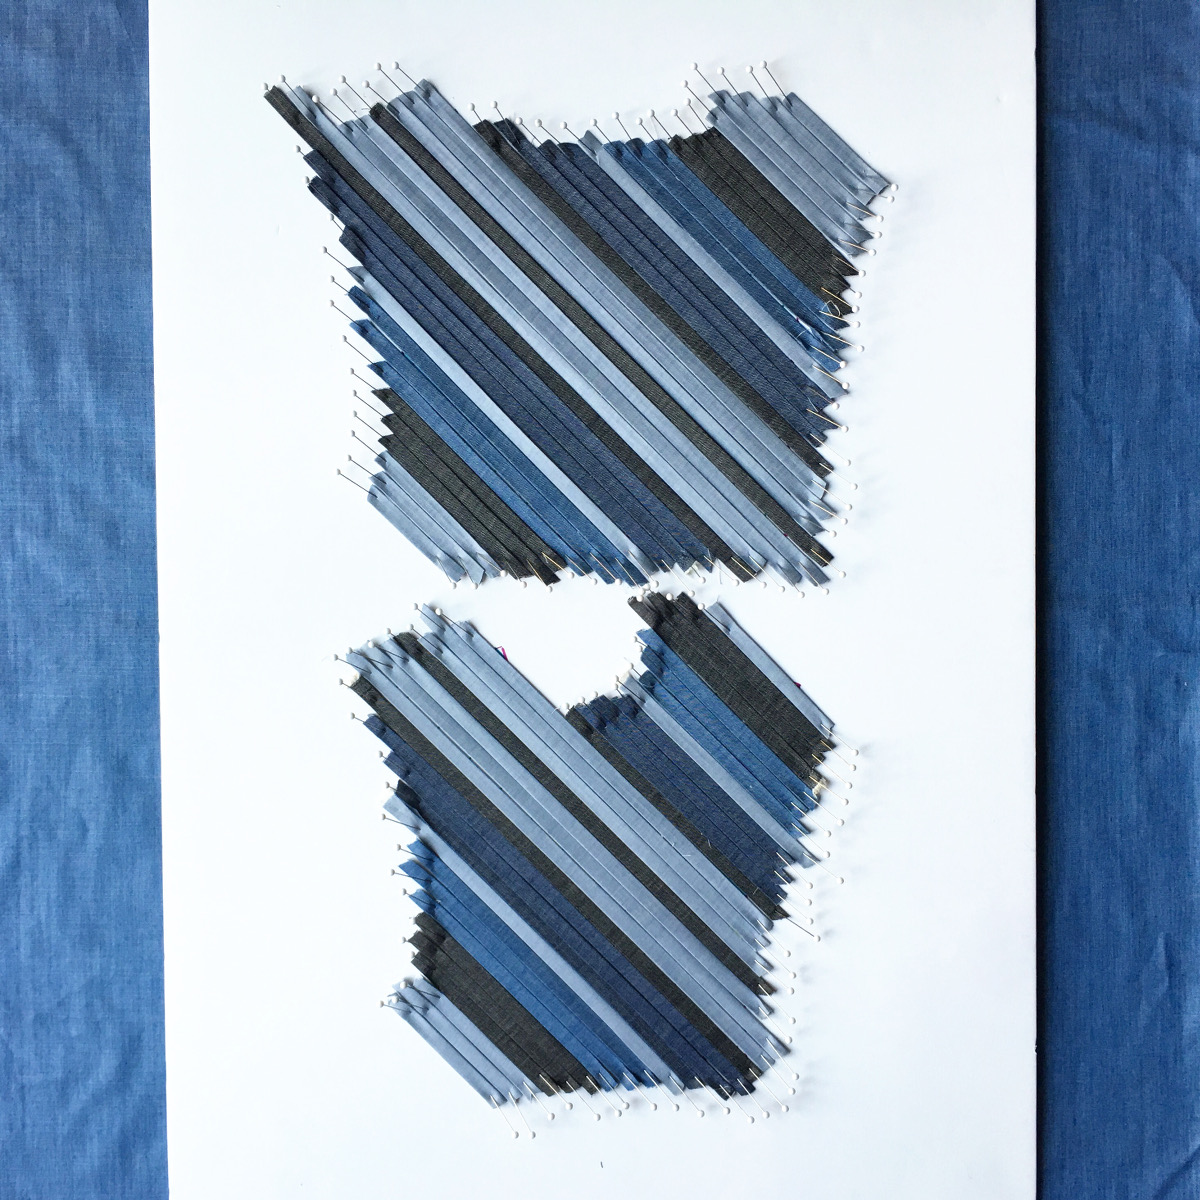
And I just keep going, repeating the order from the other side, until the pattern is complete.
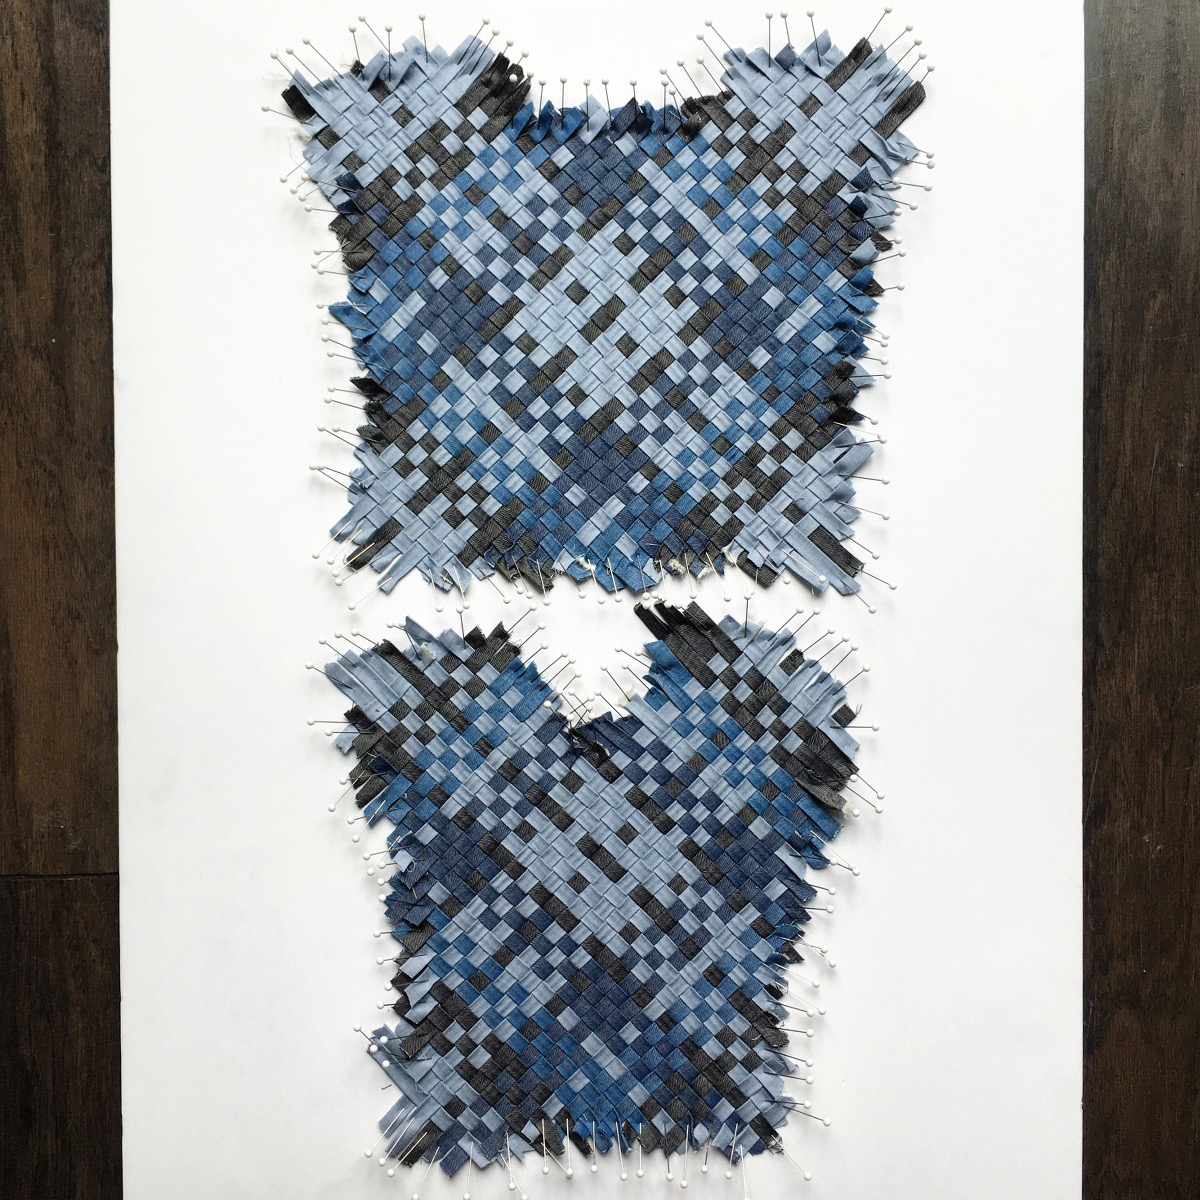
The next step is all about getting that fusible interfacing on the wrong side of the weave. If you’re concerned about the weave coming apart, I have used either masking or packing tape to secure the edges of the weave before unpinning. Since this weave was smaller than the width of my mini ironing board, I skipped the tape and carefully unpinned the insets one at a time. Once one was unpinned, I placed the ironing board on top of the weave, sandwiching it between the two boards and flipped it with the weave landing upside down on the ironing board. If you don’t have a mini, flipping with another foam board or cardboard would work and then you could shimmy it onto your larger ironing surface. After this, I like to use a light weight fusible interfacing to secure the back of the weave.

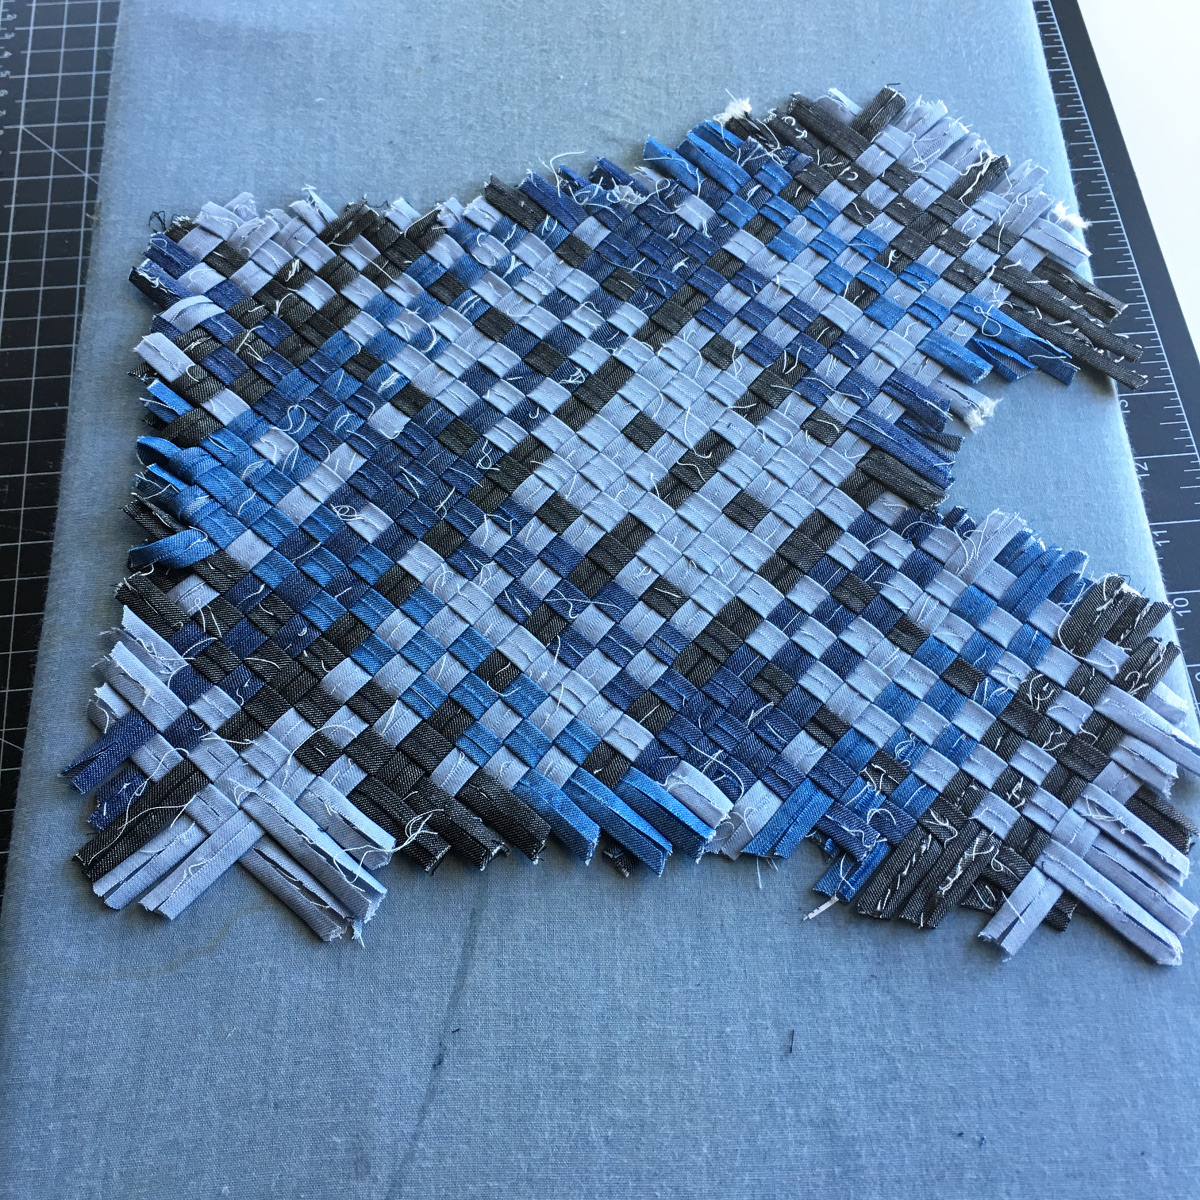

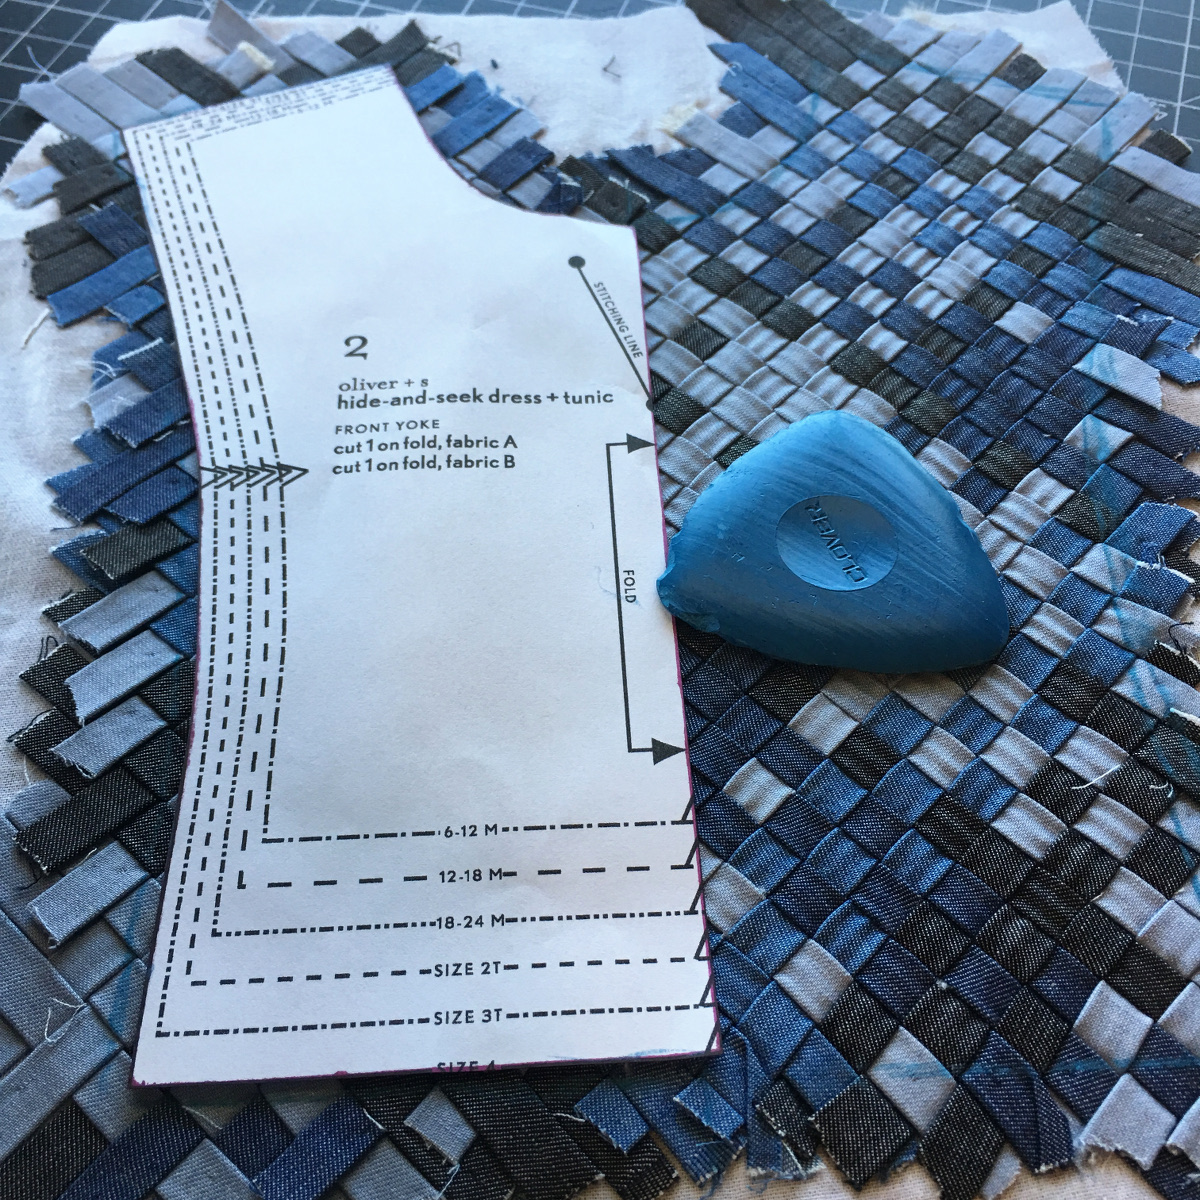
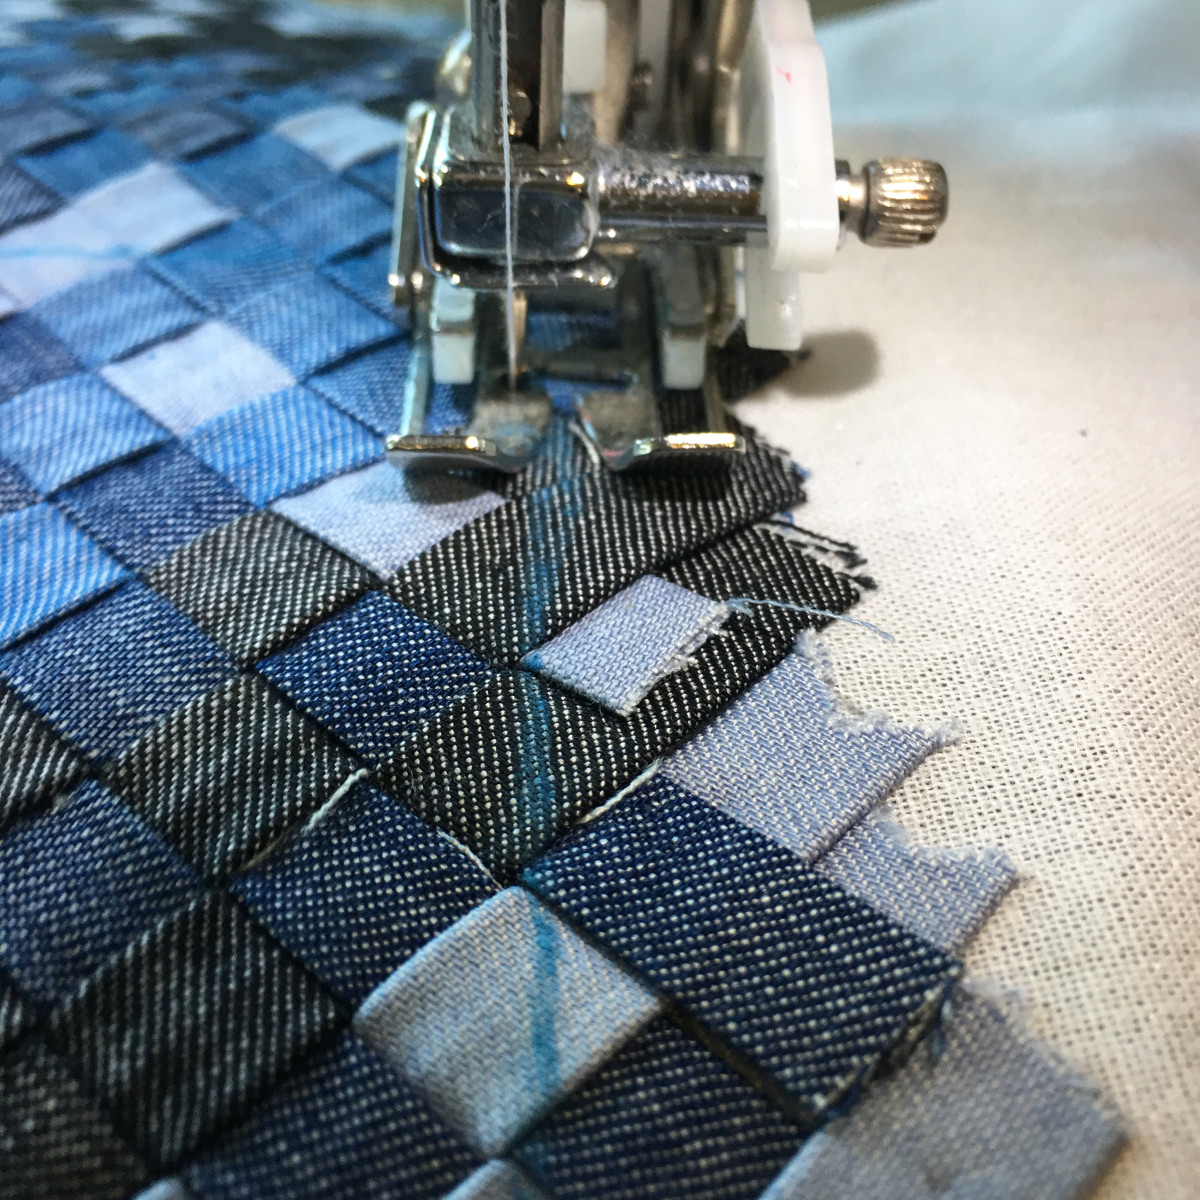
Once everything is safe to move, draw the center line on the weave and use chalk or marker to outline the appropriate yoke pattern. With walking foot attached, sew over this chalk line and then cut between 1/8”- ¼” outside of that line. For the front yoke, you will need to sew and cut the outside perimeter. I also secured the V section of the front yoke to prevent movement when attaching to the lining. For the back yoke, also sew on both sides of the center line so that you’re able to slice it in half.
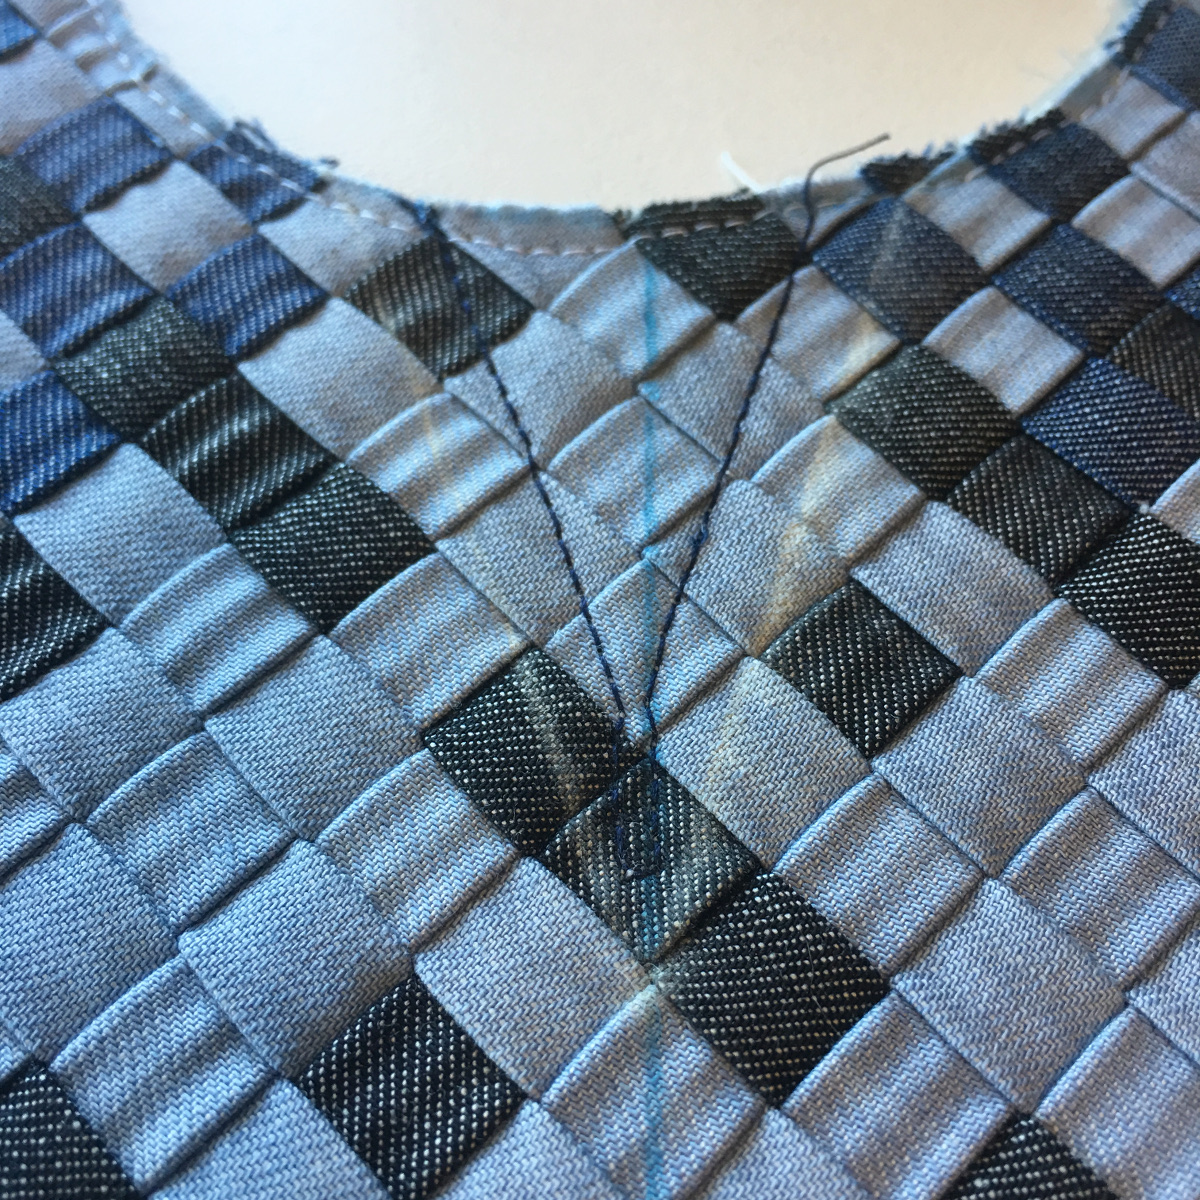
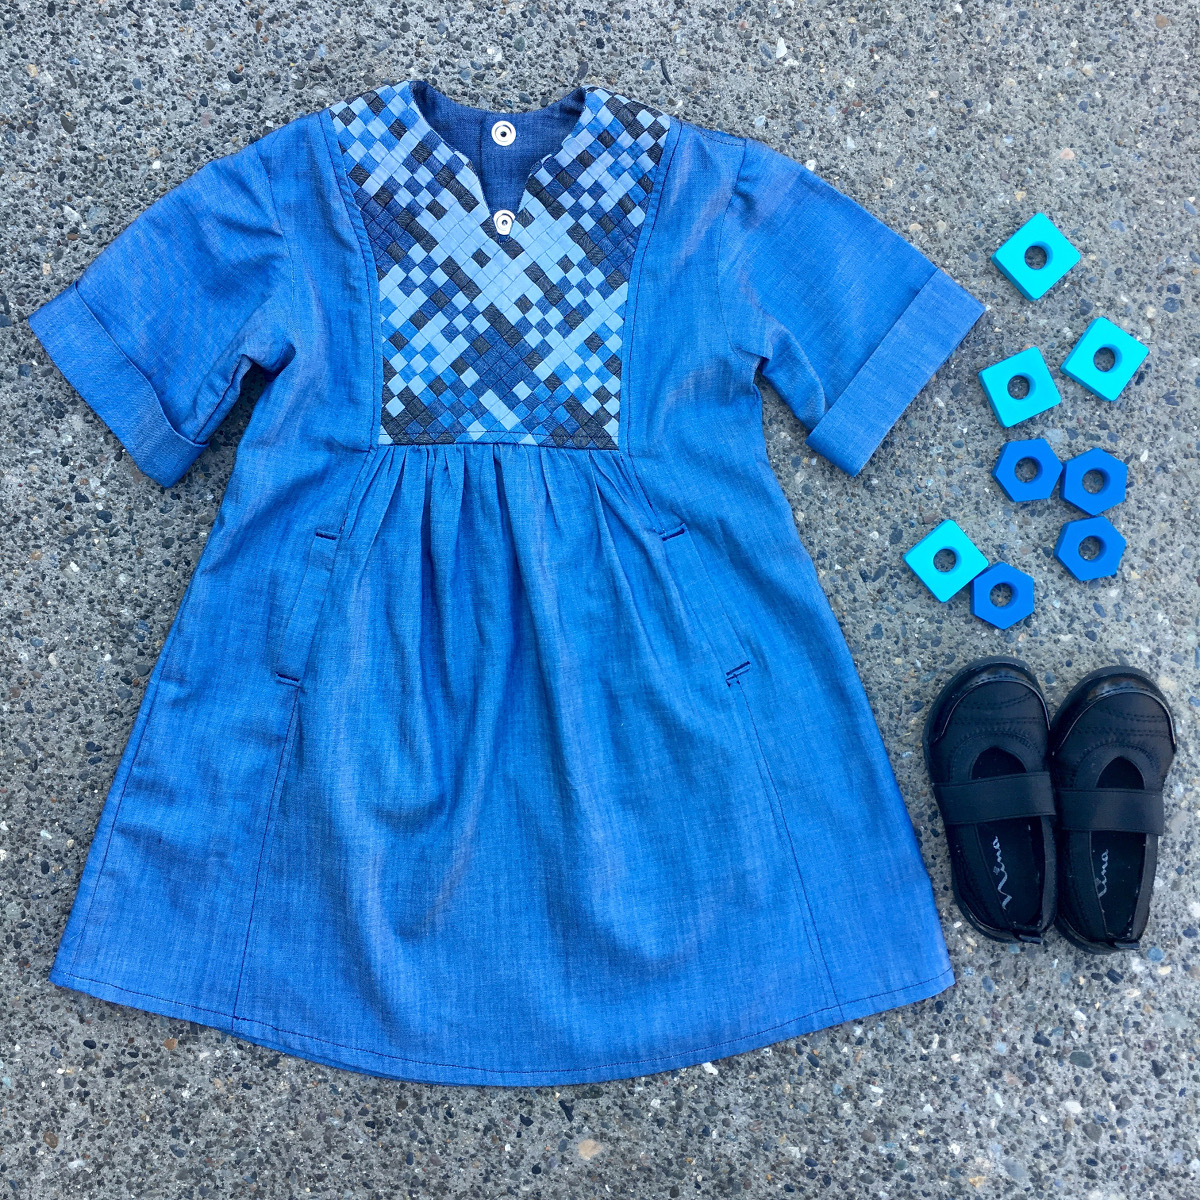
And voilà, the front and back yoke are ready to be integrated into the Hide-and-Seek Dress pattern.

If you have any questions along the way, please feel free to reach out. I’m totally available and willing to help! I’m super excited to see others use this technique and integrate weaving into their apparel. Expect to see much more from me in the future!
Thanks for reading and stay awesome!