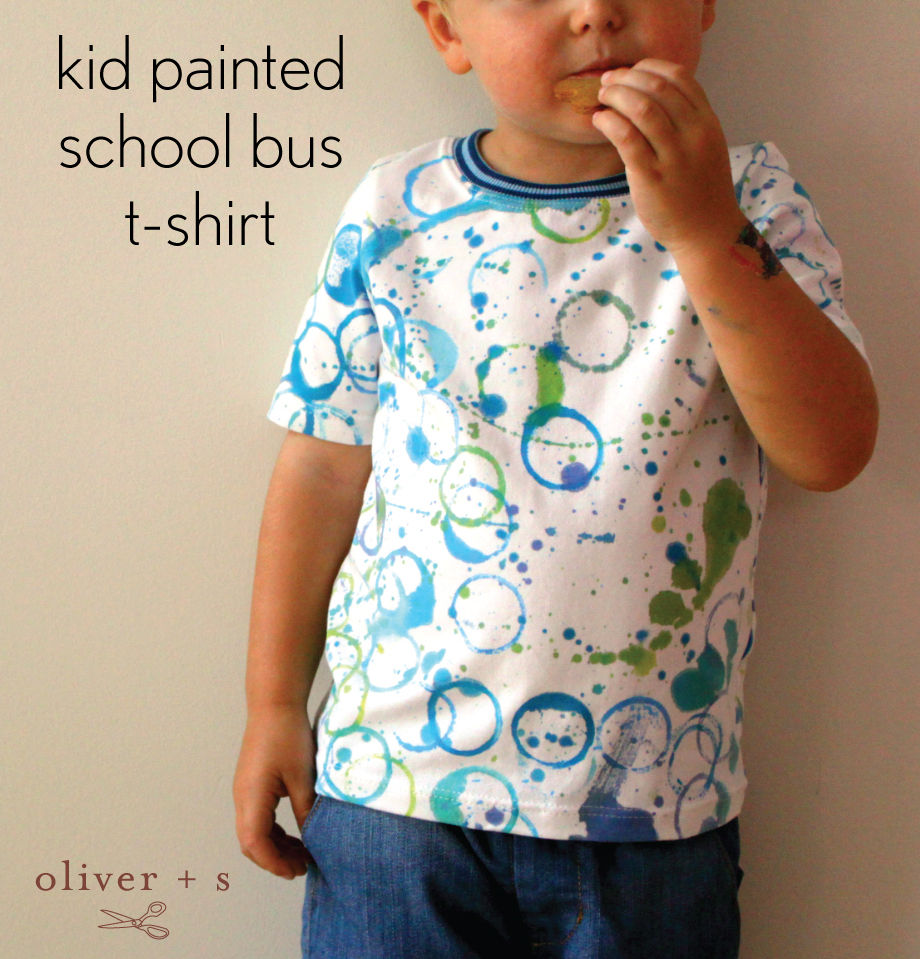
Please welcome Ailsa today. She is going to share how to do some kid-friendly fabric painting on knit fabric. See the amazing results that were achieved on the School Bus T-shirt she sewed. Thank you so much, Ailsa, for this wonderful tutorial!
Hello, I’m Ailsa. I live in Newcastle, Australia, where the climate is warm and mild, subtropical even. My family wears t-shirts all year round, so I’m always on the lookout for good t-shirt patterns and interesting knit fabric.

I had a play with this technique last year during Kids Clothes Week when the theme was “Kid Art“. I thought it might be cool to let the kids paint their own fabric and then sew it up into t-shirts for them. Maybe you’ll think it’s cool, too.
Things you’ll need:

- Acrylic Paint: you don’t need much. Maybe your kids already have some. We had this one but you could also try something like this.
- Textile Medium: an additive that is mixed into the paint to enable it to adhere to fabric. I used this one but you could also try this. Acrylic paint does stick to fabric (especially when you don’t want it to) but this additive is your guarantee that it won’t wash straight out.
- A palette, or plastic containers and brushes for mixing.
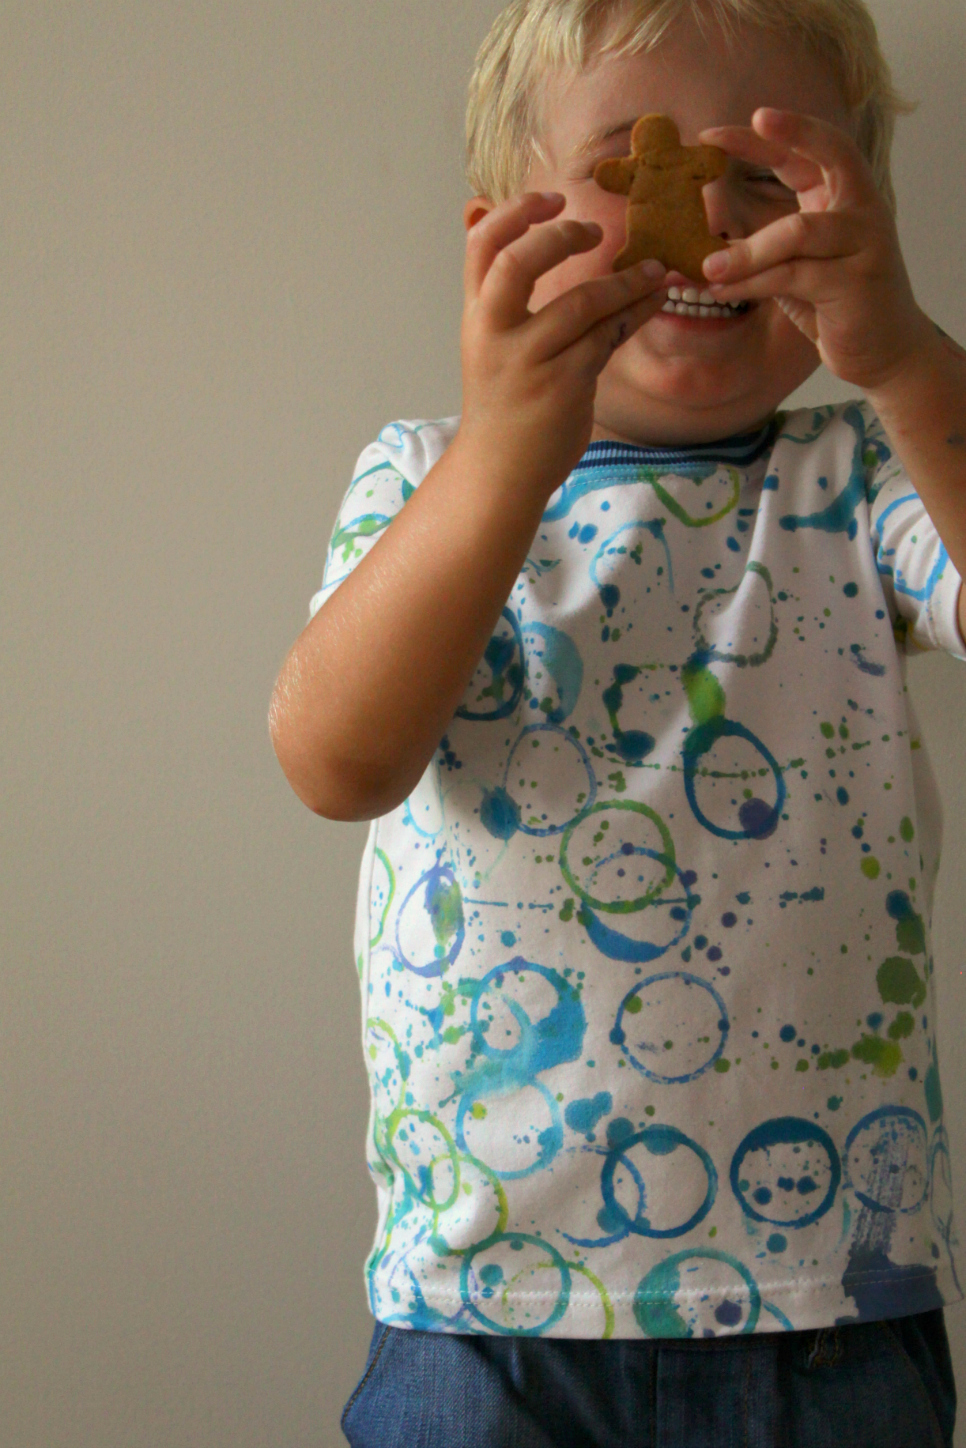
- Fabric: I like to use knit jersey with nice stretch (a little lycra if I can find it). The School Bus T-shirt pattern specifies at least 25% stretch and explains how to check your fabric.
- Cardboard Tubes: toilet rolls or kitchen wrap rolls. This time we used the cardboard rings from the center of washi tape rolls and they were great for small fingers.
- Plastic Sheet: or an old towel to protect the surface you’re working on. We did ours straight onto the concrete driveway (I’m sure it will wash off eventually!). If you’re painting onto a ready made shirt, place something inside the shirt to stop paint soaking through onto the back.
How to:
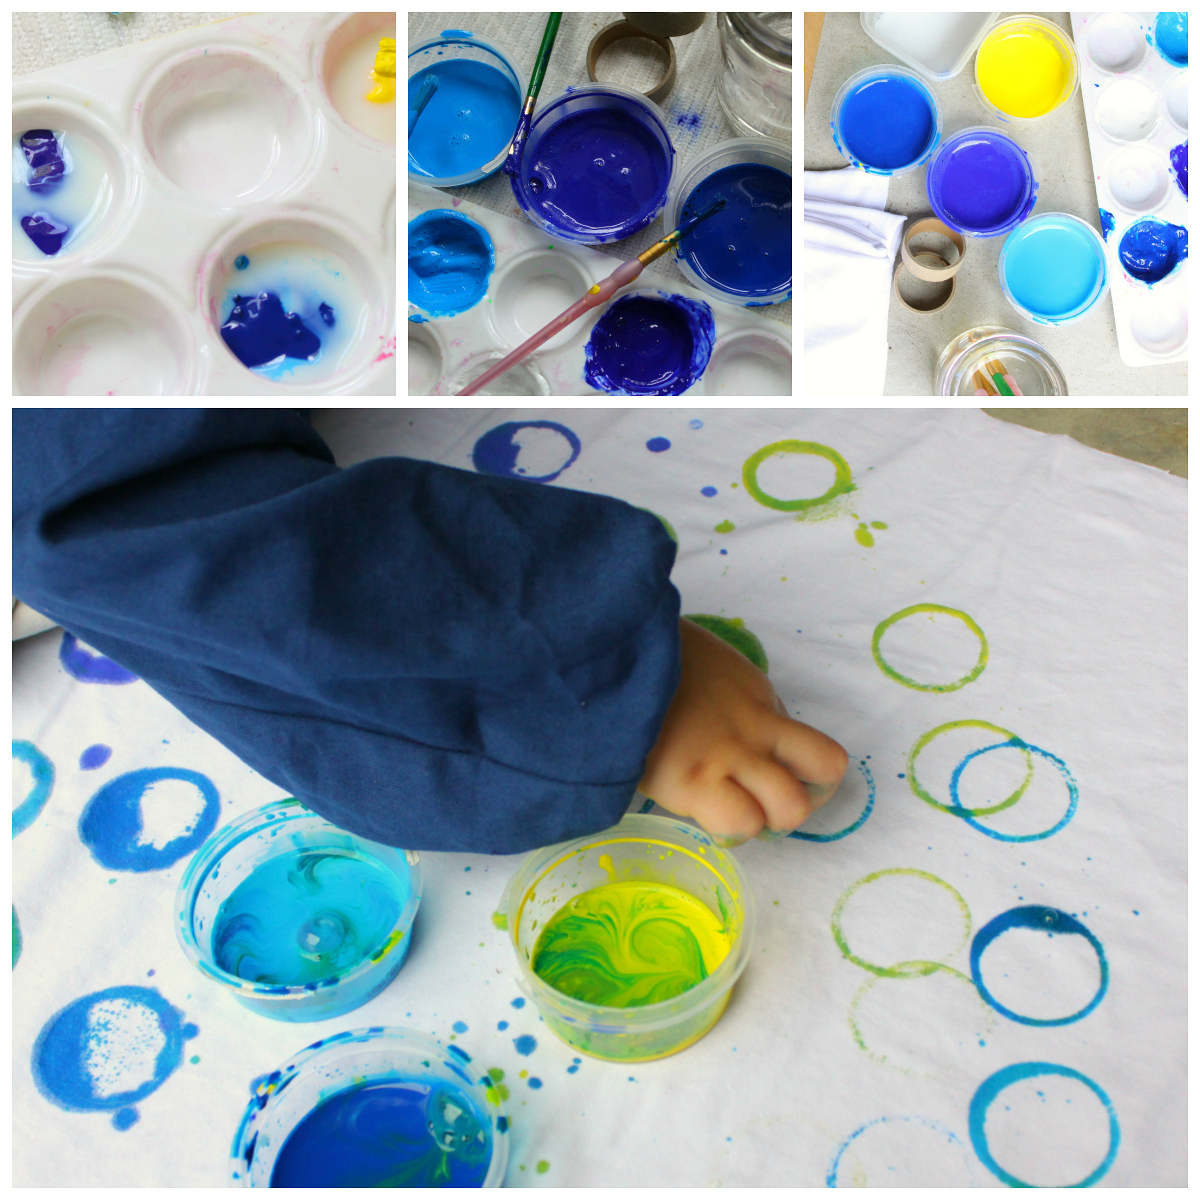
1. Mix fabric medium and paint as recommended by the manufacturer and dilute with water to the consistency of milk.
2. Lay out the plastic sheet and the fabric on top. Then have fun! We started out dipping the cardboard rings into the paint and printing circles. Sometimes the paint formed bubbles across the end of the ring that popped as we printed (to squeals of delight!). Organized printing quickly gave way to dabbing with fingers, dripping with paintbrushes and eventually dribbling the last bits onto the fabric.
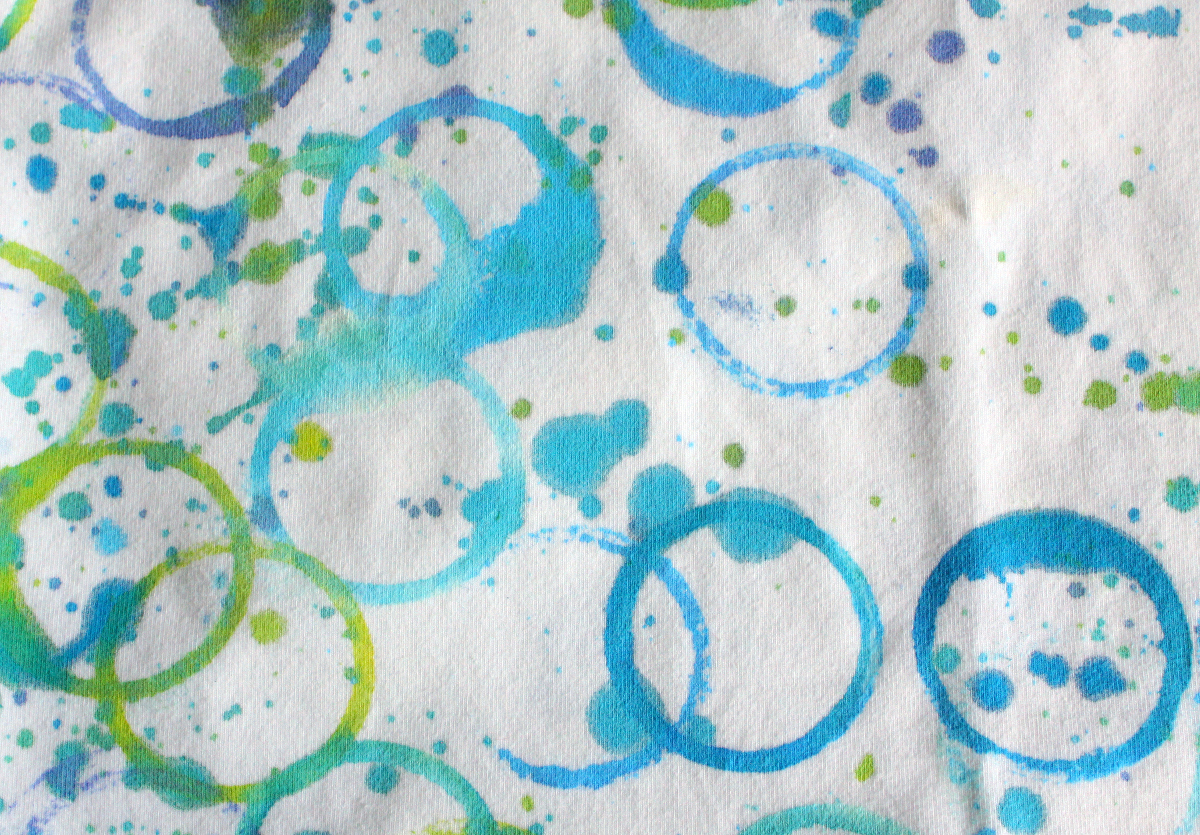
The tricky part is calling an end to the fun before it all becomes one big blob. All is not lost if you end up with areas that you’re not happy with: let the kids draw onto those areas with fabric markers or a Sharpie style permanent marker.
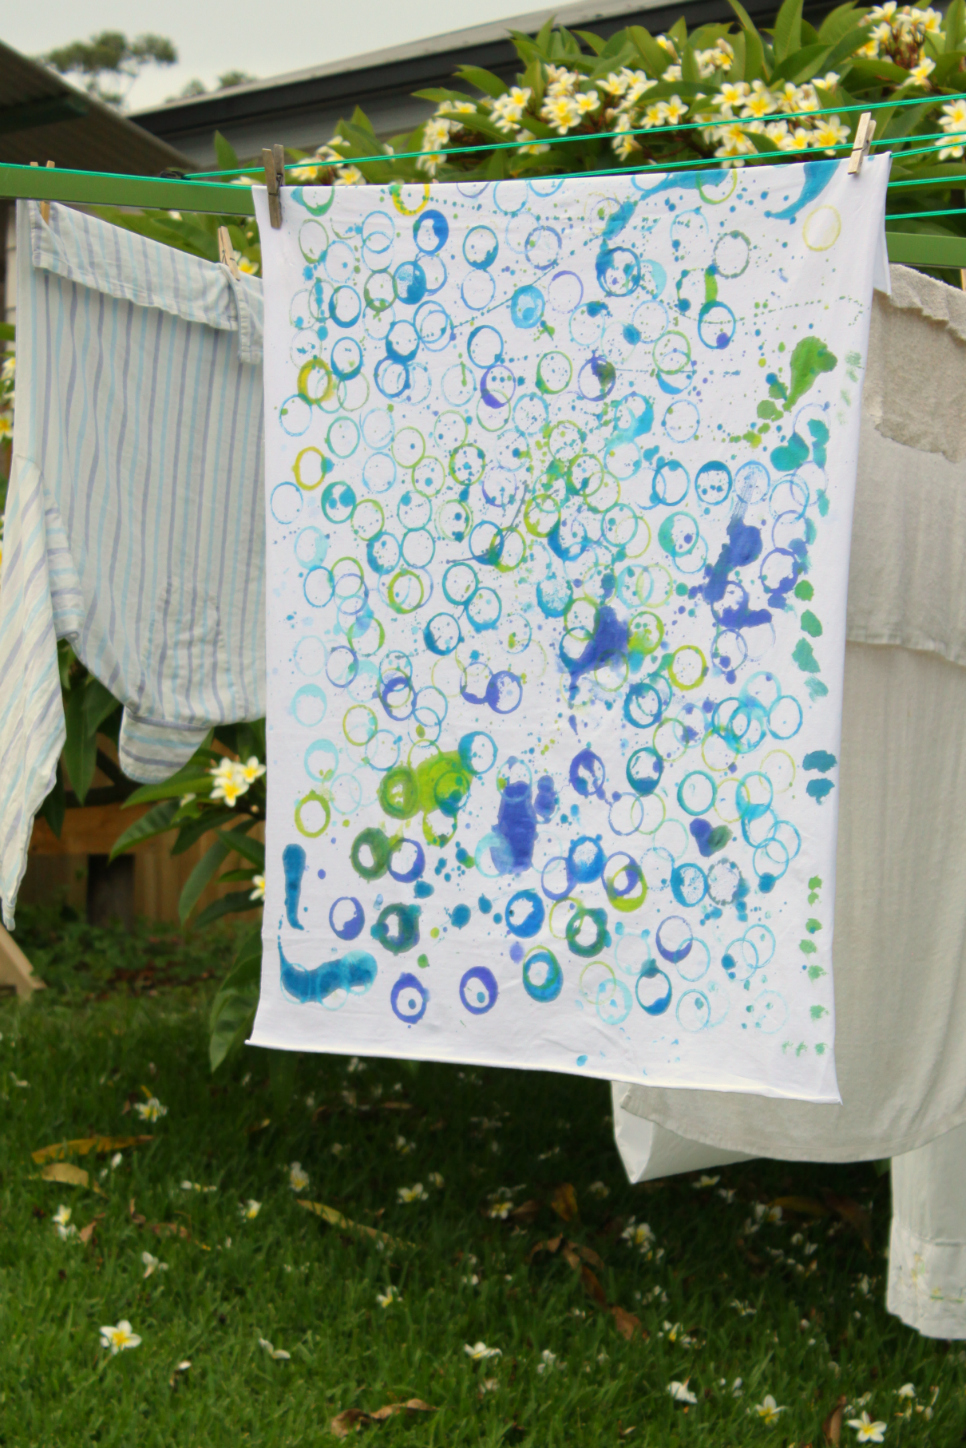
3. Dry your fabric and heat set according to the manufacturers instructions. I ironed mine for the specified time, you can also use a clothes dryer.
4. Sew! I made a straight size 5 for my chunky 3.5 year old. That’s pretty usual for him so the sizing on this pattern seems pretty standard. I followed the (great) instructions except for some small things:
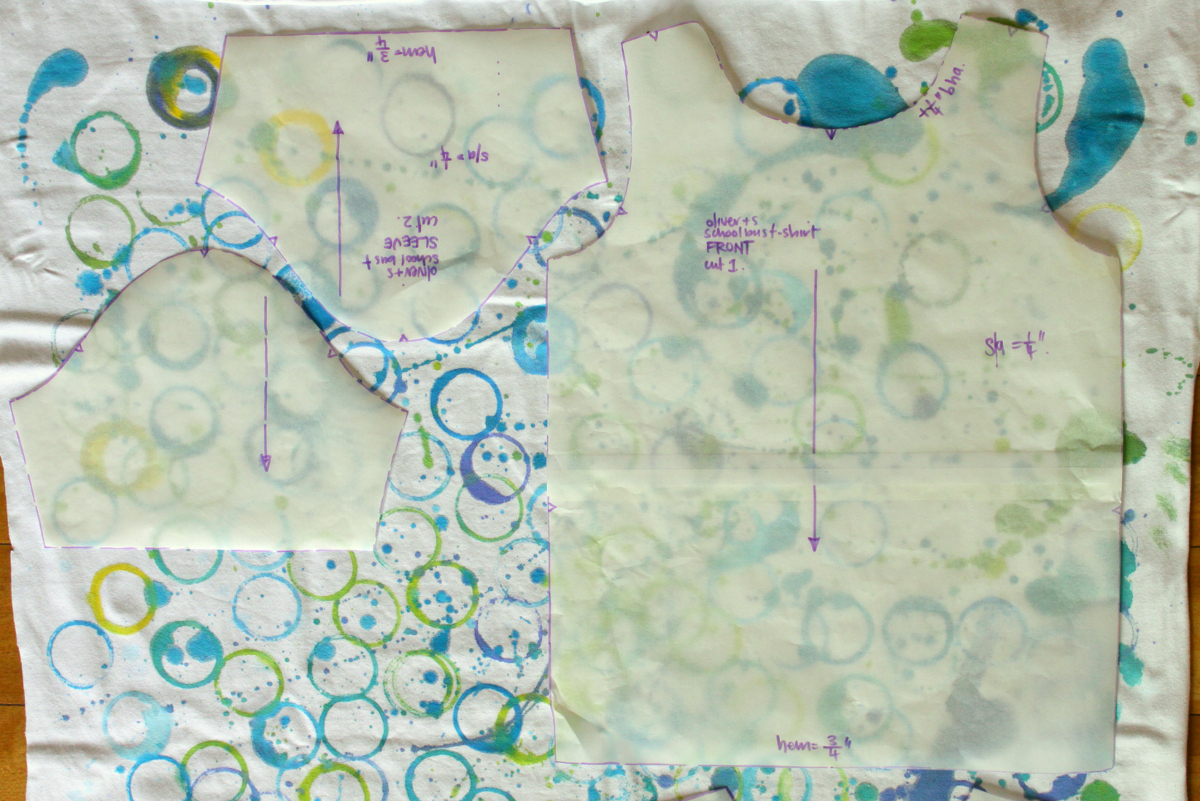
a) I traced two sleeves and traced the front and back pattern pieces full width so I could better choose which bits of the print got used.
b) A “BHA”. My kids have big heads so I do a “big head adjustment” on pretty much everything that gets pulled on over their heads. I trimmed a 1/4″ off around the front and back necklines. Then I measured the new seam line (a seam allowance away from the pattern edge) and multiplied this by 3/4 to cut out my neckband. I’ve used this Ottobre ribbing before and it’s really nice and stretchy so I know this ratio works. For less stretchy bands I might use 7/8. Gauging stretch for neckbands is the part of knit sewing that took me a while to get a feel for. I’m getting better with practice.
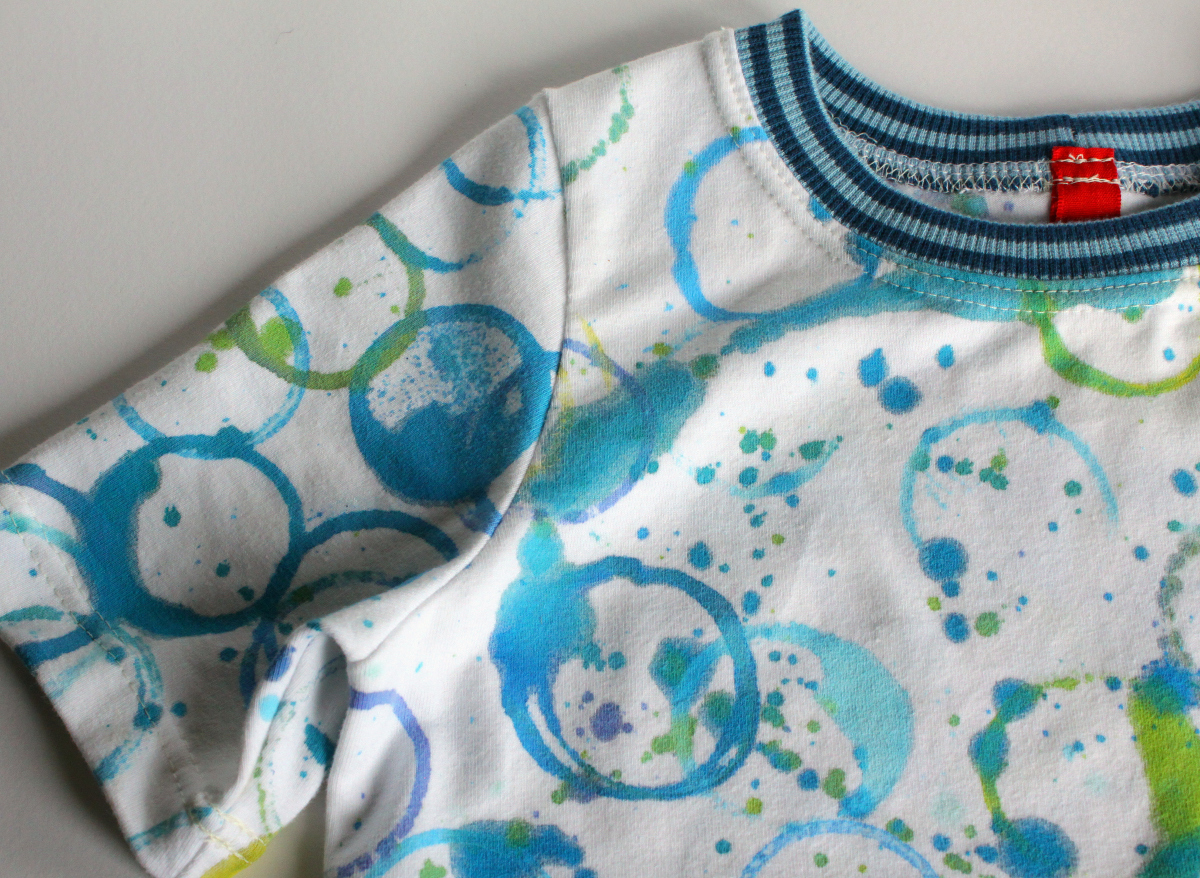
c) I topstitched the neck with a double needle. I often do a single, long but narrow zig-zag around the neck. It helps the seam allowance sit flat. This time the double needle was sewing without a hitch so I just kept going!
While writing up this tutorial I’ve been thinking about other things to try with this technique…
- Other shapes for printing… like cookie cutter stars. I wonder if plastic would work as well as the cardboard? Or corks or potato printing.
- Stripes with a paintbrush. A bit like Liesl’s, but more drippy and blotchy (in a three year old way).
- Placement printing. Cut out your fabric pieces before painting so you can place the prints just where you want them… around the hems or just over the shoulders etc. My kids are still too young to be able to follow this level of instruction.
- Bleach onto a dark fabric. Better try this without the kids!
- Galaxy print. Then splattering color onto the bleached areas to get something like these. Or recreate this fantastic fabric.
OK, you get the idea… there’s a lot of fun to be had with fabric, paint, and a great basic t-shirt pattern. Thanks, Oliver + S, for having me and thank you so much for reading!