
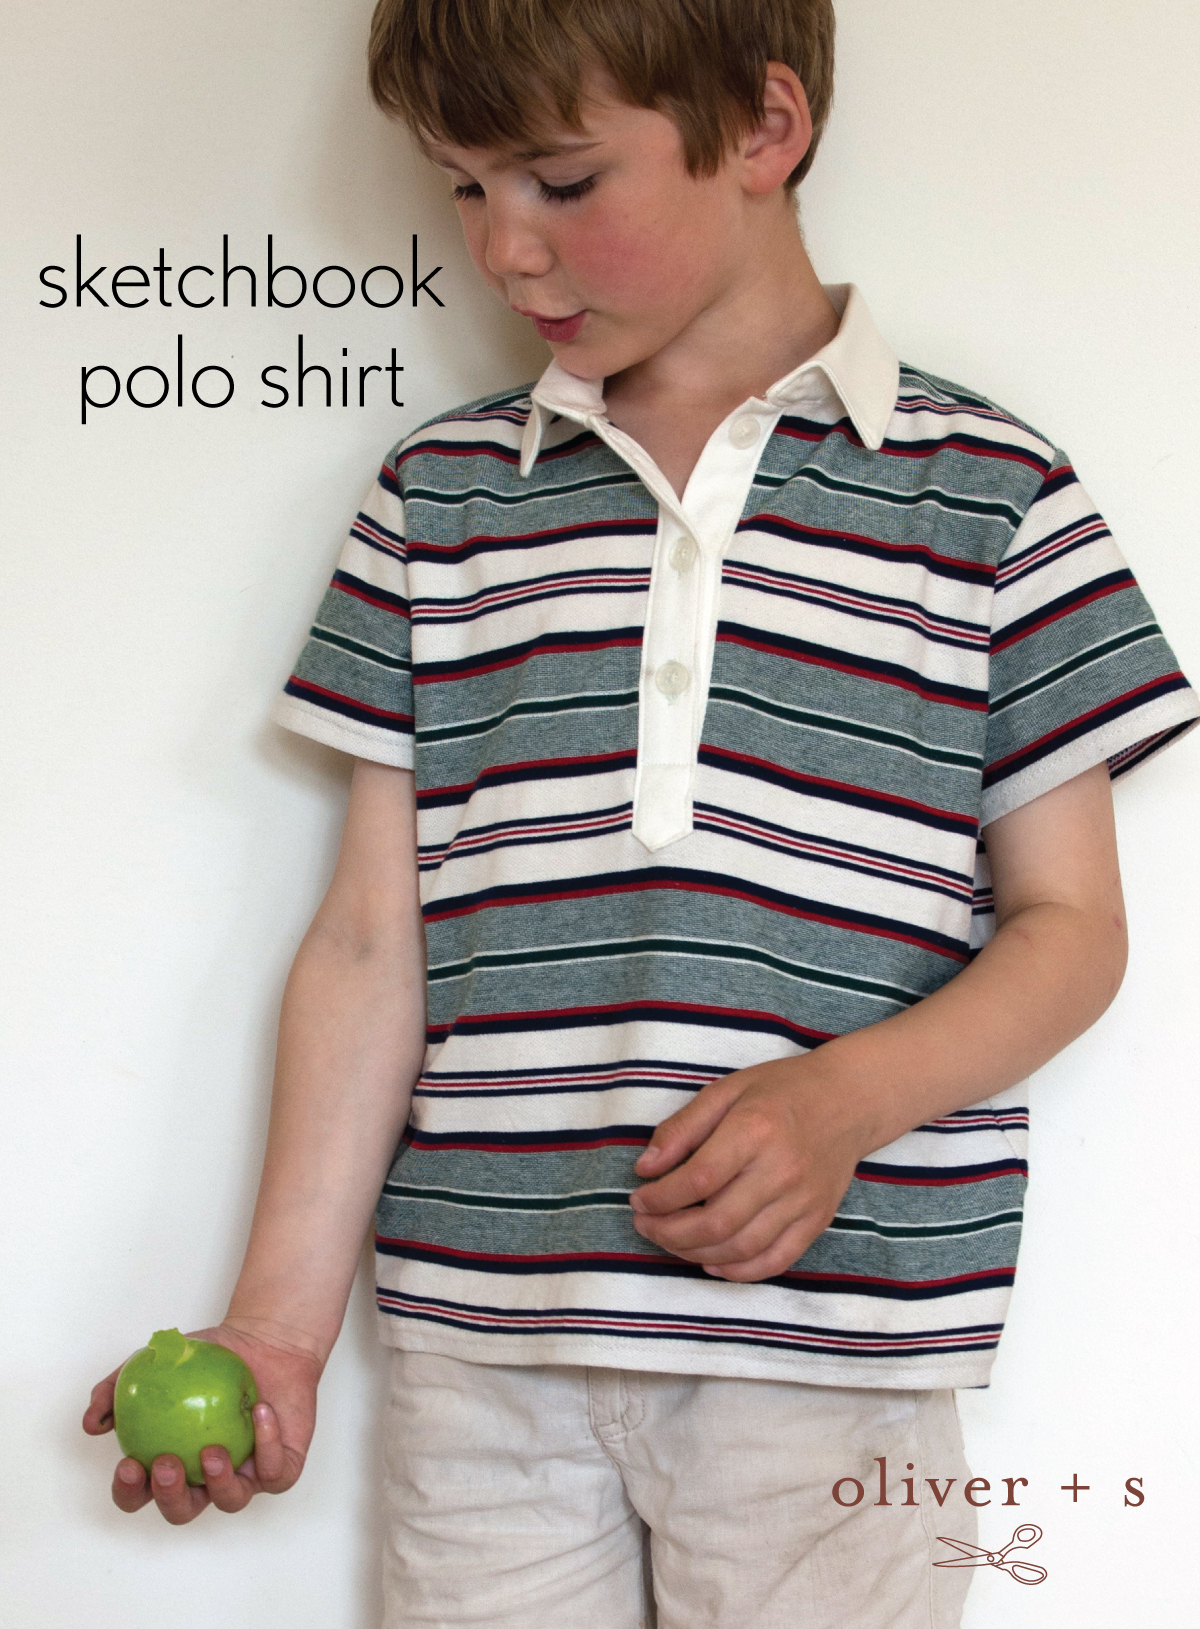
Guess who’s back today? It’s Shelley, returning this time with a project that changes the Sketchbook Shirt into a polo shirt using the button placket from the Jump Rope Dress. Thanks for sharing all of this wonderful information and inspiration with us Shelley!
I hope everyone is enjoying their Christmas sewing. Today I’ve got an idea for you if you have a boy who complains about having to wear a formal, button up shirt, but who you’d like to see at Christmas lunch in something other than a grubby old T-shirt.
To make a nice boy’s polo shirt you could buy a polo shirt pattern, or you could combine a few of your favourite Oliver + S patterns and see what happens. That’s what I did of course!
No sooner had the Jump Rope Dress pattern been released than clever sewists started noticing that the top half of the dress made a very nice blouse. A search of the Flickr pool turns up quite a few Jump Rope shirts. Cherie made some gorgeous sleeveless versions. Also I’ve collected some other lovely Jump Rope tops onto a Pinterest board here.
I think credit must go to Peta for first thinking of combining a woven collar with a knit fabric and making a Jump Rope rugby top.
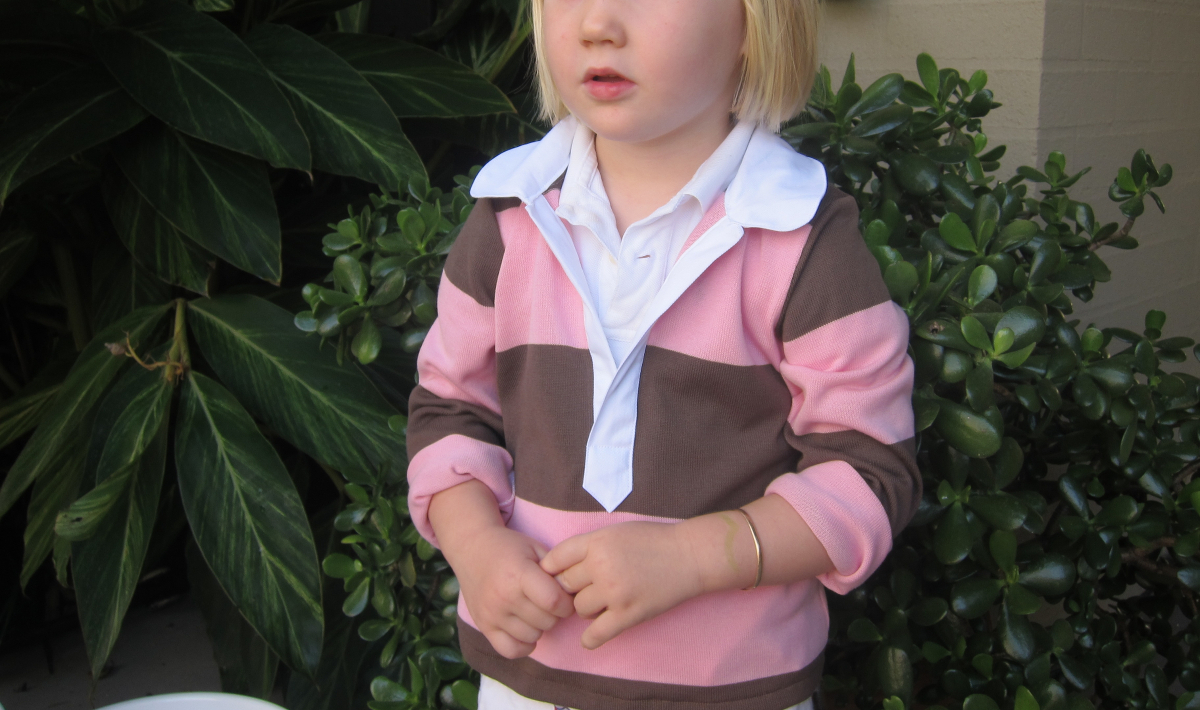
And in doing so she inspired this great little casual, collared boys T-shirt by Johanna. Johanna used the Nature Walk pattern, eliminated the separate front panels and inserted the Jump Rope placket.
If you’ve never sewn a placket like this before, don’t worry, you’re in for a treat. The Oliver + S forum members have declared it one of the all-time most satisfying moments in sewing!
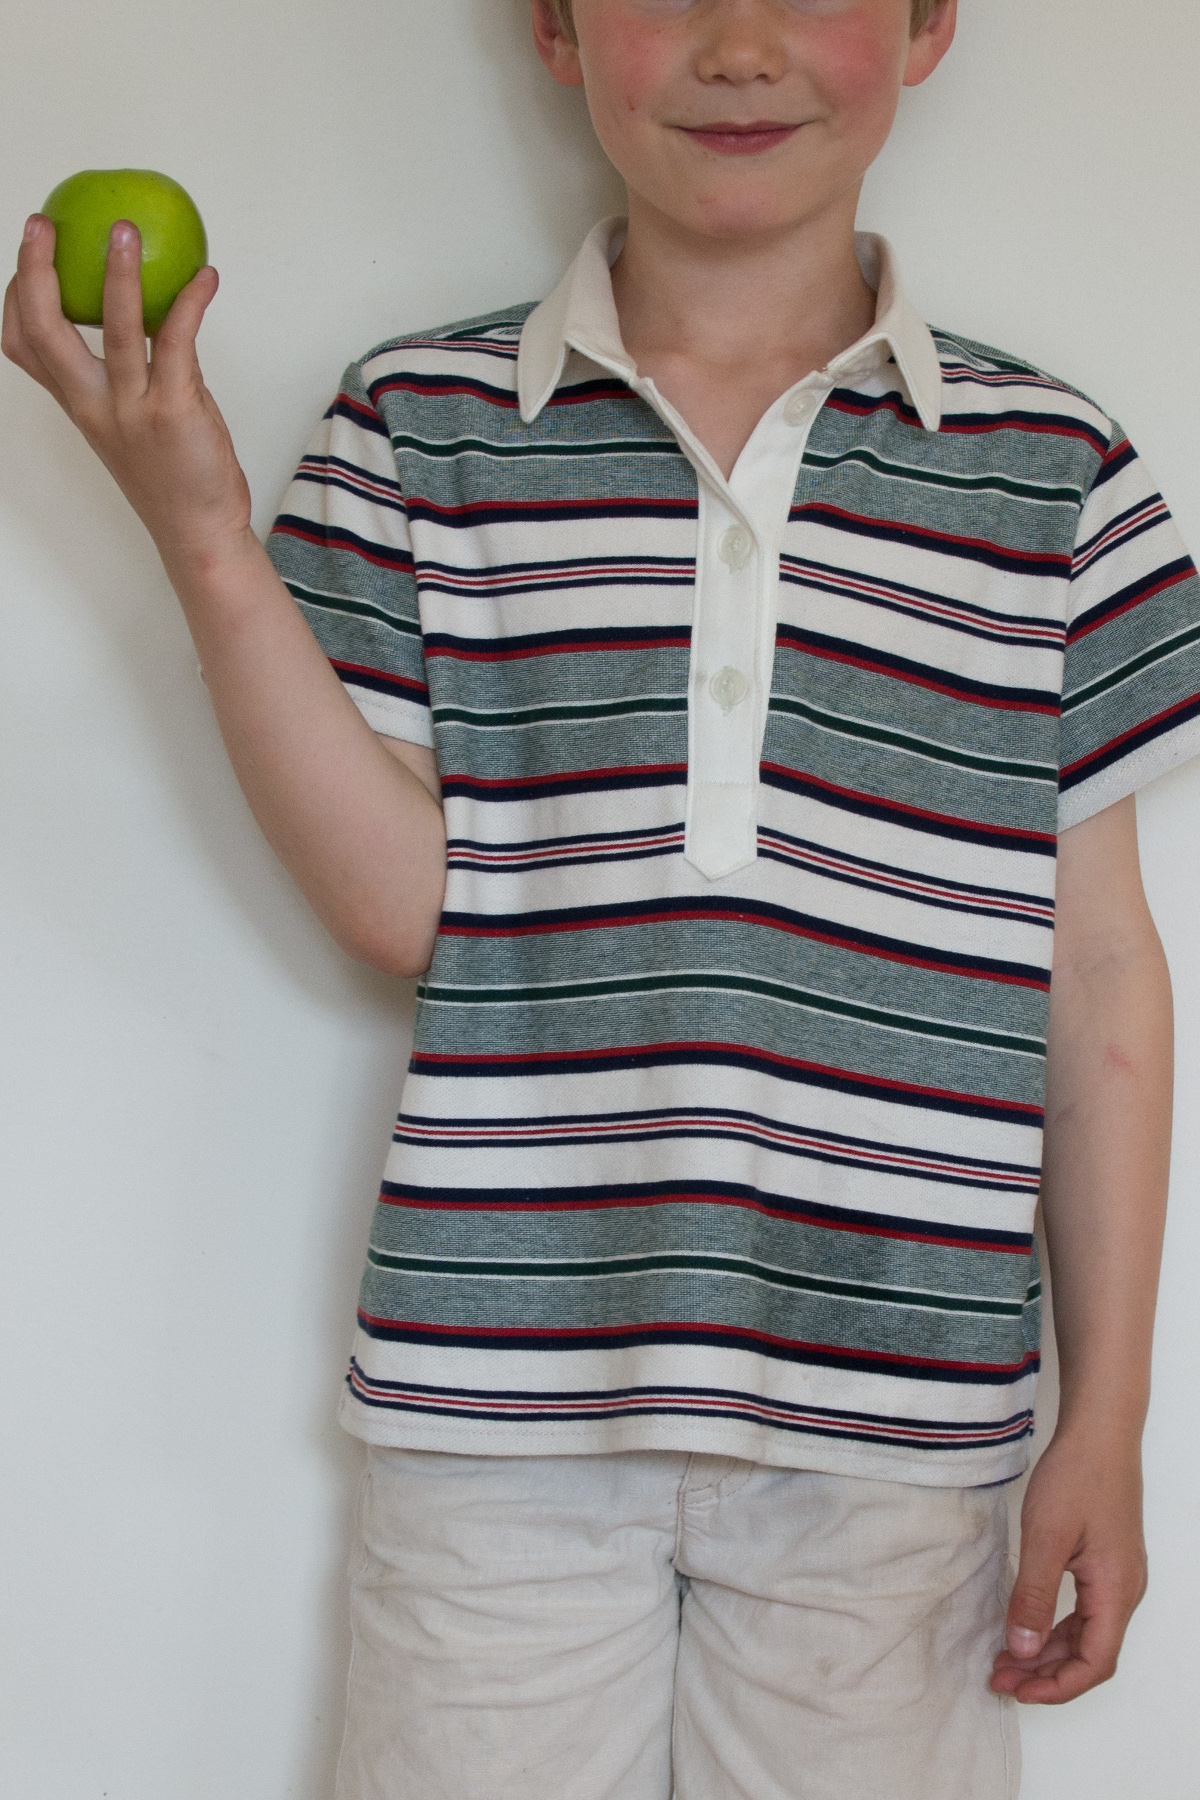
For my polo shirt I chose to use the Sketchbook pattern. I like the collar shape and I’d just made one straight up and knew that it fit well. When I mix patterns together I like to make things a bit easier for myself by keeping sleeves with their matching armholes and collars with their matching necklines. So all I needed to do was convert the Sketchbook pattern into a single front piece and single back piece.
The front pattern piece is easy. The way the button placket is usually sewn means that the edges of the fabric just touch at the middle inside their little overlapping plackets. With no adjustments required you can simply cut the front pattern piece on the fold.
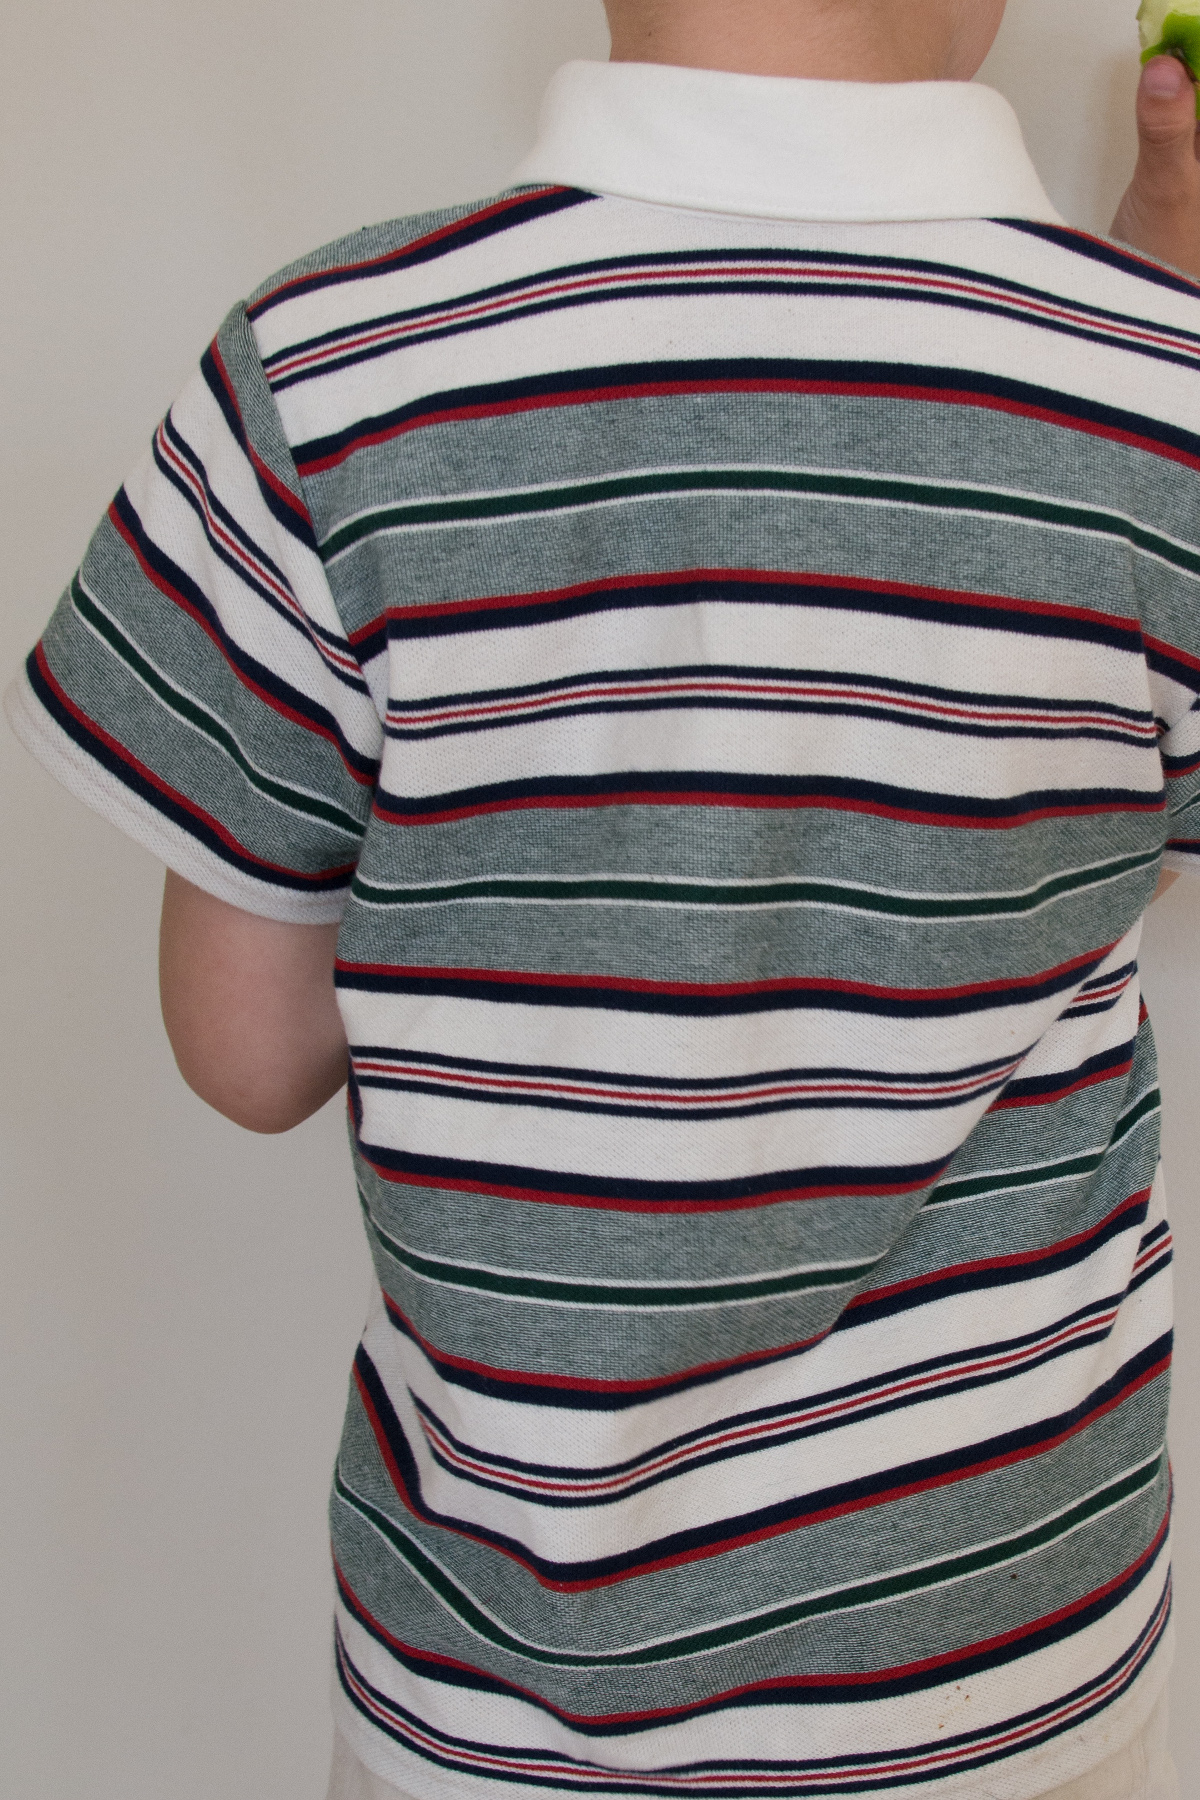
The back requires only a few changes. I combined the yoke and back panel pieces into one by overlapping them by 1”. I moved the back panel piece off the fold by 1” to take out the fabric that is used for the box pleat in the shirt. For both the front and back pieces I squared off the hem at the sides to remove the curved shirttail hemline.

The placket for the Jump Rope dress is quite deep. Here, I’ve sewn a size 6 shirt but only used the size 2T/3T placket. You can make the placket any length you like, just keep the markings at the bottom and shorten it at the neckline.
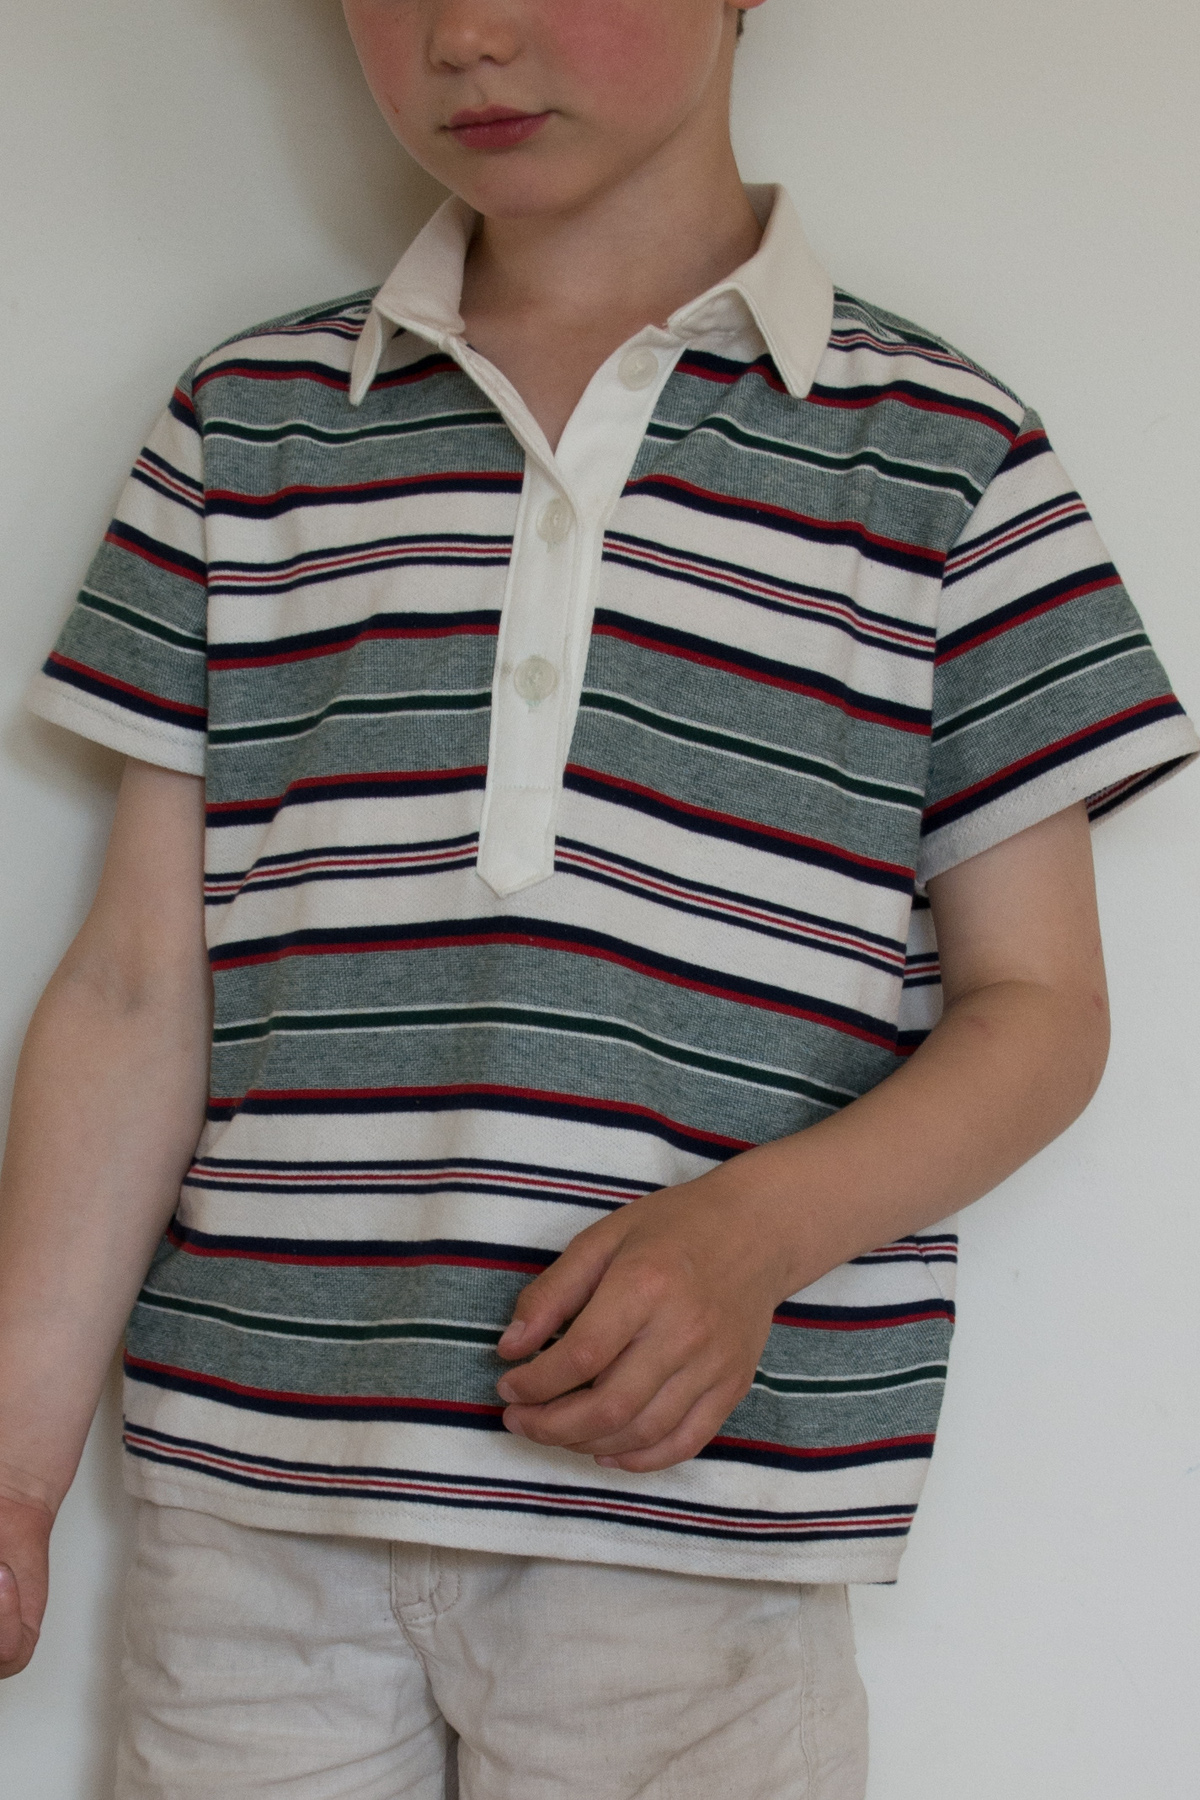
Once I’d sewn the collar I could put the Sketchbook pattern instructions away and then follow the Jump rope instructions to sew the placket and complete the polo shirt. The button band part of the collar won’t overlap as it does in the shirt, so there’s no need for a button or buttonhole on the collar.
This was a project that started out slow and meticulous and then finished in a flash. I can see myself making many more of these polo shirts. My husband is a big fan of the polo shirt and it’s pretty cute seeing my son looking as preppy as dad does on Christmas day. I wish you all happy holidays and I’ll see you again in the New Year.
Shelley