
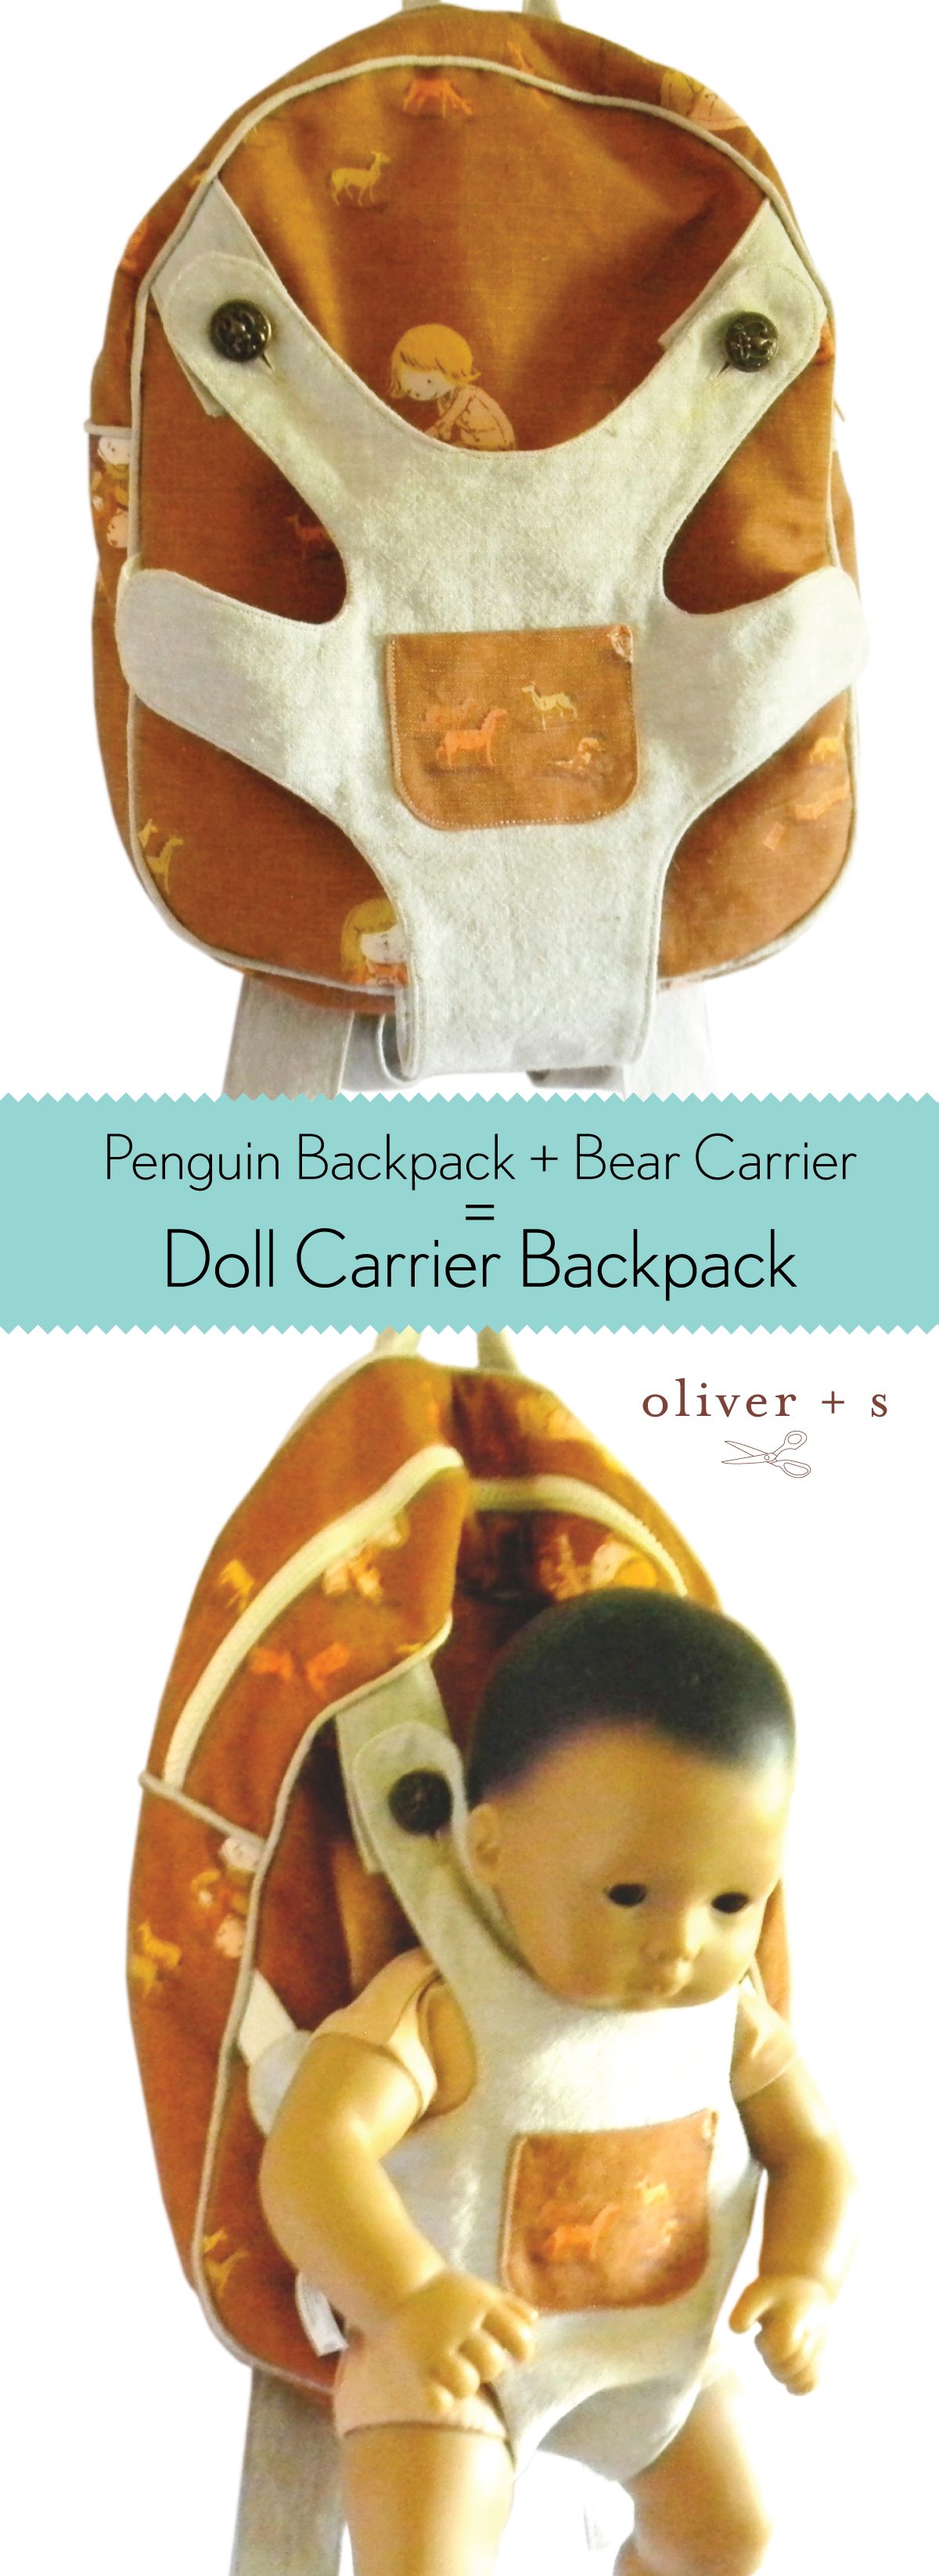
Today we are happy to welcome Rita who blogs at Margee Slim and runs an etsy shop called BOLDWeavings. She has a clever project to share with us. Rita is going to show how she took the Bear Carrier from Little Things to Sew and attached it to the Penguin Backpack to become a doll carrier backpack. That way all the doll accessories can be put inside the backpack and travel along with the doll! Now I’ll hand it over to Rita.
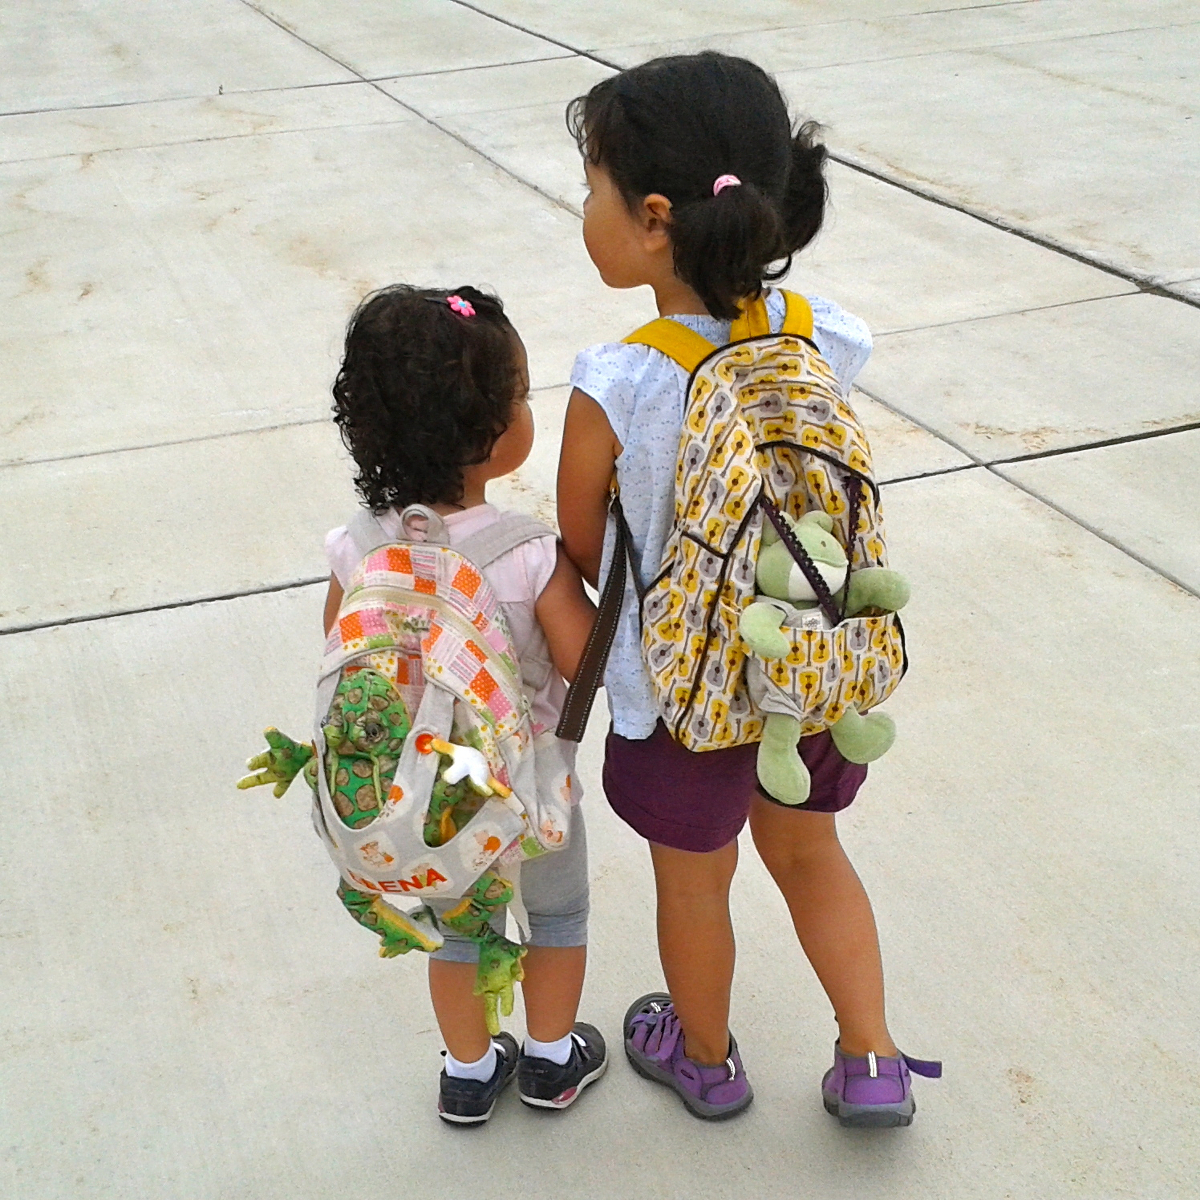
The idea came about a year ago, just as we were heading out the door. My then three-year-old wanted to bring her doll along, and I suddenly decided that our exit could wait while we added a doll carrier to her backpack. The first attempt was self drafted and worked okay. But I think it was a few weeks later (possibly in a dream) that it occurred to me that the Bear Carrier from Little Things to Sew sewn to the front of a toddler backpack would work perfectly. I’ve since made three and I’m sure there are a few more in the works–my parents have eight grand-daughters five and under.

Thank you so much to the team at Oliver + S for inviting me to show you how I did it!
To prepare the backpack
1. Cut pattern pieces including: 18 C, D, E, G, J, L, M, N, O, and strap rectangles, as instructed in the book.
2. Cut 1 additional O from the main fabric for the front panel.
To prepare the carrier
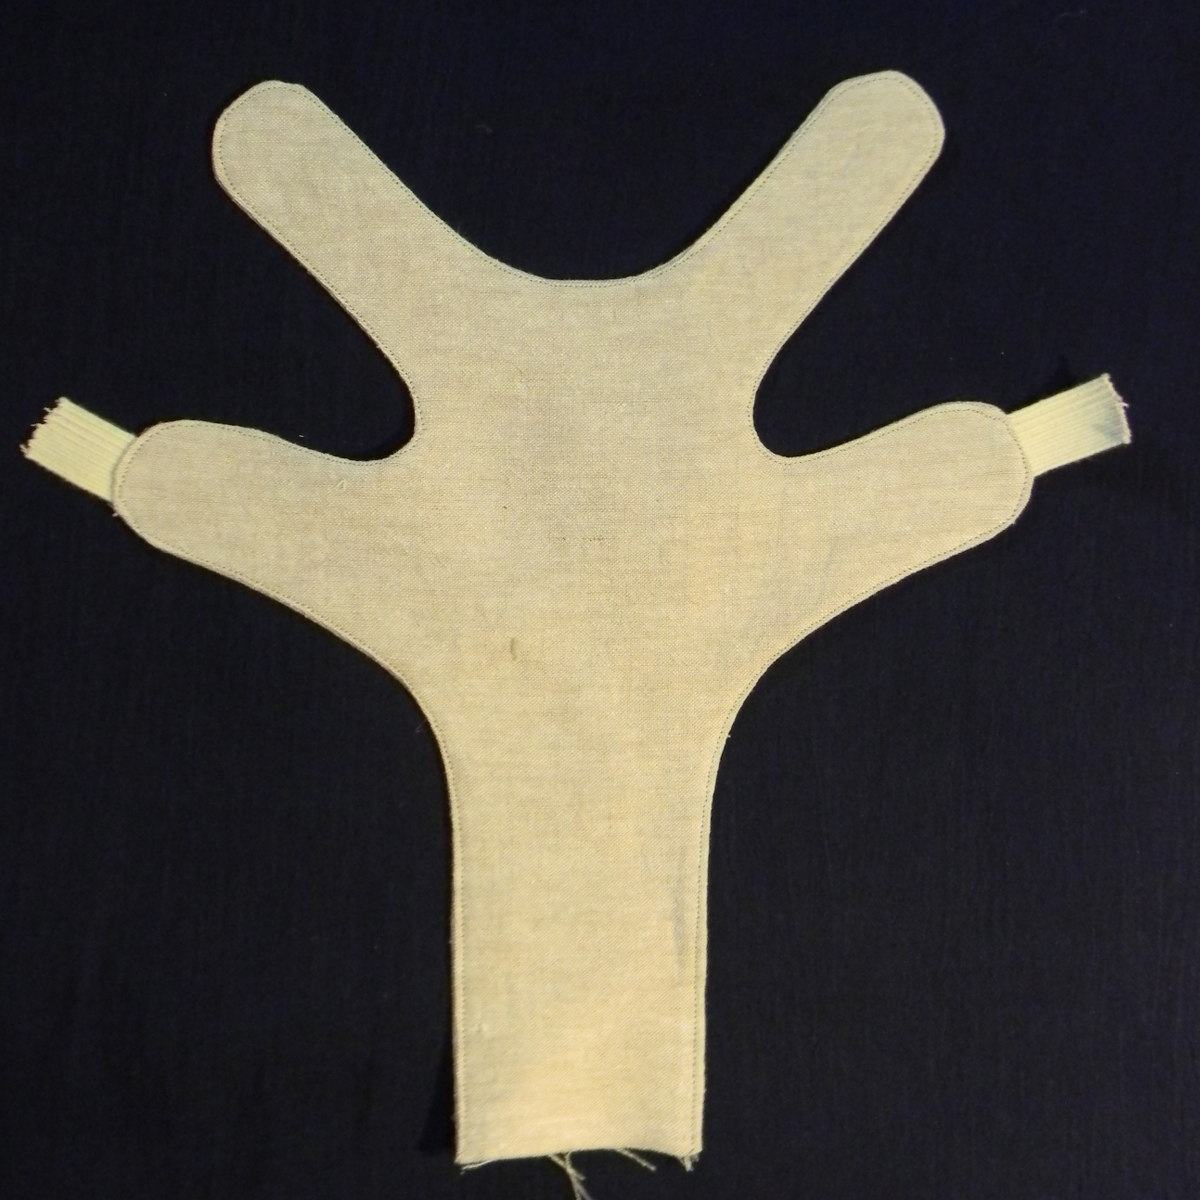
1. Trace pattern 10A along the dotted lines onto freezer paper and cut it out along those lines.
2. Cut 3, 13 (height) x 12 (width) inch rectangles, 1 from each of the carrier fabric, lining and either batting or cotton canvas.
3. Cut 2, 6 x 3½ inch rectangles for the button straps.
4. Cut 2, 1½ inch pieces of 1 inch elastic.
5. If you wish to add a pocket, cut and sew pattern pieces 10B and C as instructed in the book.
Tip: If you wish to have the carrier embroidered, trace around the freezer paper cut out of 10A onto the fabric you want embroidered to ensure the image is centered.
To sew the carrier
1. Place the main fabric and lining rectangles right sides together, place the batting or canvas rectangle behind the lining fabric. Iron 10A cut from the freezer paper to the wrong side of the main fabric.
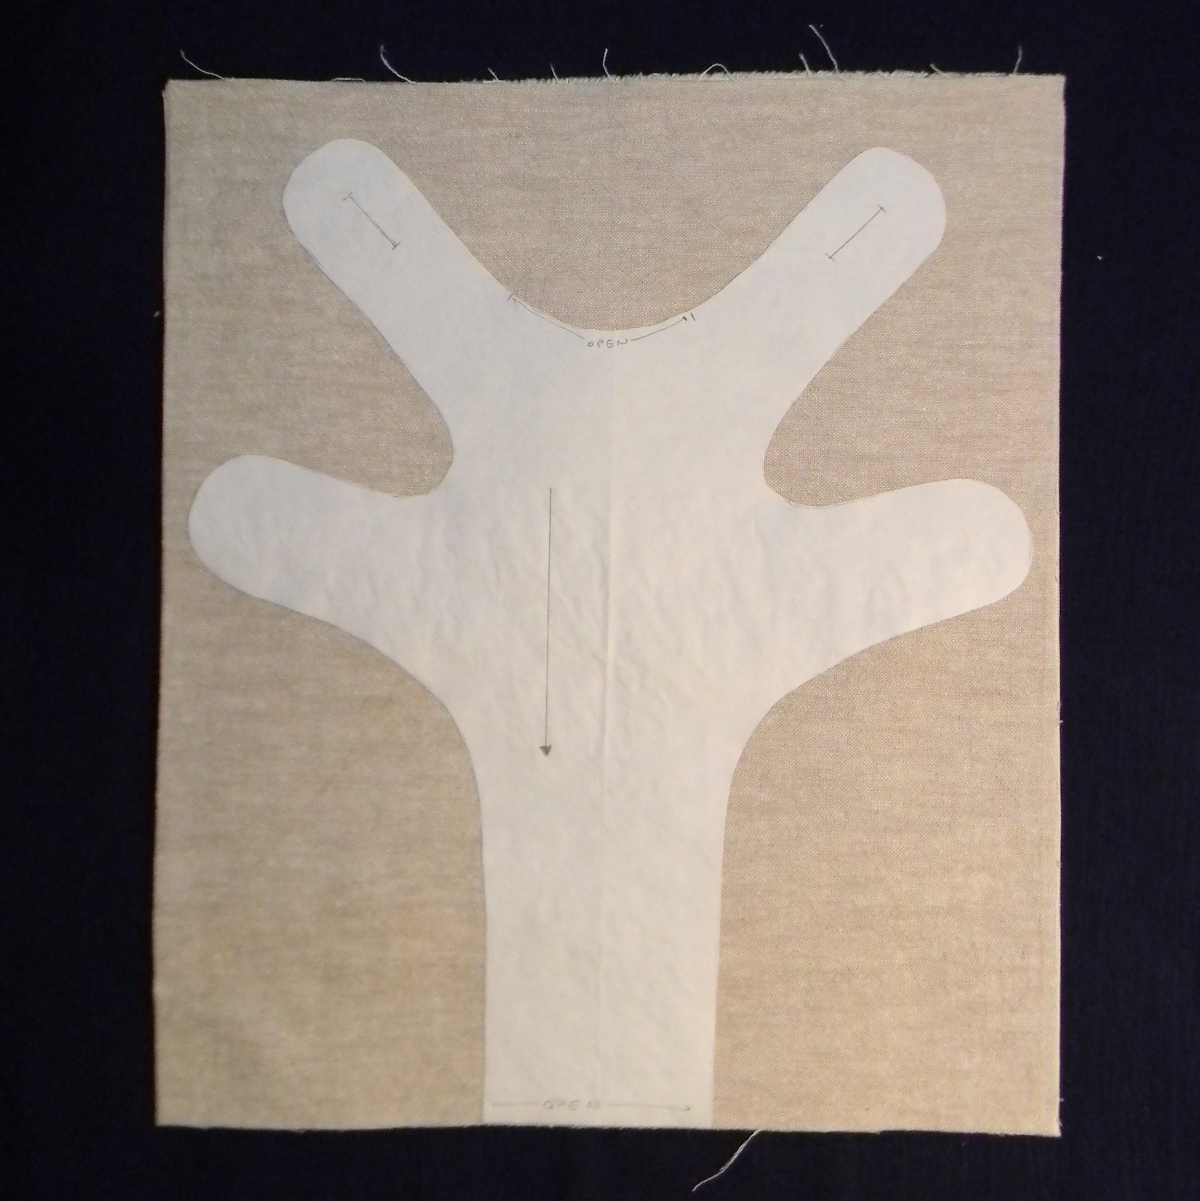
2. Begin sewing around the freezer paper, using it as a guide, starting at the bottom A. As you approach B, slip one piece of elastic between the main fabric and the lining so 1 inch of the elastic is under the freezer paper and ½ inch is outside (in the seam allowance).
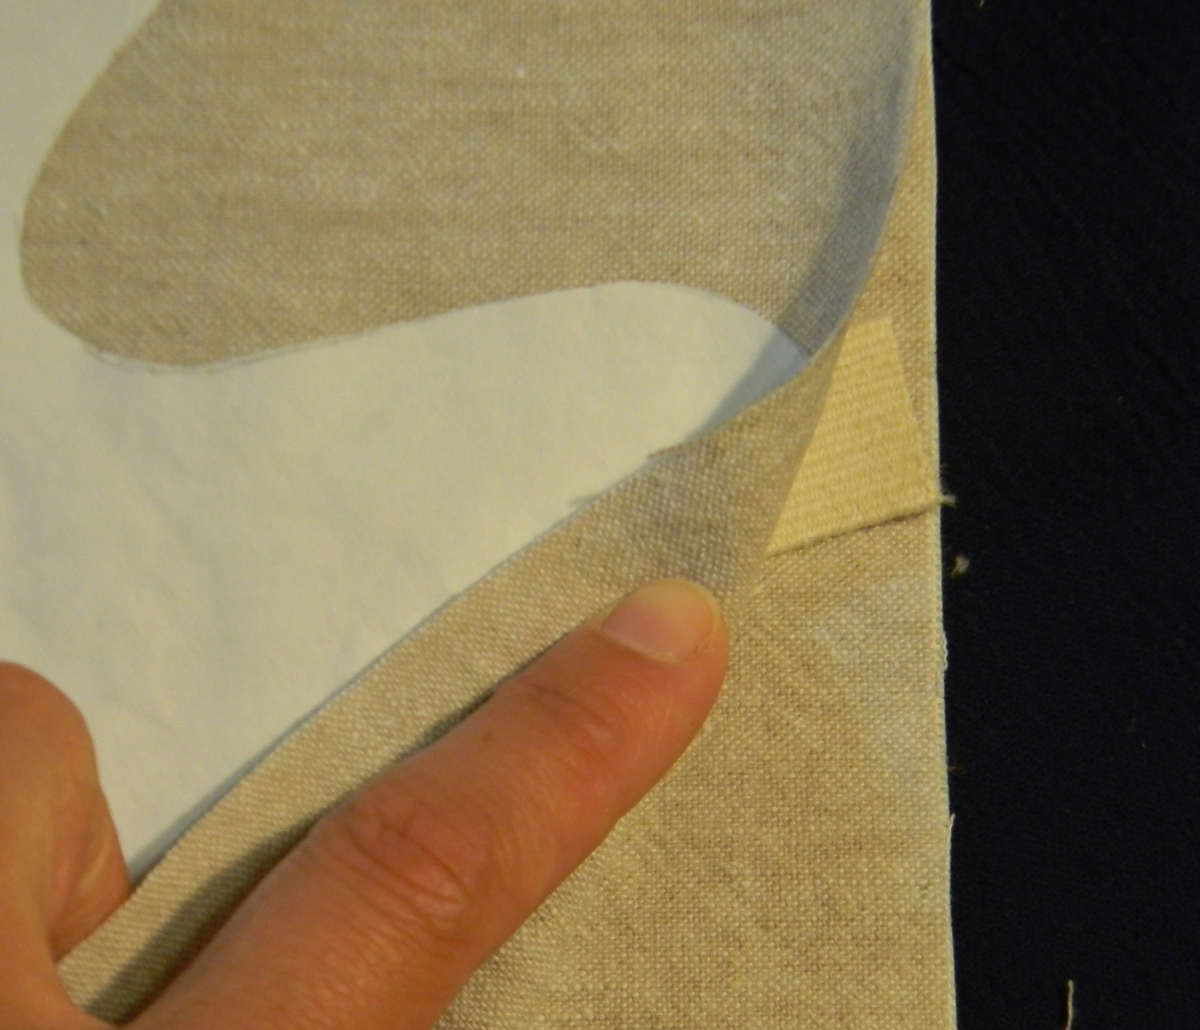
Continue sewing around the freezer paper until C and place the second piece of elastic as you did the first. Sew down to D, leaving the bottom portion open. (The elastic allows for some stretch to accommodate different size toys, especially when the backpack is filled.)
3. Cut around the stitching, clip the curves and the peel off the freezer paper.
4. Turn the carrier right side out through the openings.
5. Iron and topstitch along the outside.
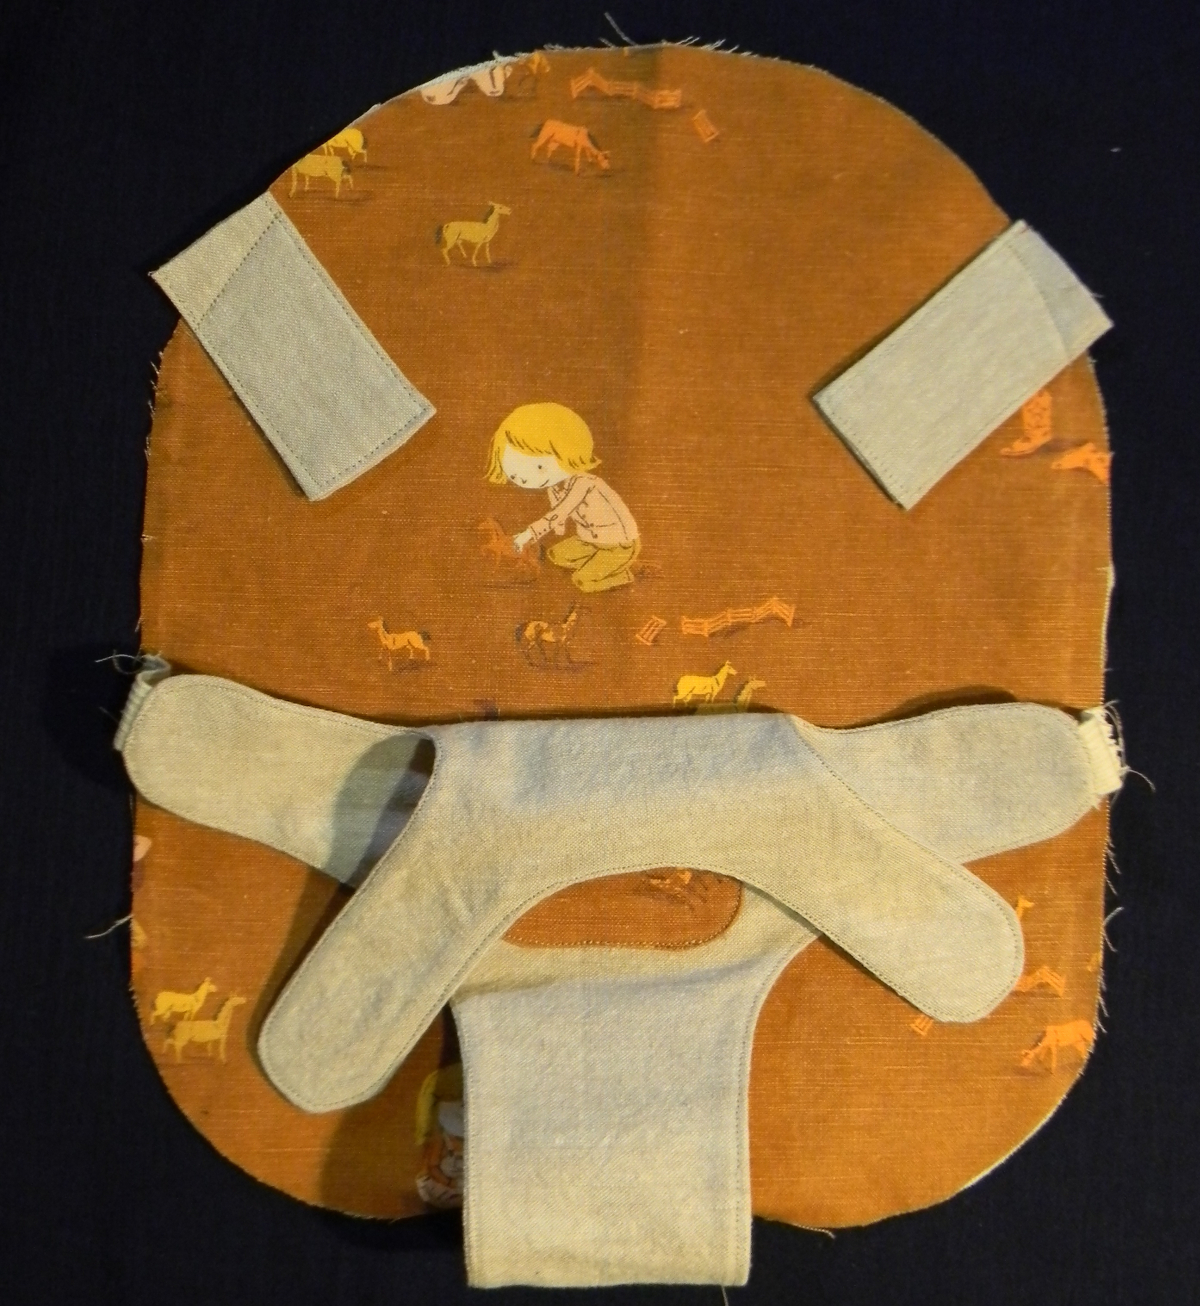
6. Sew the buttonholes.
7. Sew the two straps for the carrier buttons as instructed in the book for the back straps, turning one edge in so it is fully enclosed.
8. Attach the carrier to the front panel of the backpack.
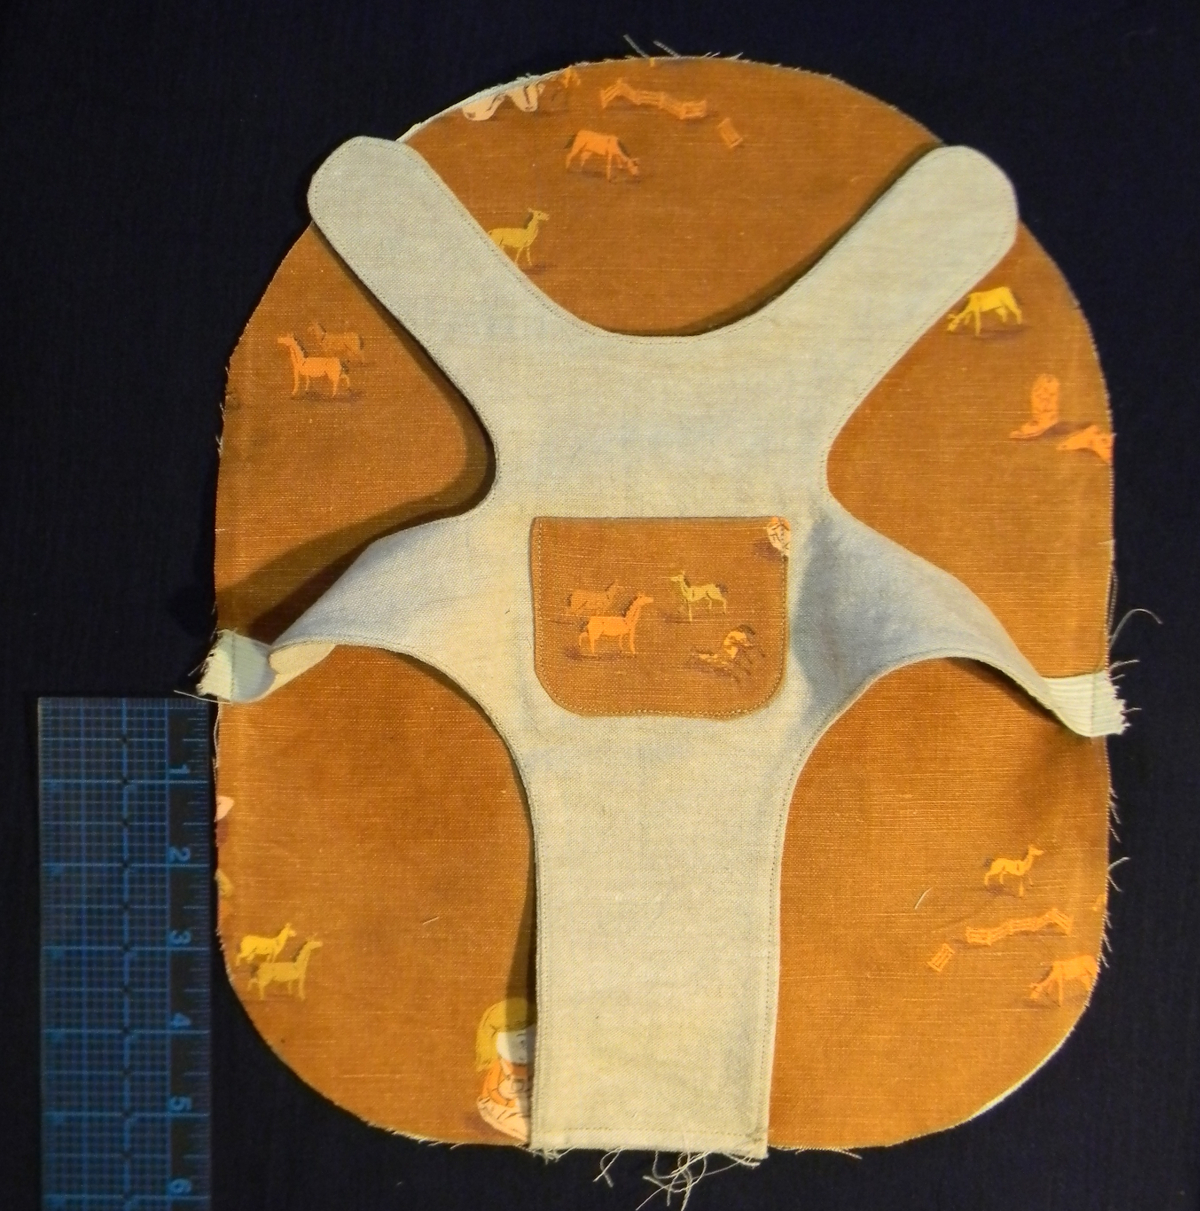
8a. Center the bottom of the carrier to the bottom of the front panel.
8b. Sew the elastic pieces 3 inches from the top of the bottom corners.
9. Attach the button straps 4 ½ inches from the top center of the front panel. Alternatively, put the buttons into the buttonholes on the carrier and then position on the front panel. In either case, the raw edge can be rounded to match the front panel.
Finish the remainder of the backpack as instructed in the book.
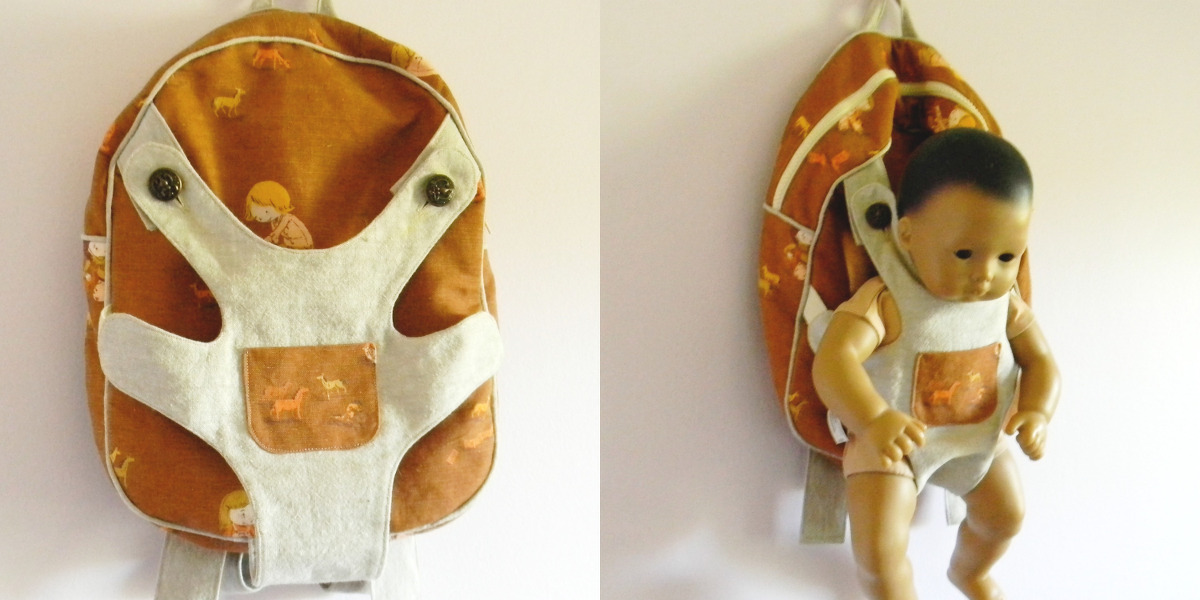
Enjoy!