
Giulia came into the studio one day last year wearing a darling new dress. It was a really simple style, but I loved the shape of it so much we decide to adapt the same loose-fitting silhouette into an Oliver + S pattern. (And I still want to make a pattern for a similar dress in my size!)
Instead of making the dress in all one fabric, the way Giulia’s dress was, we thought it would be fun to add seams and a yoke so you can feature a special fabric, or maybe some embroidery. That dress became our new Hide-And-Seek Dress pattern.

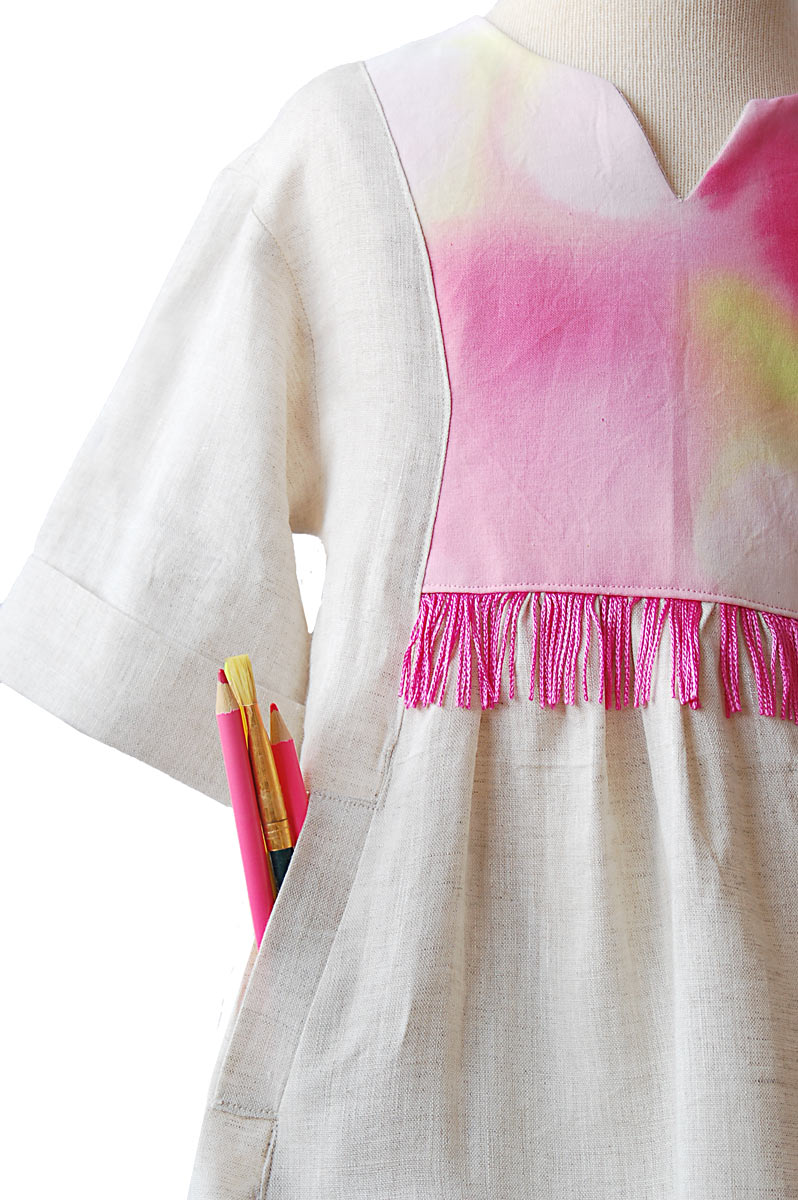
One of the things I love about this pattern is the way it goes together. You’ll see what I mean when you make it. We designed the dress (View A) to have seams down the front and back, and we inserted some welt pockets in the front seams. These welt pockets are really easy to sew, even though they look fancy and complicated. The dress also has relaxed three-quarter-length sleeves with a cuff, which I think makes it looks really contemporary and sweet.
This is a loose-fitting, relaxed style. It’s not fitted, so keep that in mind when you’re sewing. You’ll notice that the sleeve seams don’t hit the shoulders because this style is meant to be a bit over-sized. This is one of those styles that you could make as a dress, and as your child grows the dress will convert into a tunic and still fit. So there’s lots of wear in a style like this.
View B is the same style as a tunic with short sleeves and no pockets. Wear it with leggings or skinny jeans, or even over a skirt. Really cute. And of course the sleeve lengths are interchangeable between the two styles: short-sleeved dress, 3/4-length tunic, you know–lots of options.
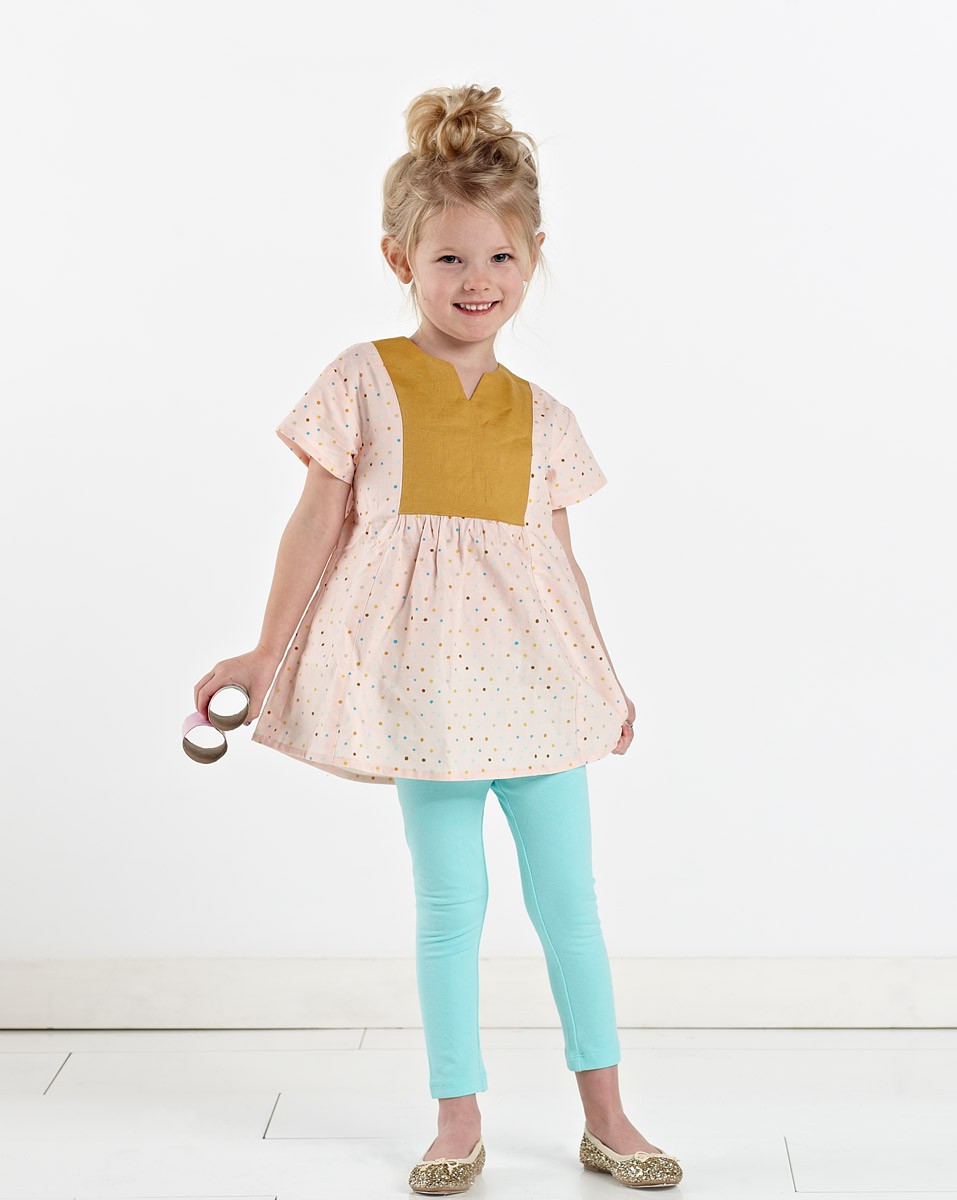
Both the dress and the tunic include my favorite V-notch neckline (I love the V-notch and try not to use it too often in our designs) and back button closure. Don’t fear the buttonholes! They’re easy. Next week I’ll show you another version of this dress that I made for S, and I had a lot of fun with the buttonholes on it. They’re each a different color to blend in with the fabric I used for the yoke.

Theresa actually hand-painted the fabric we used for the yoke on this dress, and I’ll ask her to tell you a little bit about how she did it if you’d like to try it yourself. When we were choosing the fabrics and trims I remembered this dress, which has been pinned and pinned, and I thought it would be fun to try using fringe trim on our dress, too. It’s so darling (but where are the girl’s arms in that photo?), and while fringe is not a trim I would normally use, the photo helped me feel brave enough to try it. When I show you S’s dress you’ll see that I used smaller, more subtle trim. So if you’re not a fan of the fringe, don’t fear!
This dress and tunic would be really sweet in all one fabric, too, like Giulia’s original dress. I love a good dress or tunic with a relaxed fit, and I can’t wait to see what you do with this pattern! It’s available now in both paper and digital format.