
Today we welcome Julie Bossert to our Customizing series. I (Kristin) saw Julie’s in-progress photos of this amazing jacket on Instagram, found out from my friend Jessica that it was an adapted Nature Walk Pullover, and simply had to see if Julie would contribute a post about her creation here! Lucky for us, she was game.
Hi! My name is Julie Bossert. I own Sewn Studio, a modern fabric shop and sewing studio in Cincinnati, Ohio. We are big Oliver + S fans at Sewn. They are by far our best-selling patterns, and when working on a project, every member of the Sewn staff would prefer to sew from an Oliver + S pattern than any other.
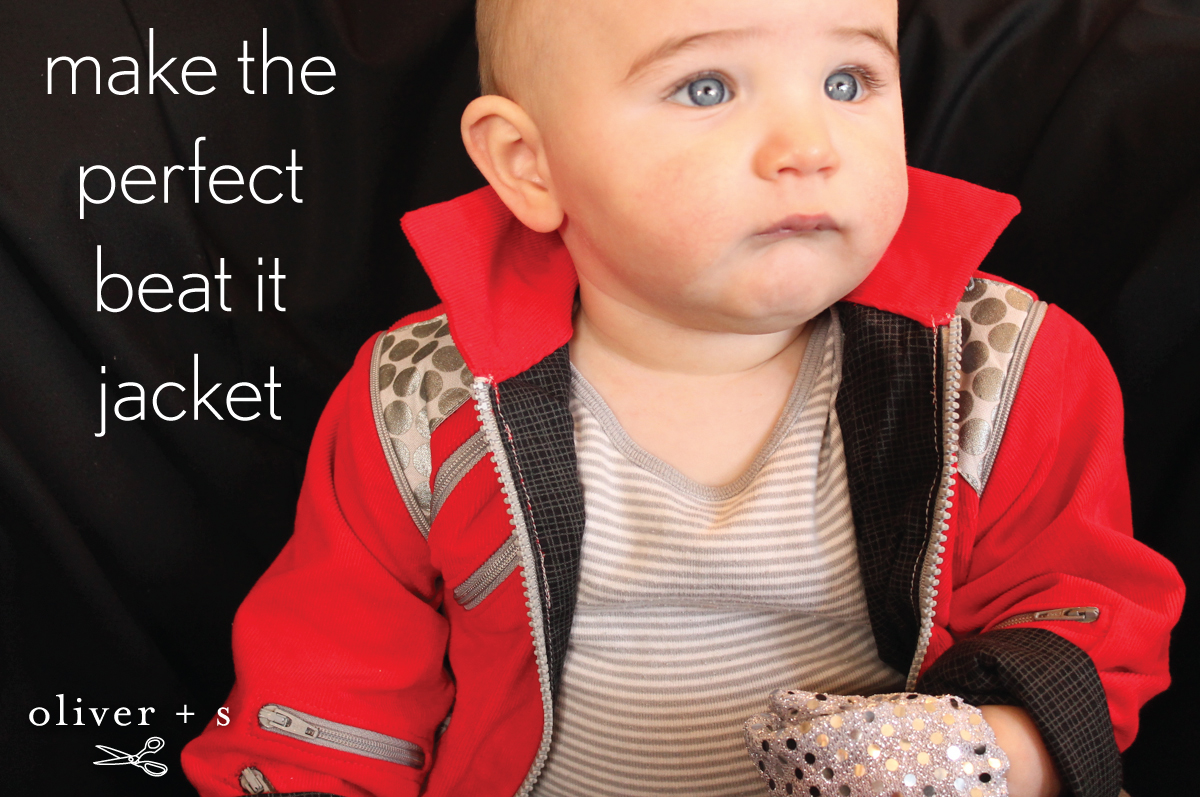
We’re also big Michael Jackson fans. So, when I needed (yes, needed) to make an infant-sized MJ “Beat It” jacket, I went straight to the Oliver + S patterns. You remember that jacket, don’t you?

Although there is no baby-sized-jacket-with-an-obscene-number-of-zippers, I noticed that the collar and general shape of the Nature Walk Pullover were exactly what I was looking for.
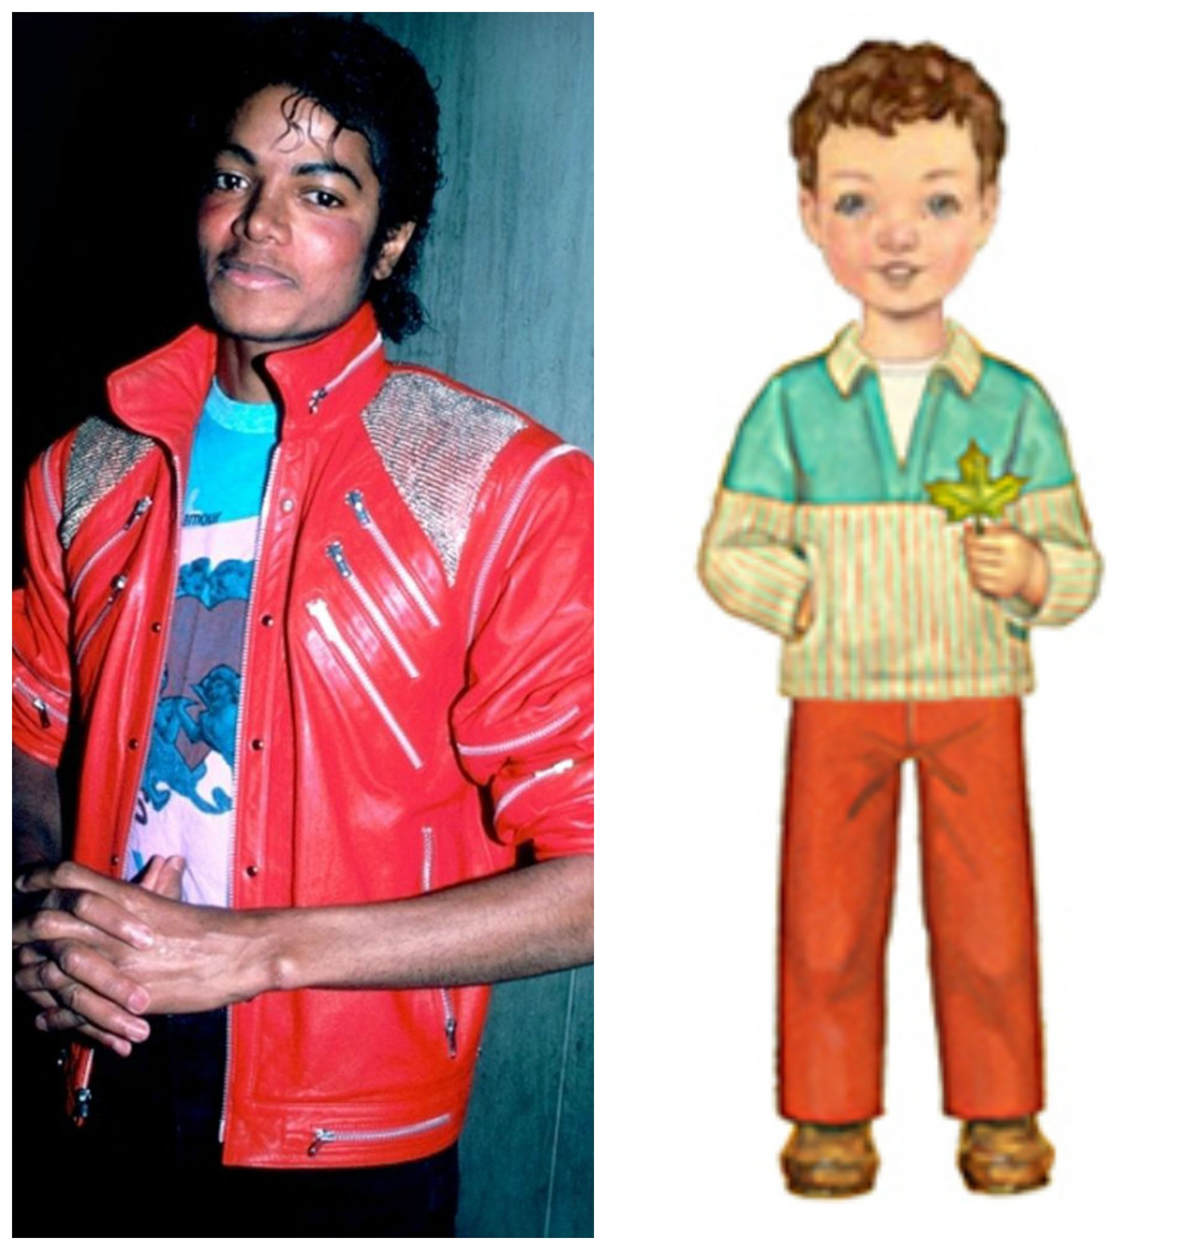
Do you see it? I do!
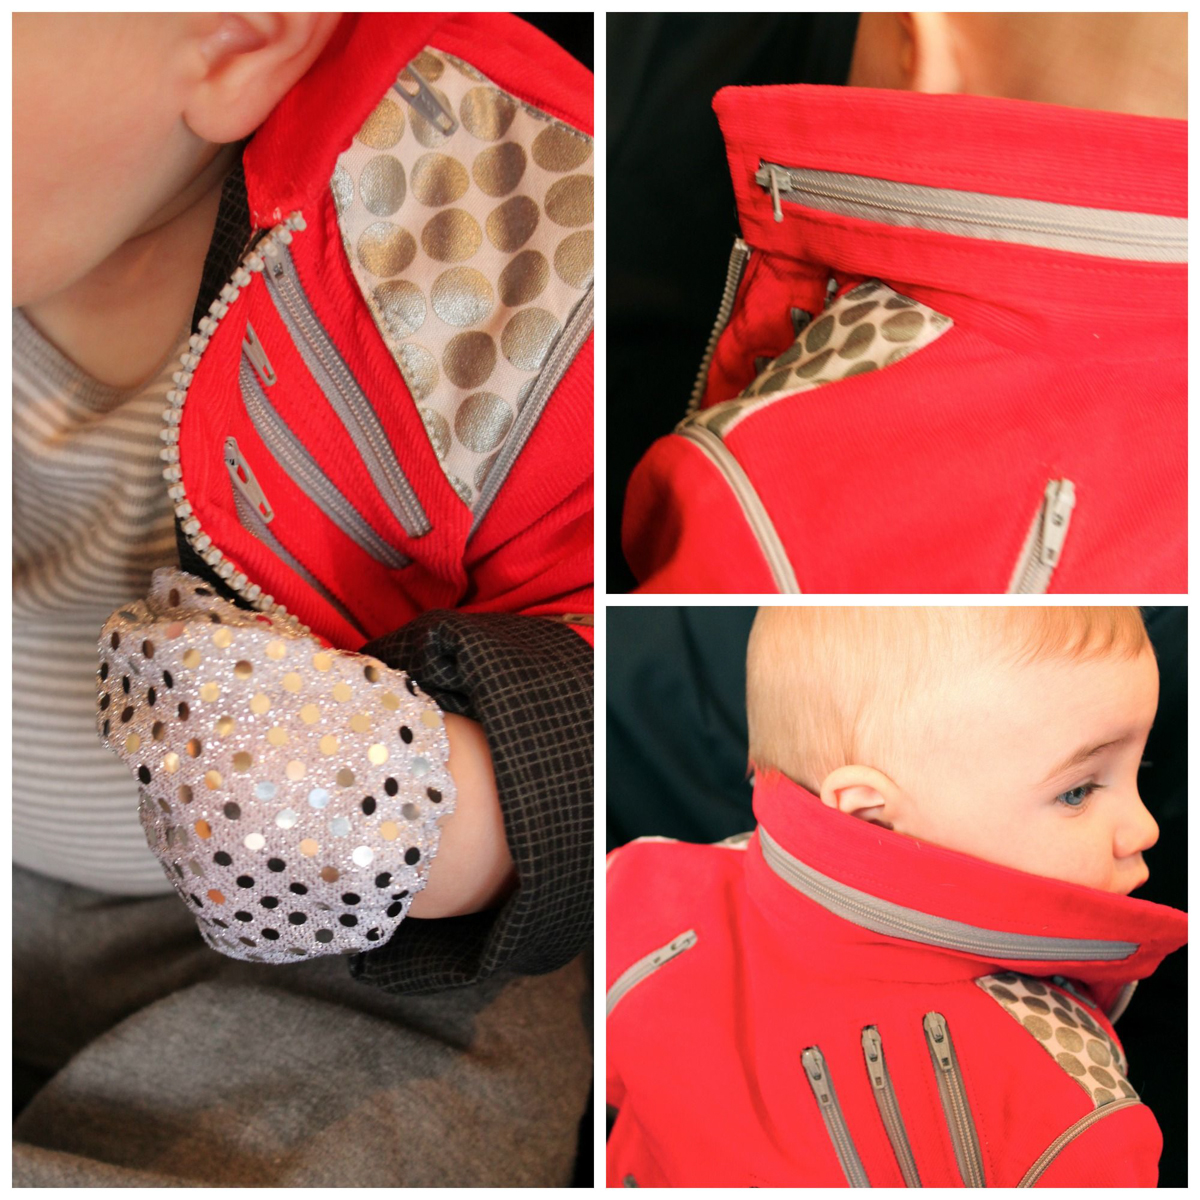
With a few changes, and a whole lot of zippers, I turned that pullover into this.
In case you also need to make a Beat It jacket for your little moonwalker, here’s how I did it.
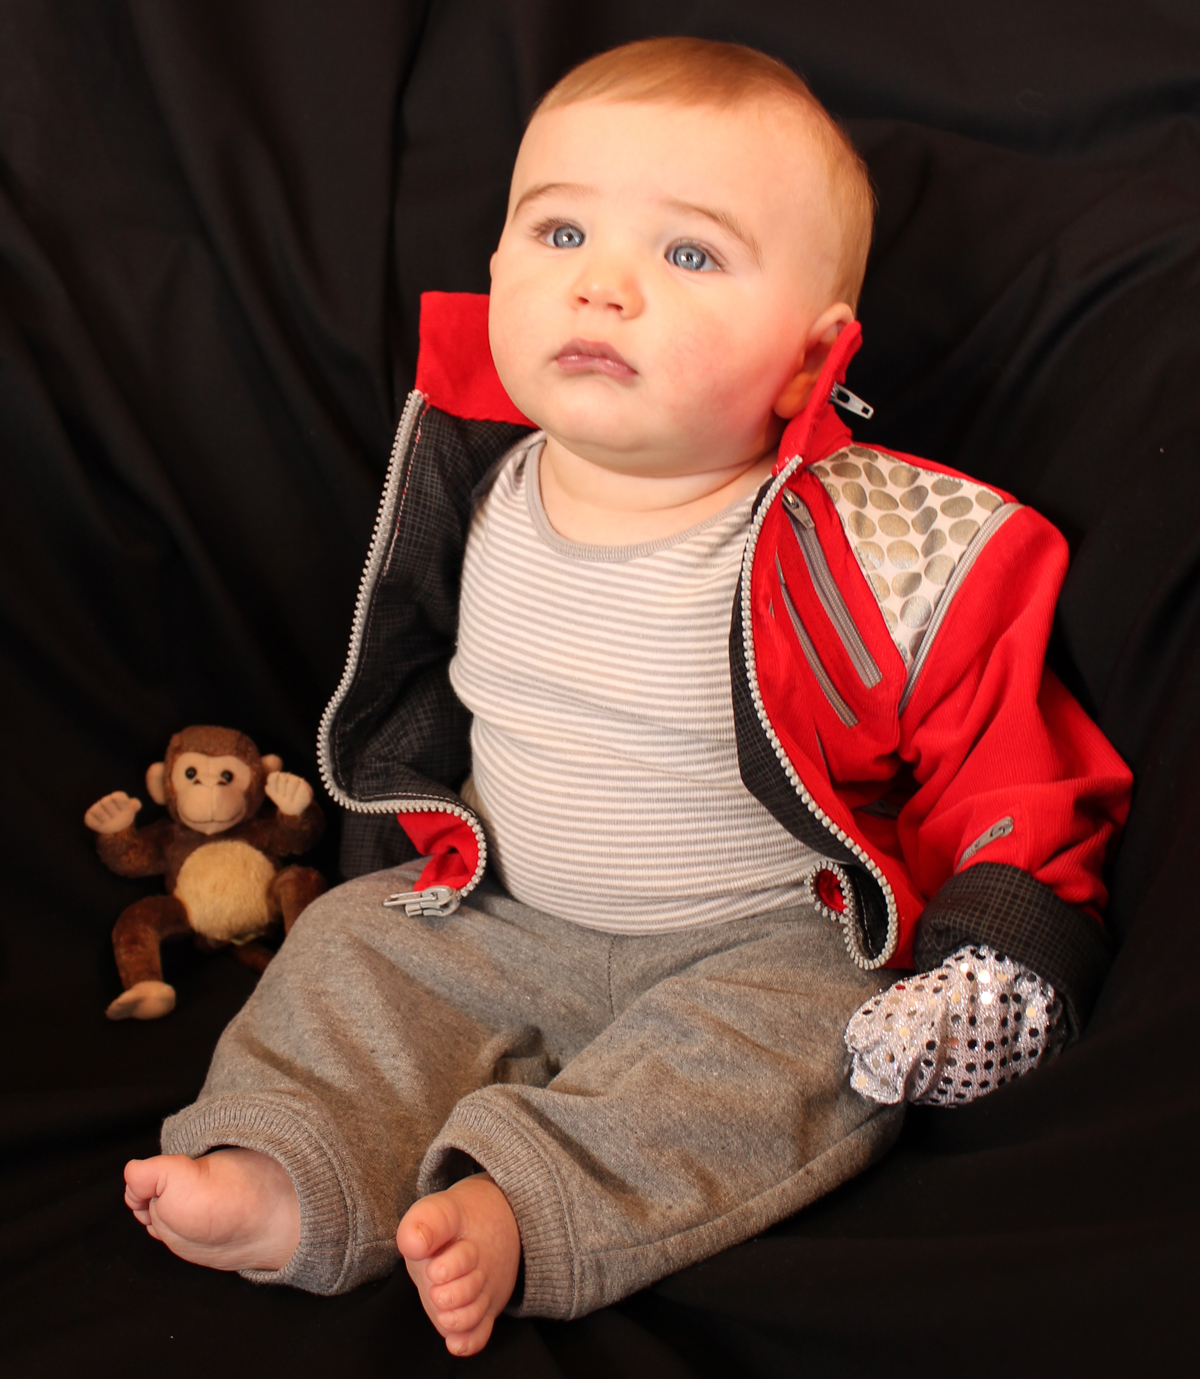
I used Robert Kaufman’s 21 Wale Corduroy in flame, YKK zippers in the color Grey Kitty, Michael Miller’s Mirror Ball Dots, and Windham Fabrics Spin in black for the lining.
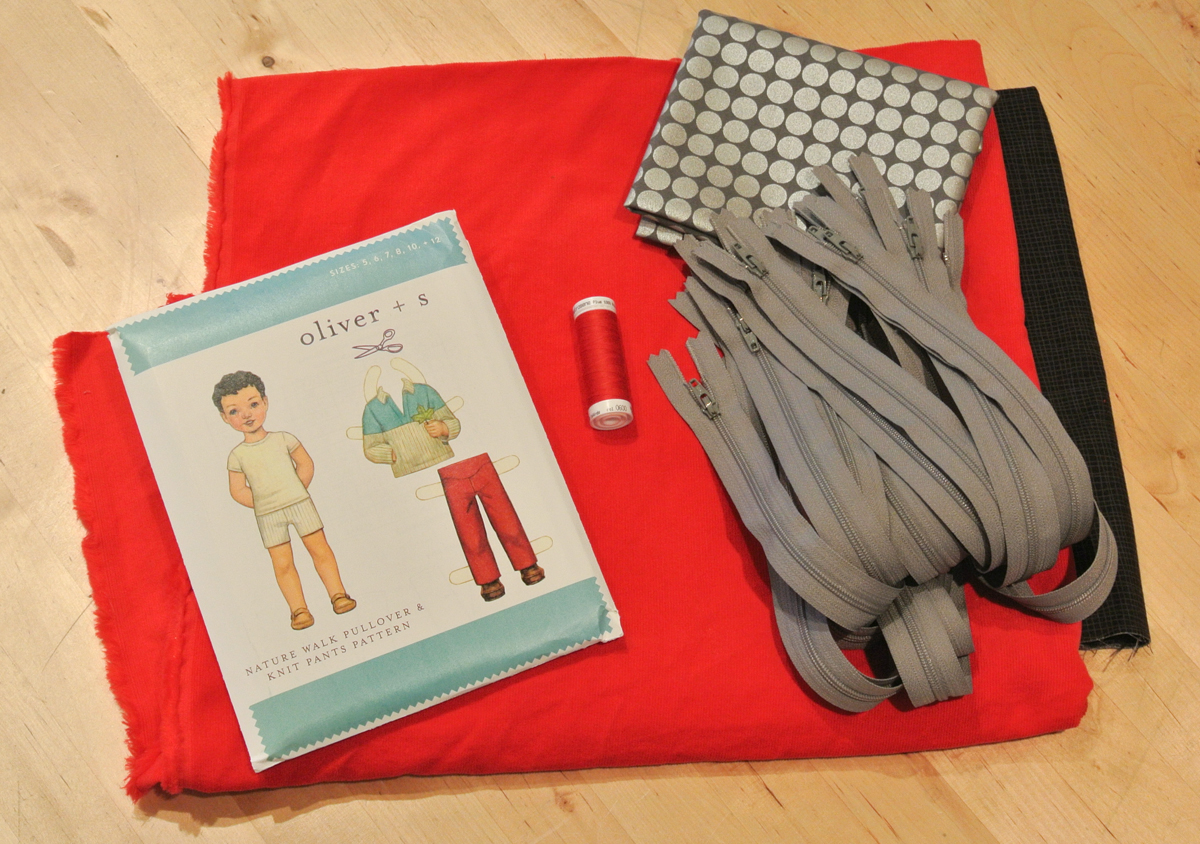
I printed the digital version of the Nature Walk Pullover. To make the jacket, I didn’t need all of the pattern pieces. I used only pieces 1, 3, 4, 5, 6, 7, and 10.
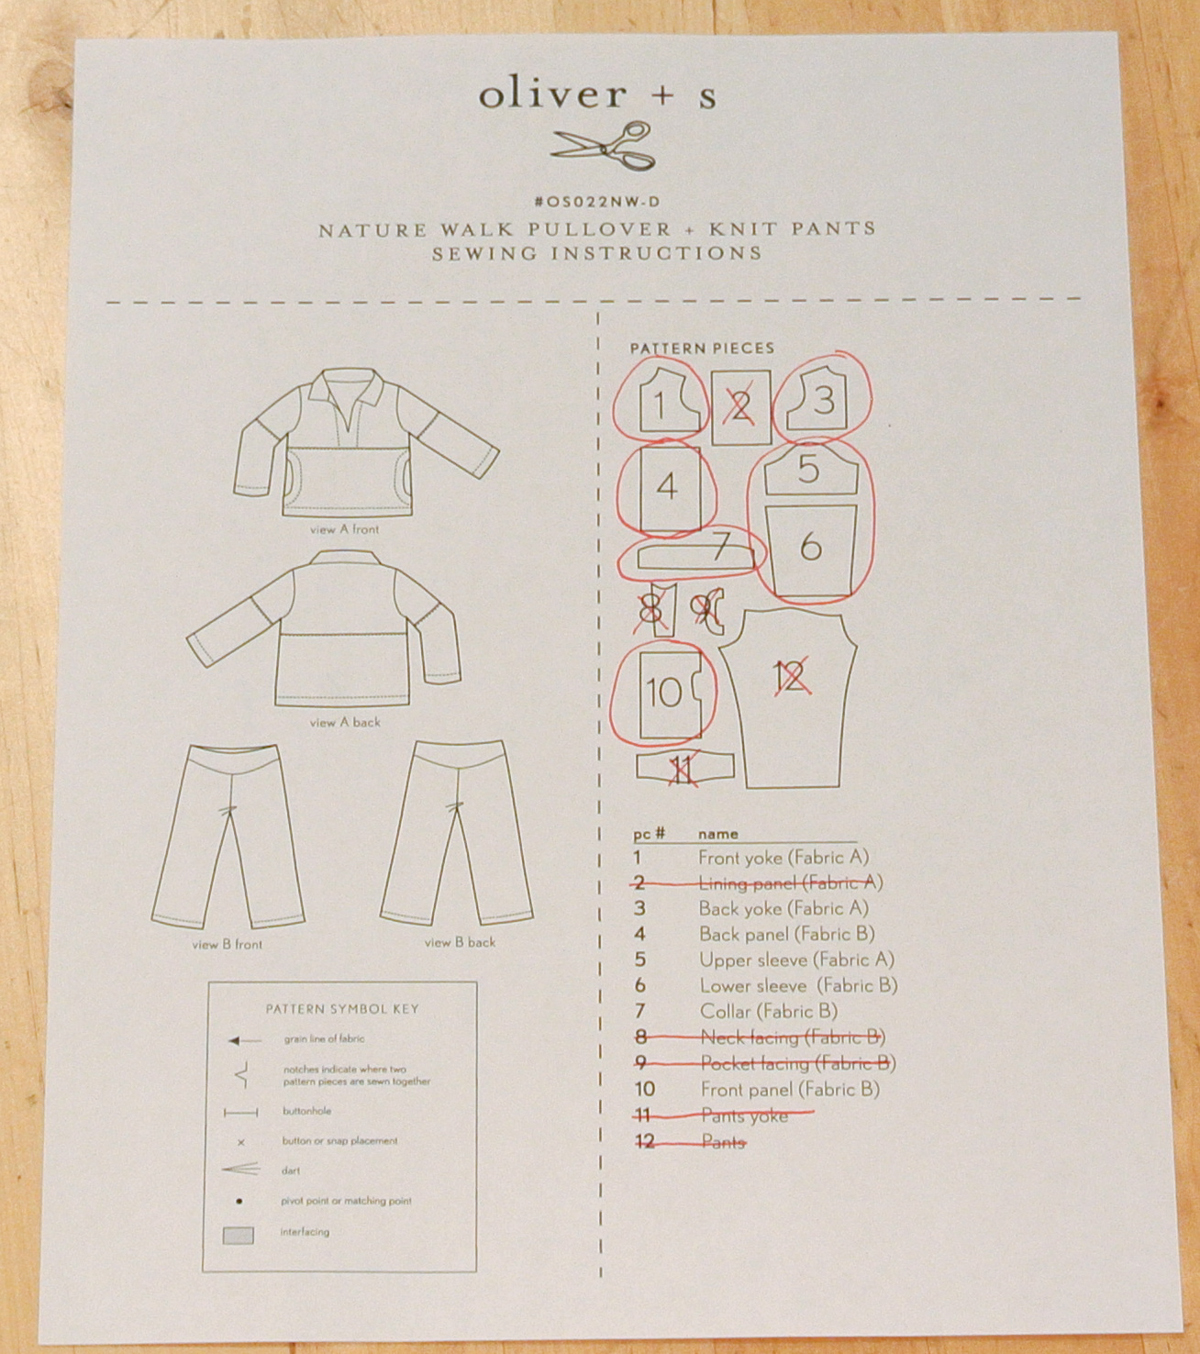
I taped piece 1 to piece 10 to make the front pattern piece, and piece 3 to piece 4 to make the back pattern piece. Pieces 5 and 6 combined to make the full sleeve pattern piece. The back piece was the only piece that needs to be cut on a fold.

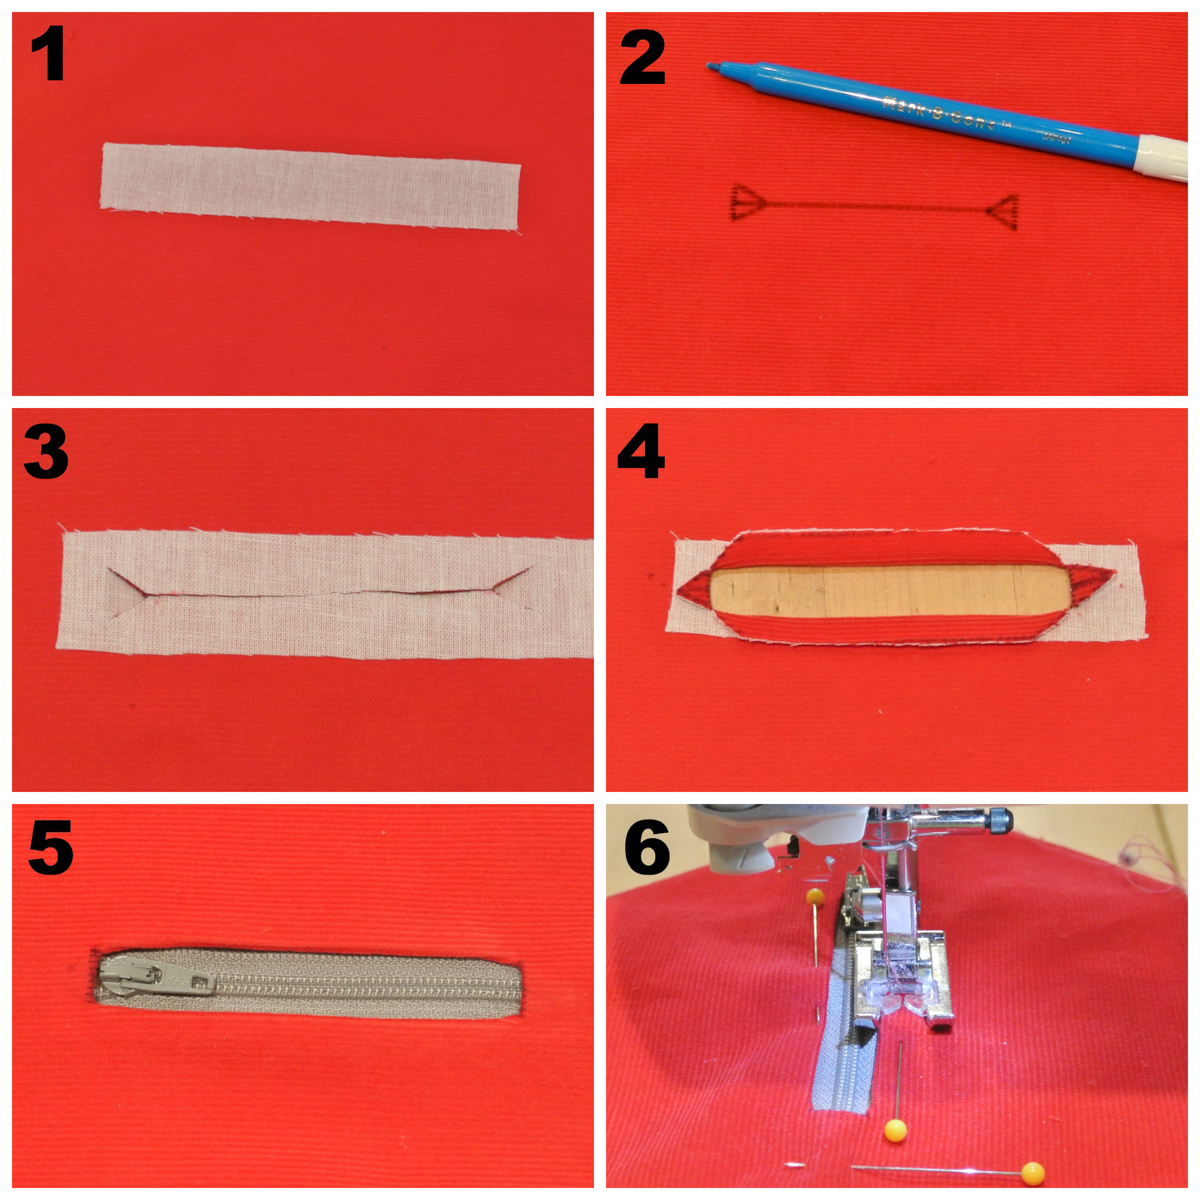
I used photos of the King of Pop wearing the iconic jacket to determine zipper placement, and inserted the zippers (22 of them!) before sewing the jacket pieces together. I put a strip of fusible interfacing on the wrong side of the fabric before cutting each zipper opening. I pressed the edges of the zipper opening to the wrong side, and pinned the zipper in place before stitching around the edge of the opening to secure the zipper. Each zipper is fully functional!
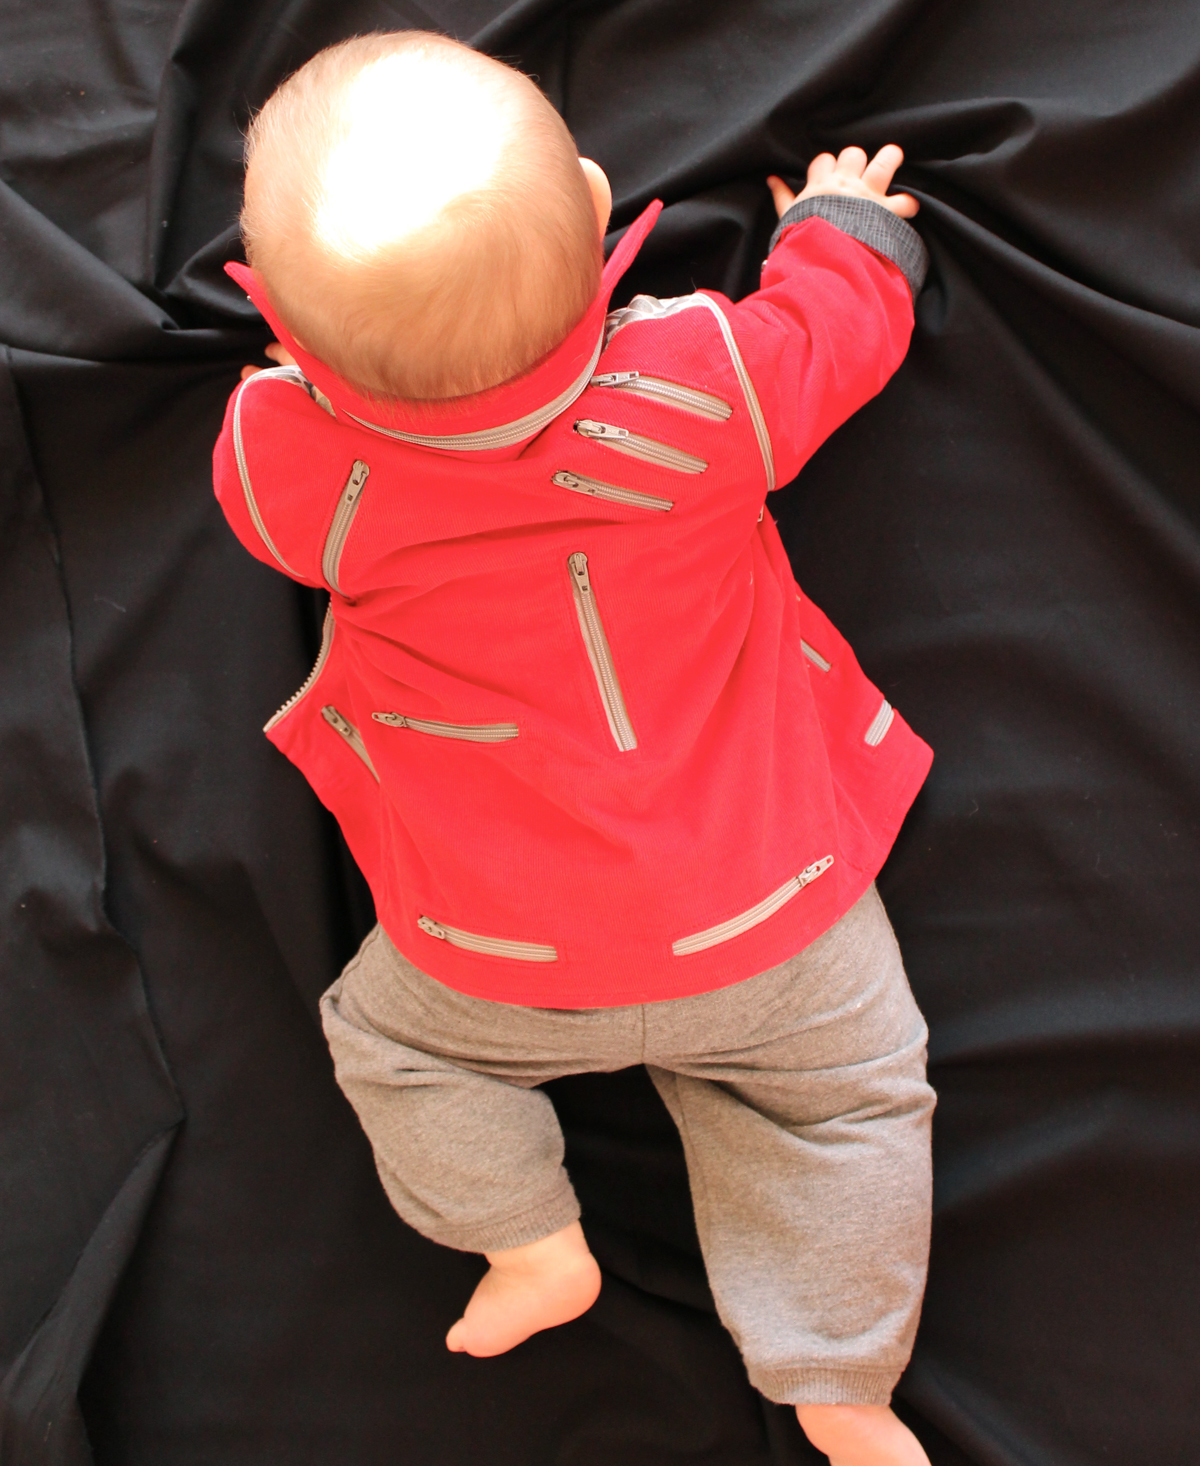
The sleeves are attached with separating zippers, making them removable (sweet!).

I love the way those baby arms look coming out of those zipper-trimmed armholes!
I opened each separating zipper, and sewed the zipper halves to the shoulders and sleeves, before I sewed each sleeve into a cylinder and closed the side seams of the jacket. Then, I just zipped each sleeve into place.

This little guy is ready to “Beat It!”

You better run, you better do what you can
Don’t wanna see no blood, don’t be a macho man
You wanna be tough, better do what you can
So beat it, just beat it….
Now your little one can “Beat It,” too. I hope you’ll share a photo of your Beat It jacket in the Oliver + S Flickr Group. Shamon!
Thanks for having me on the blog today. I love this project and it was so fun to share it!
It’s so ridiculously awesome . Thanks so much for joining us, Julie! You can keep up with Sewn Studio by following their blog, Facebook, Twitter, Pinterest, and/or newsletter.