
Raw-edge applique is about as fast and easy as applique gets. If you haven’t tried it before I think you’re going to like it because it’s a lot of fun and because you can do some seriously cute things with it.
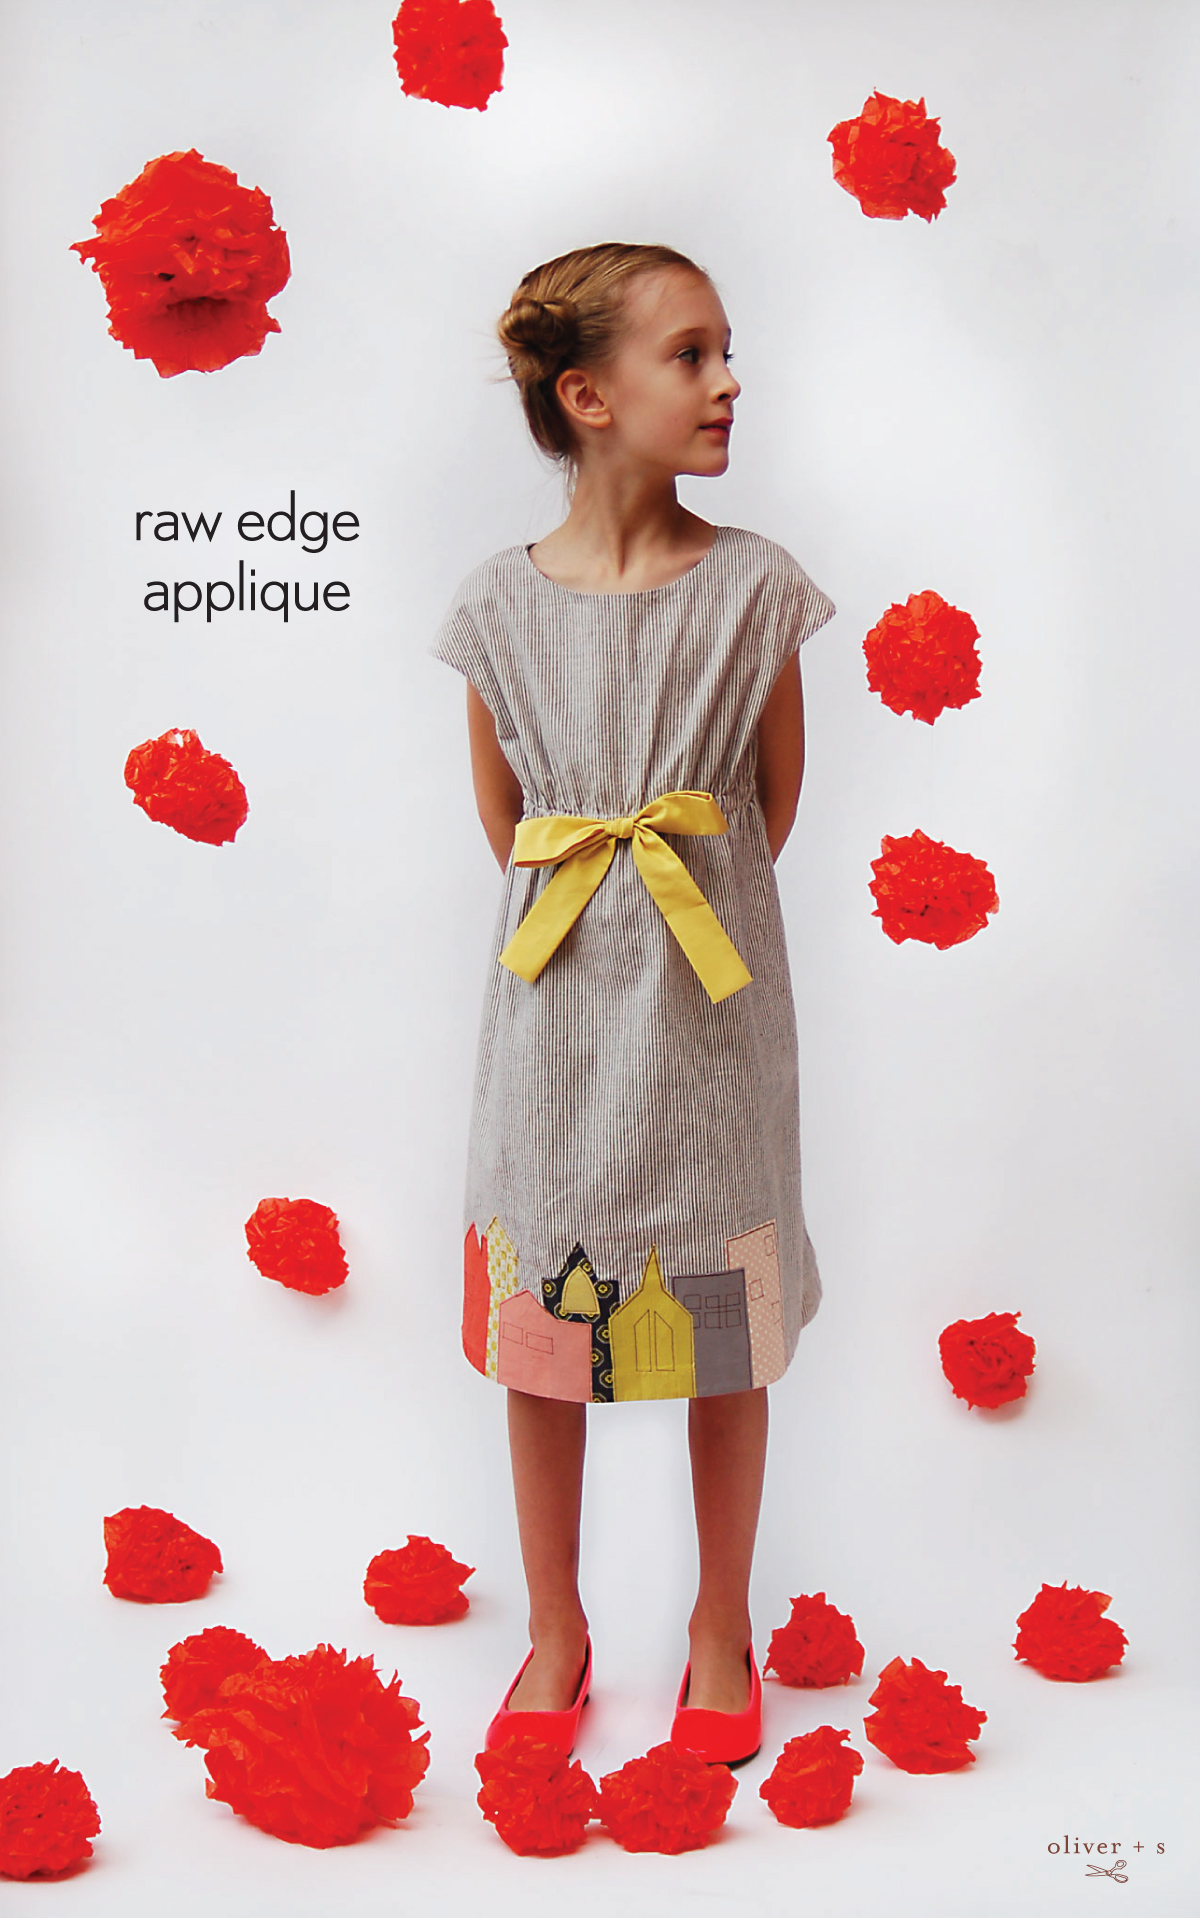
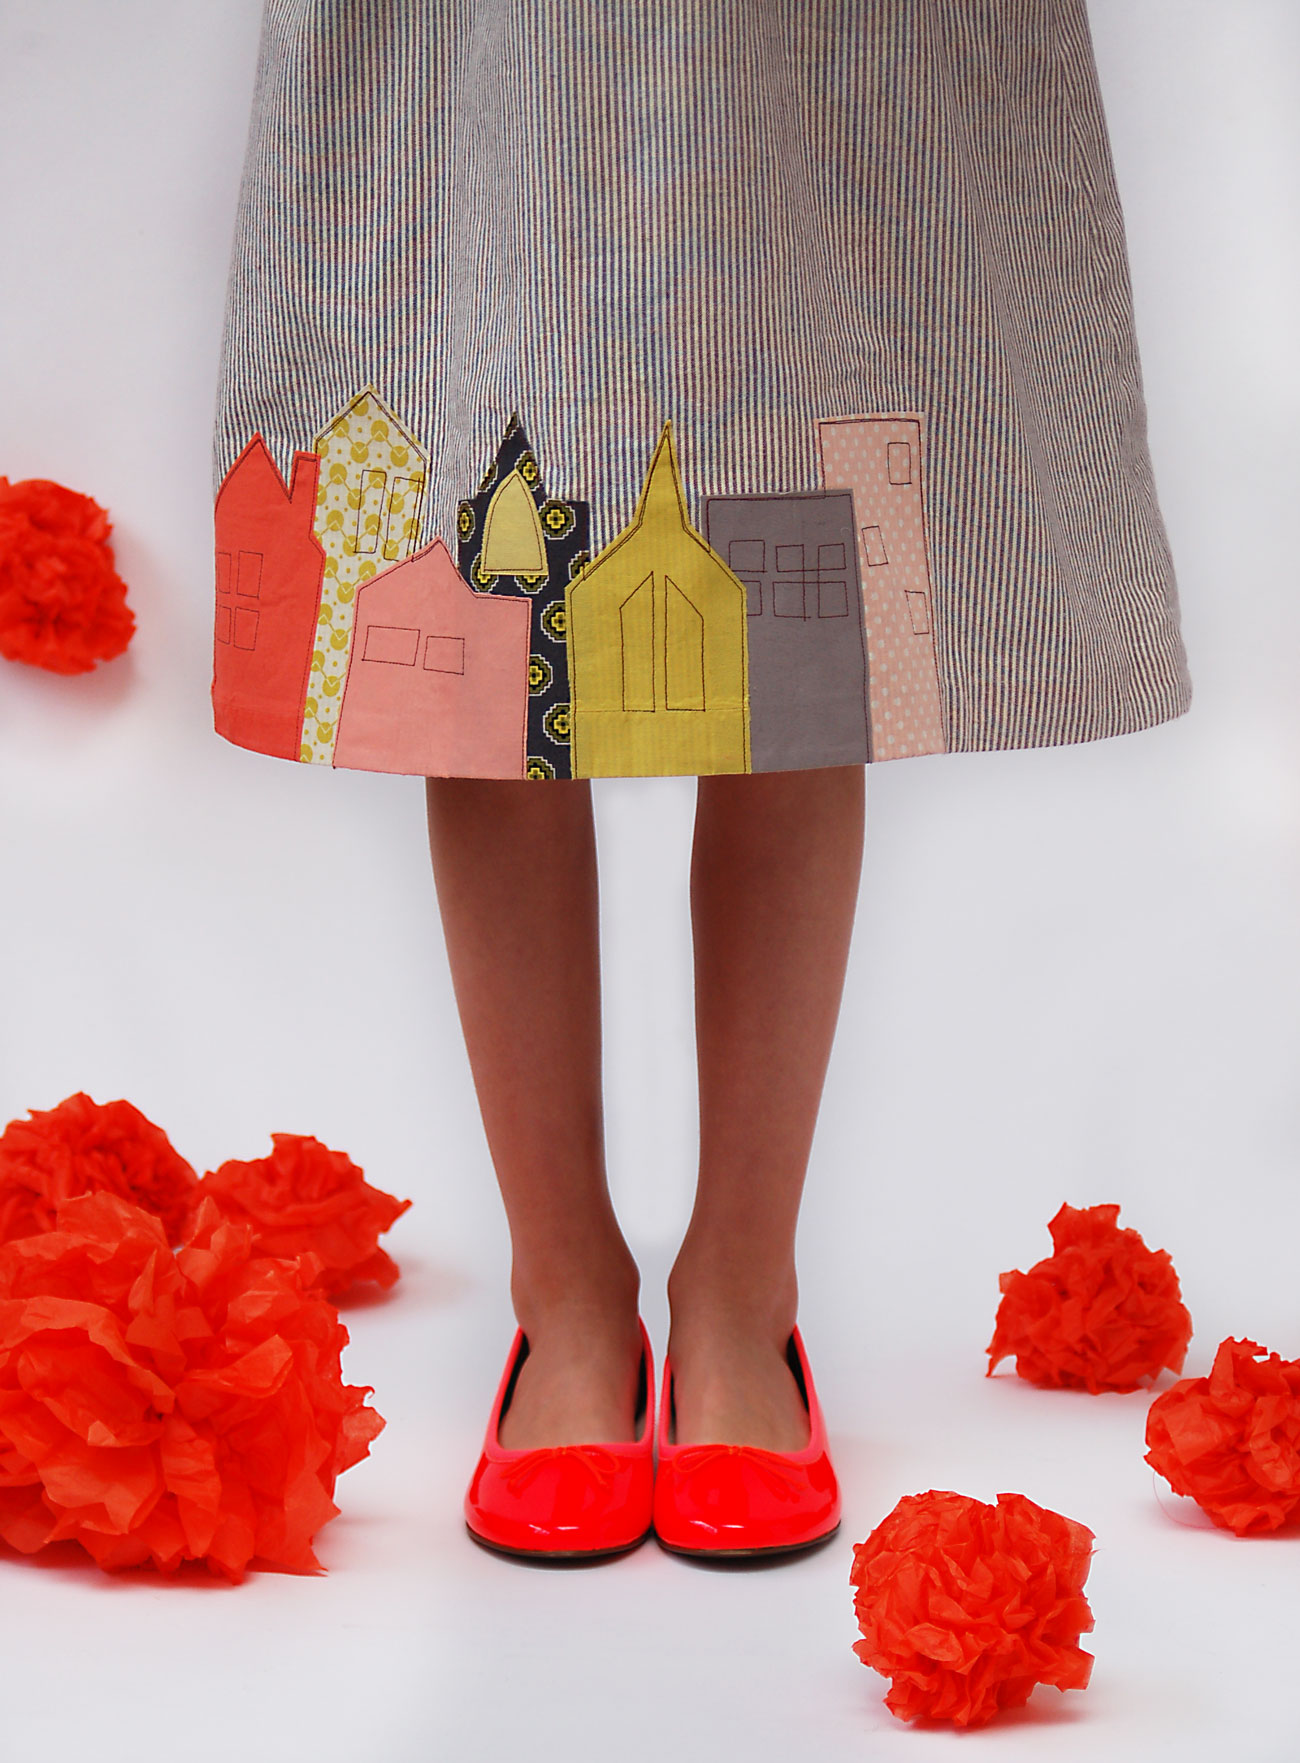
I designed these little houses for S’s Roller Skate Dress. I had such a good time doing it that I thought you might like to give it a try too. I’ve created a template that you can download and use to make the same little houses, and I’ve written up a tutorial about how I did it.
But don’t limit yourself to these houses. Once you know how to do raw-edge applique, you’ll be able to design your own applique, too.
Supplies Needed
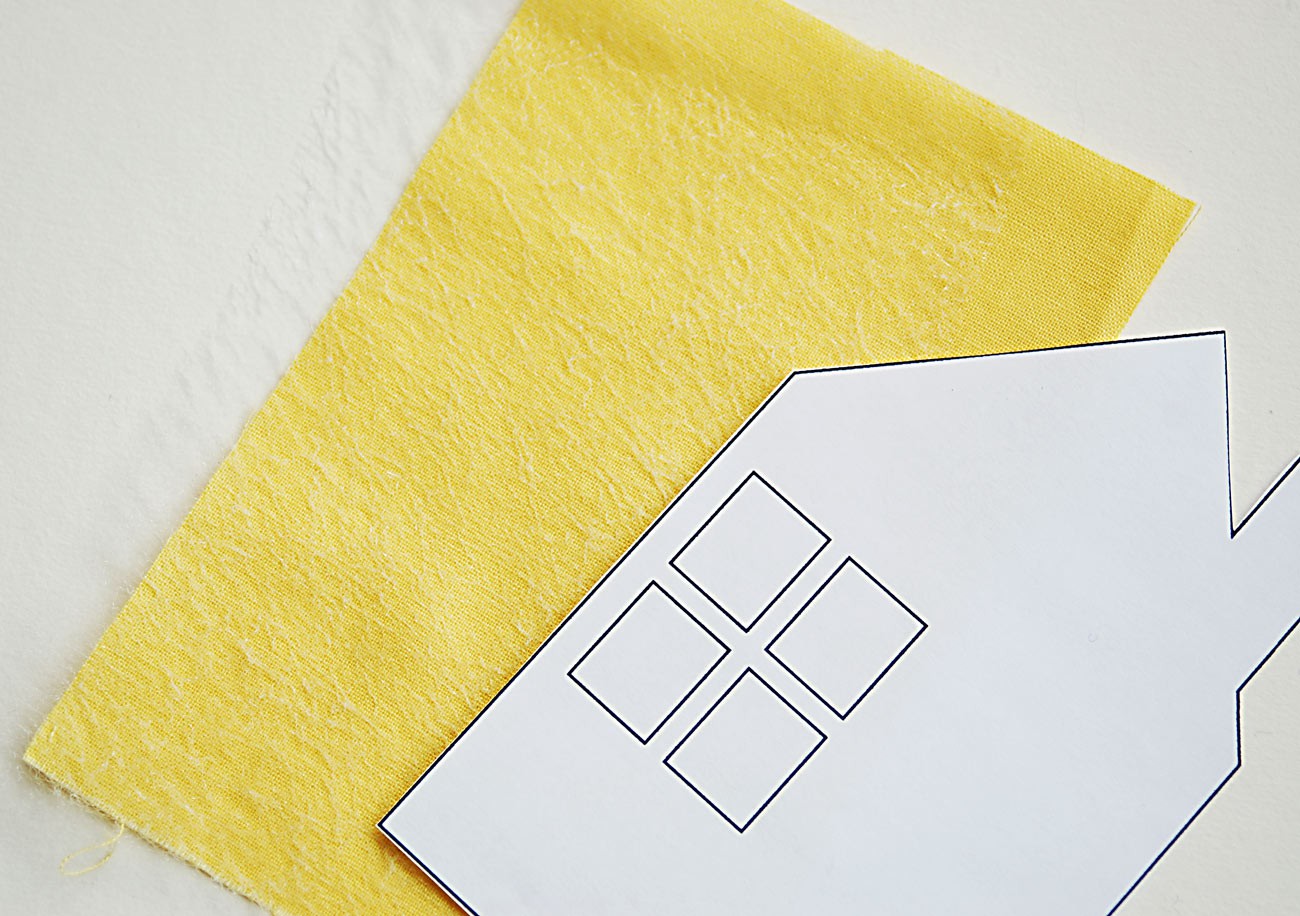
For this project you’ll need your dress fabric, some coordinating or contrast scraps for the houses themselves, fusible web (I’ll talk about that shortly), a non-stick pressing sheet (I’ll also talk about this), and thread. You can print out the house templates here. Feel free to re-size these as desired. If you print them at 100%, that’s the size I used for S’s dress (which I made in a size 6 and lengthened).
First, you’ll want a good fusible web. I’ve tried a lot of brands and types, and for projects like this where you want the finished dress fabric to remain drapey and flexible without any stiffness or bulk, I love Mistyfuse. We’ve started carrying it in the Shop if you’d like to give it a try. I really like how lightweight it is, and you’ll see how fine it is. I once told Iris, the creator of Mistyfuse (who lives and works in Brooklyn, hurray!), that Mistyfuse is like a spiderweb. She didn’t agree–it’s not sticky like a spiderweb–but it’s really sheer and fine. Which is what I meant. If you want a stronger bond you can also use two layers, but one layer is usually enough. I’ll show you several other amazing uses for Mistyfuse later. (Hint: you can make your own interfacing!)
You’ll also need a silicone-based pressing sheet. If you have silicone-coated baking parchment in your kitchen, that’s perfectly fine to use. But Mistyfuse also makes these fantastic Goddess Sheets that I’ve been using for a while now and adore. The Goddess Sheet is a non-stick pressing sheet, so you don’t gunk up your iron when you’re working with interfacing or fusible adhesive, and nothing gets stuck to anything that it shouldn’t get stuck to. You know what I mean. I use mine all the time now. I was asking Iris about it, and this is how she described it to me in an email: rich teflon coating over a really lightweight fiberglass–for fast and even heat transfer and very high temperature tolerance. Sounds delicious, yes? I’ve been threatening to get rid of my Silpat baking sheets and our panini press and just use Goddess Sheets for baking and panini making instead. In our tiny New York kitchen, any product that saves space is a gem. We’ll get back to panini shortly, but Goddess Sheets are designed for the sewing room, so let’s talk about applique, shall we?
How To
1. Start by cutting out all the pieces of your Roller Skate Dress. It’s easiest to do the applique first and construct the dress when the applique is finished. You can also add applique to a finished dress, but it’s almost always easiest to work flat, with no seams or corners to work around.
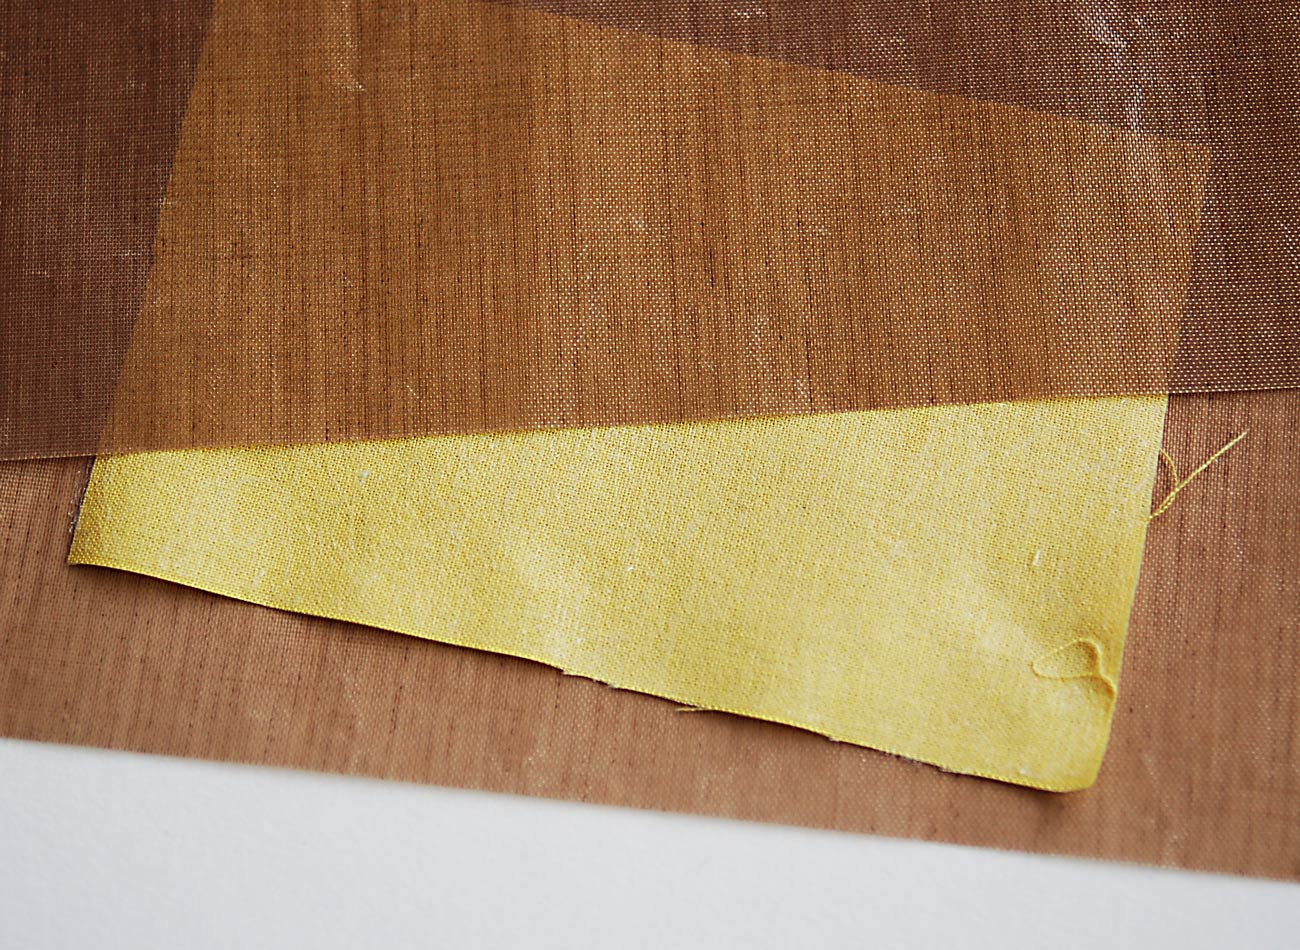
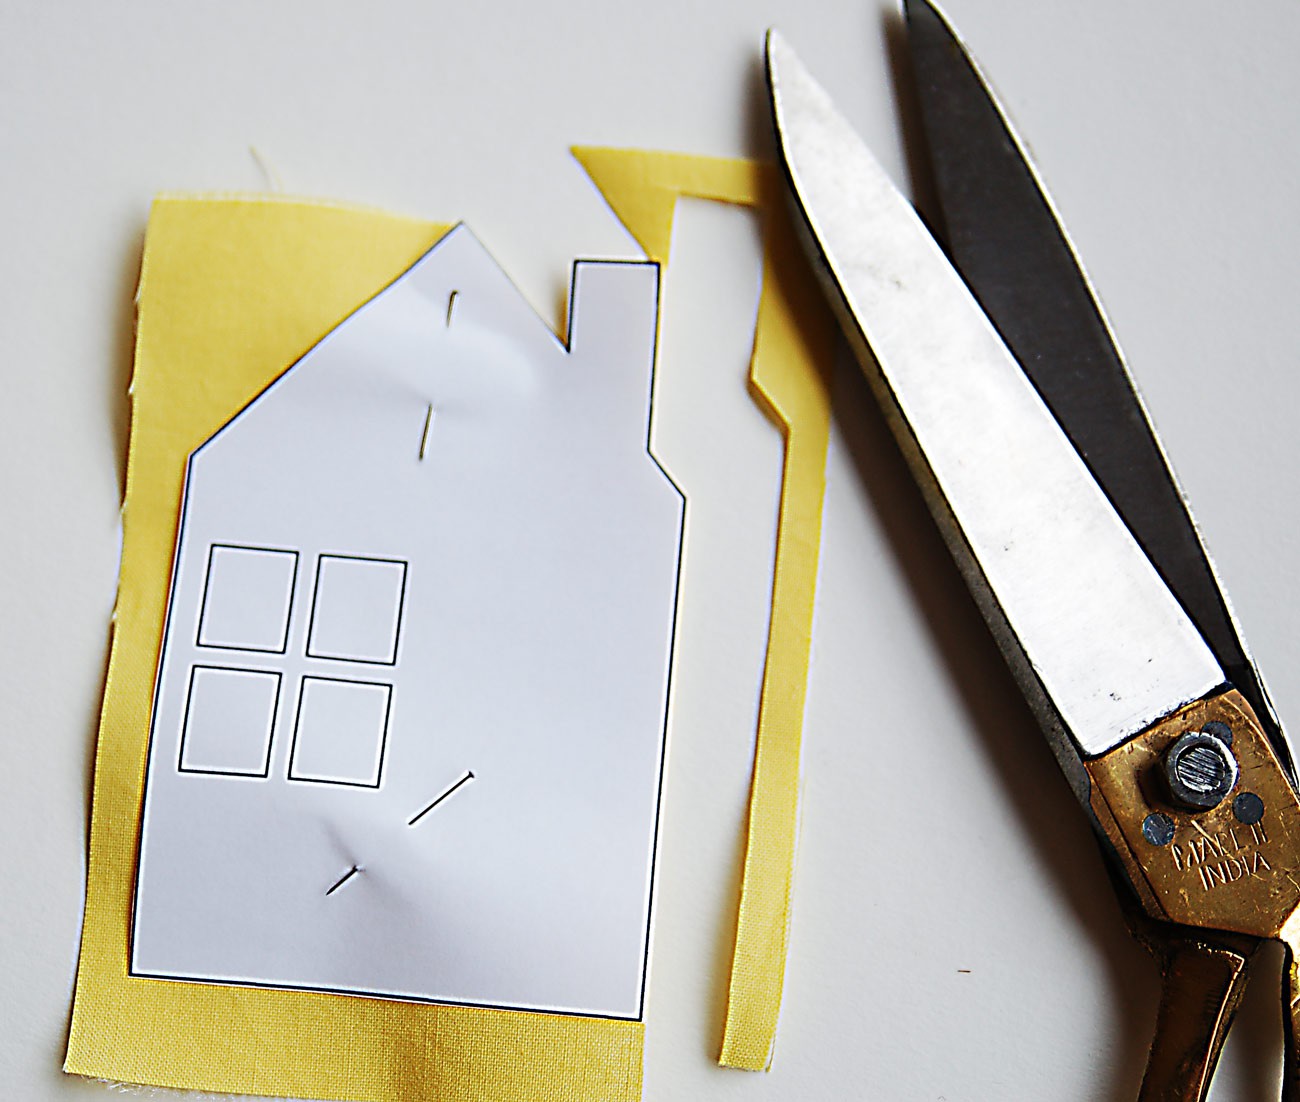
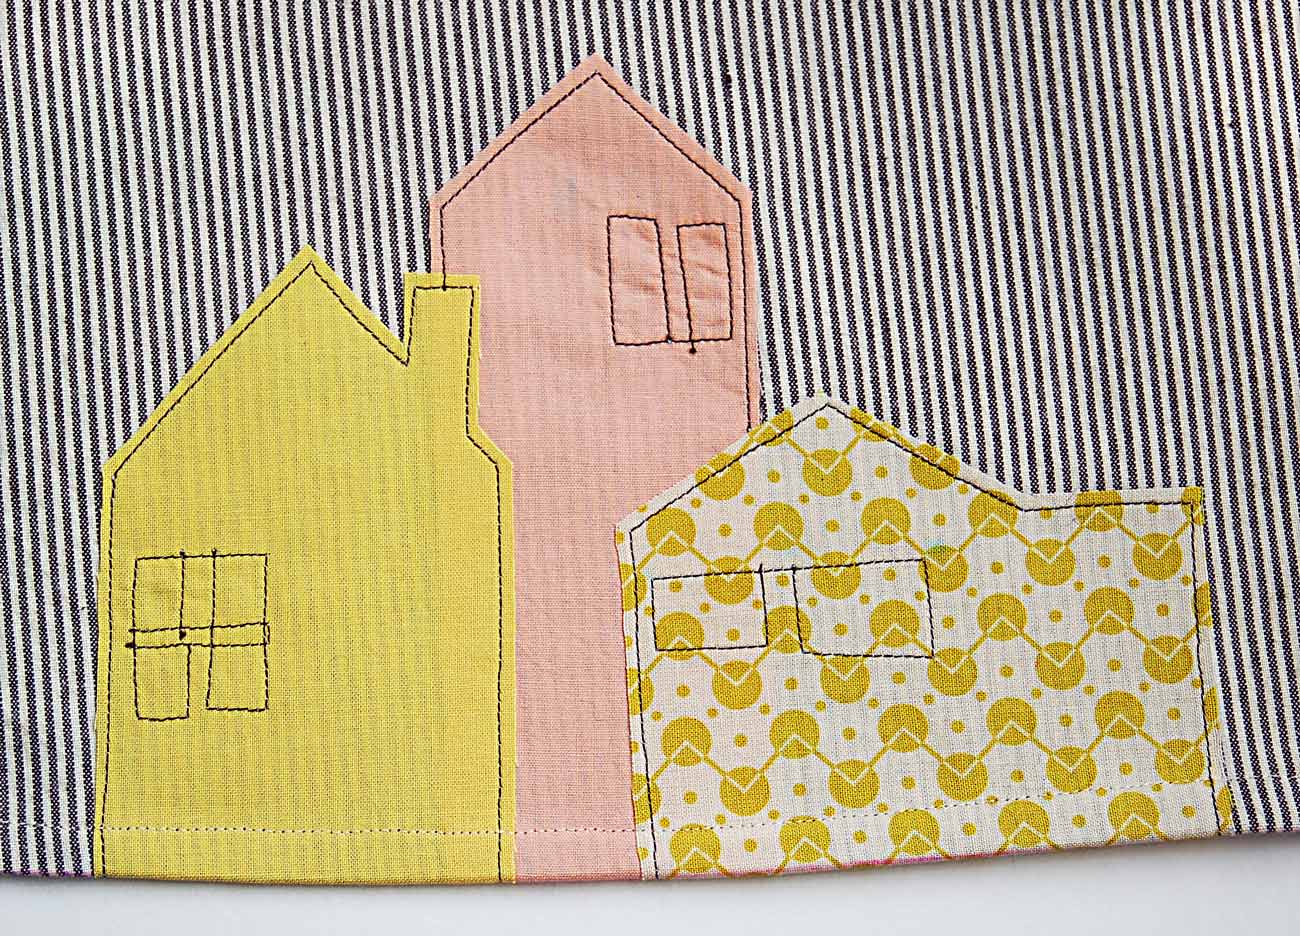
Print and cut out the house applique template pieces, and then cut a piece of fabric and a piece of Mistyfuse a little larger than the template piece for each house. If you’re planning to applique the houses at the hem of the Roller Skate Dress, like I did, be sure to leave a little extra fabric (and Mistyfuse) at the bottom of each house template piece. You’ll see what I mean and why I do this shortly. Can you see the Mistyfuse in this photo? It’s so fine that it’s difficult to photograph.
2. Place the Mistyfuse on your Goddess Sheet, and position the fabric, right side up, on top of it. Then cover it with the Goddess sheet. So the Goddess Sheet is the bread that wraps around the fabric and the Mistyfuse, and the fabric and Mistyfuse are the fillings in your sandwich, ok? Heat up your iron and give this sandwich a good press. I guess that makes our sandwich into a panini! You’re melting the fusible web to the fabric so one side of your fabric has glue to attach it to your dress fabric. Let the Mistyfuse cool, and then peel the fabric off the Goddess Sheet with the Mistyfuse attached to the fabric. The Mistyfuse side will look a little shiny, like this, if you can see it.
3. Now repeat this for all your other house pieces by fusing the Mistyfuse to one side of your fabrics. Then you can pin the house template to the right side of the fabric and cut out each house, leaving approximately half an inch of fabric below the house. Use chalk to draw a line indicating the bottom of your house. (Chalk is safest here because you’re going to be pressing it with the iron, and sometimes water-soluble fabric pens don’t wash out after being heated.)
4. Use chalk to draw the finished hem line on your dress, too. For the Roller Skate Dress the hem seam allowance is 5/8″, so your chalk line will be 5/8″ from the cut edge of the hem.
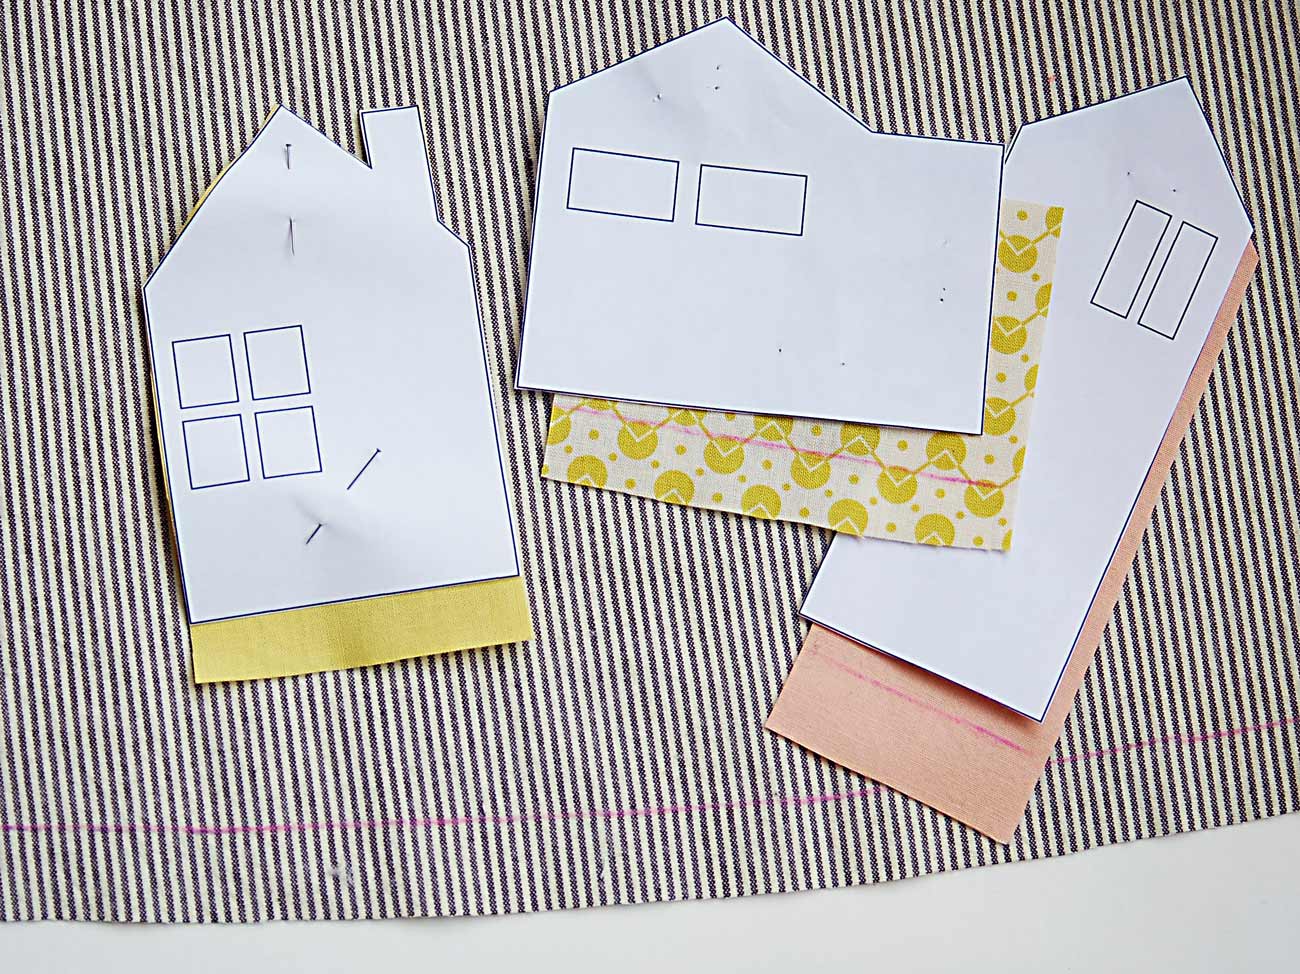
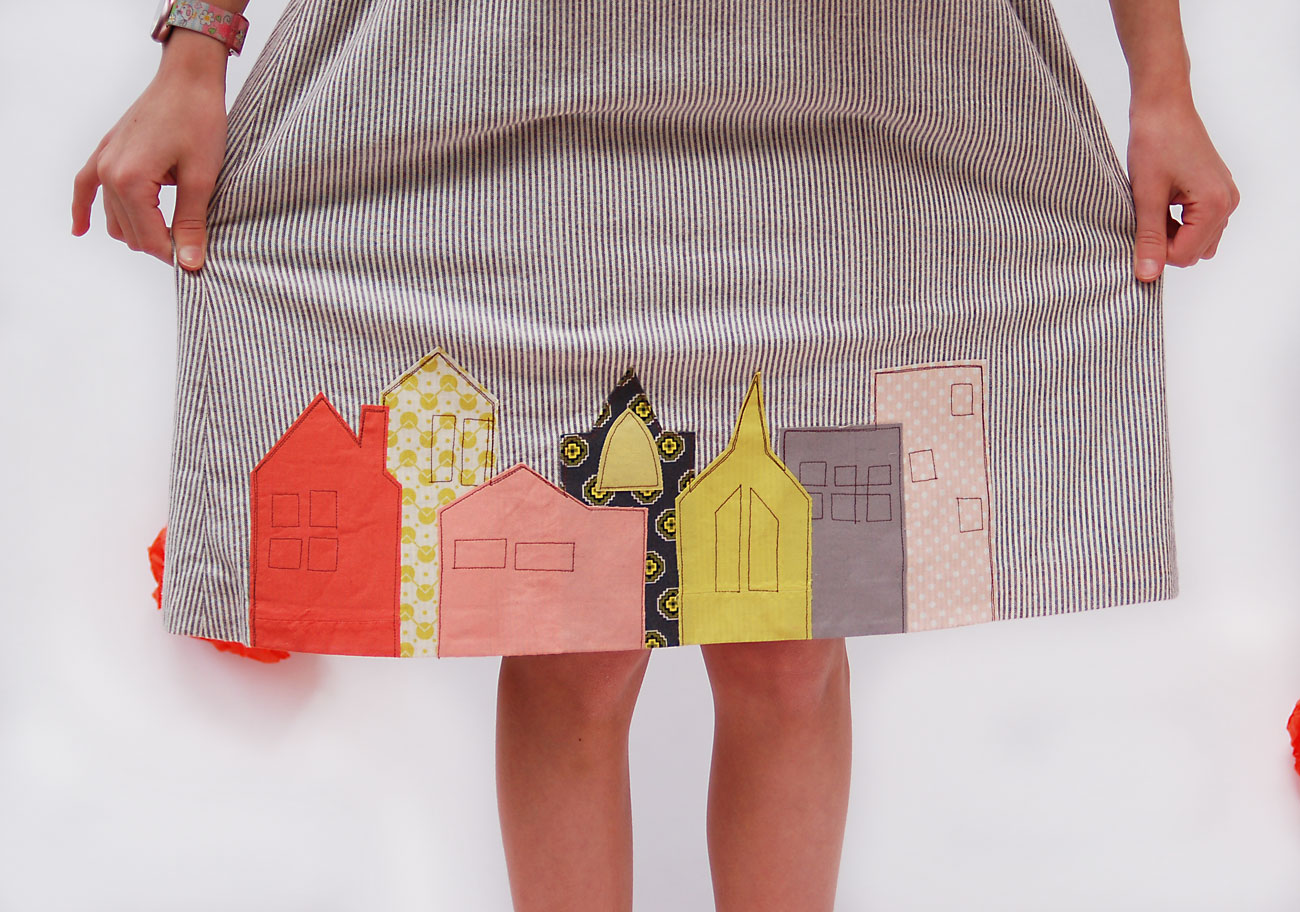
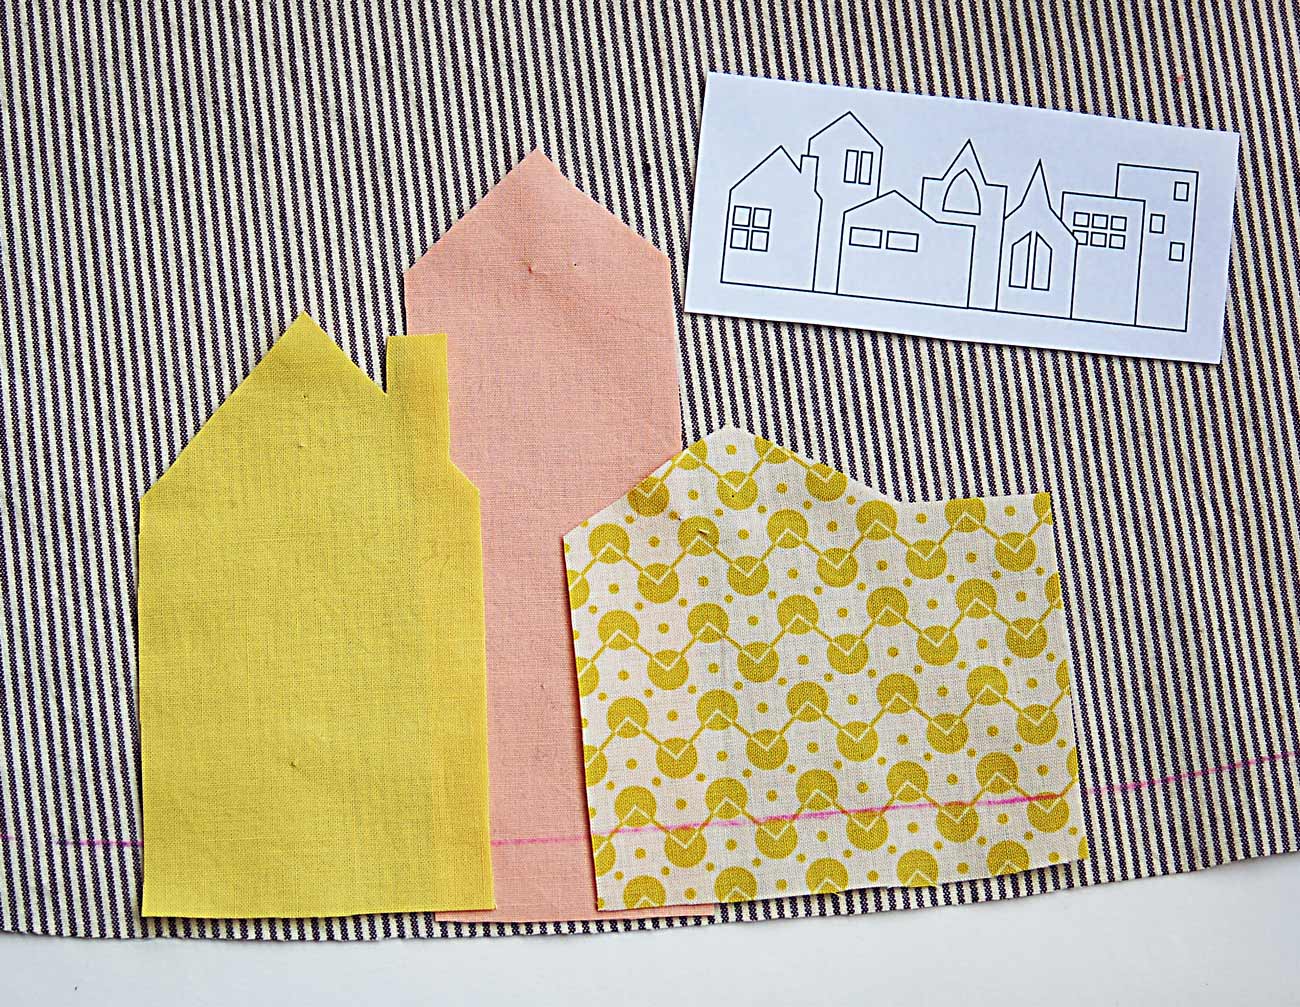
5. Now you can refer to the little diagram on the house templace, if you want, showing which houses go where. Or arrange them however you like, layering as desired. As you’re arranging, be sure to take into account the seam allowance at the sides of the dress panel so you don’t end up with dresses in the side seam. I started my houses about 1 1/2″ from the side seam, but do what feels right to you. Line up the chalk lines on the bottom of the houses with the chalk line on the dress hem so the excess fabric below each house will be in the hem seam allowances.
6. When you’ve got everything arranged as you like it, start pressing to fuse the houses in place! You can do this one house at a time or, if you’re careful, fuse them all at once. It’s a good idea to carefully position the Goddess Sheet on top of the pieces as you fuse so any errant Mistyfuse doesn’t adhere itself to your iron. (Just to be safe. It probably won’t happen, but sticky irons are the worst. Maybe worse than broken panini makers.)
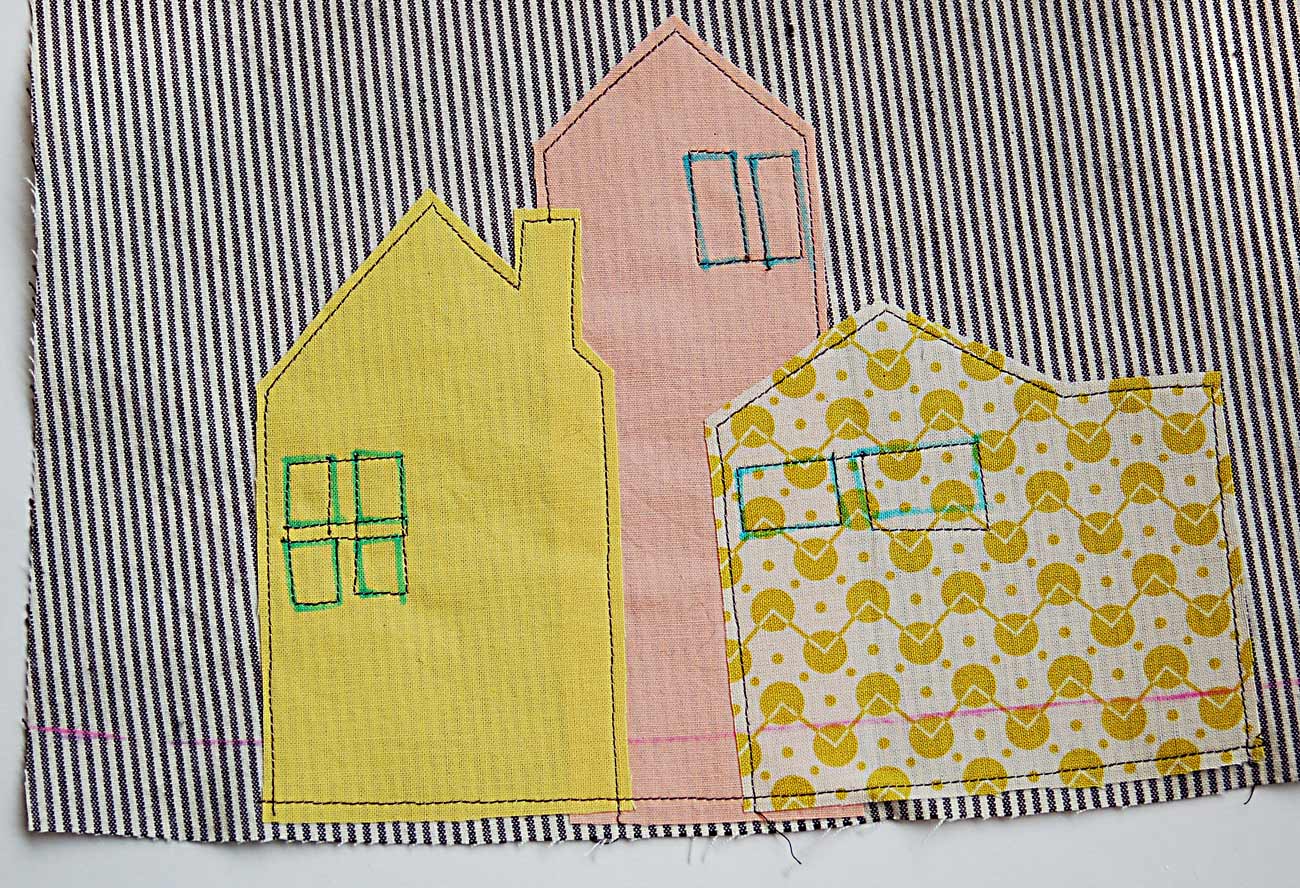
7. Edgestitch the houses in place to give them a nice, defined edge. I used brown thread because I wanted the houses to look like they were drawn onto the dress. I like to edgestitch loosely, not worrying too much about staying straight, because I think it’s part of the charm of this design. You can also use the house templates to draw the windows and details with chalk, and then machine stitch over the chalk lines to finish them. If your machine has a needle down and a lockstitch function, both of these options will come in really handy for these bits.
8. Any other details you’d like to add? Go for it. Use the same raw edge applique technique, or maybe you’d like to hand embroider a sun or a cloud somewhere on the bodice? And that’s really all there is to it. Sew the dress the way you normally would, and when you finish the hem of the dress the bottom of the houses will get turned to the inside of the dress.
Easy, right?