
Do you remember Shelley (a.k.a. Lightning McStitch) with that amazing Evel Knievel costume? Well, she’s back, this time with a really sweet tutorial for you.
This time she’s here to demonstrate how she made these adorable ruffled bloomers using the Tea Party Bloomer pattern. Thanks so much, Shelley!
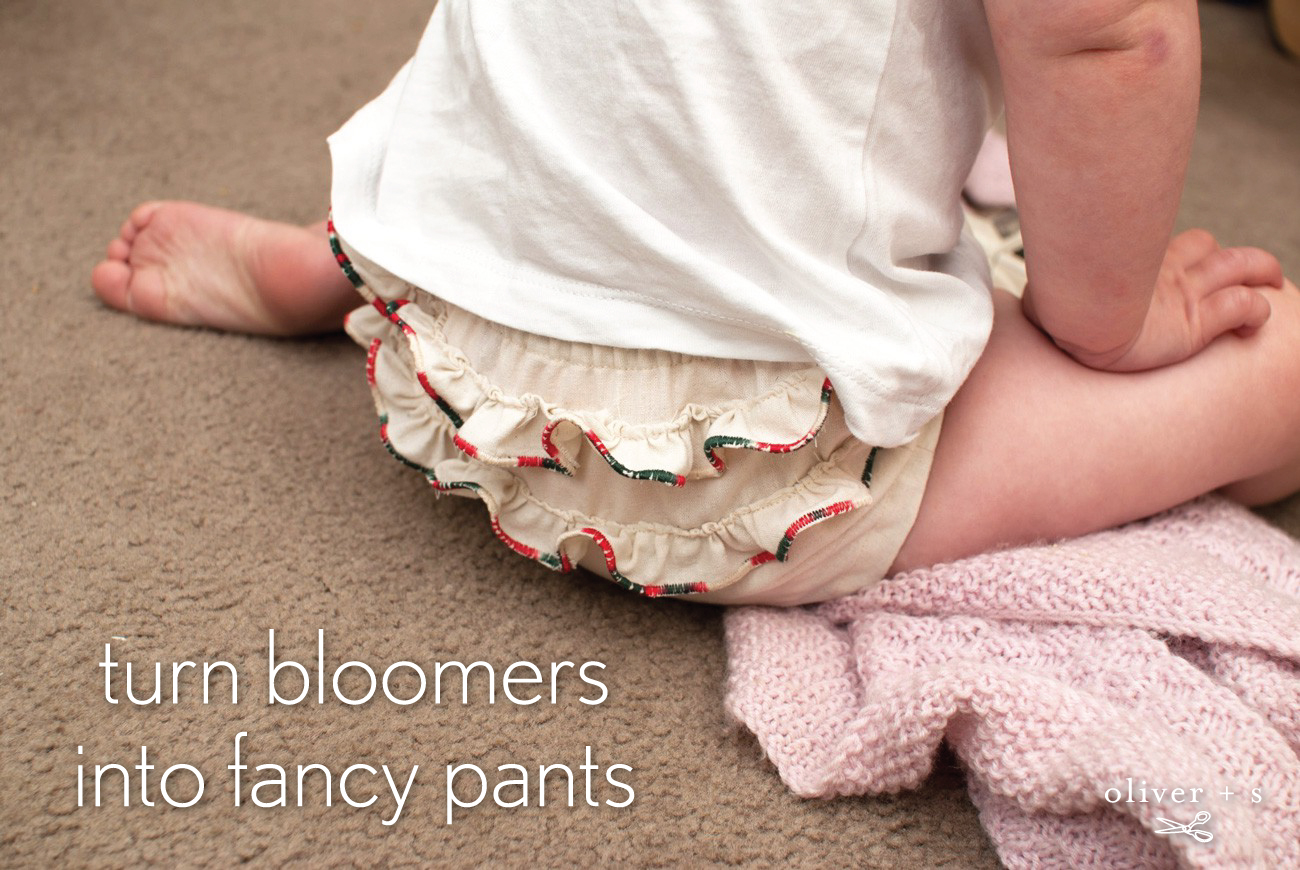
This December there were so many beautiful Christmas dresses and outfits appearing in the Oliver + S Flickr group that I couldn’t help but get into the sewing spirit. Our Christmas can be unbearably hot and the Australian toddler may end up wearing nothing more than a singlet and a nappy on Christmas day. So, here comes another pair of ruffled Tea Party Bloomers to fancy-up that yuletide backside.
I’ve done this twice now, and I’m sure there could be better, neater or easier ways, so I’d like to consider this an “open” tutorial, where I’ll show what I did, and your comments may improve the whole process. A Flickr search demonstrated that there are some very experienced ruffle-ists among the Oliver + S devotees.
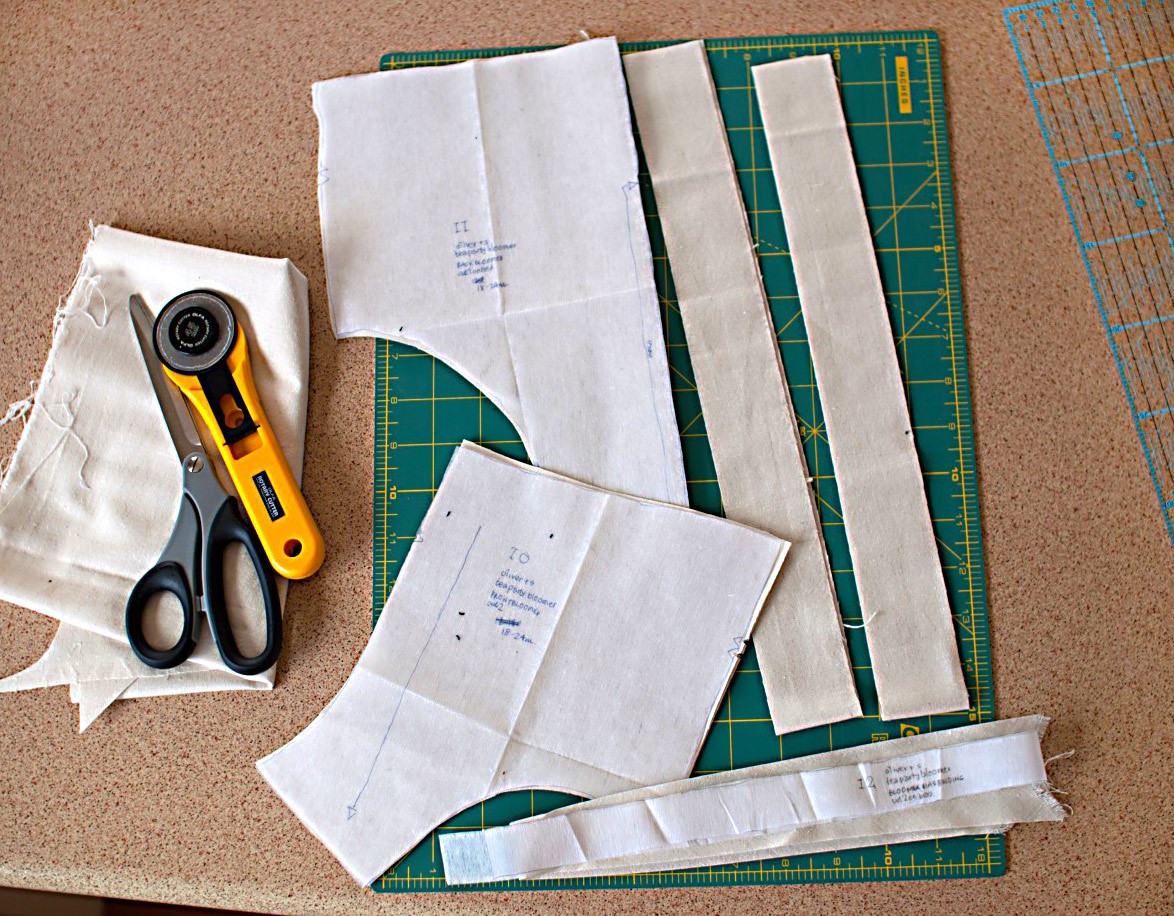
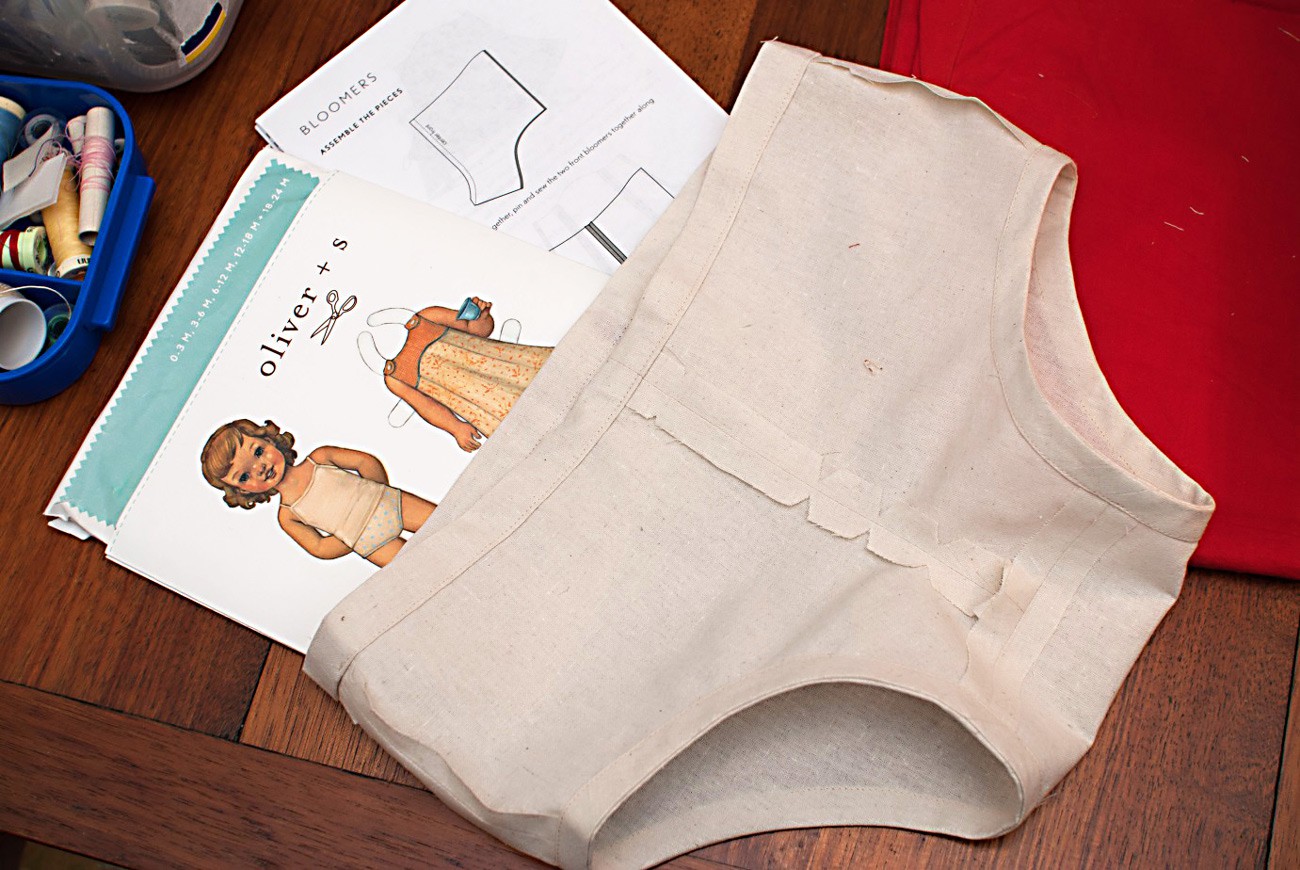
Starting with the Oliver + S Tea Party Bloomers pattern, I’ve cut out the two pattern pieces and leg bias binding, and then cut two strips of fabric about 1 3/4″ x 25″ for the ruffles. Initially I cut the ruffle strips longer, but the rolled hem becomes quite stiff and it gets hard to gather them enough. A little shorter would be fine if you had a limited amount of fabric.
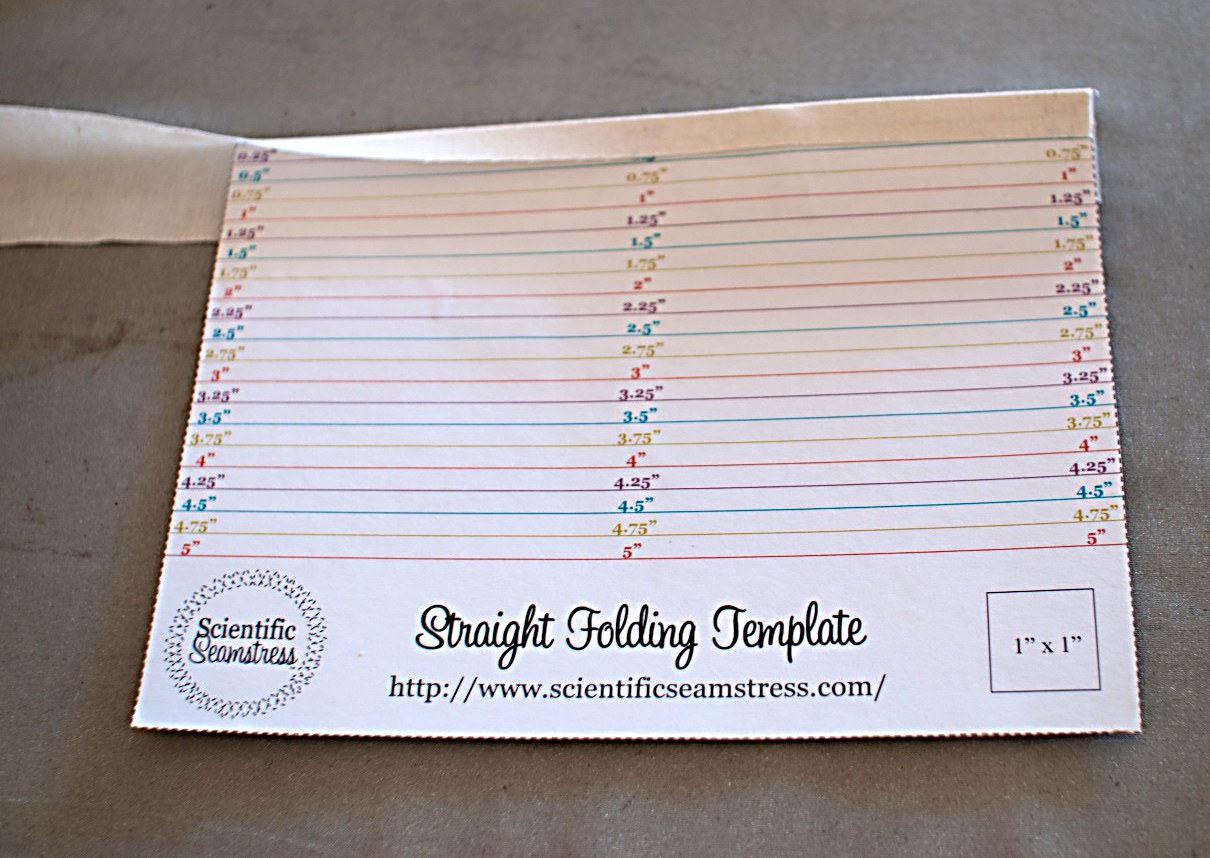
Press one long edge of each ruffle strip to the wrong side by 1/2″ to create the rolled hem. I’m a metric person but through sewing “NYC style” I’m starting to get an eye for the imperial measurements. However, I still love using my cardboard backed, glued on, downloaded hem guide from the Scientific Seamstress.
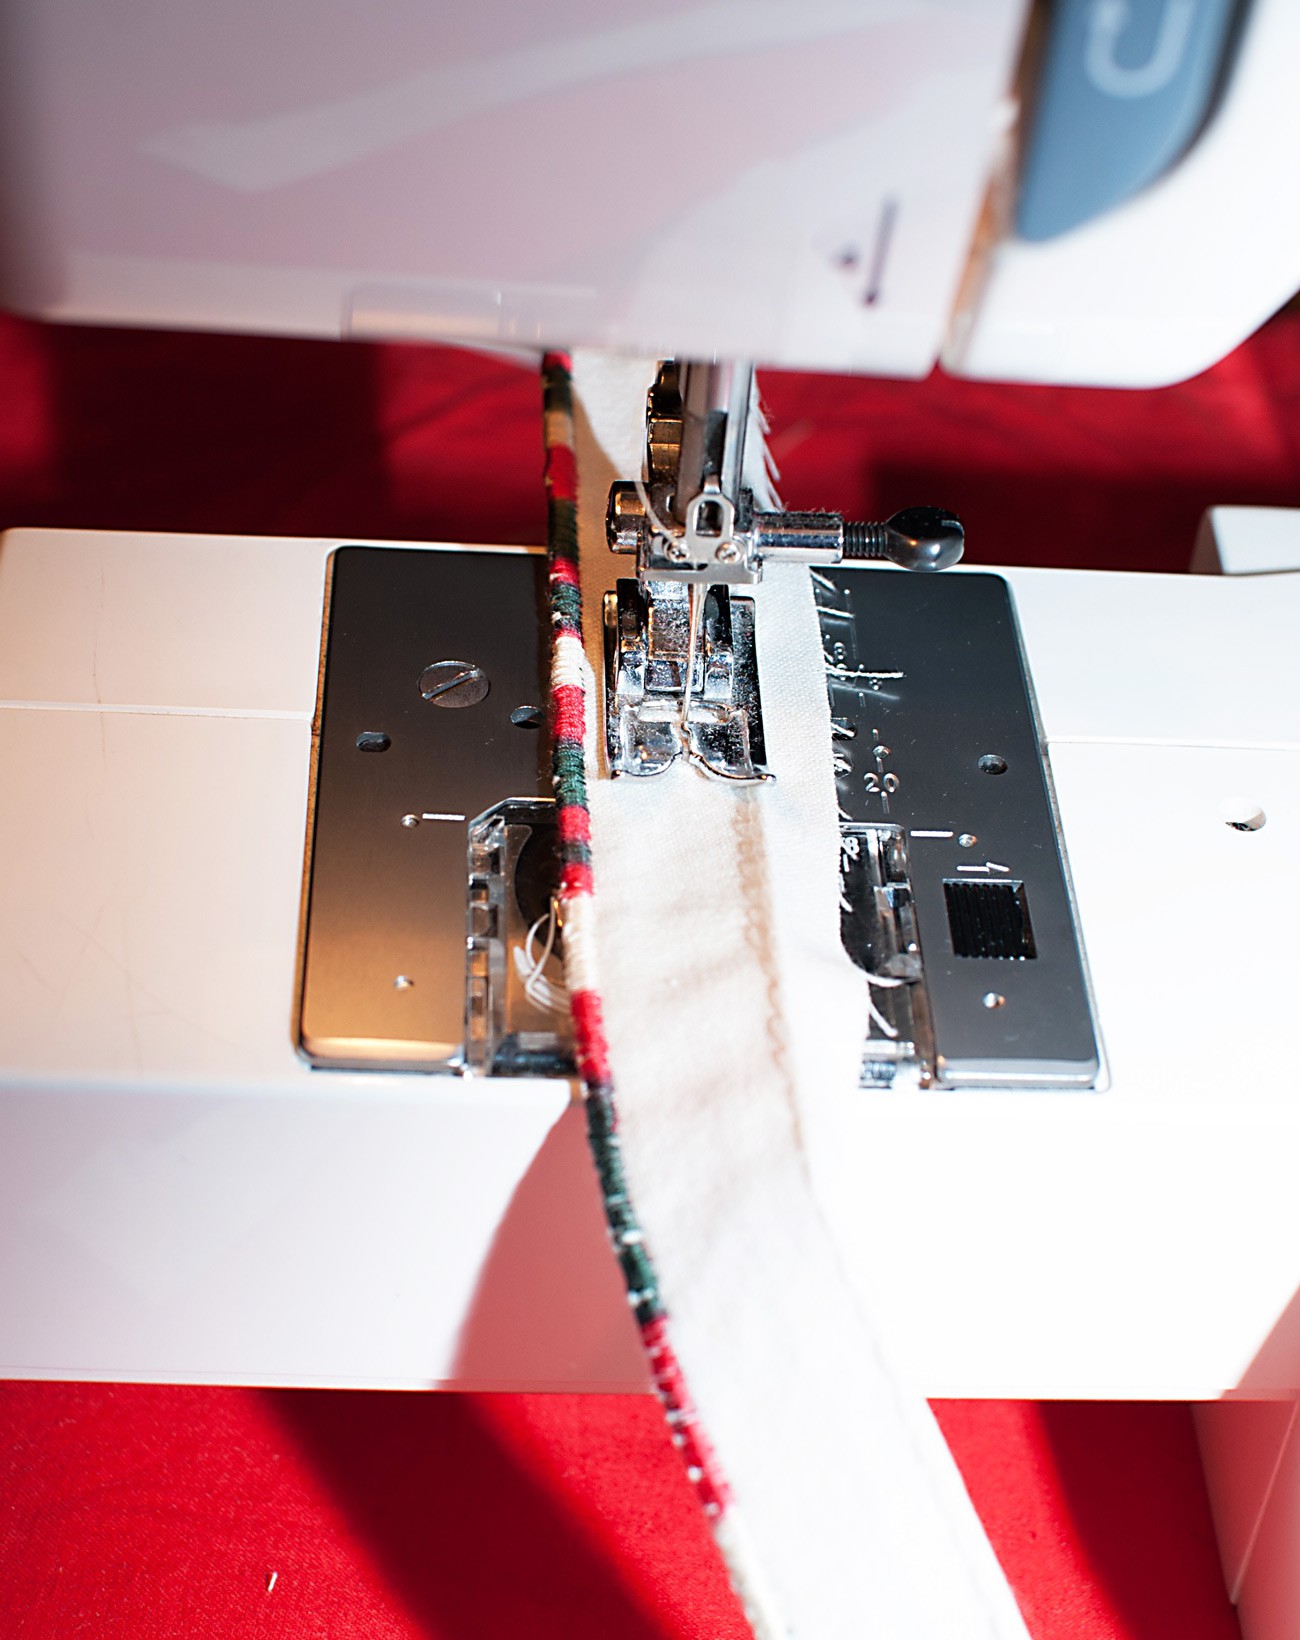
To create the rolled hem, it pays to be on good terms with your sewing machine. My machine and I were not getting on well when I made this pair (I suspect an old blunt needle could have been part of the problem), and it took quite a few practice runs on test fabric to get needle tension and stitch length right (or as close as I could be bothered with!). I don’t have a serger or a rolled hem foot, so I’ve just used my edgestitch foot and made do. I used a variegated thread on top and bottom, as the rolled hem is going to stick out enough to be seen on both sides. Liesl gives some nice instructions on creating a rolled hem in the Family Reunion pattern for the ruffle tab option.
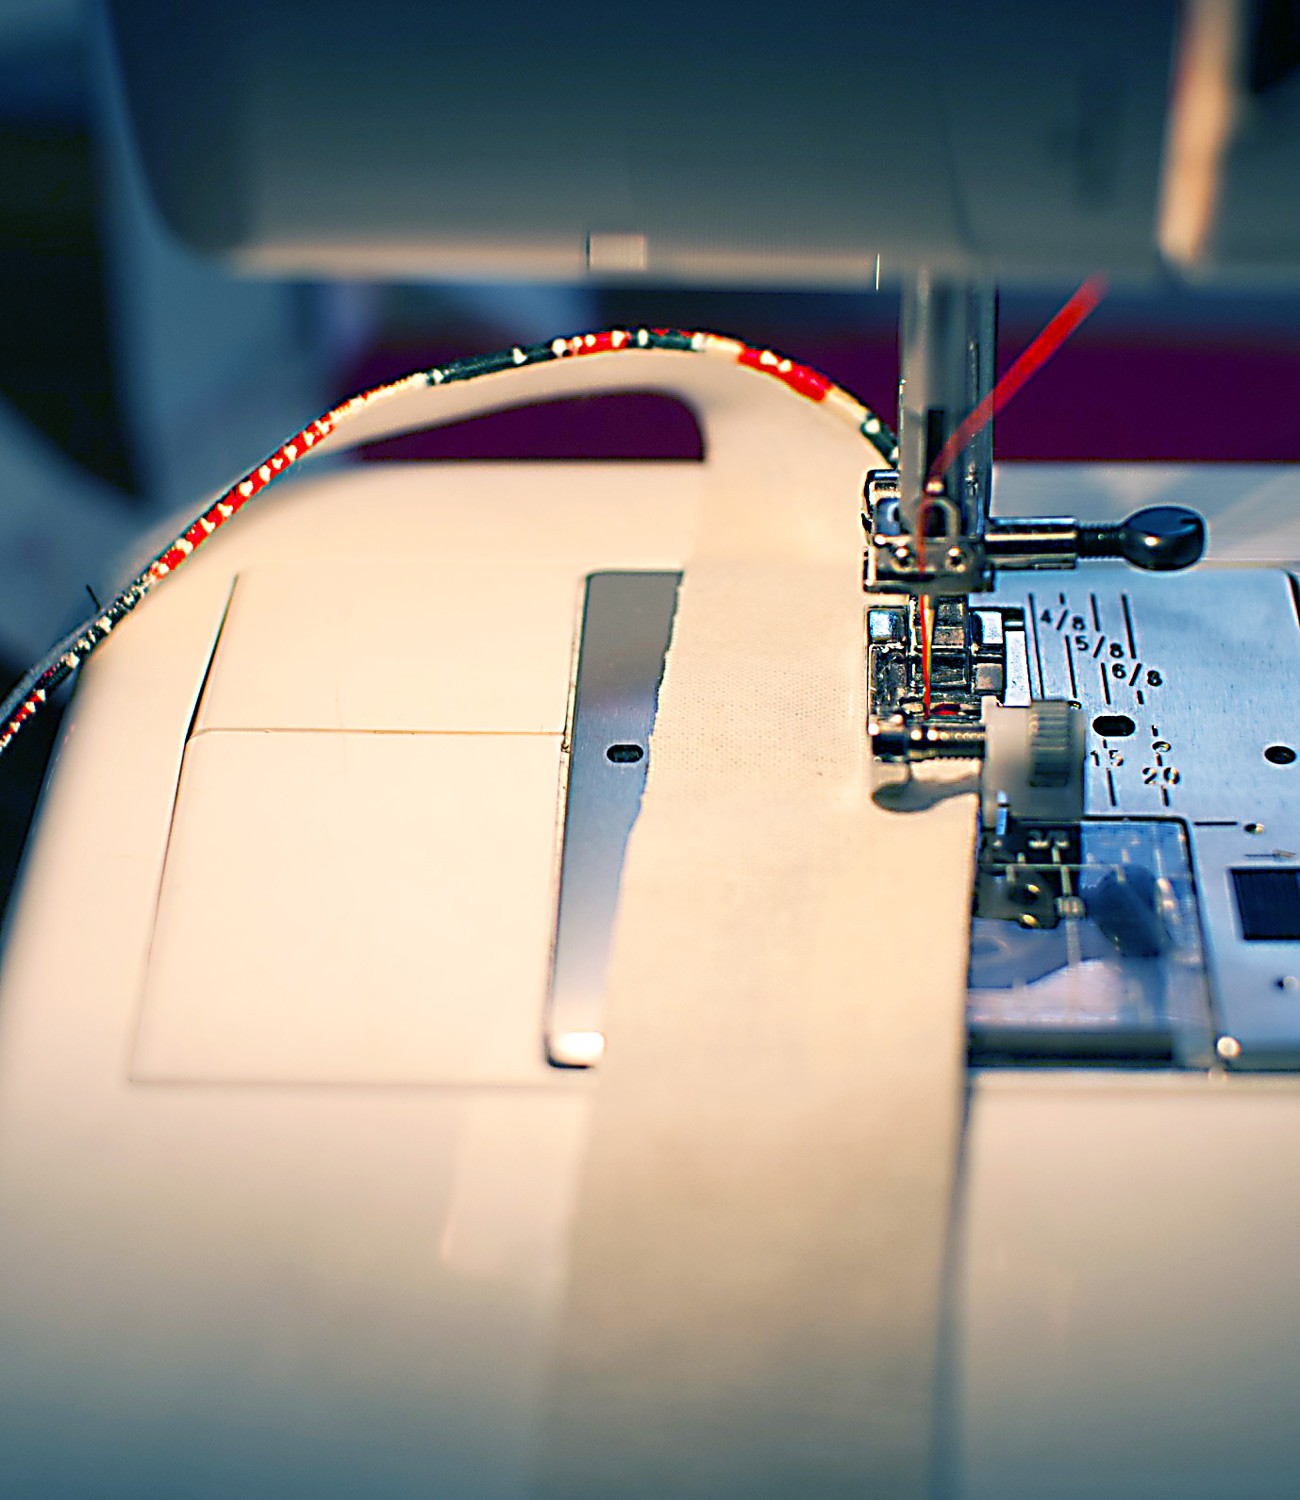
I set my machine to a medium width, zigzag stitch of very short stitch length and aimed to get the needle to land right on, or slightly over, the folded edge of the fabric.
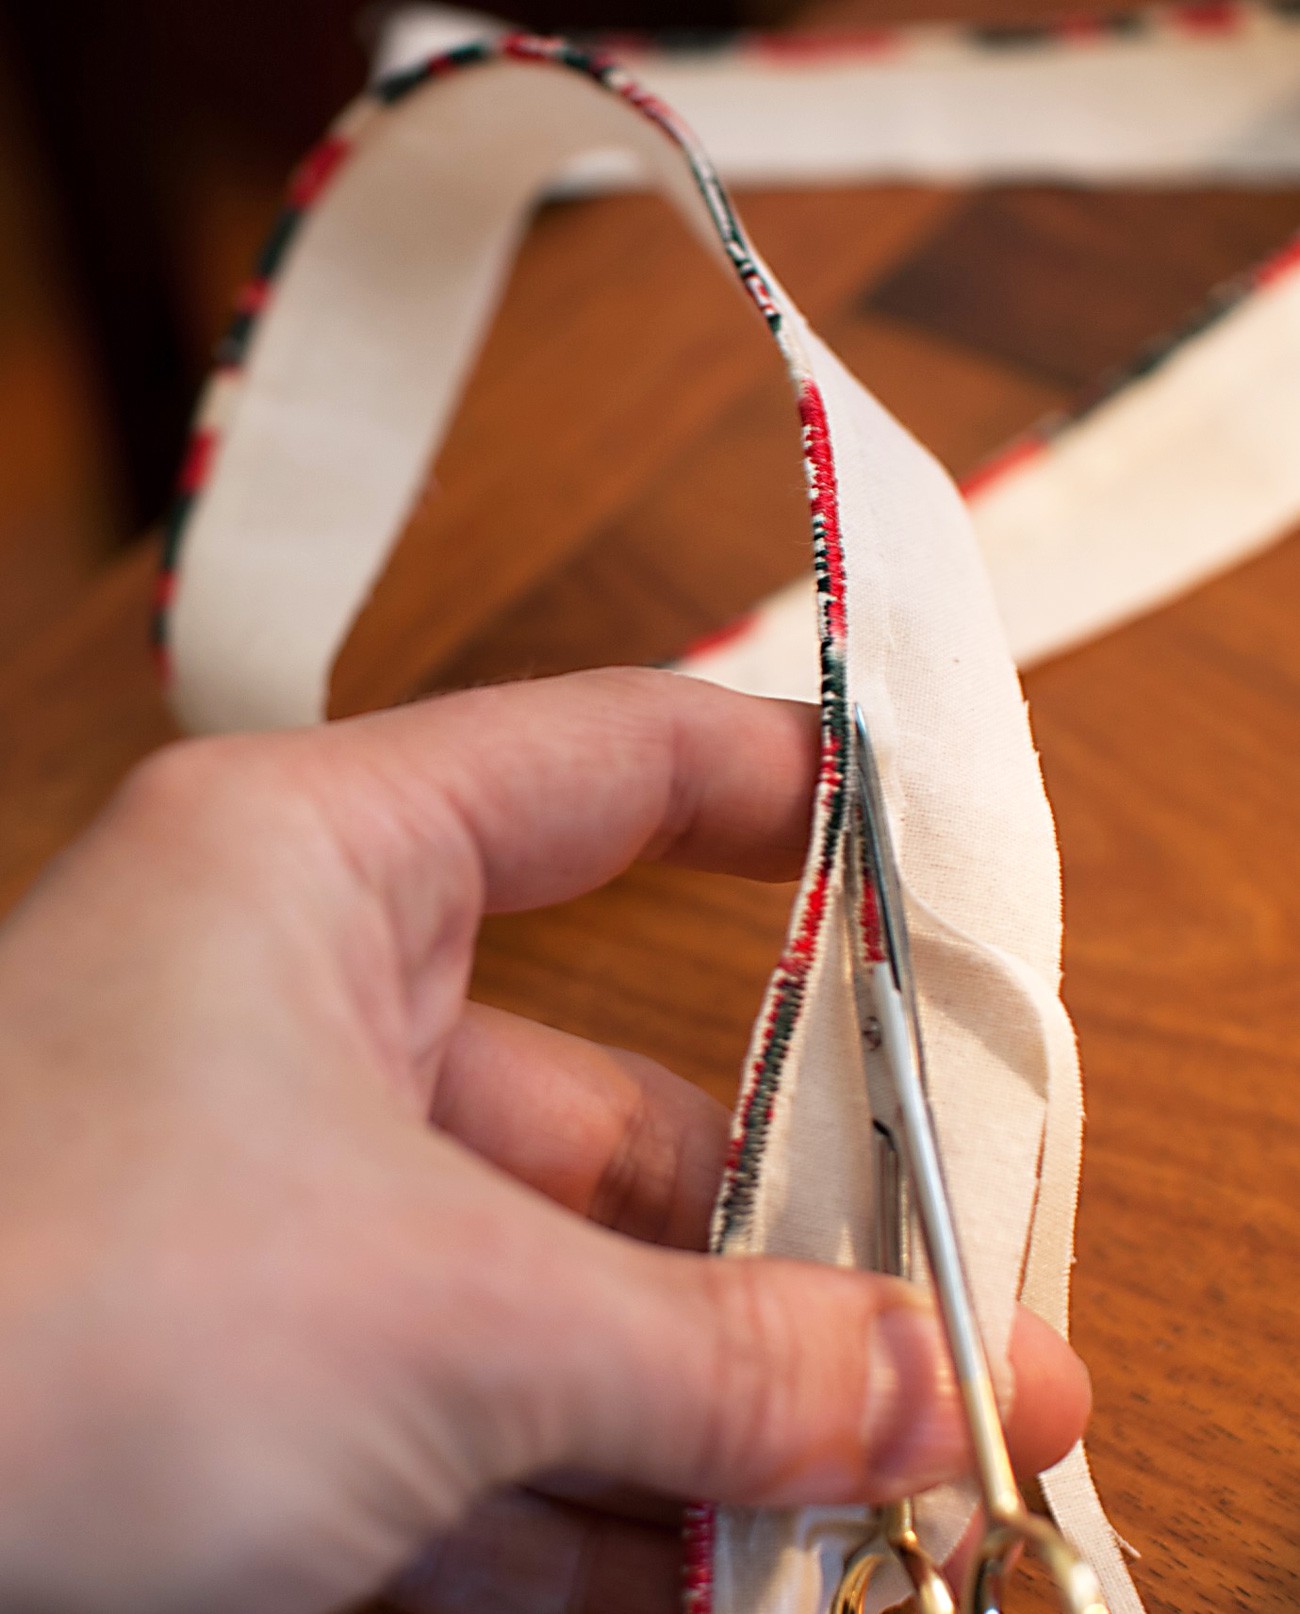
Start and stop the satin stitch about 1/2″ from each end of the ruffle. With scissors, trim the remaining seam allowance away from the stitched edge as neatly as possible.
Press the other long edge of the ruffle strip to the wrong side by about 3/8″. Then sew two lines of gathering stitches along the length of the ruffle strip. The first row of stitching should be on or slightly below the opened-out crease and the next about 3/8″ below. Leave long thread tails at each end.
Now, to the bloomers. Construct the bloomers as per the pattern instructions right up to the point of inserting any elastic.
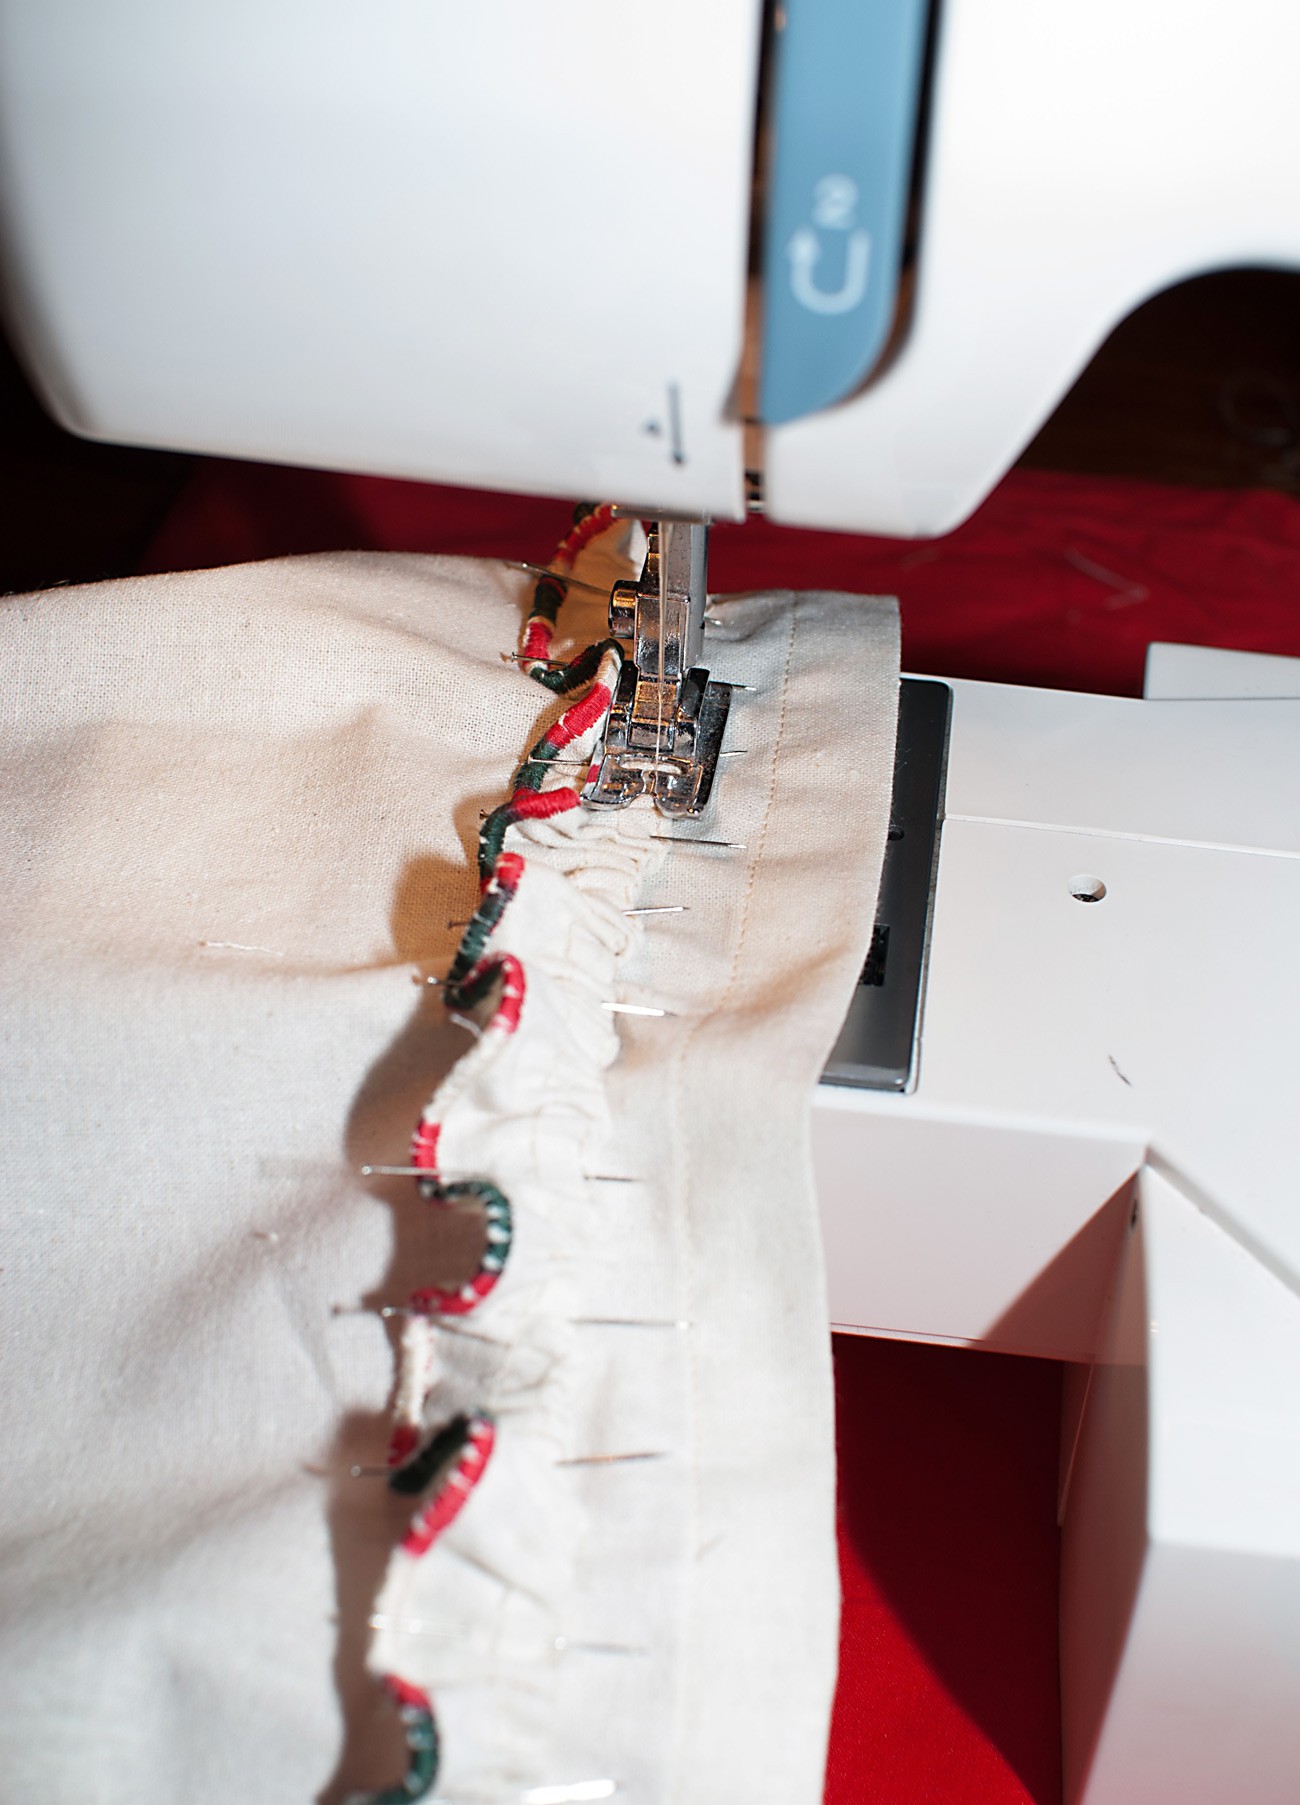
With the bloomers right side out, use fabric chalk to mark the lines along which you want to attach the ruffles. I’ve done the first ruffle about 1″ below the stitched waistband line, and the second line about 1 1/2″ below the first. I didn’t mark the lines, but probably should have as they’re a bit wonky! To attach the ruffle I folded over the short end by about 1/2″ and pinned it to the side seam of the bloomers.
Refolding the seam allowance crease as you go, pin the gathered ruffle to the bloomers until you reach the other short end. Pin that short end with the seam allowance folded under to the other side seam. Here’s where I wonder if it wouldn’t be easier to have sewn the gathering stitches through the folded under seam allowance as well. Can two layers of fabric be gathered as easily as one?
Stitch the ruffle to the bloomer back panel about 1/4″ from the folded edge. Start by stitching along the short folded edge at the side seam, then pivot to continue along the length of the gathered ruffle, pivoting again to finish by going down the other short folded edge. Remove the gathering stitches as necessary. I left the top ones in as I’d stitched almost on top of them.
Attach the second (or third or fourth!) ruffle in the same manner.
Finish the bloomers by inserting the leg and waist elastic and closing the casings.
Voila! Some leftover calico has been turned into “fancy pants.” The hard part is convincing my toddler she really should put a skirt over the top before we go out anywhere!