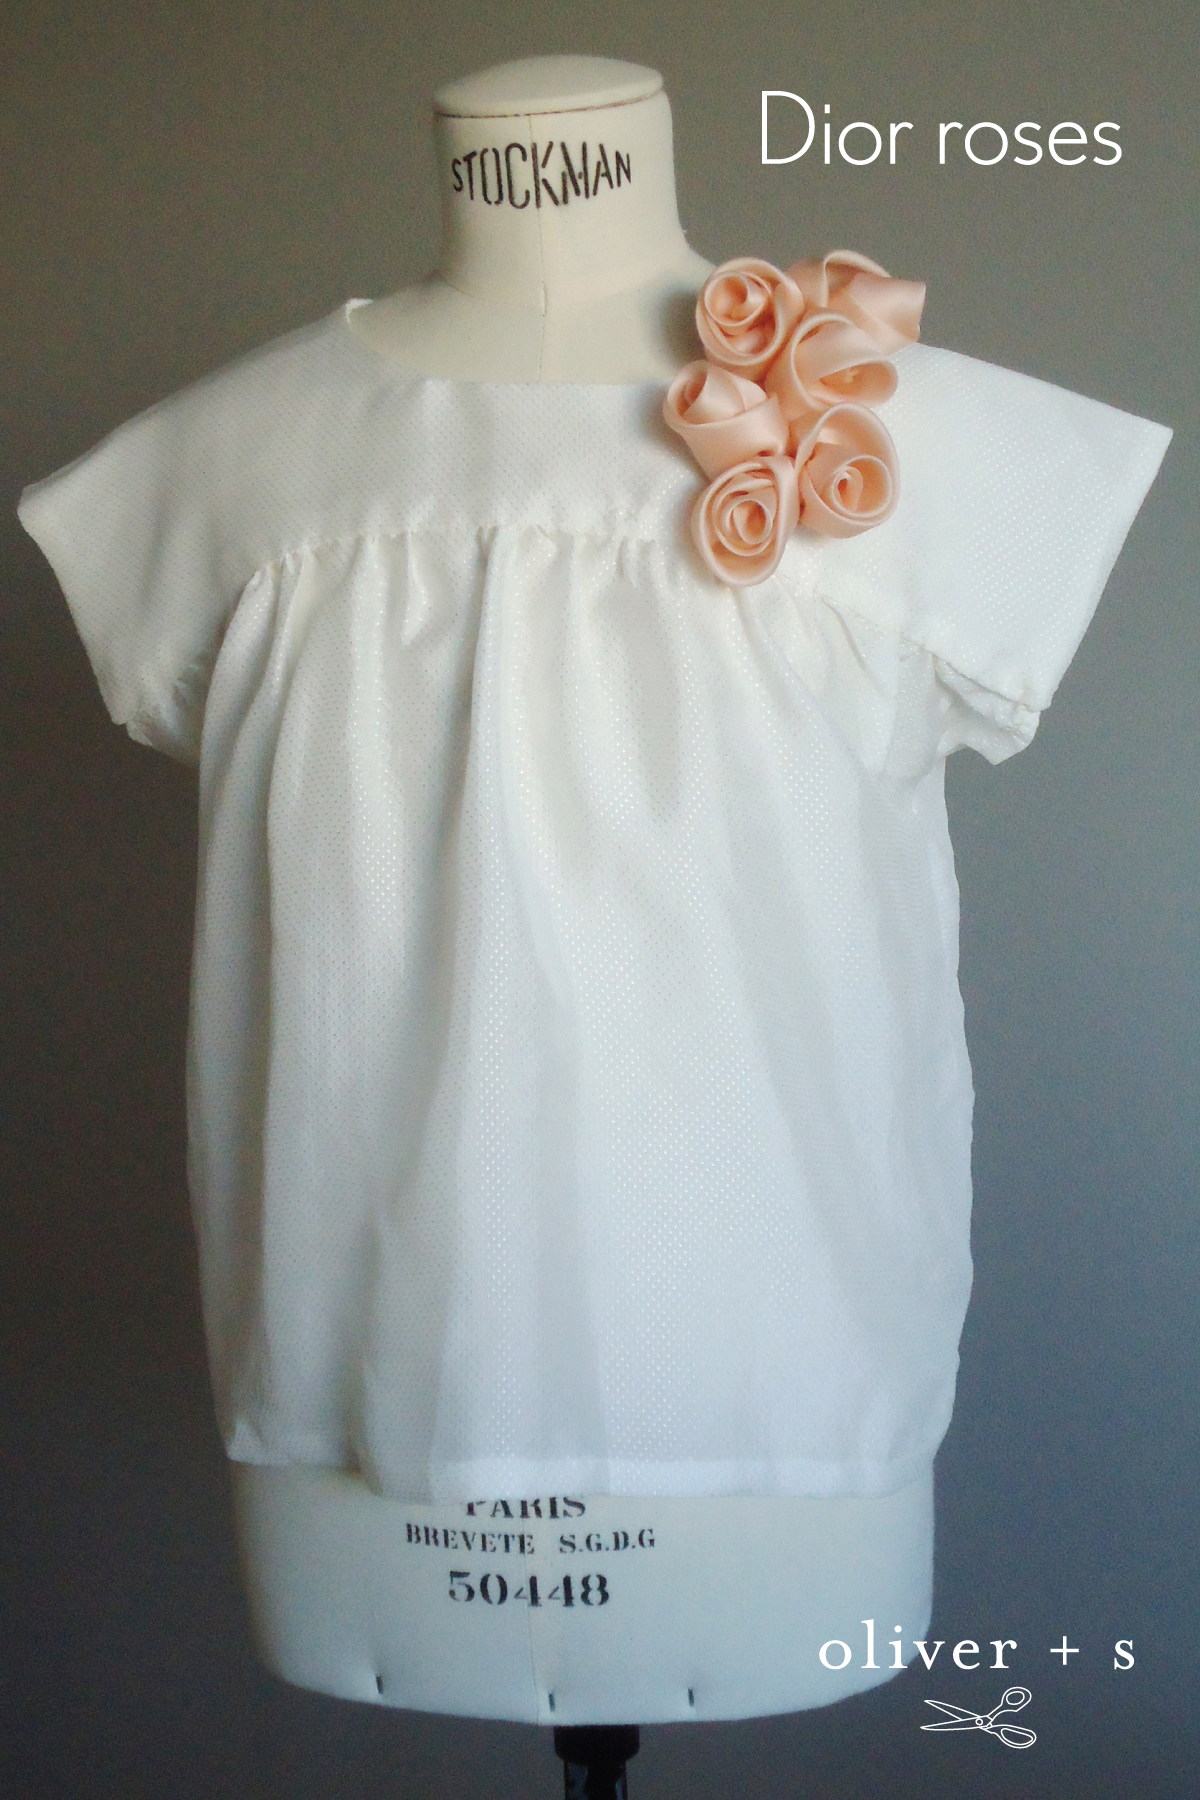
Today we are happy to welcome back Marie-Michelle. She has returned to show us how to create Dior roses. They look absolutely lovely as an embellishment on the Ice Cream Blouse (which just happens to be her favorite pattern, by the way). Thank you so much Marie-Michelle for this wonderful tutorial!
Christian Dior’s love of flowers was a longstanding one, inspired by his childhood garden in Granville in Normandy, France, whose flowers were tended by his mother. “Christian Dior loved flowers as much as he loved women, as evidenced in his sketches, where designs for dresses played second fiddle to the studies of flowers that inspired them.”
He used fabric flowers and floral embroidery to decorate lapels, hemlines, accessories, sleeves or entire sections of clothing (see the making of the miniature Miss Dior dress). It is a custom that has continued with the house’s successive designers from Marc Bohan to Raf Simons.
Galliano also used roses to great effect. On this 1987 wedding dress for Francesca Oddi, now in the V&A collections, a decade before he was to take the helm at the house of Dior, a combination of satin, chiffon and organza roses from bud to full bloom form, cascading down either side of the left shoulder. If you take a closer look at the gown, you’ll notice that the roses not only cling to the garment’s surface but also emerge as if growing from its fabric – an intelligent and lovely commentary on design, draping and process.
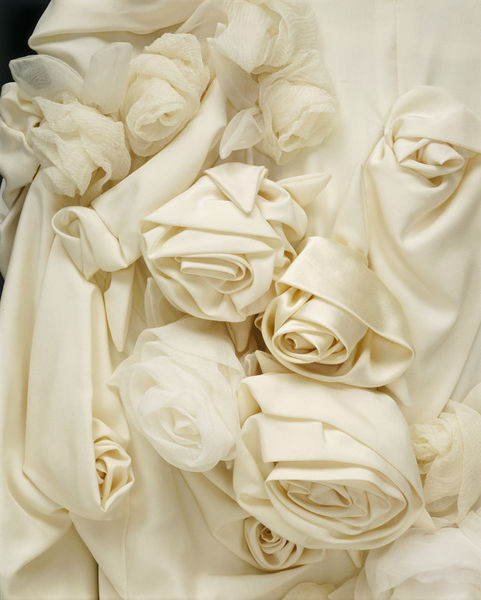
© Victoria and Albert Museum, London
The following Dior roses can be made from a number of fabrics depending on the look wanted. Stiff and opaque silks such as taffeta, dupioni, faille or shantung will make firm and unflinching roses, while the transparent and buoyant qualities of silk organza, organdy and marquisette will lighten the rose. Chiffon and crêpe de Chine will create a soft, tumbling effect and charmeuse or crêpe back satin will make for lavish roses. Linens, lightweight wools and cottons will create a more casual, sporty looking rose. Or make something novel with lace or tulle. Try mixing up different fabrics or colors for subtle color variations and textural interest. These roses are also a great way of using hand painted and naturally dyed fabrics (for inspiration be sure to consult these two natural hand dyeing books: “Harvesting Color: How to Find Plants and Make Natural Dyes” by Rebecca Burgess and “The Handbook of Natural Plant Dyes” by Sasha Duerr). A 20 x 70 cm (8 x 28”) strip of fabric should be plenty for making one three-petaled rose.
Though they may seem rather fastidious to make at first, you’ll find that with time and a little practice, they can become a real pleasure. Like often in life, nice things take little more time and effort to make. If you’re not feeling very confident, try whipping the first few roses up in a cheap cotton muslin before using your preferred fabric.
The roses have multiple applications and can be used as a brooch to decorate lapels, bustlines or necklines, as hair decorations with a simple hair clip or elastic sewn onto the backing or to cover headbands, hats, fascinators or more elaborate headpieces; on home, wedding or party decoration projects and of course, if you’re feeling brave, as all over appliqués on garments. Making flowers out of fabric is far from new and they have been used throughout human history to decorate clothing. There are a great many techniques for making them and this is one of the easiest and one that requires a minimal amount of equipment. I’m sometimes asked what it means to me to have the “couture” moniker attached to what I make and I know that it’s a heavy word full of daunting connotations which I believe would best be dispelled! I believe “couture” means a number of things: It is the use of the very best possible materials available and uncompromising attention to detail, it is knowing the difference between what is monetizable as defined by a capitalist economy and what is truly valuable, it is the refusal of economies of scale and time and output ratios, but more importantly, for me at least, it means harnessing the maximum amount of handwork skills and techniques passed down from generations of craftspeople. These are not hard techniques to learn nor are they particularly complicated but they do require time and dedication. There is nothing more beautiful than to share, as makers and as human beings, in our collective manual intelligence.
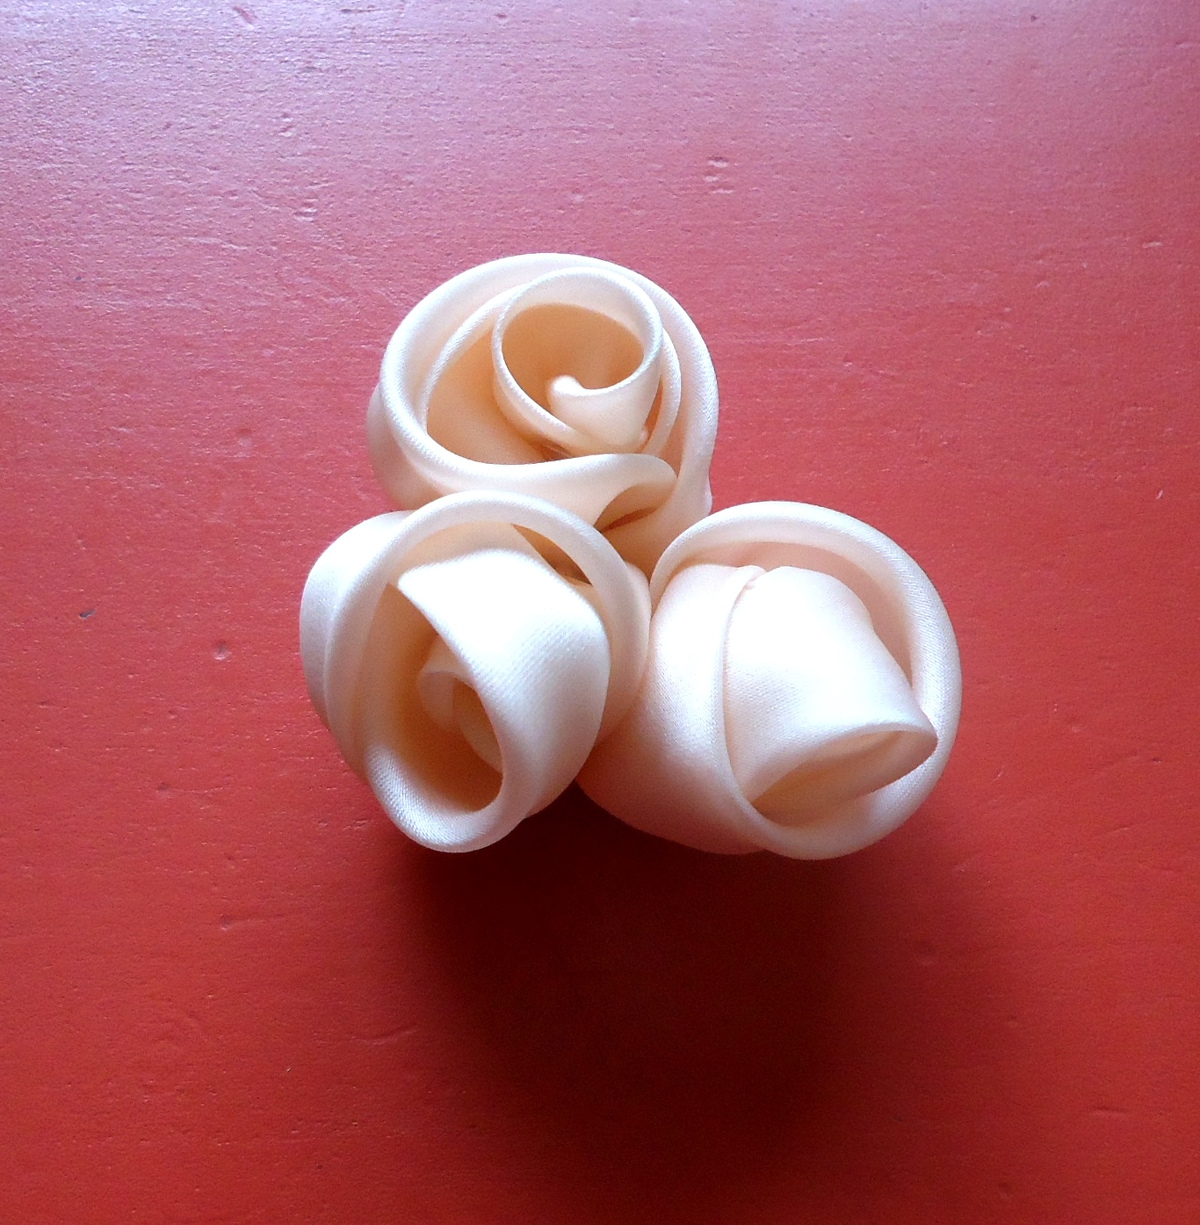
The classic Dior rose is a three petaled flower, each bud being made from three different sized pieces.
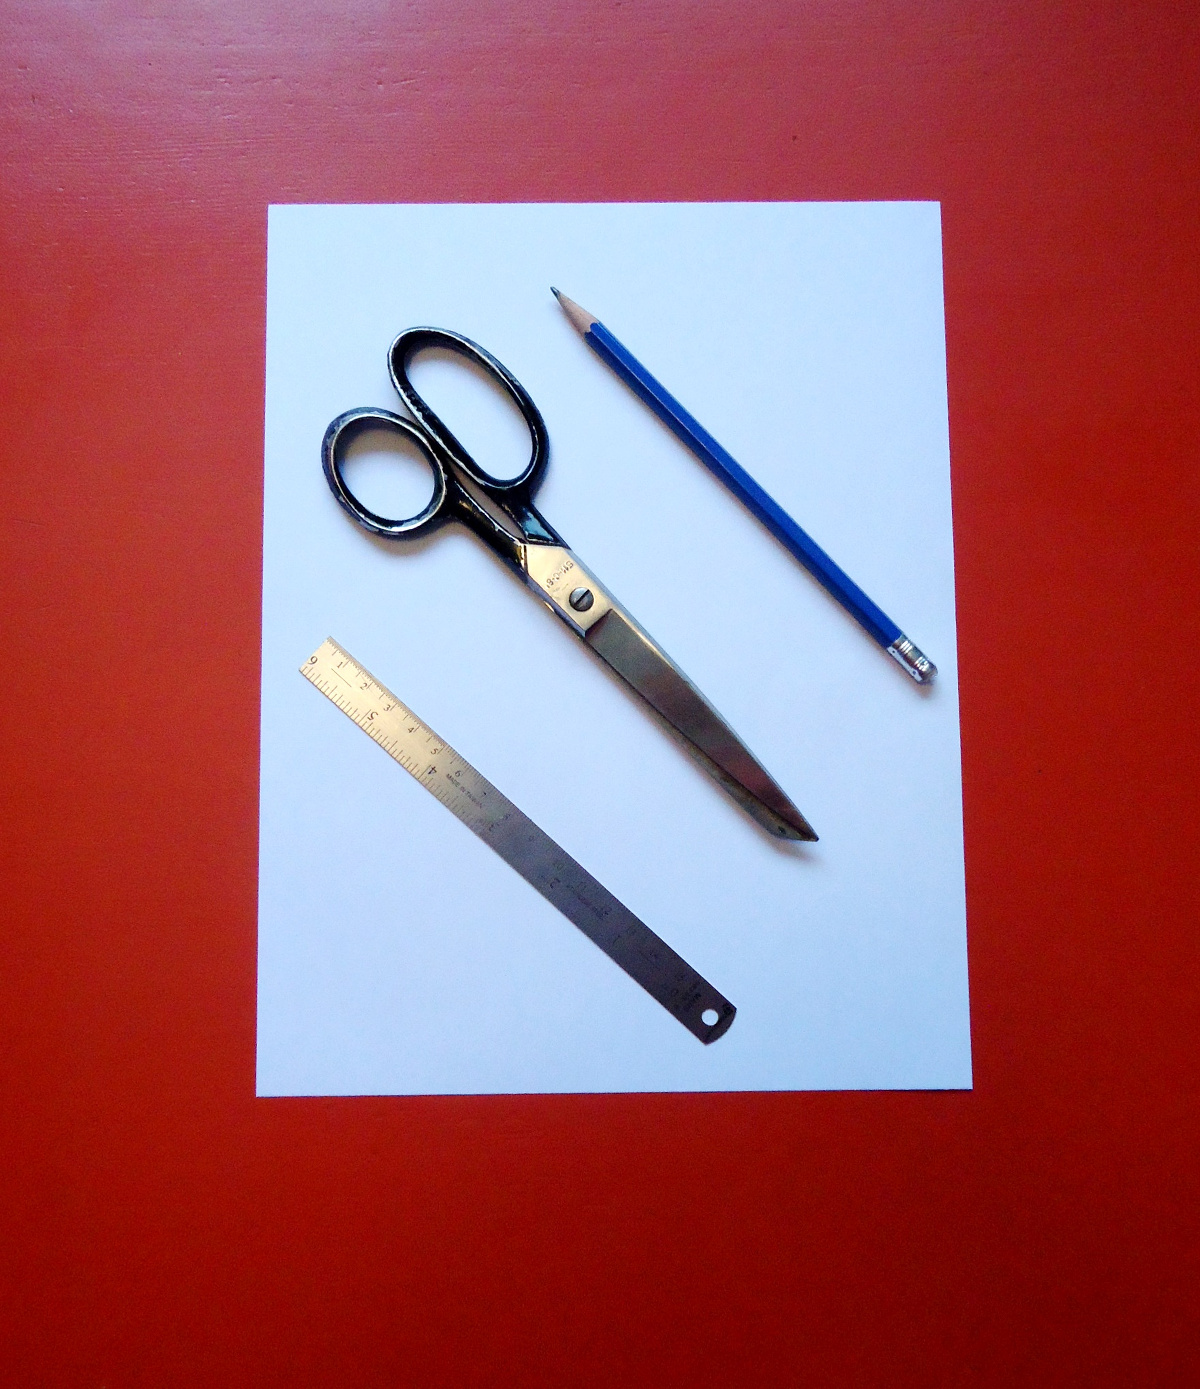
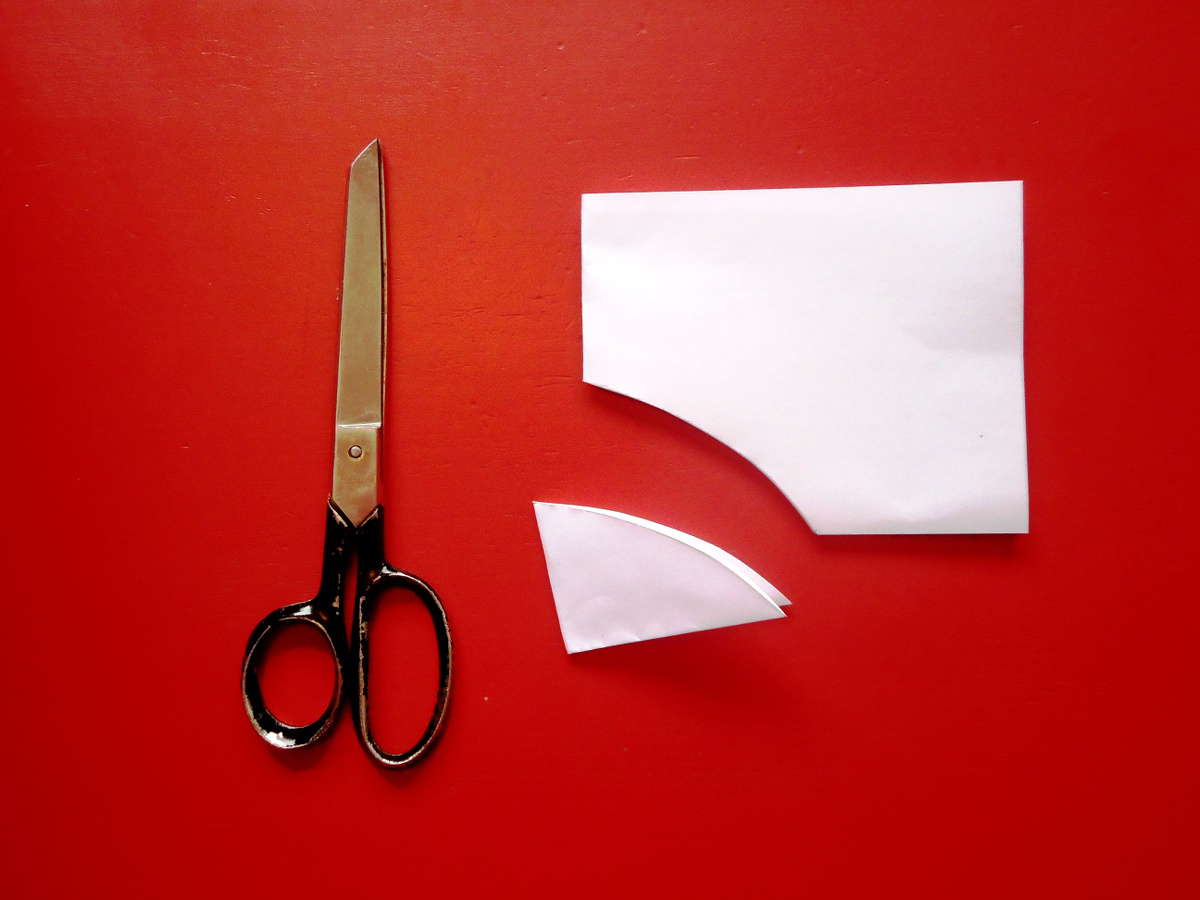
We’ll start by making templates to facilitate the cutting of the rose’s different parts. You’ll need paper or cardstock, paper scissors, a ruler and a pencil.
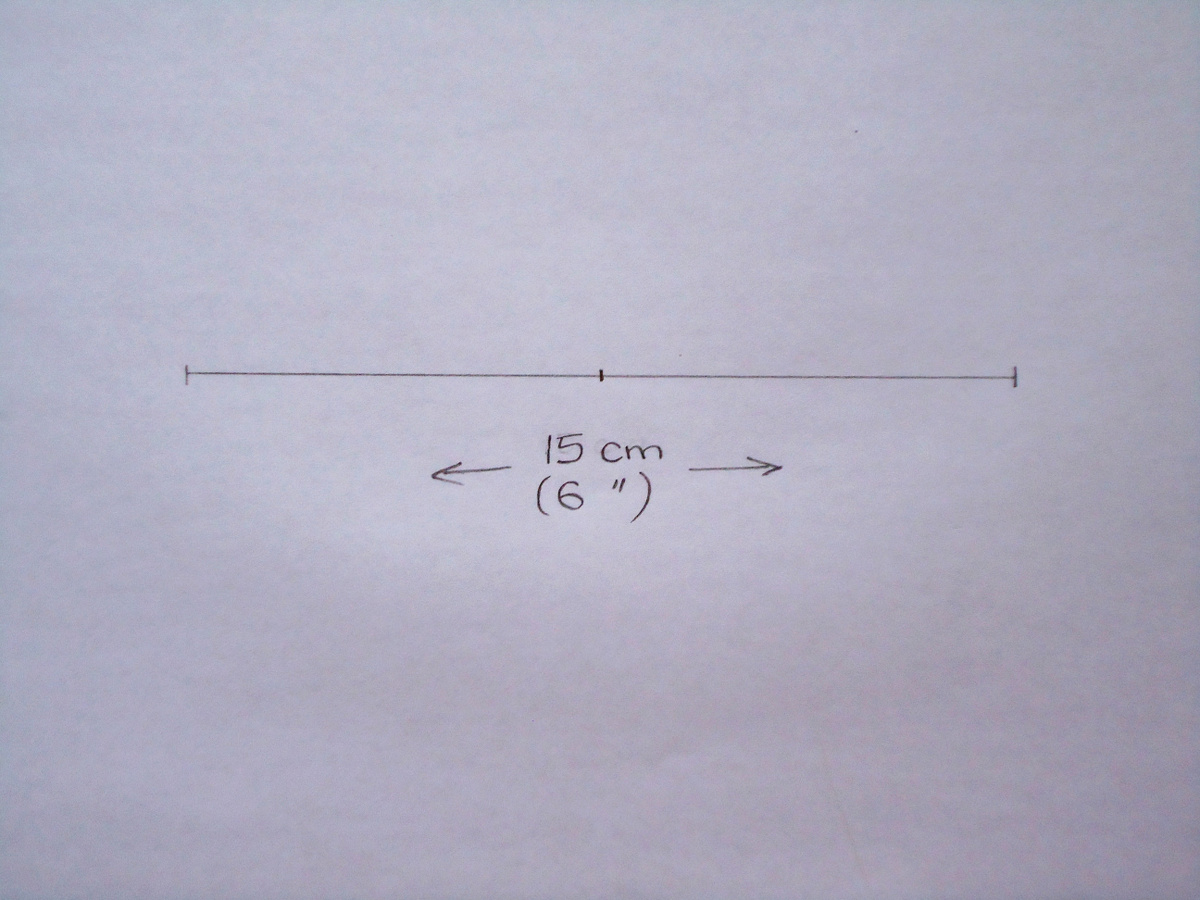
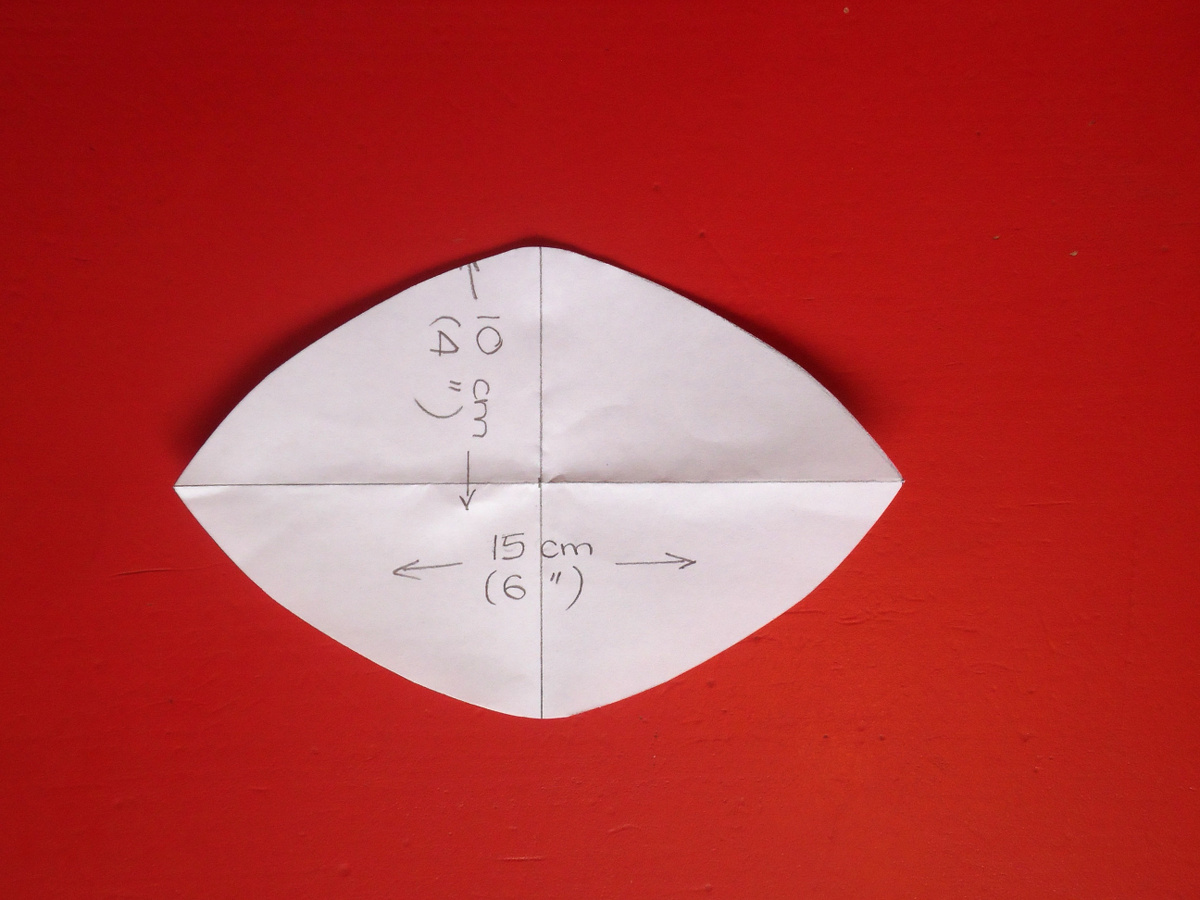
Determine what size you would like the largest part of the petal to be. Here, a 10 x 15 cm (4 x 6”) almond shape was cut out. To cut this shape, start by drawing a 15 cm (6”) line on your paper.
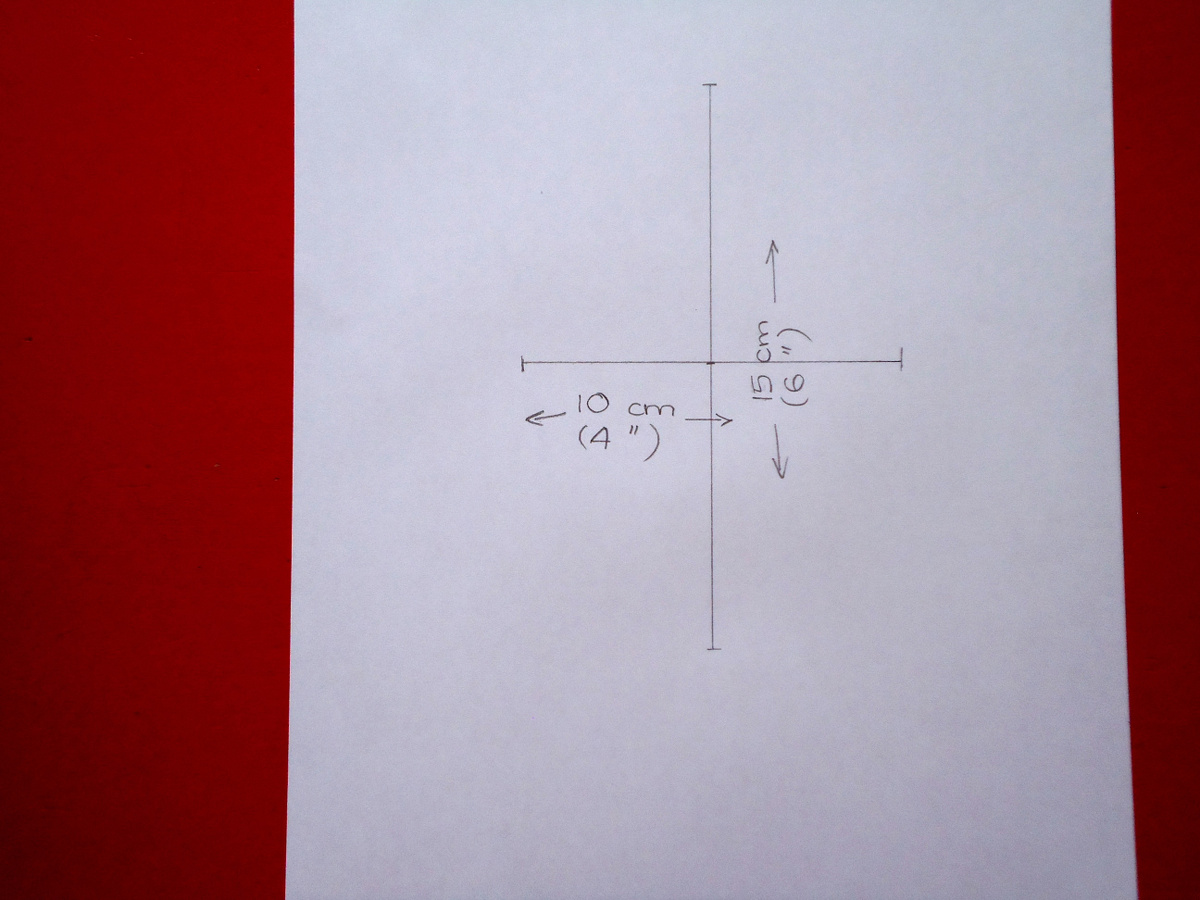
Locate the center of this line and draw a 10 cm (4”) intersecting line, balanced on either side, through the center.
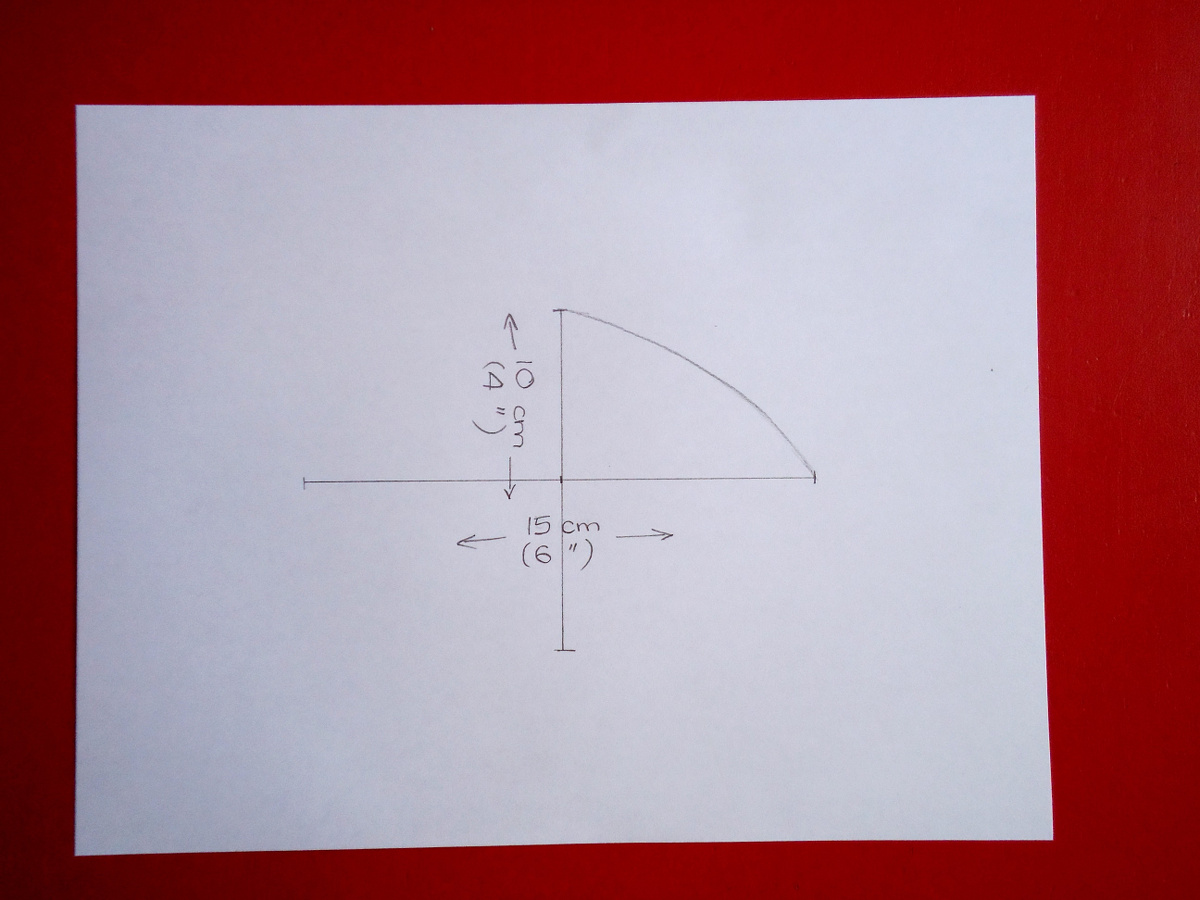
Draw a curve from one end of the 15 cm line to one end of the 10 cm line.
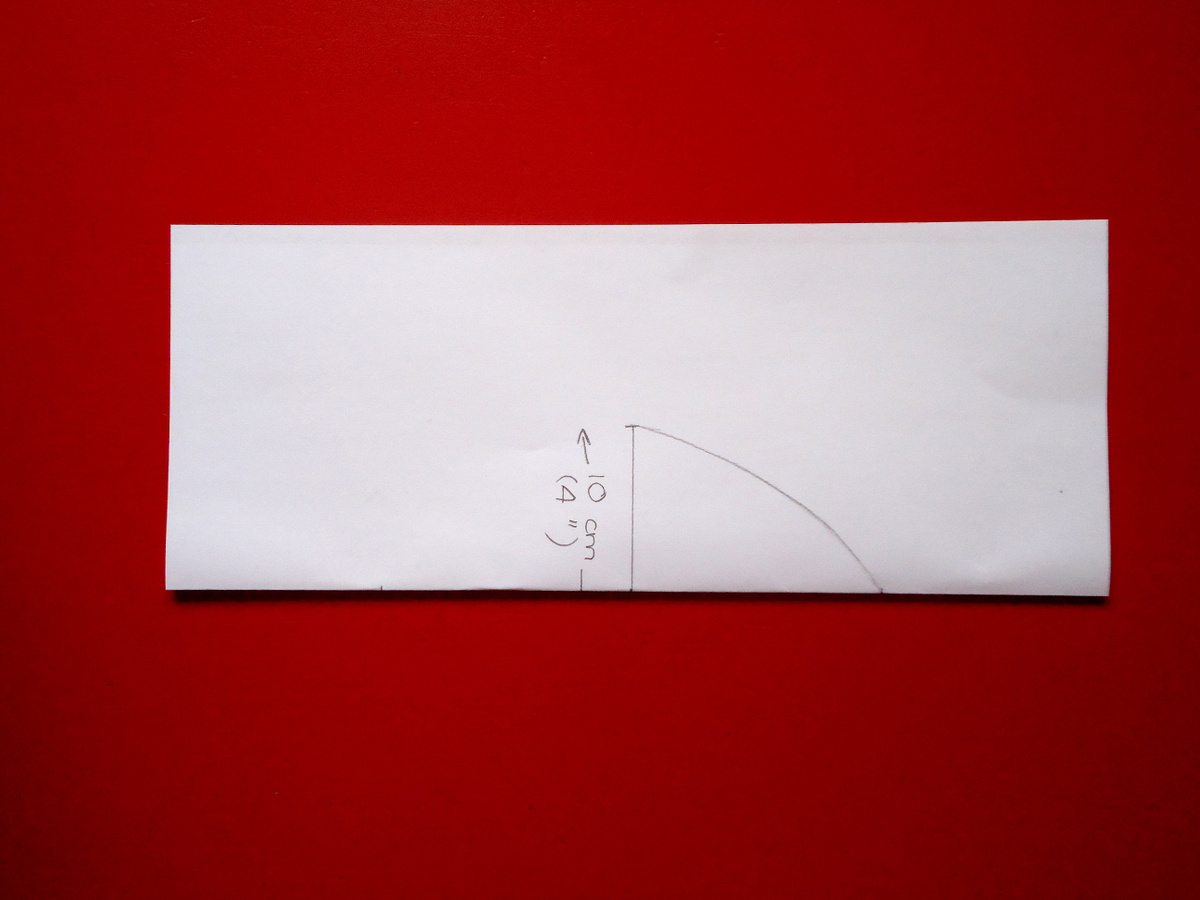
Fold the paper along the 15 cm line.
Fold the paper again along the 10 cm line.

Cut the paper along the curve.
Here is your first, large almond shape
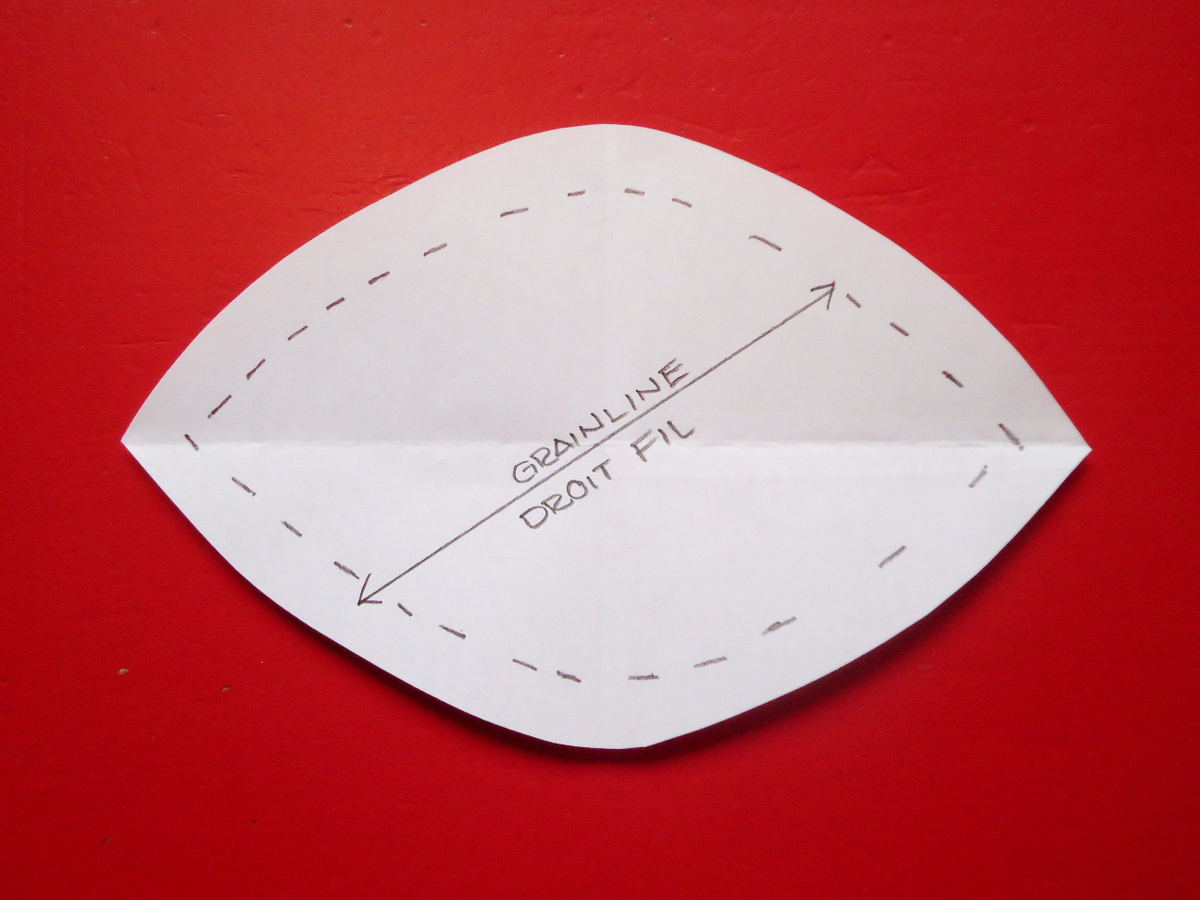
Where the two fold lines intersect on your almond shape, place the edge of your ruler diagonally and trace a line to indicate grainline.

Take your first, large almond shape and trace off its contour on another piece of paper.
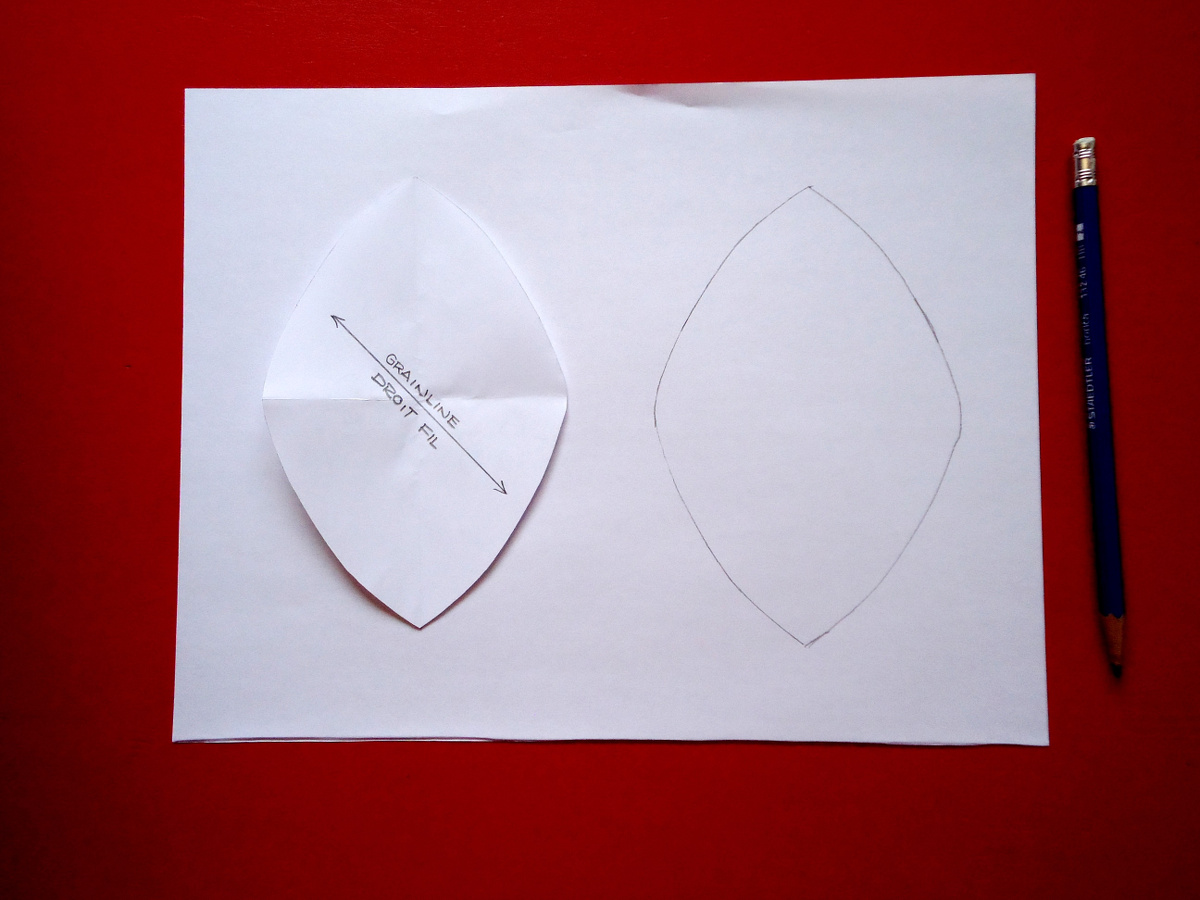
Measure and mark 1 cm (1/4”) in from the edges all around the almond shape.
Cut off the marked margin.
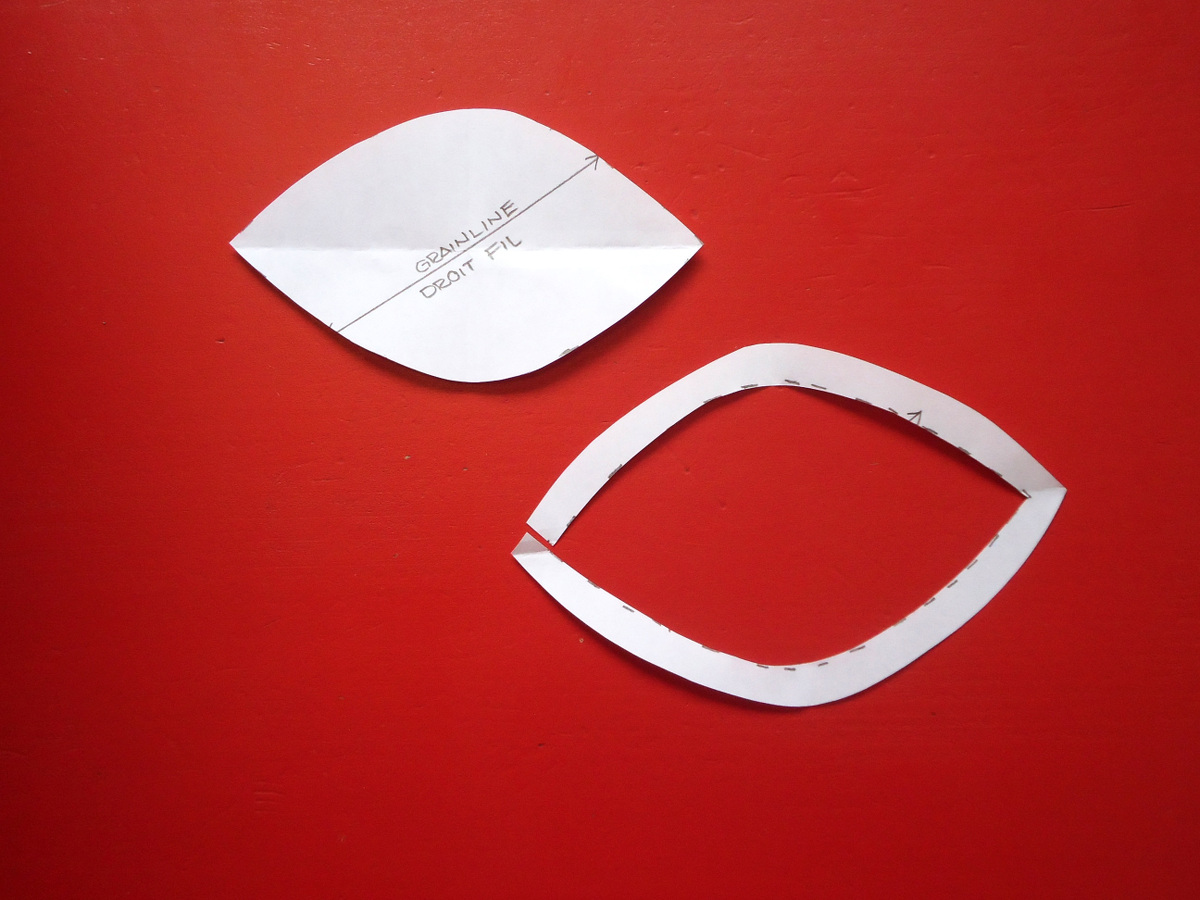
You now have two almond shapes, one large and one medium. Using the medium sized shape, repeat the last few steps to create a third, small almond shape

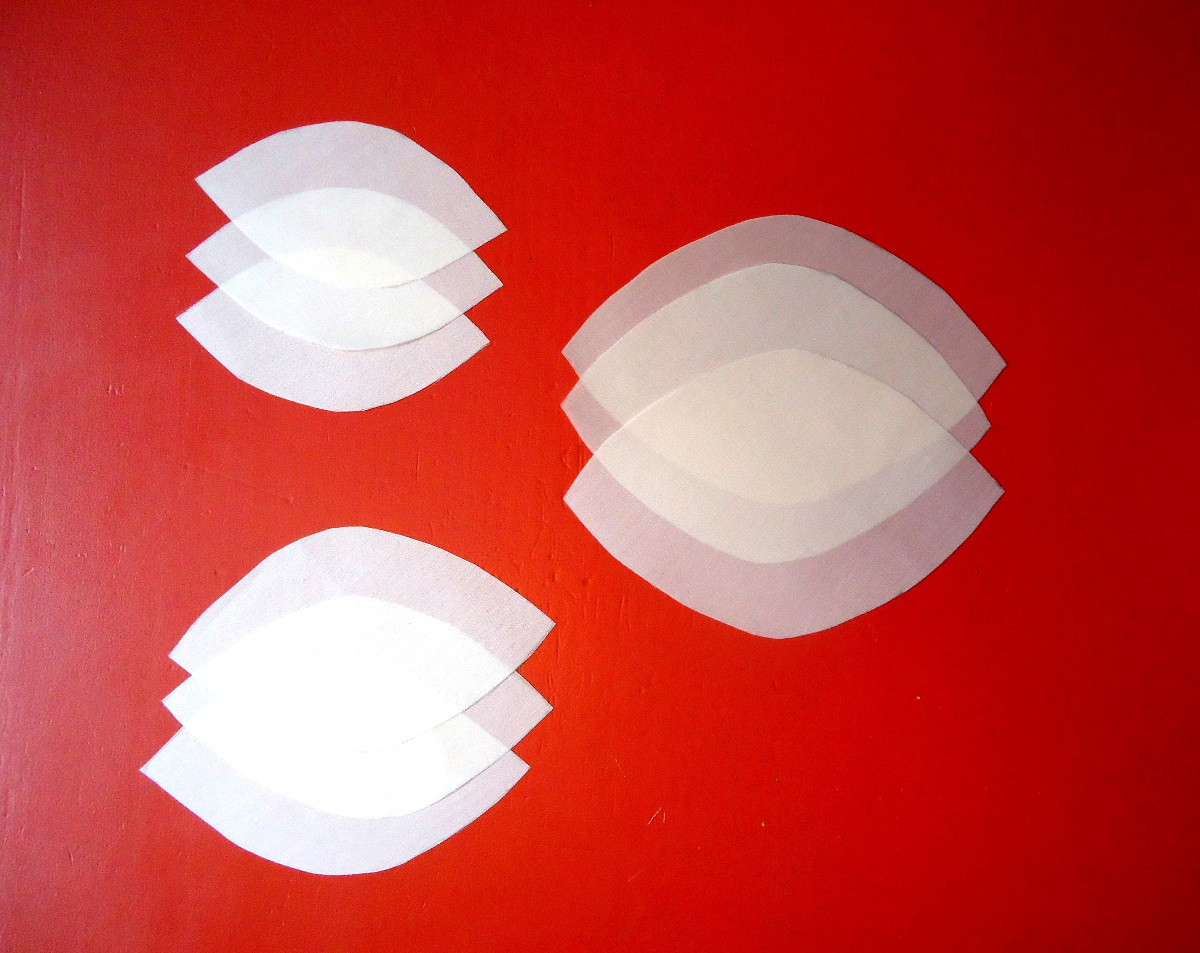
In your desired fabric (Here, I have used a double faced silk organza in a pale pink color. Double faced organza is a nice compromise between the airy quality of regular organza and the firm opaqueness of a sturdier silk), cut out three large shapes, three medium shapes and three small shapes by positioning templates on the fabric so that the grainline tracing is parallel to the fabric’s grain.
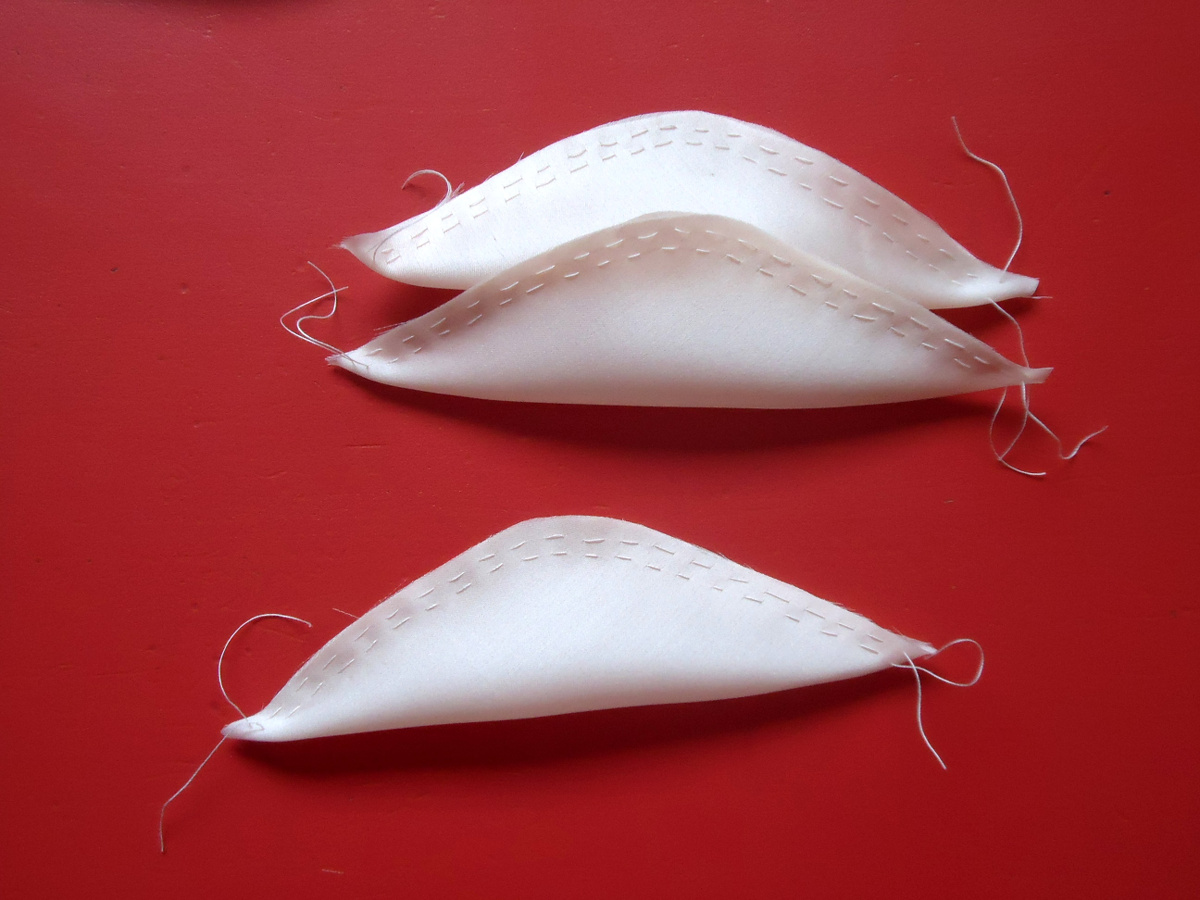
Fold each almond shape along its central line. Do not press, pinch or flatten this fold as it is imperative that the rose retain a soft ridge. Run two rows of gathering stitches by hand or machine 1 cm (1/4”) and 0.5 cm (1/8”) from the raw edge.
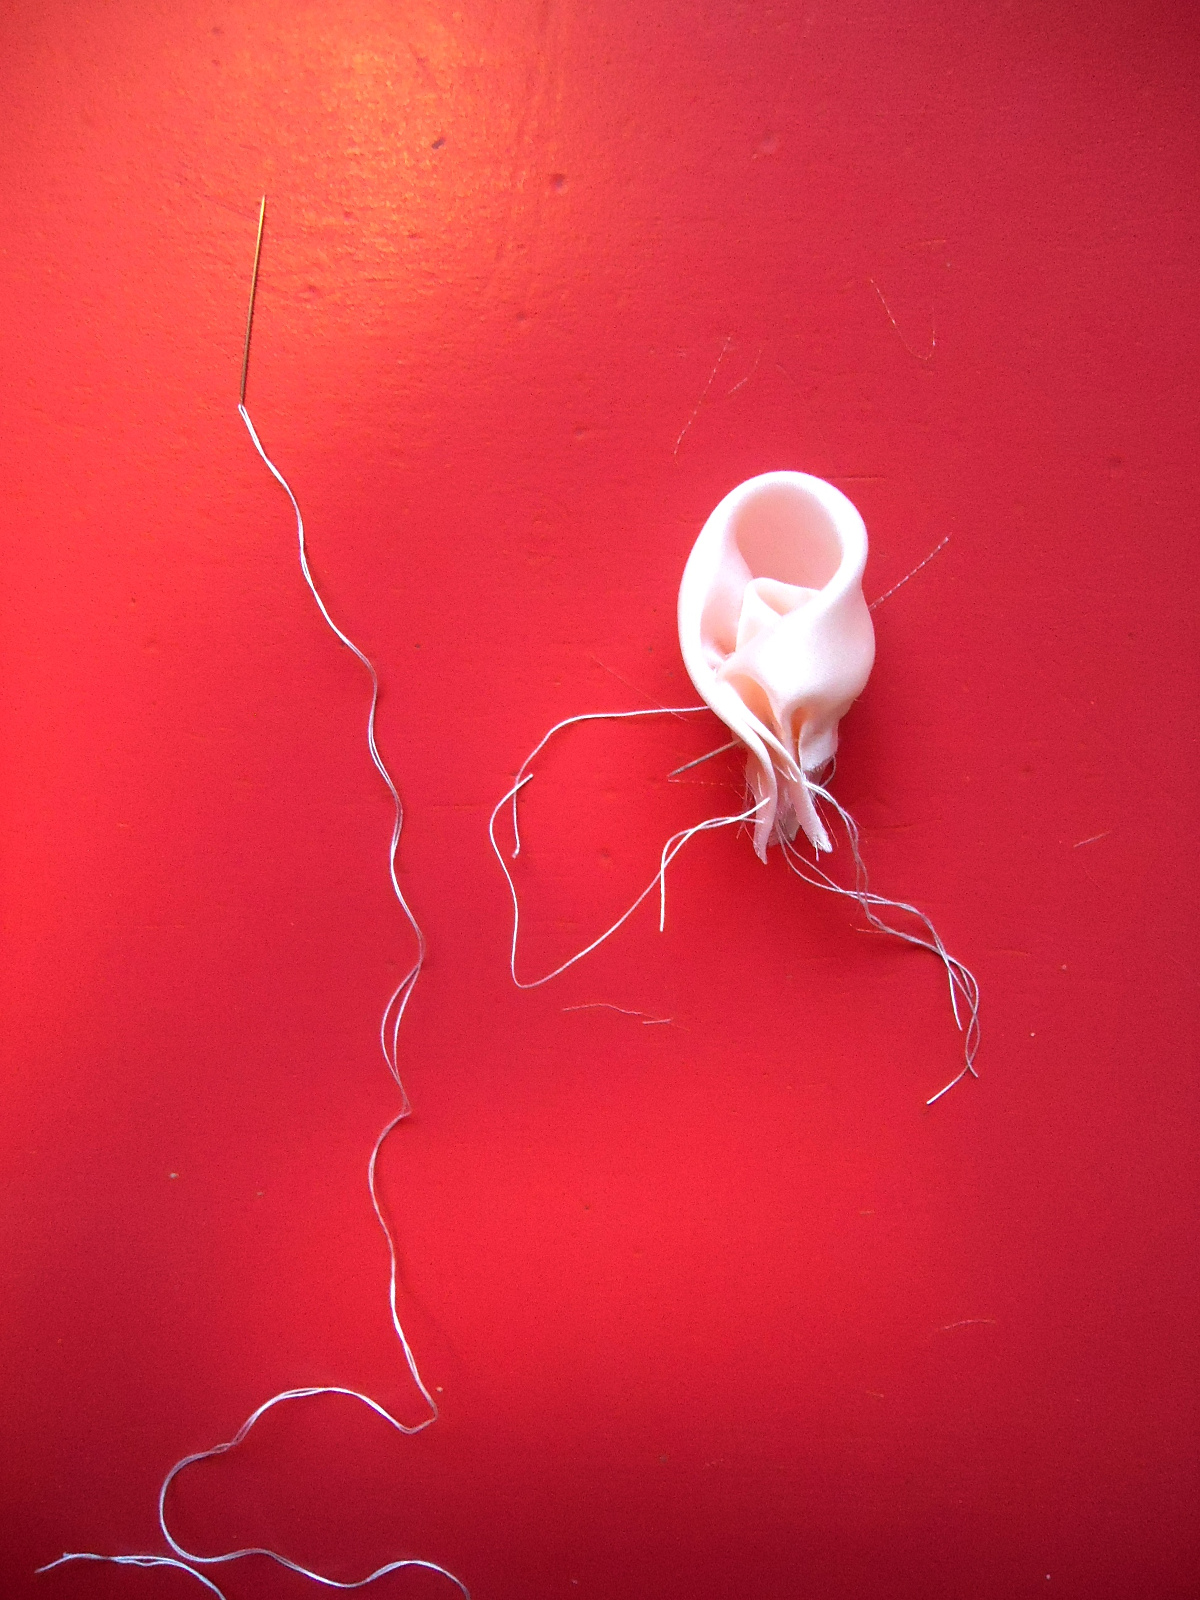
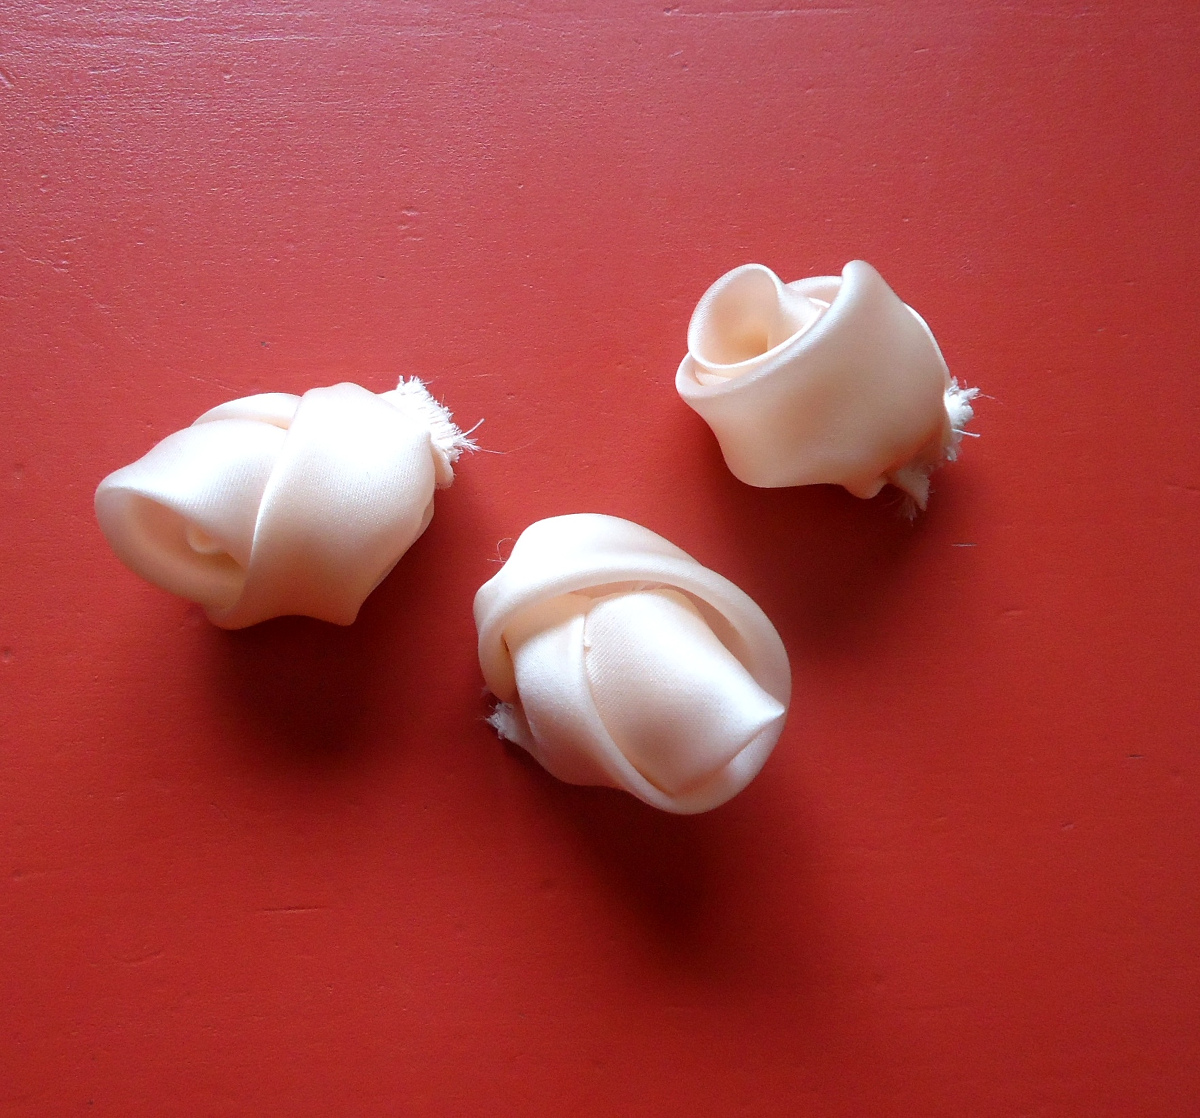
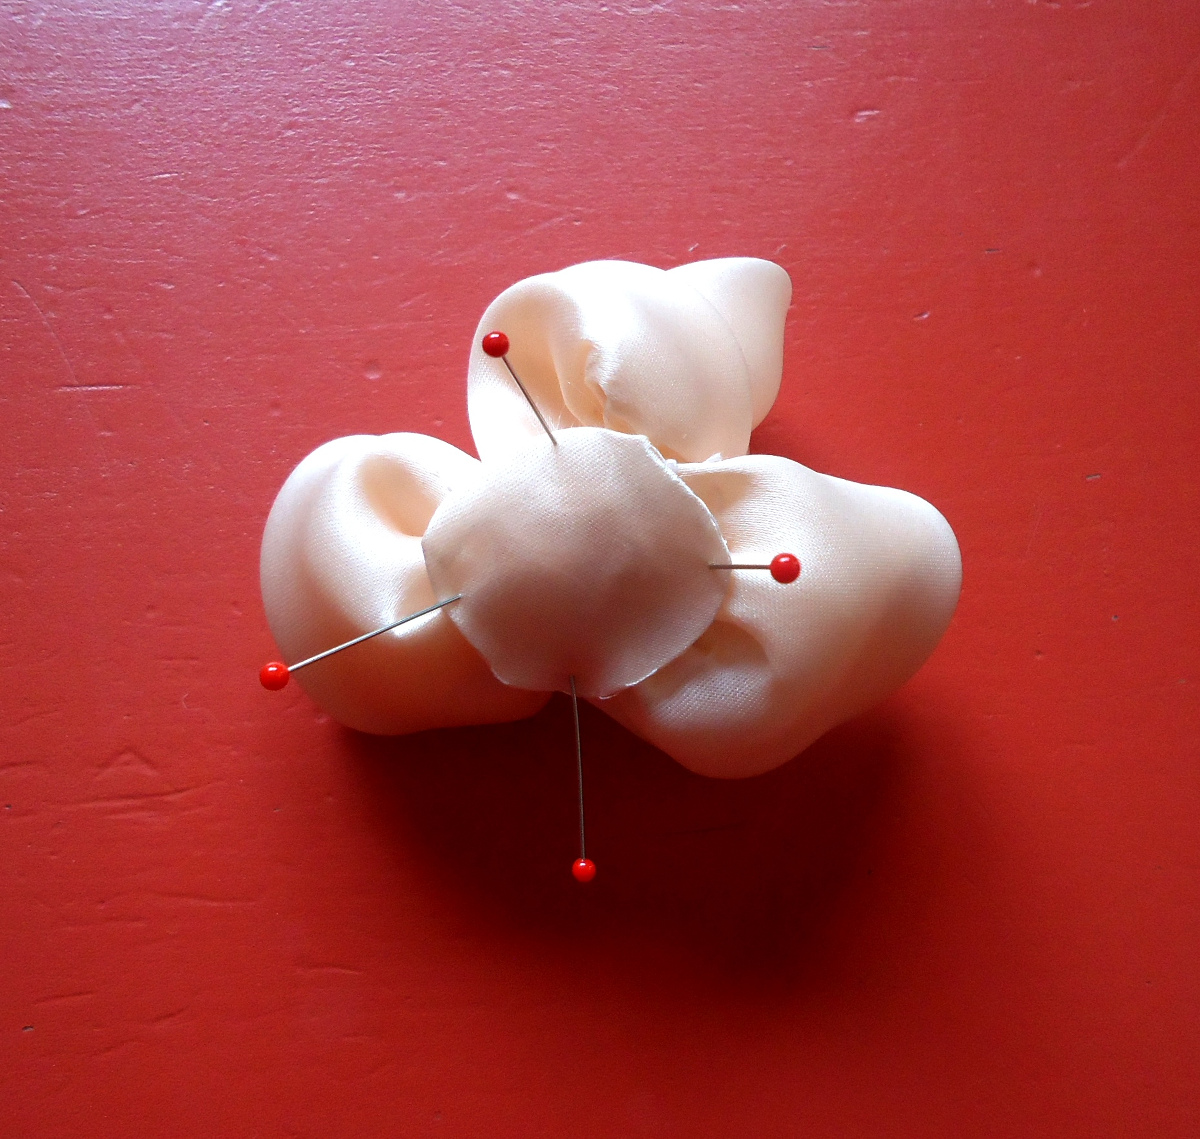
Starting with the small almond shape, pull up the tails on the gathers and gently roll the shape to create a bud.
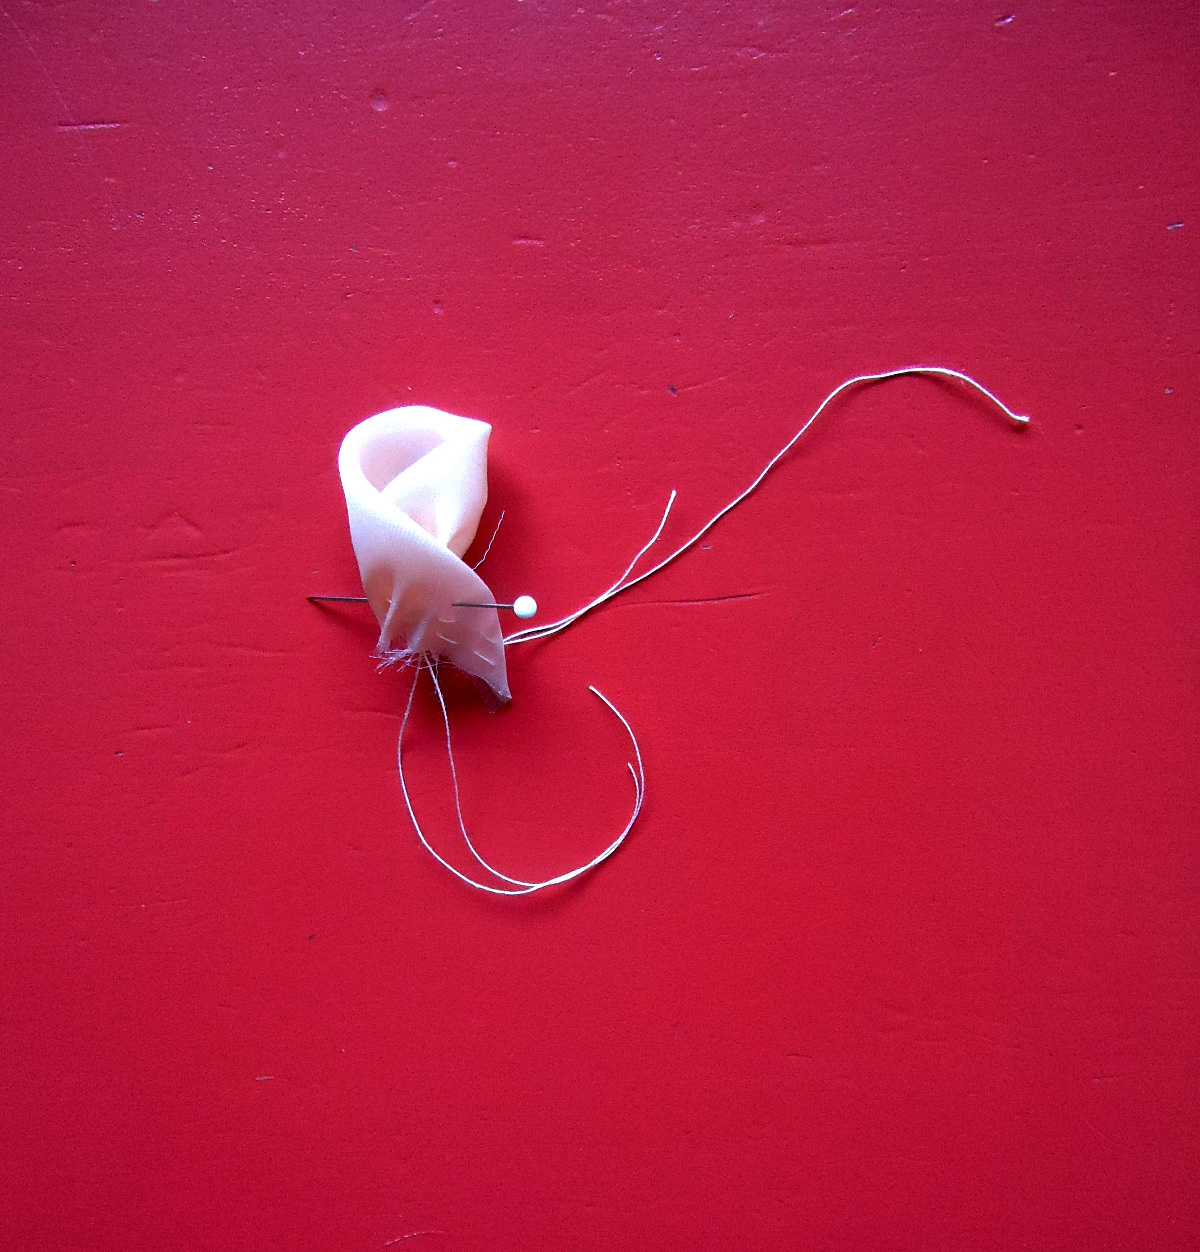
Double thread a needle with about 25 cm (10”) worth of thread and knot off. Hold the middle of the small bud and pull the gathering threads of a medium almond shape around the first bud, rolling gently to form the second bud.
Stab through the bottom of these two buds near the raw edge with your threaded needle and secure with a few stitches.
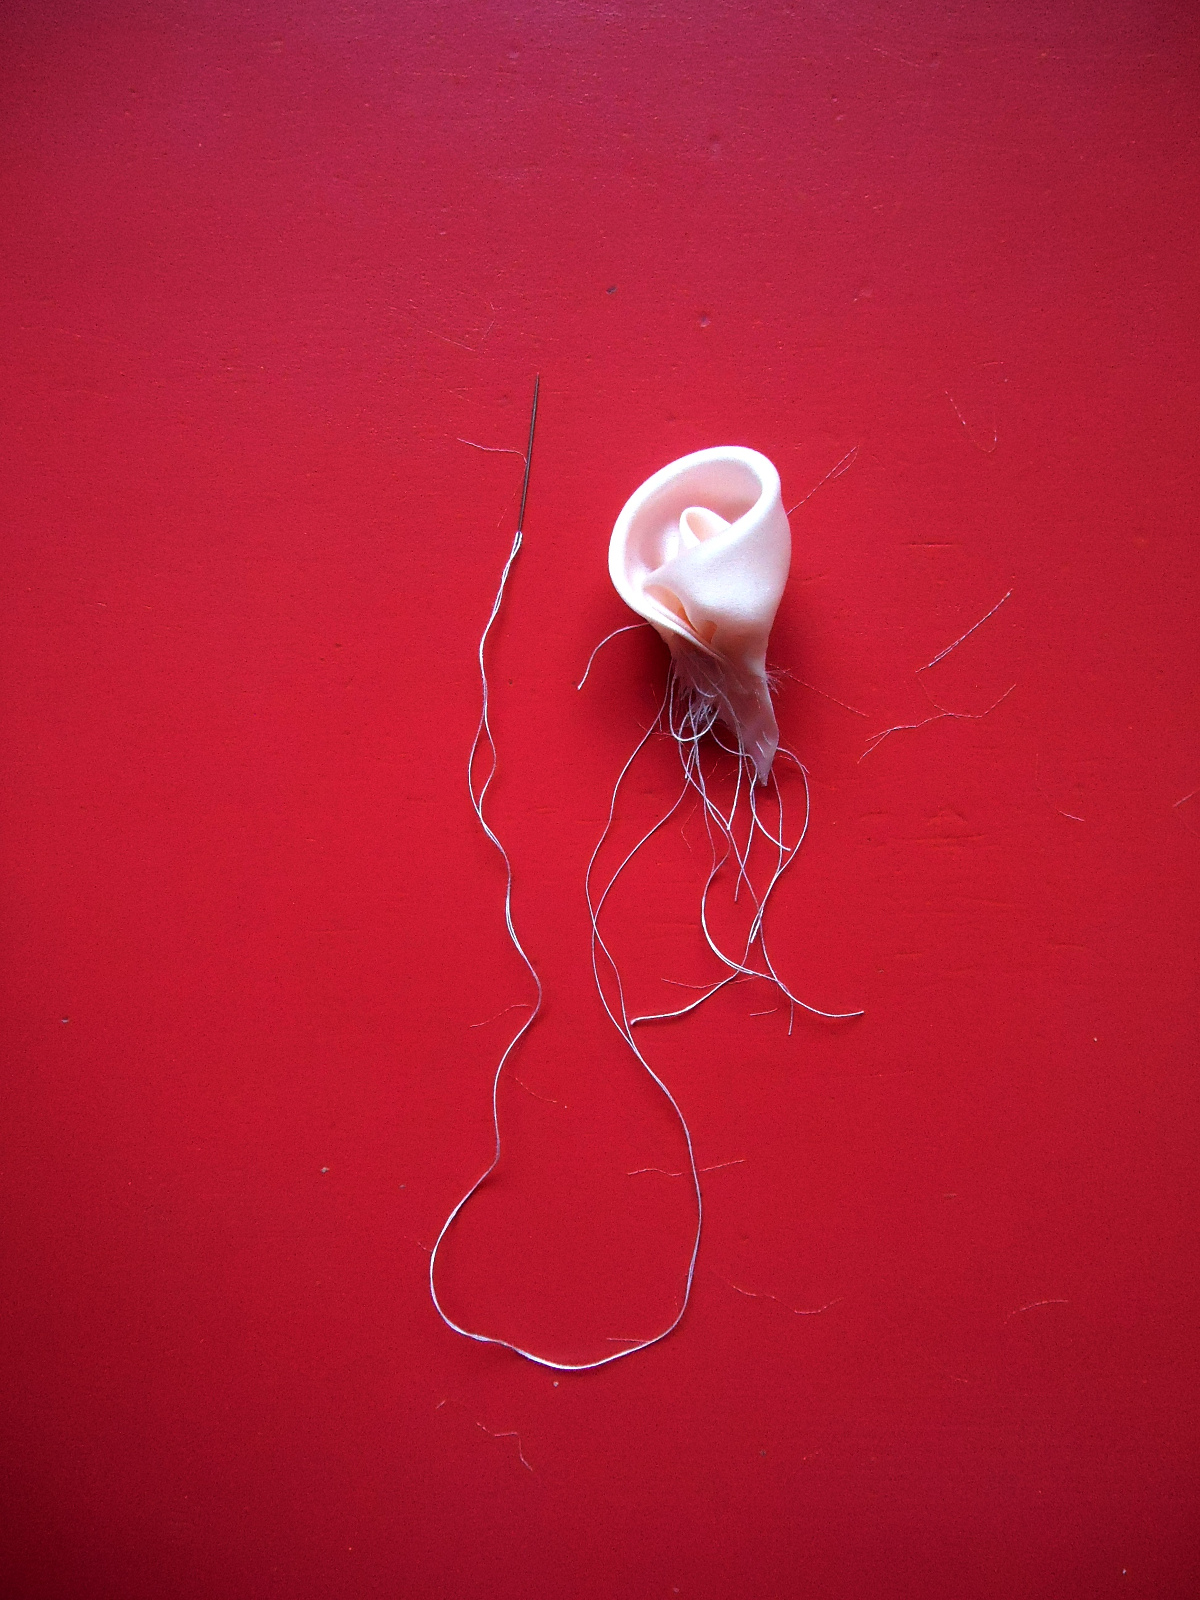
Pull the gathers on a large almond shape and place around the first two buds

Secure the largest of the almond shapes around the first two shapes with a few stab stitches.
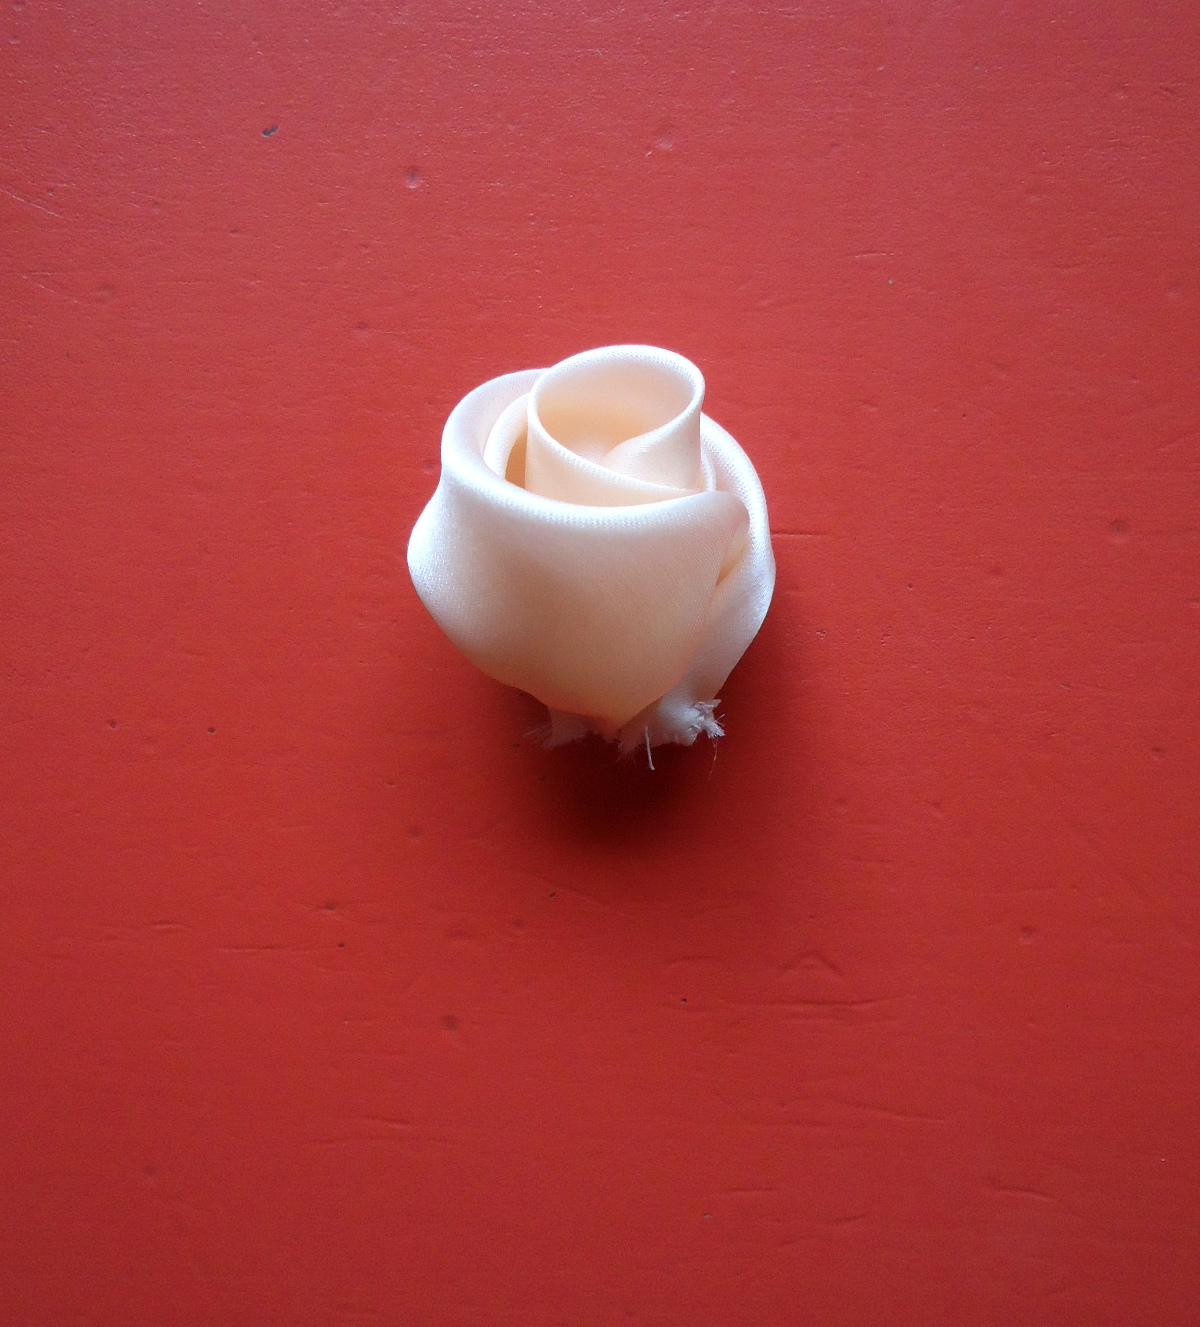
Whipstitch over the raw edges of these three overlapping buds. You now have your first petal.
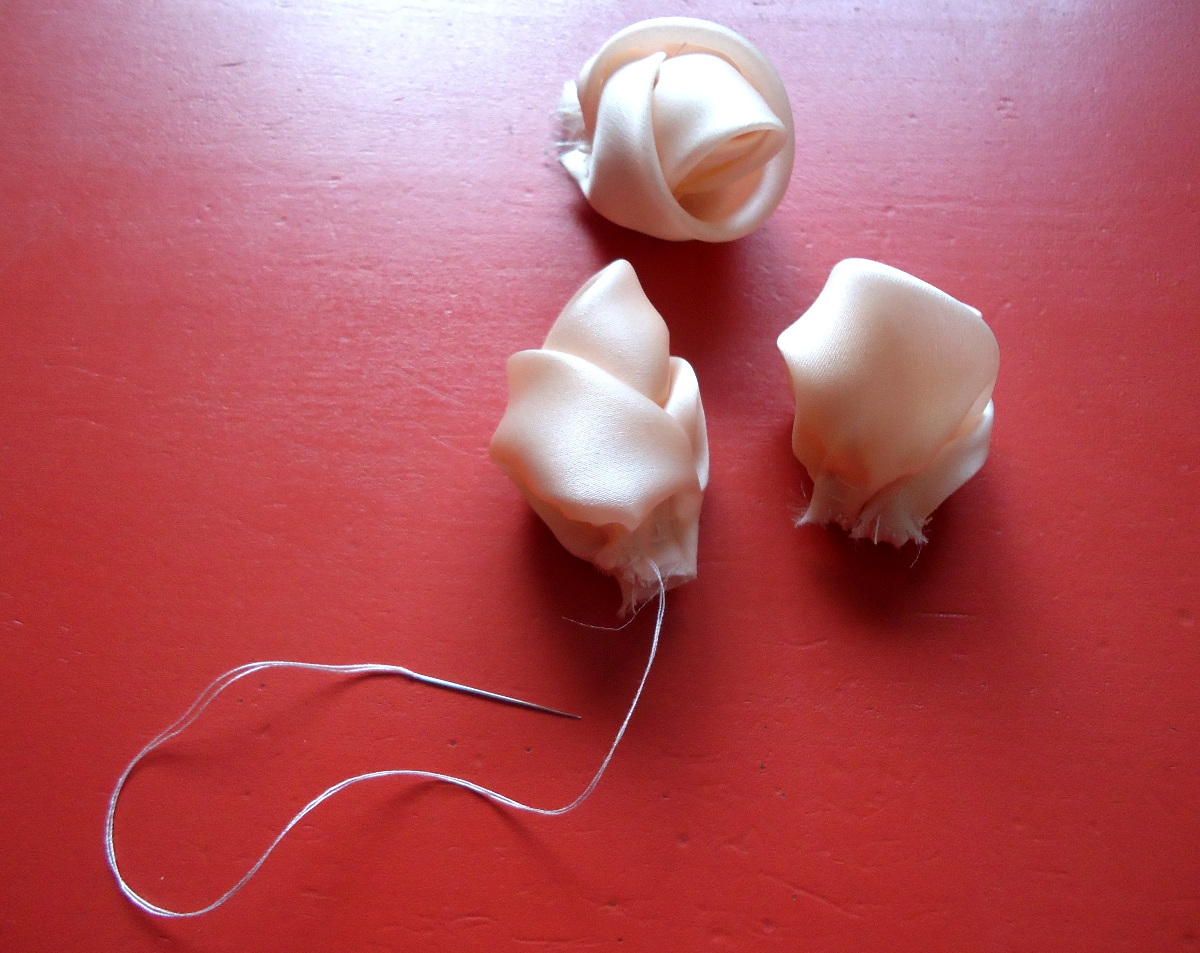
Make two more petals in the same way.
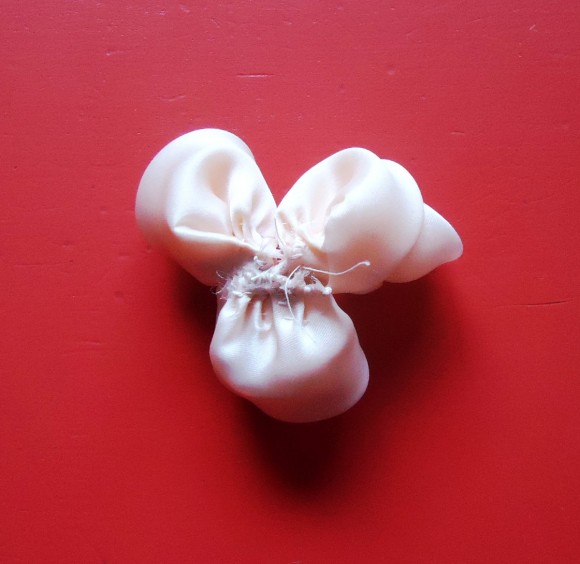
Gently spread apart and shape petals.
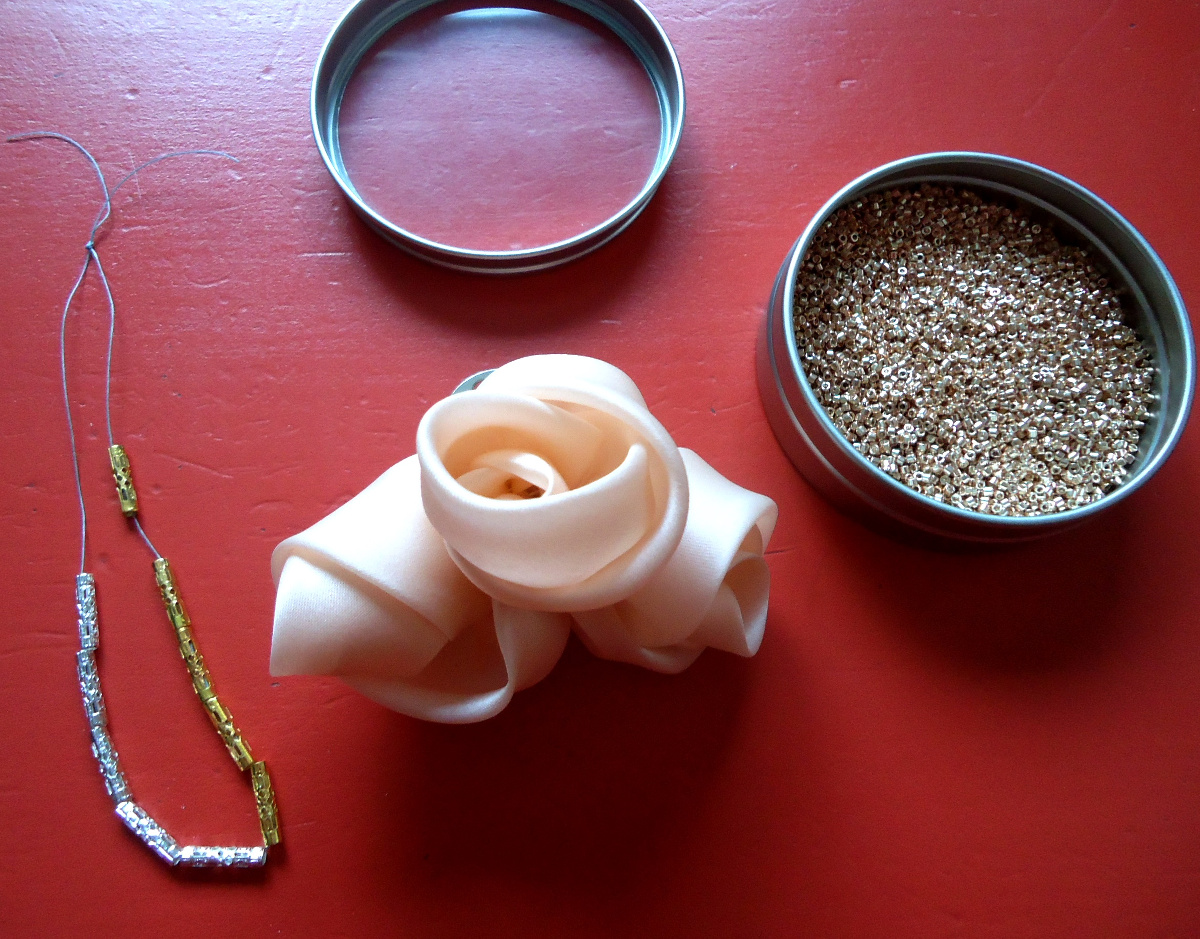
Cut out a circle of fabric to cover the raw edges at the rose’s base. Here a 5 cm (2”) circle has been cut out of the pink double silk organza. Gather the edge of the circle by hand 1 cm (1/4”) in from the edge.
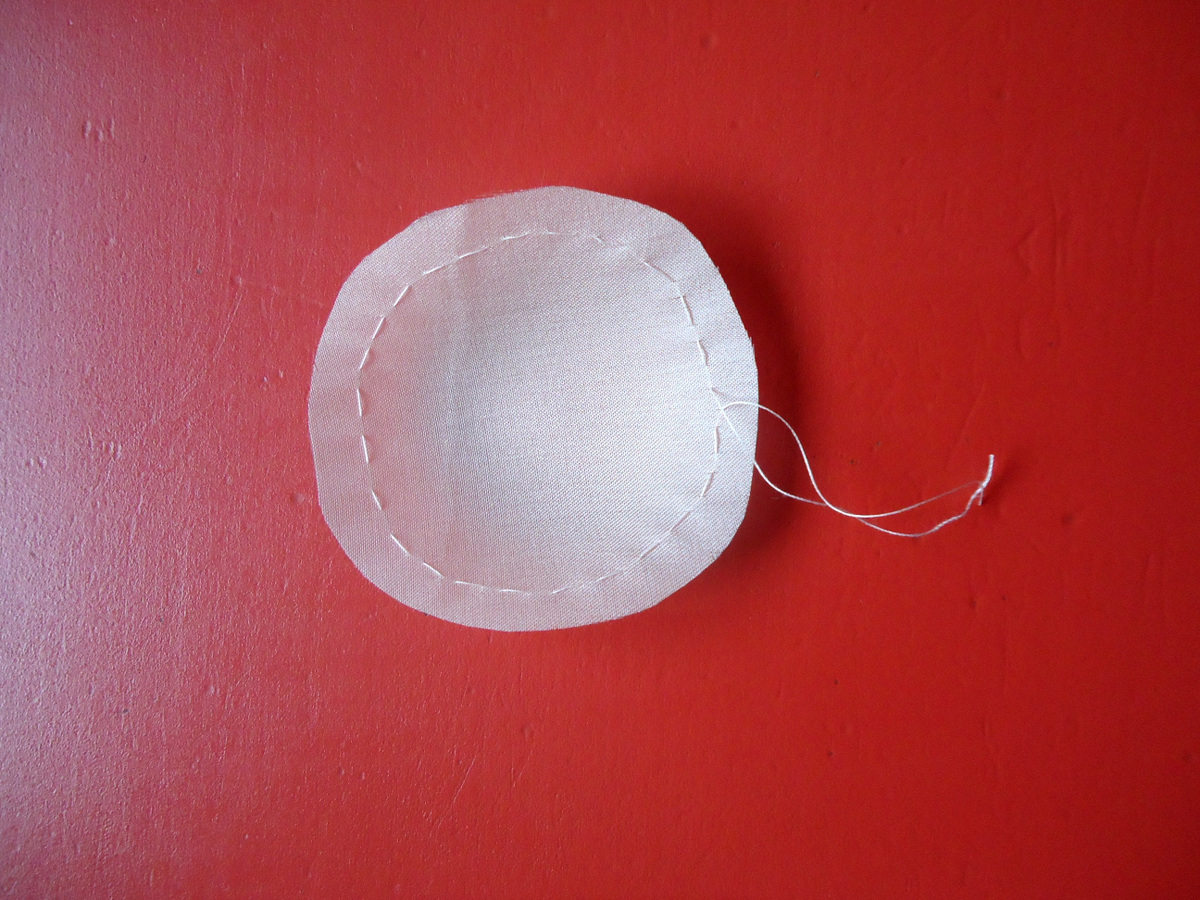

Lay the circle, raw edges to the inside against the base of the rose and slipstitch around the circle.
If desired, you can add pearls or feathers, diamante clusters, rhinestones or beads to the center or petals of the rose
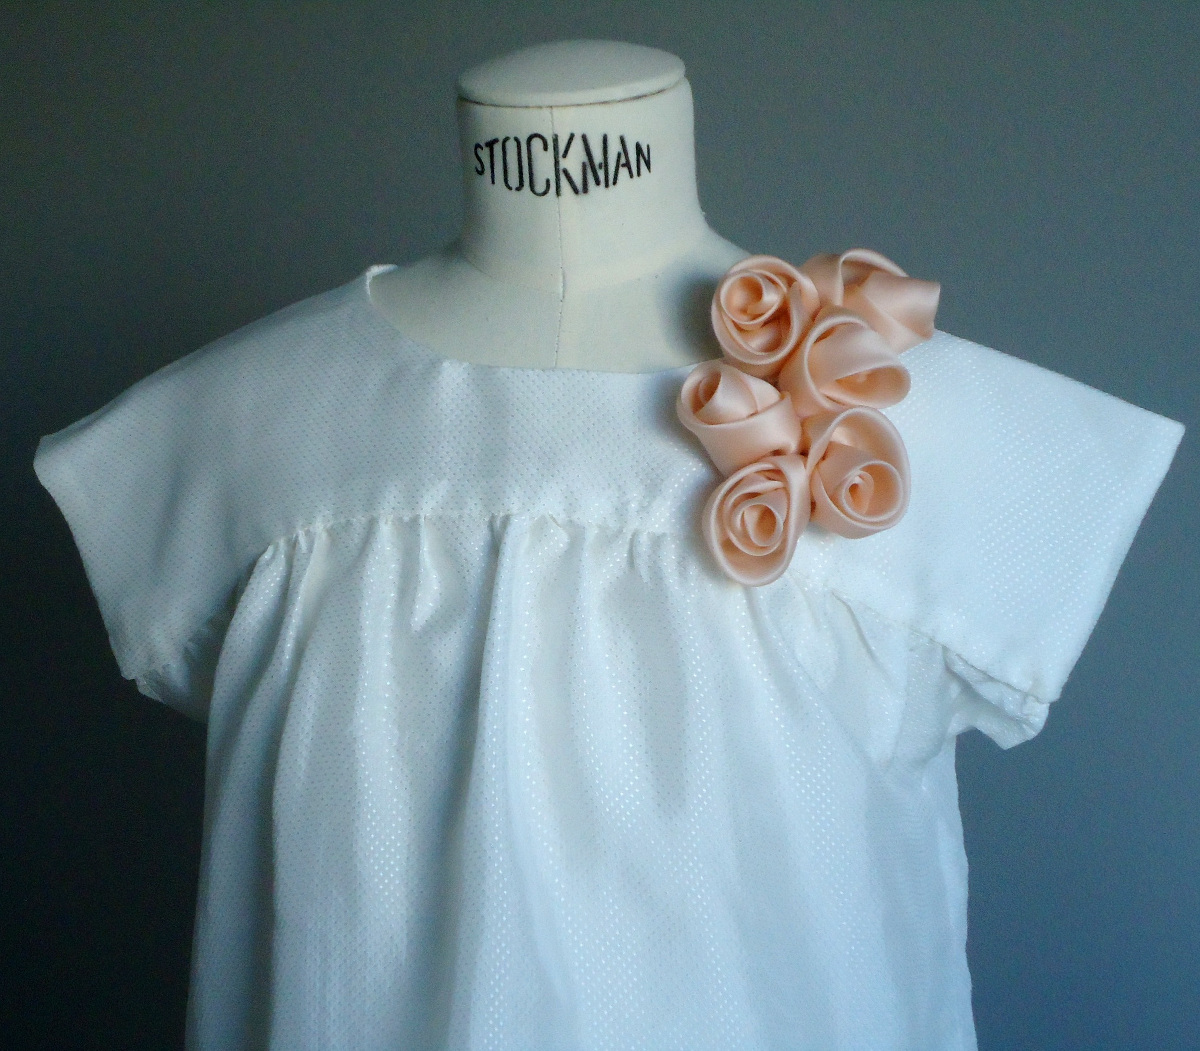
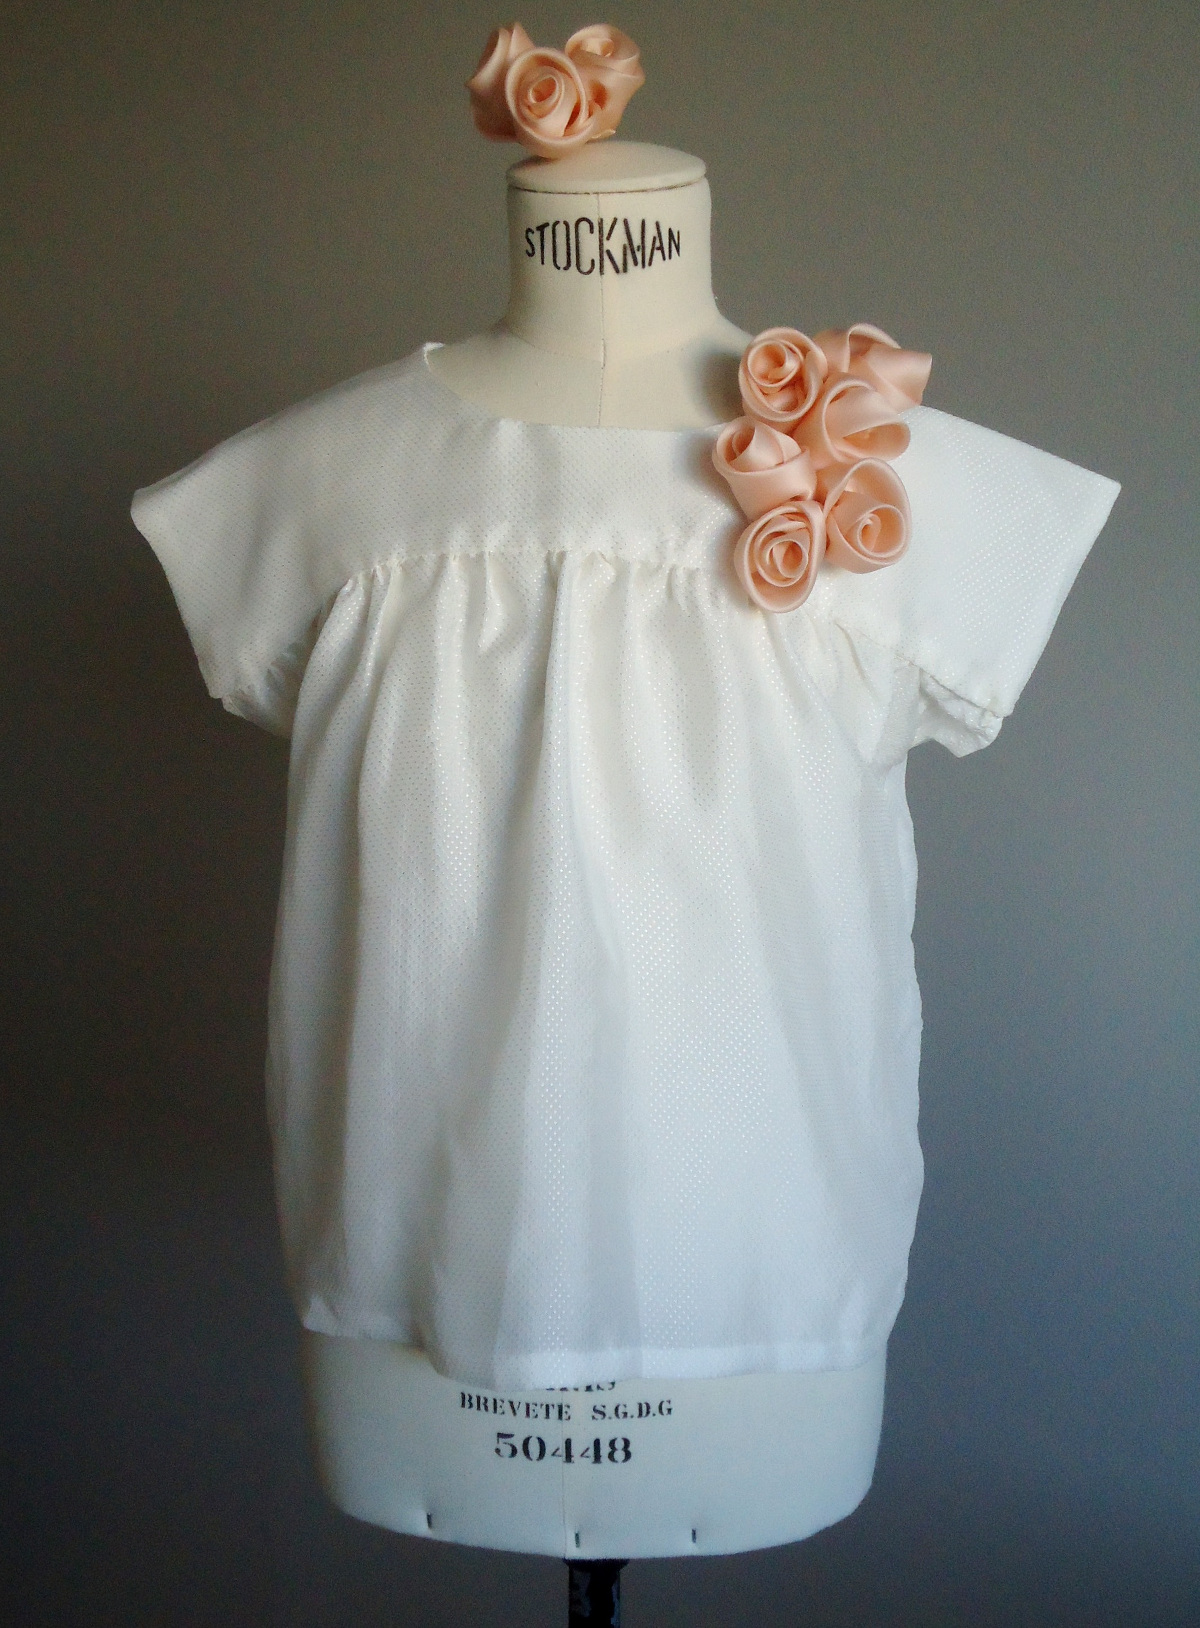
Here, a spray of roses made up of two rosebud trios and fashioned out of the pale pink double silk organza decorate the shoulder and neckline of an Ice Cream Blouse made from an off-white dotted silk. The impressionist roses lend the plain and polished top a touch of that sweet Miss Dior spirit. A third rosebud trio has been sewn onto a hair clip to be worn as an accessory with the blouse
If you enjoyed this blog post, why not sign up for our newsletter? It’s free, and you can opt to have new blog posts sent to you by email too!
Brilliant, fascinating and inspiring post. Thank you.
Wow- these are gorgeous! Thank you for sharing this great tutorial.
Lovely.
Completely stunning. I really, really hope this is not the last we’ll see of you here, Marie-Michelle!
Thank you, this is a wonderful tutorial and fascinating post!
Thank you for this tutorial! I love handwork and making a garment really special. I can see many applications for these!
Lovely! Very well presented and such a pretty addition to the blouse.
So pretty. Thank you for another post that is so inspiring!
I love it when tutorial photos are as beautiful and detailed as the finished item to be made. I loved this, thank you.
Thank you for this clear tutorial. The finished roses are delightful and something I will definitely try!
Oh my, these are beautiful! Thank you for the inspiration and tutorial.
very pretty! my daughter’s middle name is Rose so I envision quite a few of these for her.
what a wonderful tutorial. I don’t know how I missed it. So beautiful presented and written – “a firm, unflinching rose” – oooh, yes….
Спасибо,очень красиво и понятно
This post and tutorial are the epitome of what I believe Mr. Dior would have approved of and loved that someone took such care in relaying to the public something that was very precious and loved by himself! Thank you for sharing and I am honored to now try my hand at this exquisite flower! Like the others…I do hope we see more from you. Amanda
So detailed! thanks alot for the tutorial. more of it,please.
Indeed, these are fascinating! I so appreciate the care you took in preparing and presenting this tutorial. I wonder, how do you keep the roses intact when walking the garment? Thank you!
Ahem, washing, not walking!
Lizzie, you might want to contact Marie-Michelle with your question. But it might be best to affix the roses to a pin and pin them onto garments? Like she did with the hair clip. Just an idea…
Thank you for the tutorial, it was what I was looking for . Question,how would you attach a pin to it?
Bridget, brooch pins are quite easy to find: https://www.etsy.com/listing/122629470/10-brooch-pins-with-roll-safety-clasp and can be attached to the back with a bit of hand sewing. I hope that helps.
Thank you for such a lovely tutorial. I really enjoyed reading it, something I am not really good at and at most generally just skim over. Really makes one want to make these beautiful roses just to do justice to your tutorial.
Lovely; thank you for sharing!
I tried it! Thank you VERY much! Lovely and wonderful!
Thank you for this very detailed and perfect tutorial. With Mother’s Day coming I will try and make my mom a corsage with these elegant flowers. Please let me know if you have more tutorials to share with us . Thank you .
Adorei,segredo de como fazer uma rosa Dior …fácil,depois q vs contaram como!adoro bordado de alta costura e estudo tudo q descubro pela web,Todas minhas blusas são com bordados,flores de fita,contas,até as camisolas!uso uma lente para ver detalhes nas fotos.Obrigada por esta dica,abraços Sônia Dodl,Brasil
Merci,Sônia.
Thanks,Sônia.
Thanks a lot for this tutorial so complete and with pictures really good…
Beautiful!!! What material used for this gorgeous flowers?
un immense merci pour ce partage
Es un placer ver, admirar y elaborar éstas hermosas flores de el Gran Dior.
Gracias por compartirlo con nosotras