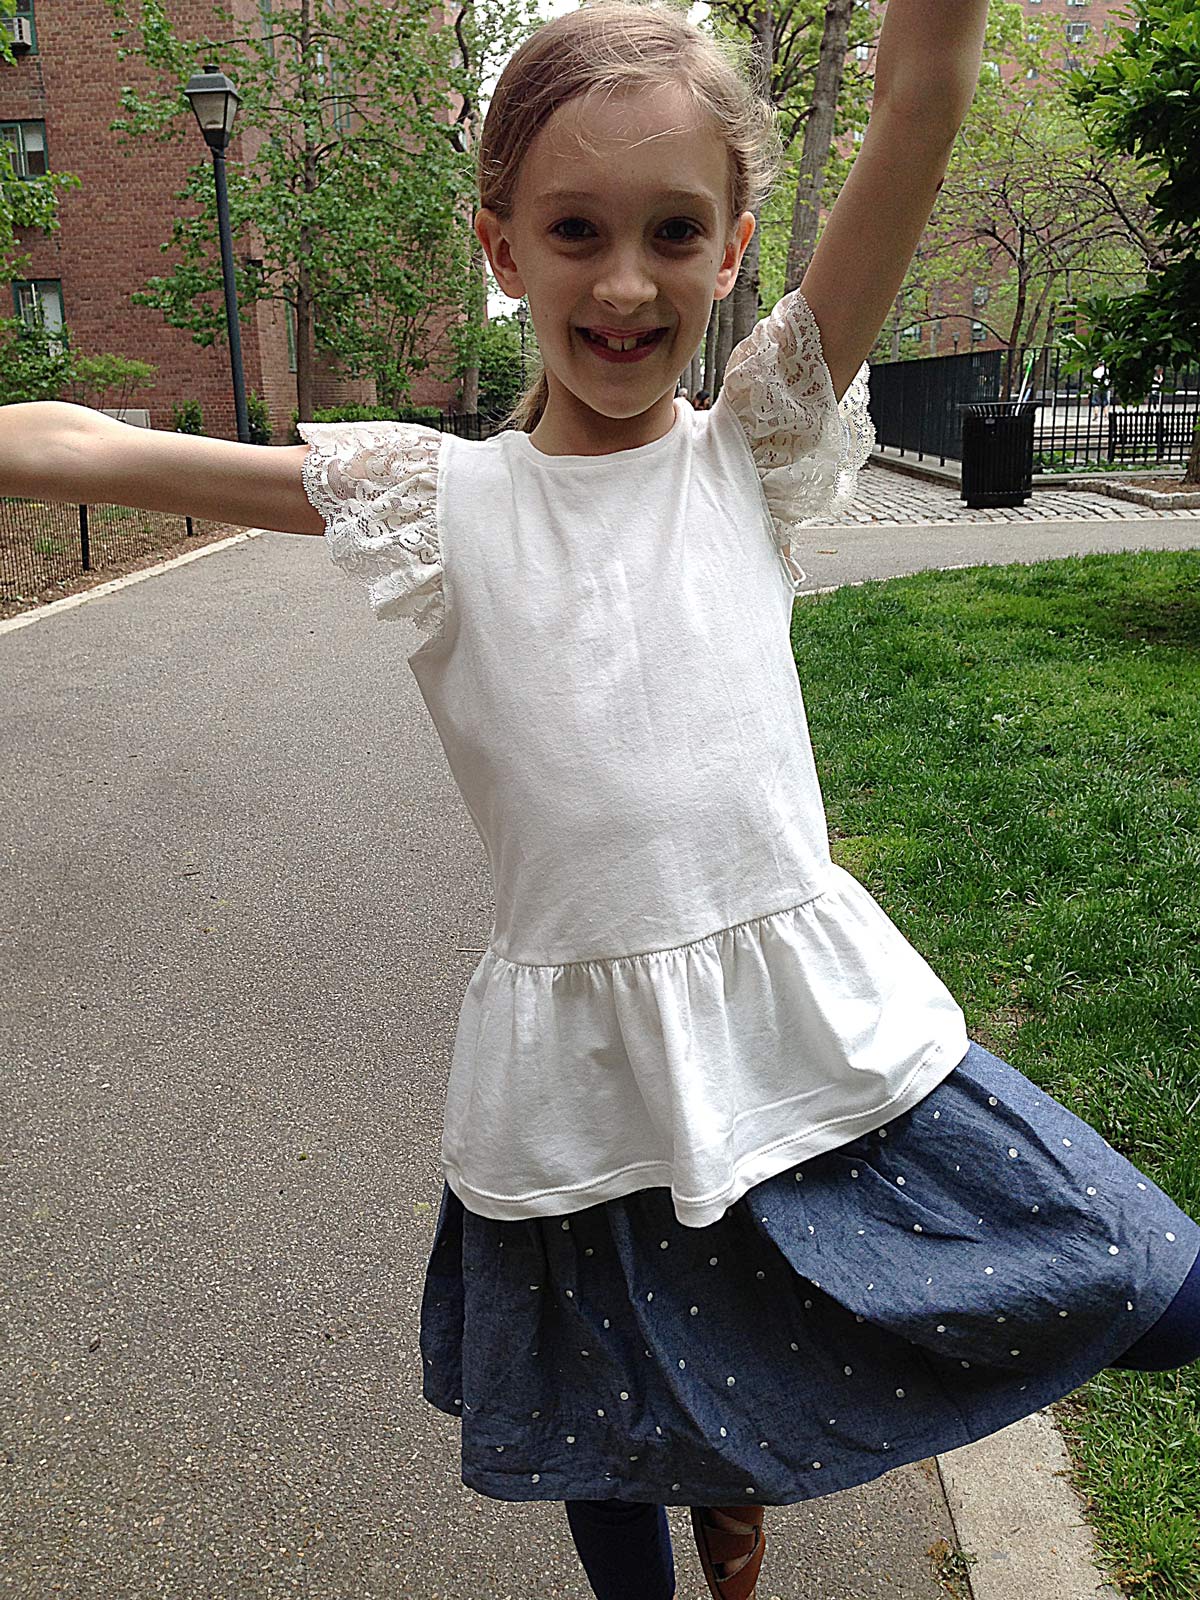
Remember a few weeks ago when I listed all those different ideas for customizing the School Bus T-Shirt? Here’s another one: the lace flutter sleeve. I’ve also included a tutorial so you can do it yourself.
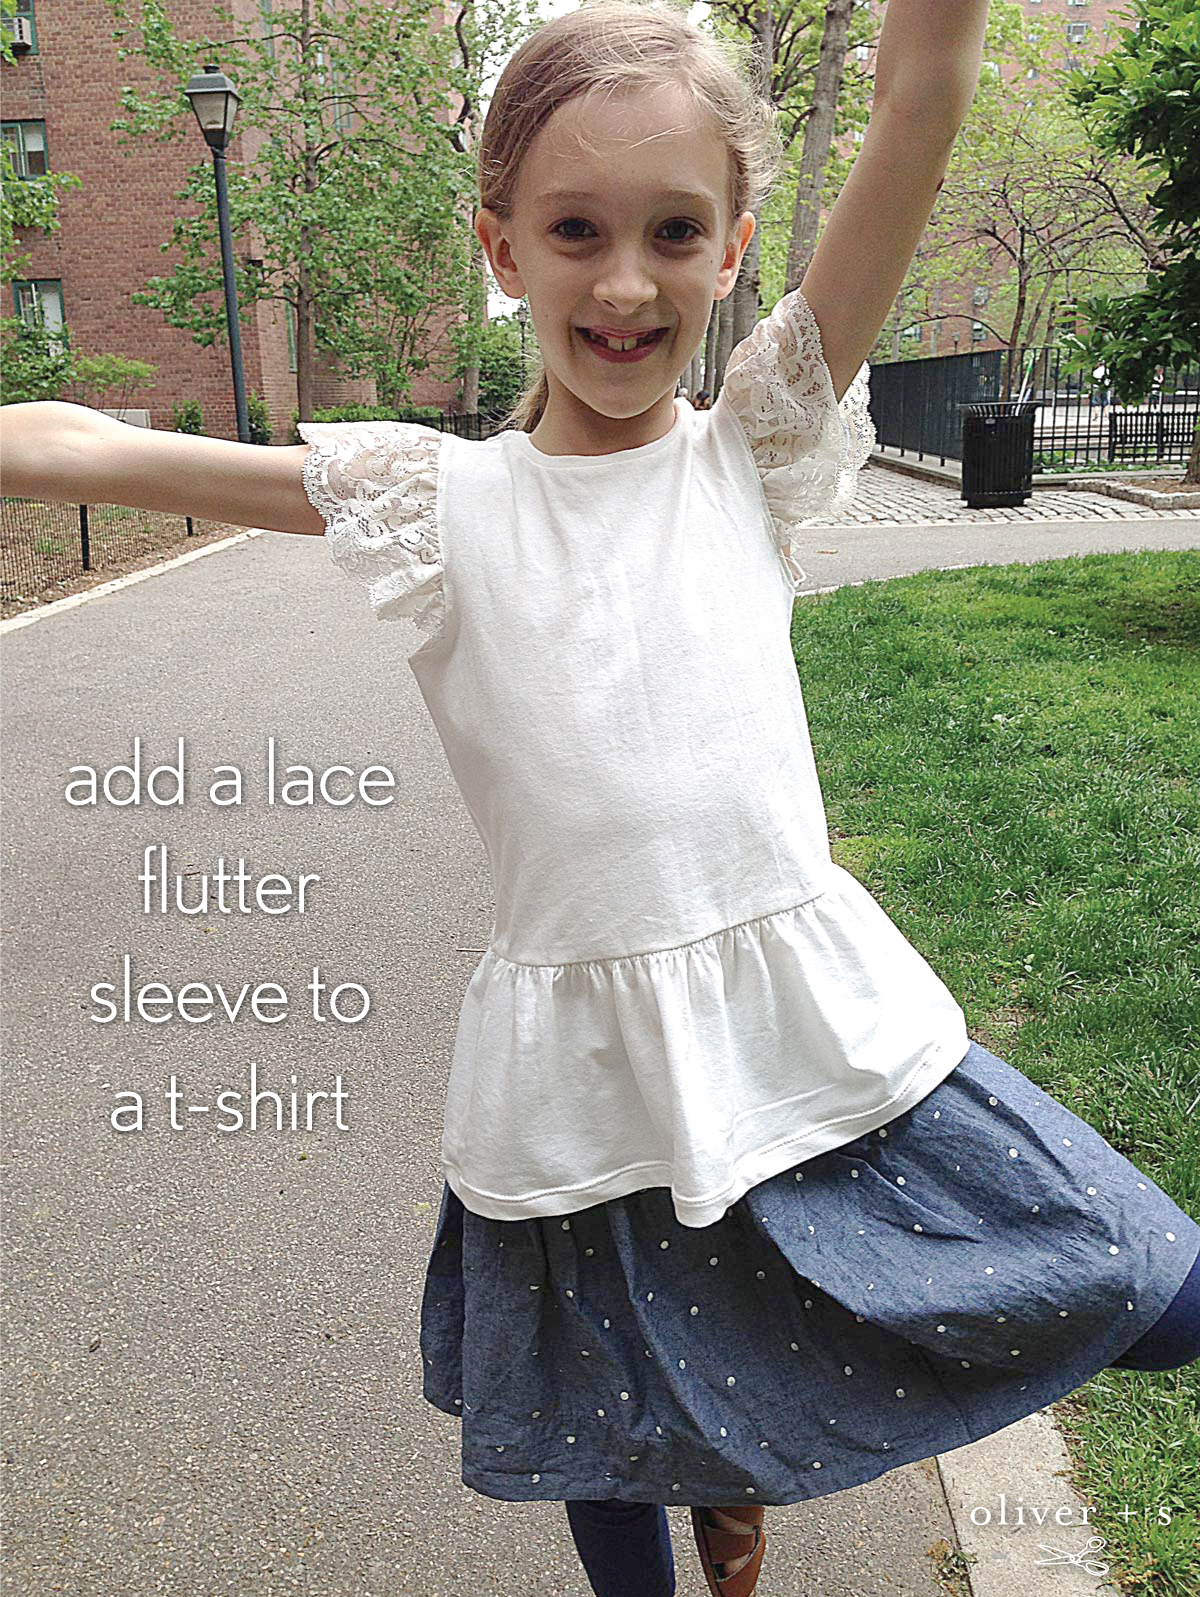

This is so easy and fast to make! I started with one yard of 5″ wide lace. This lace wasn’t anything very expensive or fancy, although think it looks quite pretty. I don’t think I paid more than a few dollars for it at Pacific Trimming the other day.
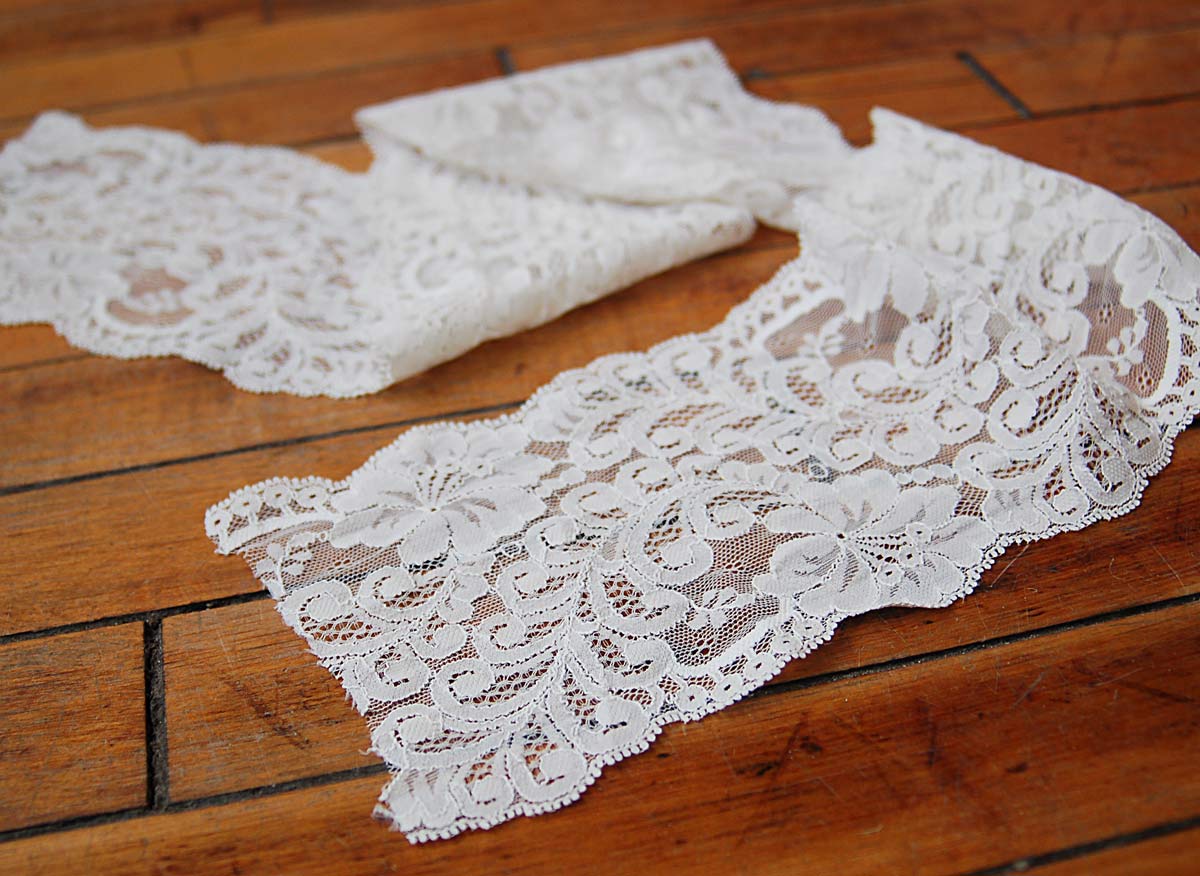
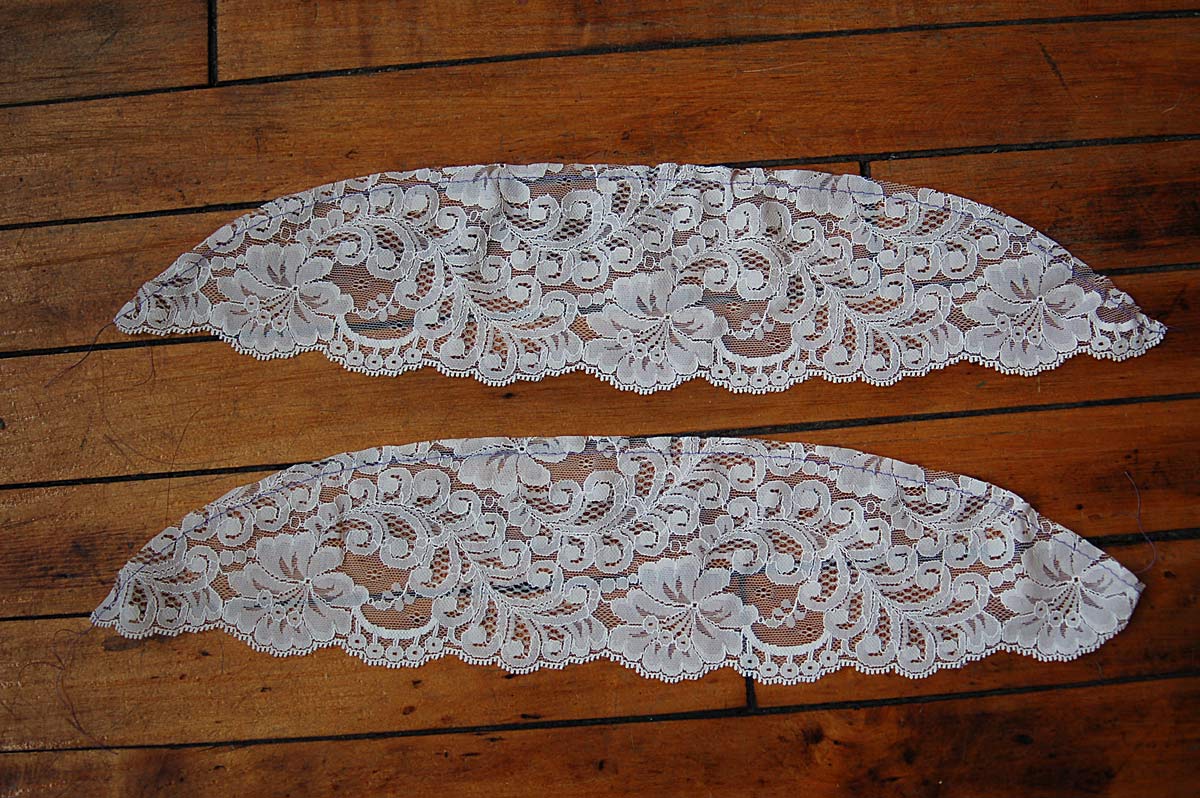
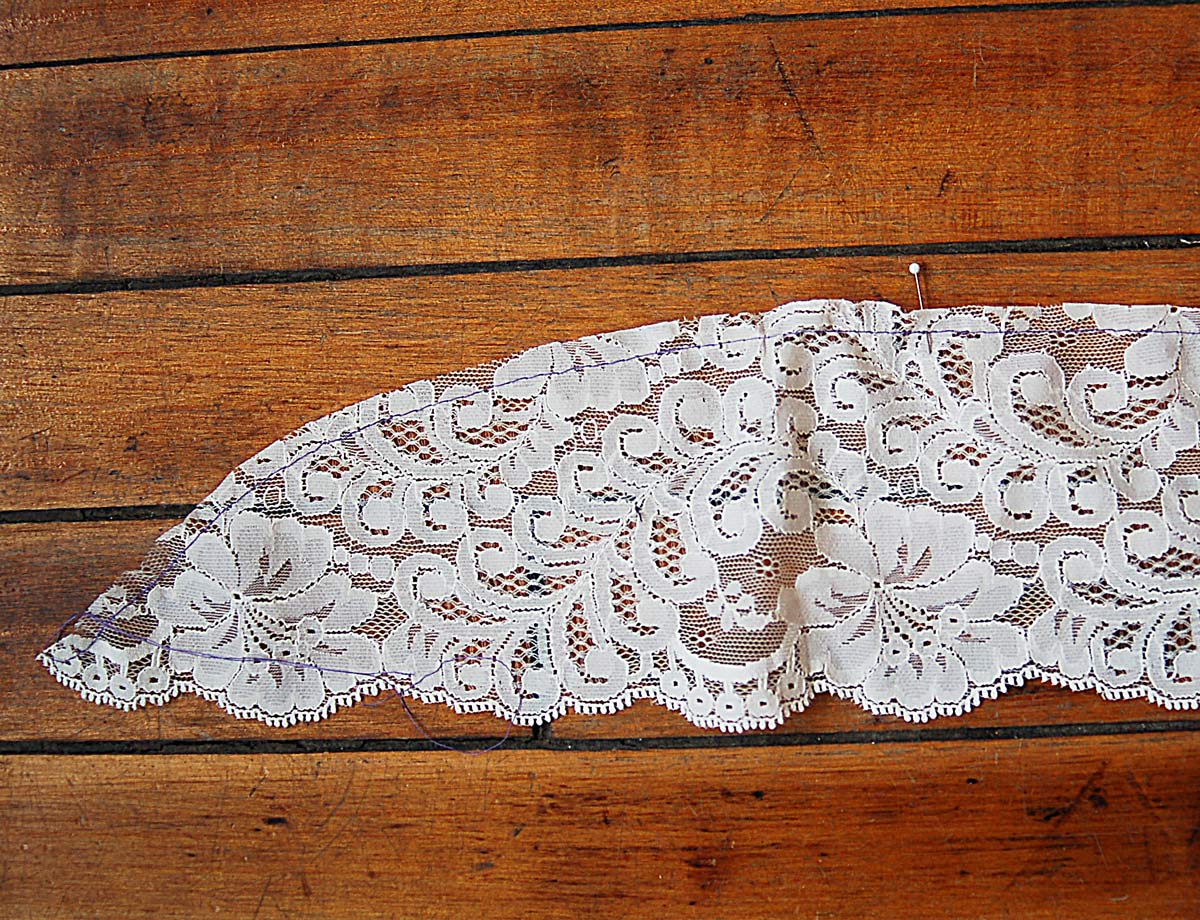
1. Cut the lace into two identical curved pieces like this. Each of my pieces was approximately 4-4 1/2″ inches wide and 18″ long.

2. Add a row of basting stitches a scant 1/4″ from the curved cut edge on both lace pieces, leaving thread tails several inches long for pulling.
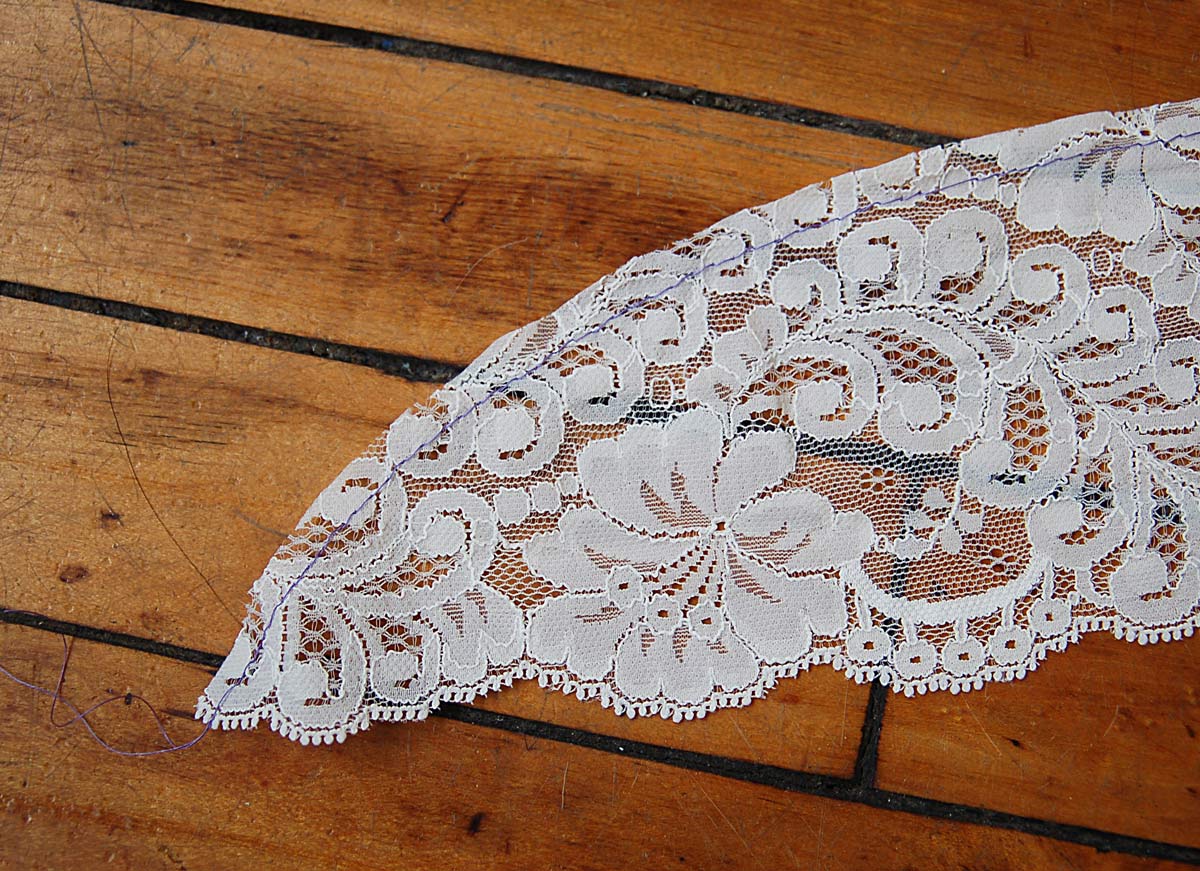
3. Find the center of each piece and mark it with a pin.
4. A ruffle sleeve doesn’t reach all the way around the armhole, so mark the armhole about 2″ from the side seams on both the front and back of the T-shirt. Pin the ends of the cut lace piece to the right side of the fabric at these marks and pin the center of the lace at the shoulder. Then pull up on the thread tails of the basting stitches to gather up the lace until its length matches the length of the armhole segment. Pin it into position.

5. Baste the lace to the armhole to hold it temporarily. (You’ll be using matching thread for your basting stitches. I used contrast thread so you can see it clearly.)
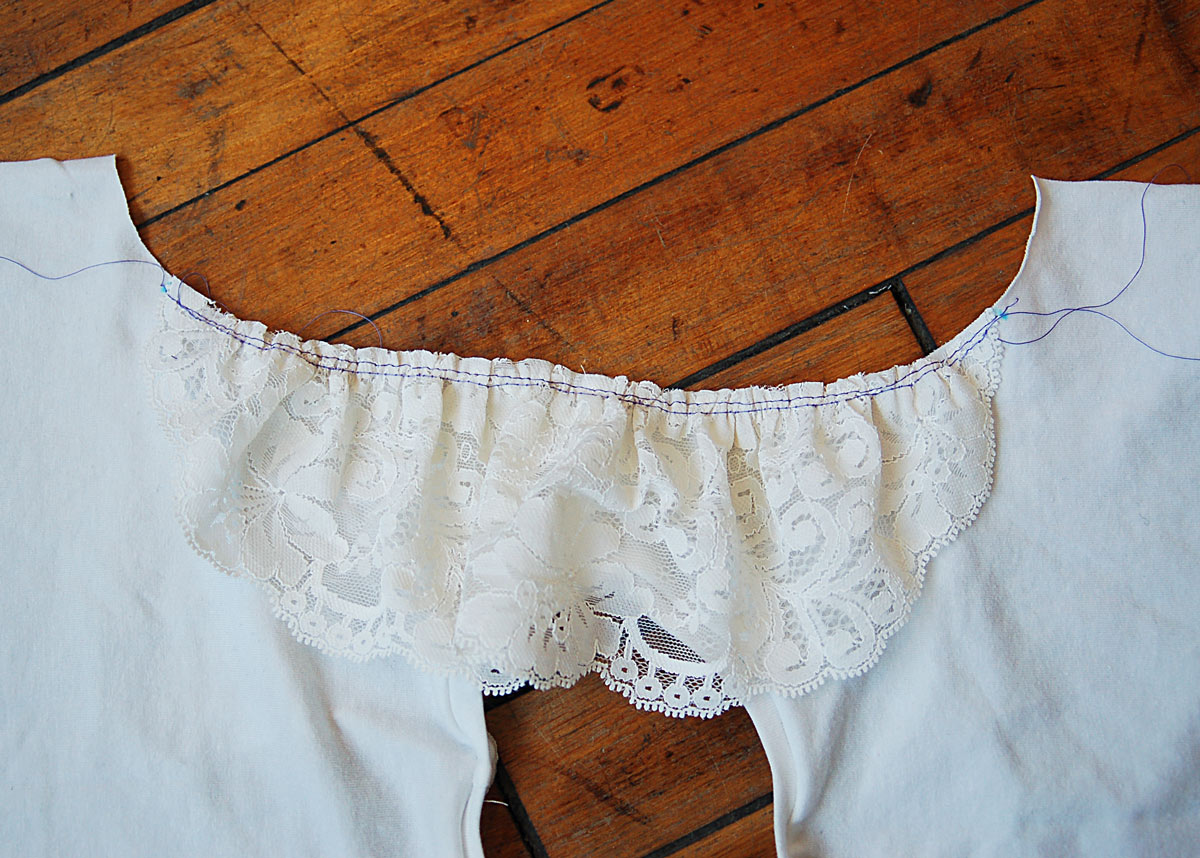
6. Once the lace is basted, stitch the side seams and finish the seam allowances as desired.
At this point I initially had planned to finish the armholes just like Cherie did with her sleeveless Lullaby Bodysuit, but I was afraid the binding would stretch the armhole and would be fiddly to apply. This is meant to be a quick and easy project, so instead I serged the armhole. (You can use a zigzag stitch and walking foot if you don’t have a serger.)

7. Then I folded and pressed the serged edge to the wrong side of the sleeve and gently pressed the lace ruffle away from the armhole. (If you’re using inexpensive polyester lace like I did, be sure to turn down the heat on your iron so you don’t melt it!) Edgestitch the armhole with a stretch stitch to finish it.
And that’s all there is to it! Enjoy your lace flutter sleeves. And add a peplum while you’re at it for a really cute summer top!

I recently took S to see the New York City Ballet, and she loved it. It might be time to start ballet classes!
This is so cute!
That’s so cute and easy. I love it!
How funny! Last month I saw some beautiful lace at my local shop. She had it in white, beige, and black, and I said, “why, what beautiful sleeves those would make!” And in the back of my mind, I wondered, how would I do that? Now I know, and must choose what project will have lacy flutter sleeves.
That is soooooo sweet! Love it! I’d love to take my little ballerina to the New York ballet sometime, I bet it was fabulous 🙂
That’s lovely. I was lying in bed last night thinking about lace sleeves in a top for my little girl, and now I can be more confident about doing it!
I hadn’t looked at the original pattern yet and oh my goodness – I can’t even tell it’s the same shirt! Yay for variations and customizing!
Love it! 🙂
I LOVE it. This is definitely going to the top of my list. I really like the peplum too.
That is super cute! I just finished a tank top where I added lace to the shoulders grading down a bit in the front and back. I must have been tired because I forgot to use my pressing cloth. Yeah, lace melted and the iron was ruined. Lesson learned from the school of hard knocks 🙂
I love it! Very cute!!!!
Thank you for all your tips… l often go back to your blog.. friendships of France ( Cannes)
Just wanted to say THANK YOU!! I’m making my own wedding dress and was not at all confident about attaching the sleeves. Until now. 😀
Your daughter is beautiful by the way! Thanks so much!
Hi there, can I do this with an adult’s dress that is Sleeveless?
Fantastic,This is just what i was looking for, thanks for sharing.
Simplesmente adoreiiiiiii!!!
Obrigada!!!
Beijinhos e BOA semana