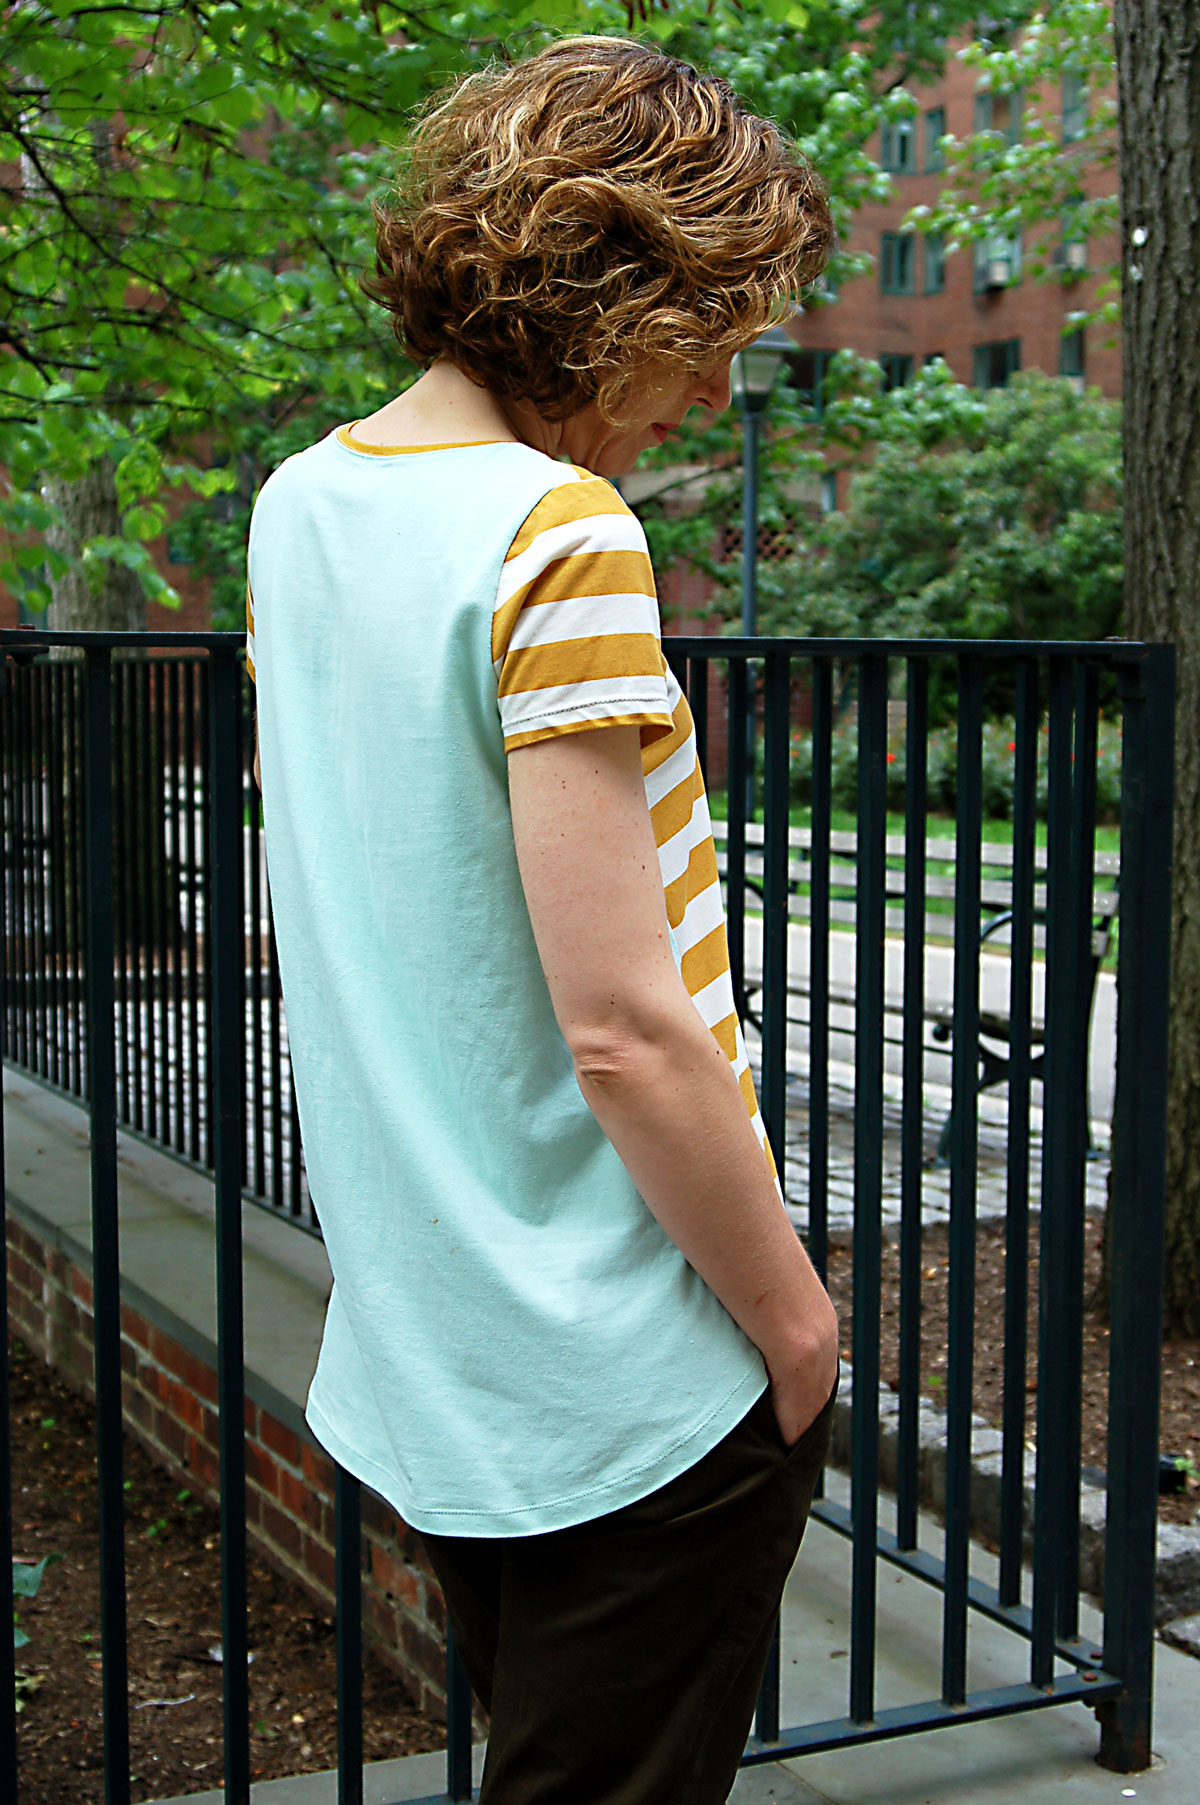
I promised you this tutorial a while ago when we first released our School Bus T-shirt and Metro T-shirt patterns. This is a fairly simple pattern making tutorial to help you turn the basic T into a high-low hem, A-line, color-blocked T. Got all that? Lots of features, not a lot of work to get them all.
Heather over at Girl Charlee sent me these knits, and I really love them! The weight and hand is terrific, and I’m starting to scheme some other ideas now that I know what a terrific range of weights and patterns she carries. I used this stripe and this solid for my shirt, if you’re interested.

There are a few steps to this tutorial, but it’s not too complicated. So let’s get started.
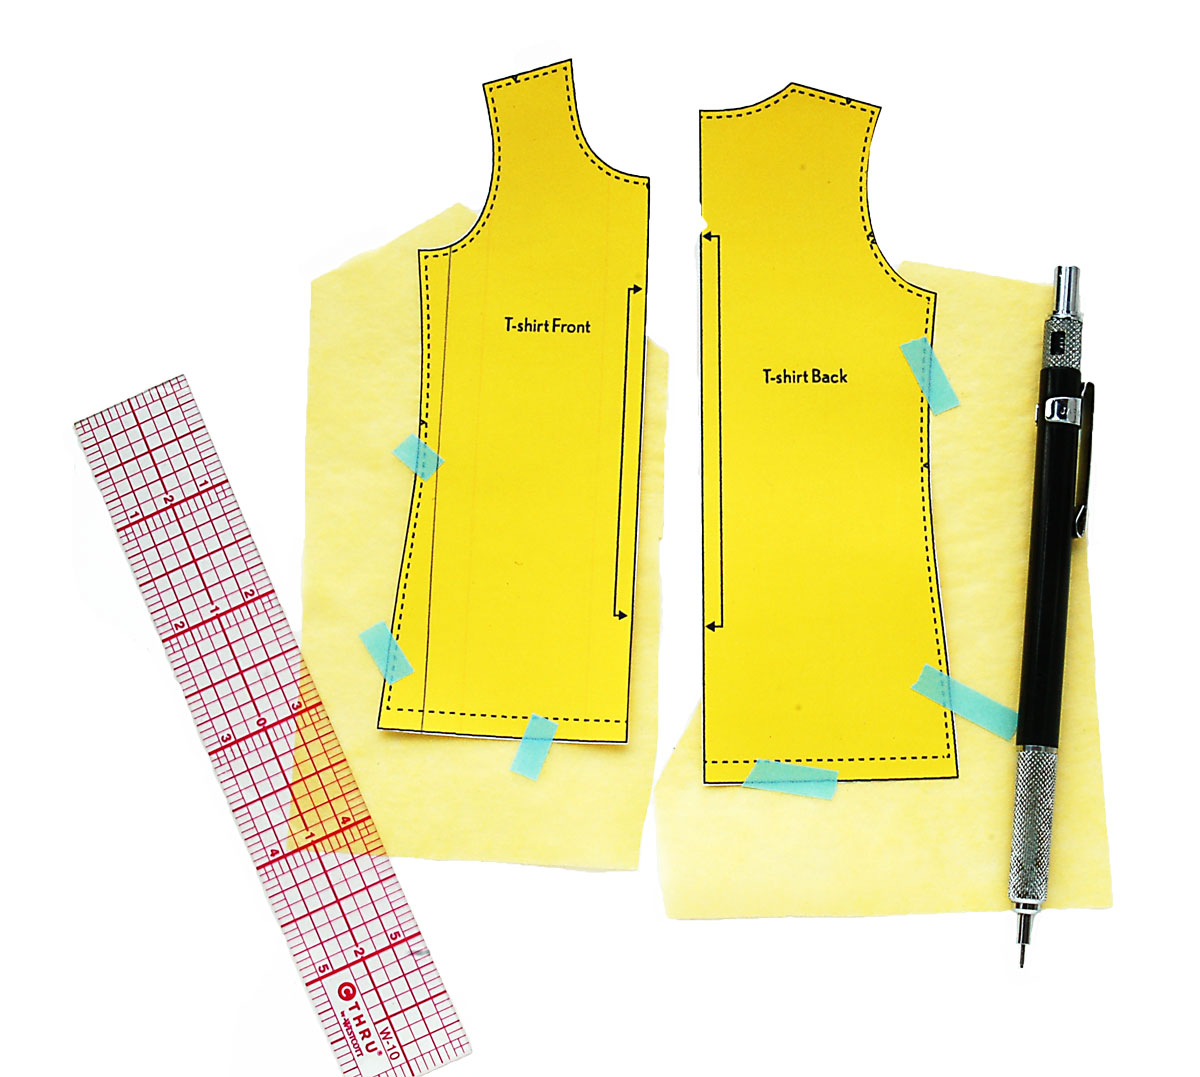
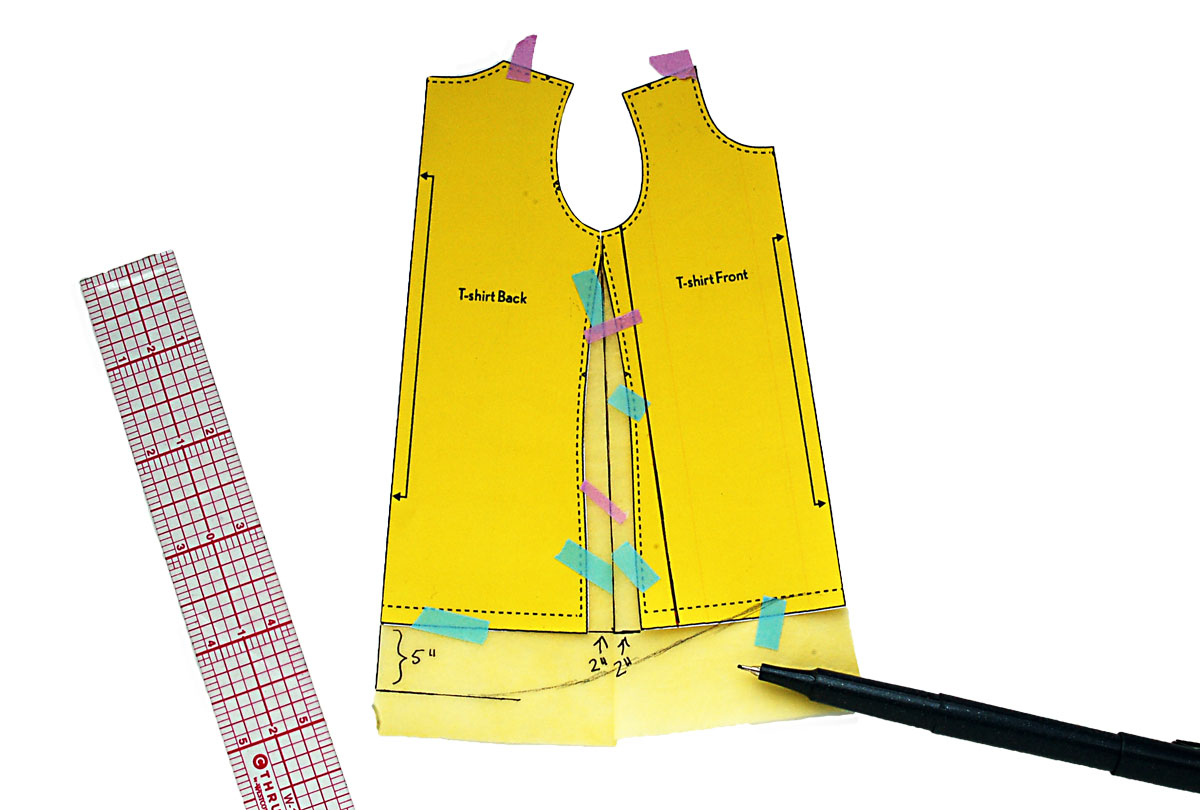
1. You’ll start out with your traced front and back T-shirt pieces. As usual, I’m using miniature versions because I think it’s a little easier for you to see what’s happening. First, draw in your 1/4″ seam allowances (particularly at the sides and the armholes) and 3/4″ hem seam allowances using your 6″ clear ruler. Tape your pattern pieces onto a piece of paper that extends at least 3″ beyond the side seam and about 6″ below the hem edge. This will give you room to make your pattern alterations.

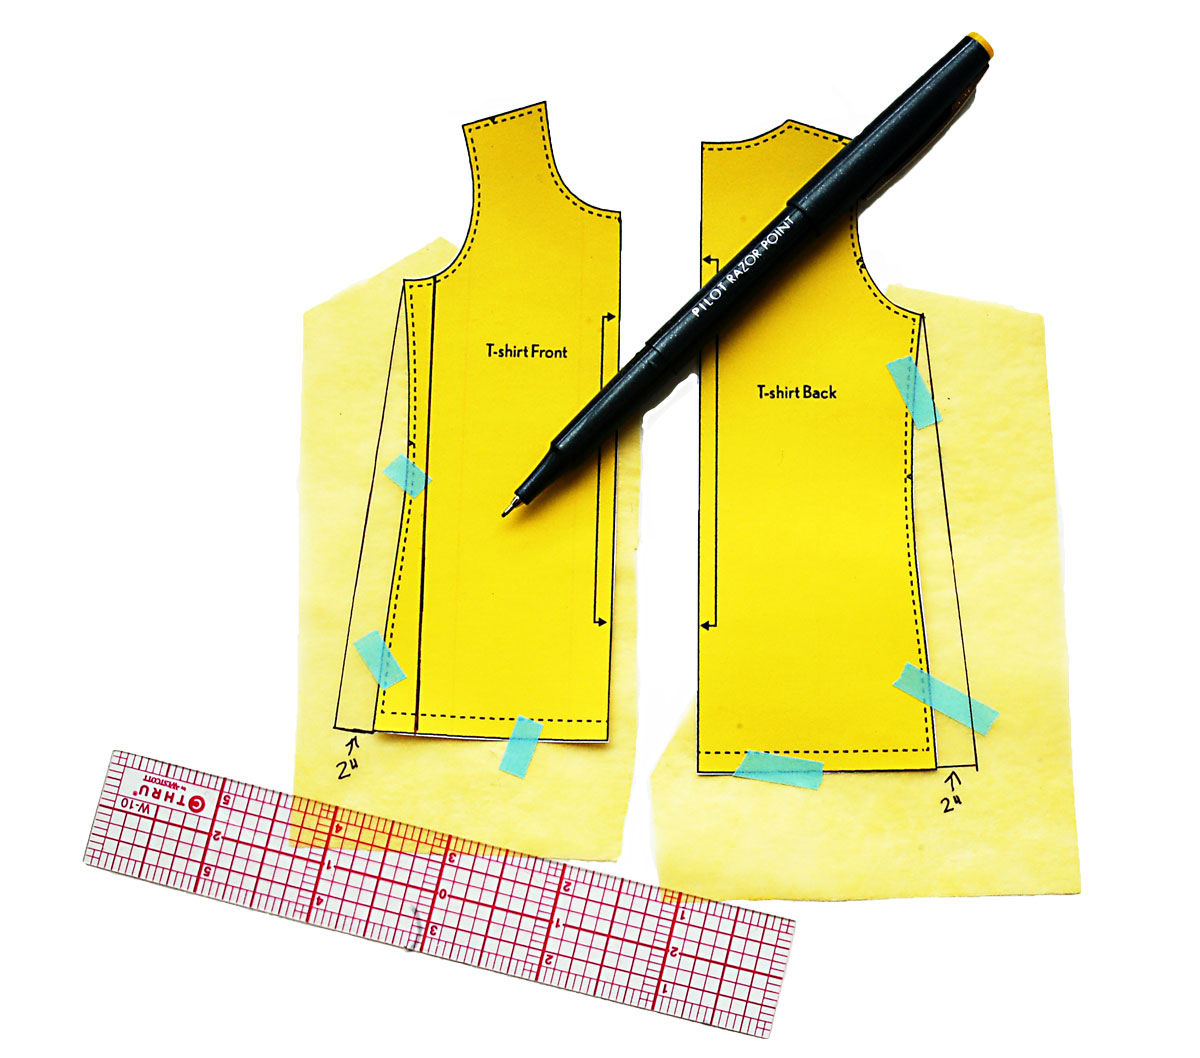
2. We’ll start by drawing a new side seam. This seam will be parallel to the center front fold line and will extend into the bottom of the armhole, so keep it relatively close to the original side seam but not so close that it will hide under the arm.
3. Next, we want to flare the sides. I drew a straight line from the underarm edge, extending about 2″ out from the hem edge. (You can flare this more if you want to, but I flared mine by 2″.) Unlike our A-line raglan, I wanted this T-shirt to flare only at the side seams, so I didn’t slash and spread anywhere else. (I also wanted it to fit close to the body through the chest and shoulders, which is one of the reasons I chose to flare it only at the side seams.)
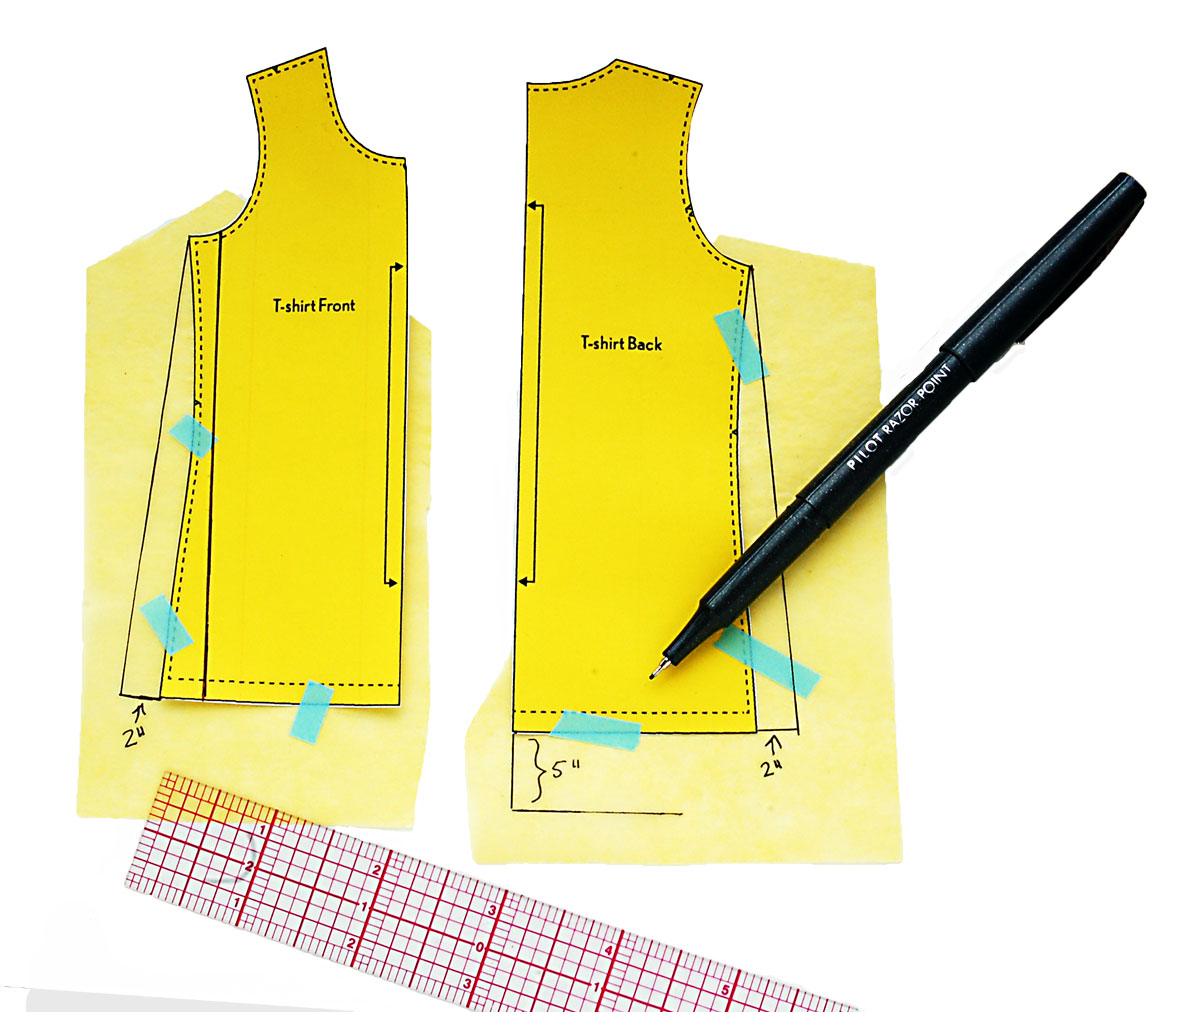
4. For the high-low hem, I decided I wanted the back to be about 5″ longer than the front. This silhouette will work best for most of you if the front of the T-shirt hits just below your high hip (an inch or two below the waistband of your jeans is a good target point) and covers your derriere in the back. Don’t make it too long or make the high-low effect too extreme. It will look sloppy! I’m long-waisted, so I didn’t shorten the pattern at all in the front, but you may find that you want to shorten it by a bit. For the back, draw a line that’s 5″ below the finished front hem line and perpendicular to the center back line (i.e. a 90-degree angle to the front).
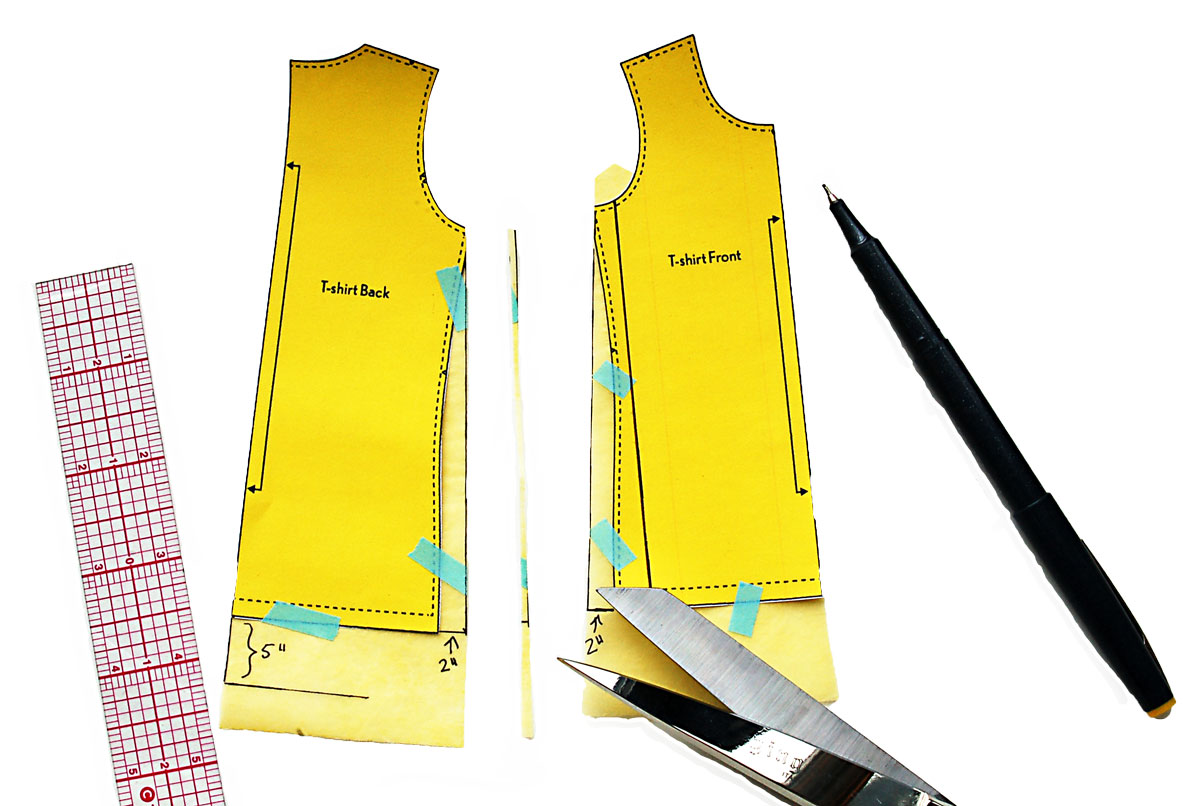
5. Draw in the 1/4″ seam lines at the sides and cut the pattern along the drawn seam lines, trimming off the seam allowances.
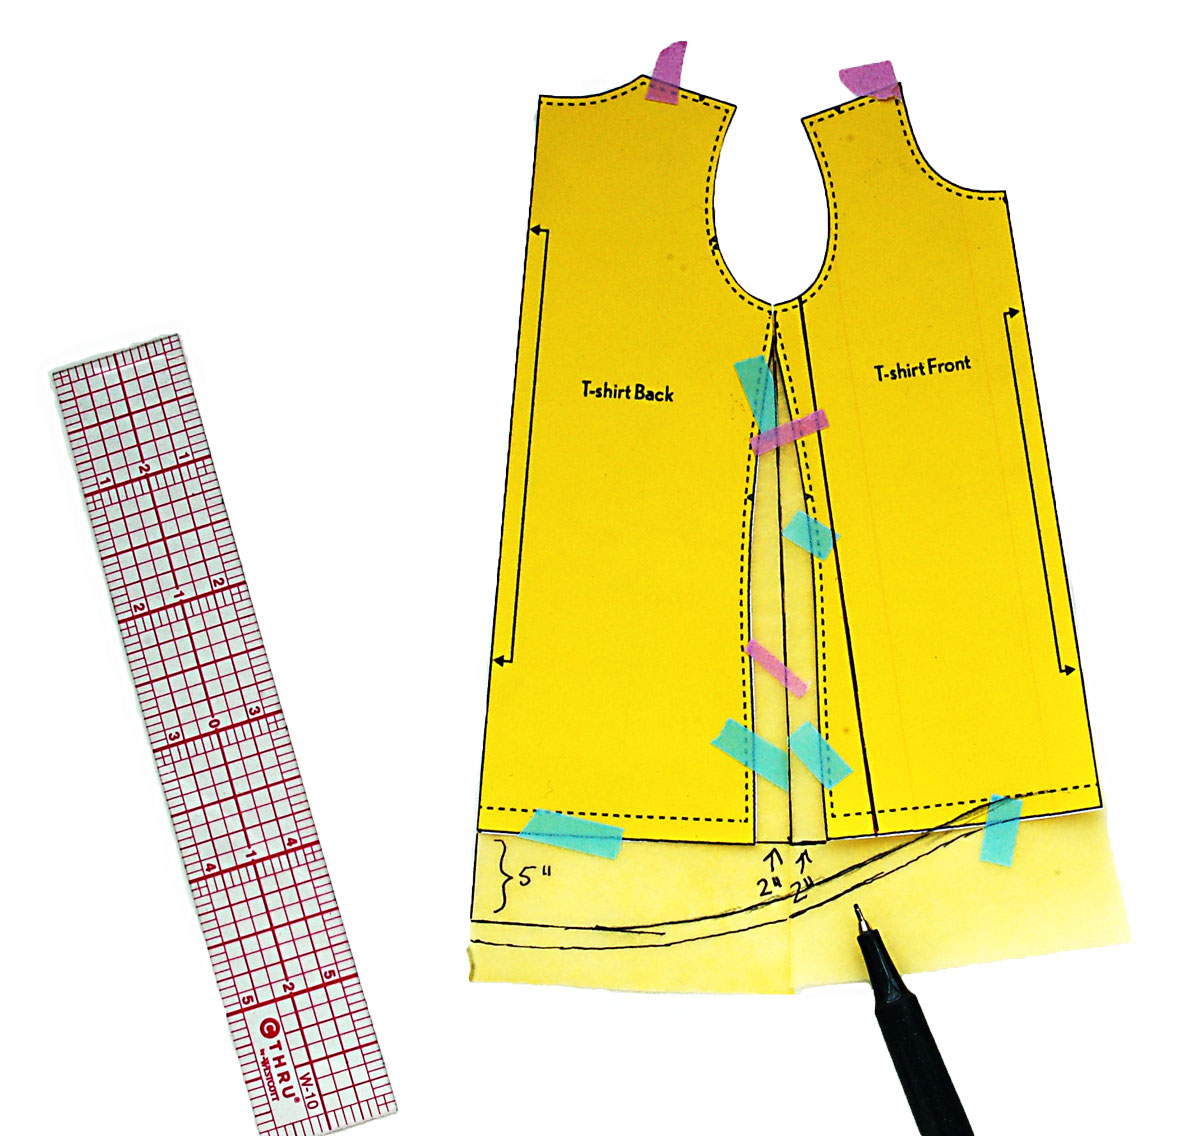
6. And here’s where it starts to get fun! Tape the front and back piece together along the cut seam lines, matching the underarm and the hem edges. Then you get to draw in your new hem. Keep about one third of the center-front and center-back straight at them hem, and gently blend the rest into an S-curve, as I did here. (Use a pencil so it’s easy to erase and re-draw until you’re happy with the curve.)
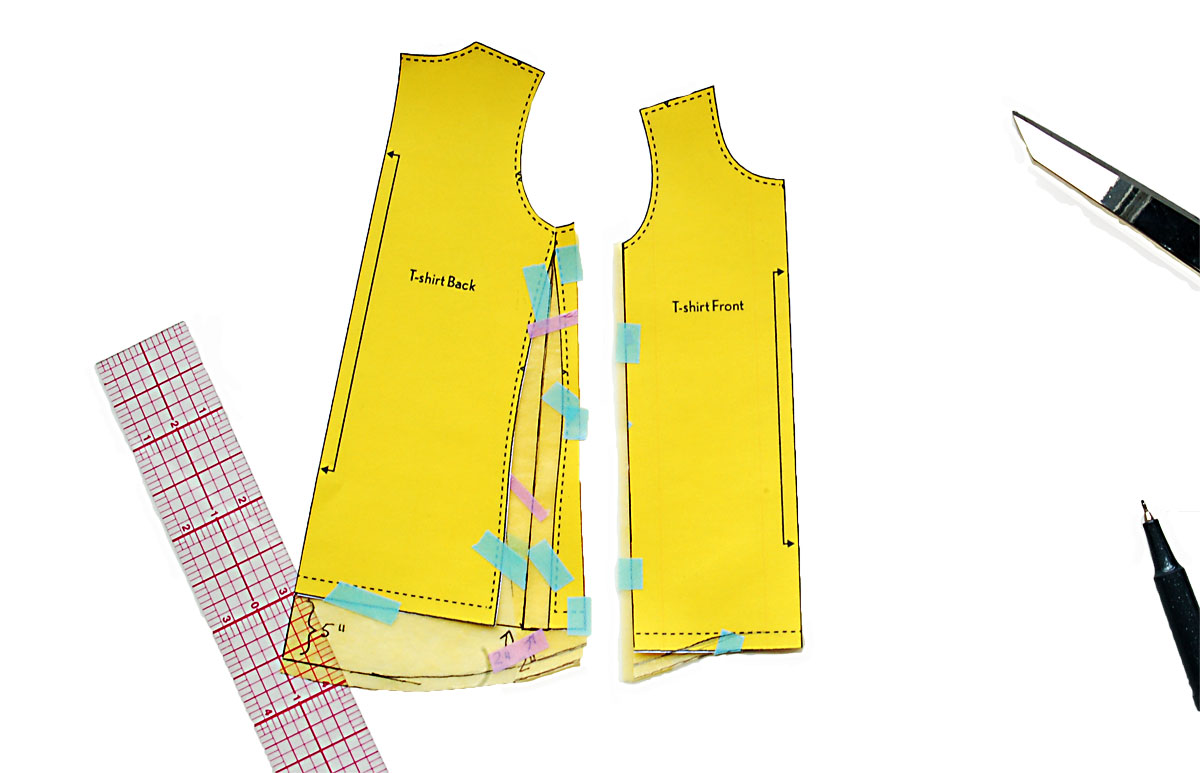
7. Once you’ve settled on the S-curve, draw the seam line (or add the seam allowances, depending on which one you started with) and trim the excess paper from your pattern. Then cut your pattern apart at the very first line that you drew in step 2, above. This is your new, shifted side seam that’s not at the side anymore. That’s how you get that fun color-blocking effect.
8. Just one last pattern-making step to be done, and I’m sorry it’s a bit difficult to see in this photo. Tape a strip of paper to the new side seams and add 1/4″ seam allowances to the front and back edges. And then your pattern is complete!
When you sew the T-shirt, you’ll want to set in the sleeves after sewing the side seams, since the side seams are shifted forward. But that’s really the only change you’ll need to make for this tutorial.

Now, who’s making a custom T-shirt this weekend?
Hilarious!!! Yesterday, at the park, I saw a mom with a hi-lo t-shirt and I thought “Ooh, I wonder if I can alter the O & S pattern to do that for myself?” HOORAY. Such perfect timing. Thanks! 🙂
You look great in your t-shirt. I want the same! Thanks for this fantastic tutorial.
The side color blocking is so flattering! I love the slimming effect. Thanks for a great tutorial!
This looks great!
Any chance of a tute for making this into a v-neck? Pretty please??
Awesome tutorial! Love the shirt! Can’t wait to recreate this. Your directions are very clear and your photos great! Thanks 🙂
I’ve just cut the fabric and was wondering how to hem the curve at the bottom of the shirt?
Thank you 🙂
Great color choice! I would not have thought to put them together myself, but I love them!