If you’re snowed in like we are, you’re going to need a project! Today’s raglan T-shirt tutorial will show you how to turn the basic raglan into an A-line top or dress (sometimes called a trapeze top or dress). Like this:

Yesterday I mentioned that this alteration is often done incorrectly. Here’s how to do it the right way.
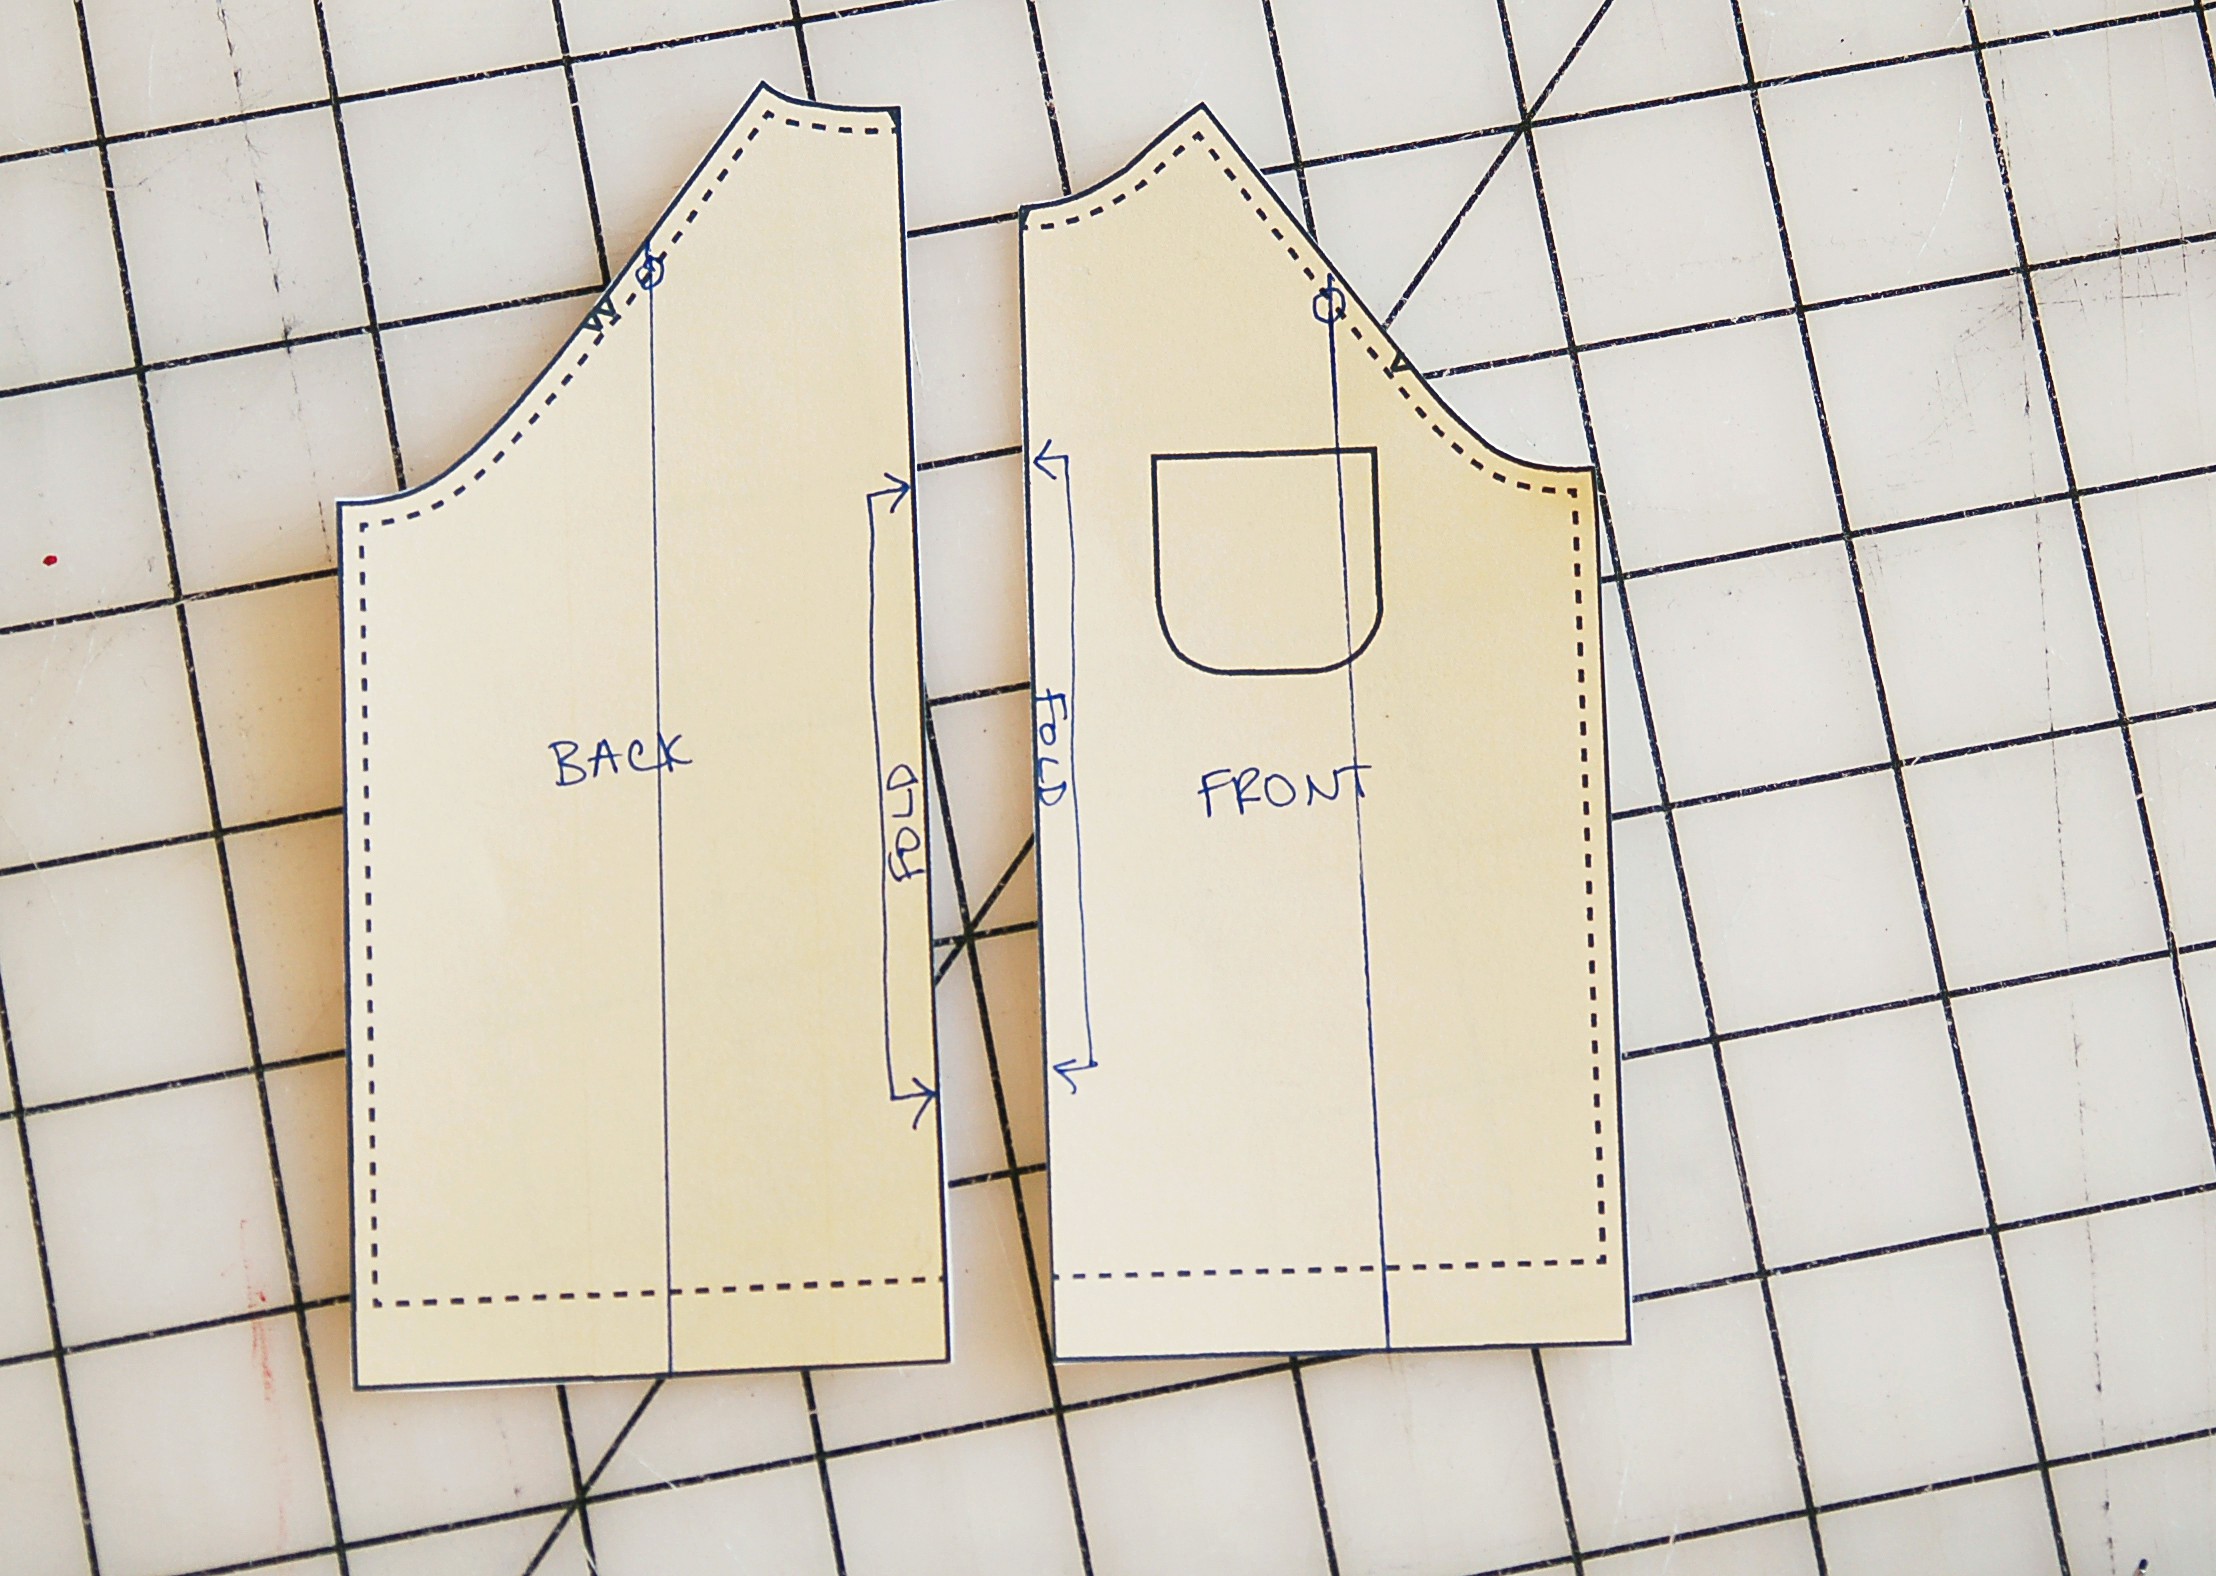
If you only add width to the side seams you’ll end up with a dress or top that flares at the sides and stays flat everywhere else. In order to add width, you need to add it all over, not just to the sides. But it’s an easy change to make. You’ll start with the front and back raglan pattern pieces.

Draw a line about halfway across the pattern pieces and parallel to the center front/back cut-on-fold line. Like this:
Then cut along the line, leaving the pattern uncut at the top raglan sleeve seamline. (See the circle I drew in the photo above.) Spread the pattern piece open an inch or two at the hem, keeping the pattern piece itself flat but opening up the cut line while leaving the pattern piece connected at the uncut paper hinge. Tape another piece of paper underneath the piece to fill in the gap, and then you can also add width or flare (straight lines connecting at the top of the piece but getting wider at the hem) to the front/back and side seams of the piece. To keep the flare even all the way around the top or dress, divide the width of the center cut (at the hem) in half and add one half of the width to the center front/back and the other half to the side seam. In other words, if you add 1″ to the hem at the cut, add 1/2″ to the center front and 1/2″ to the side seam. Like this:
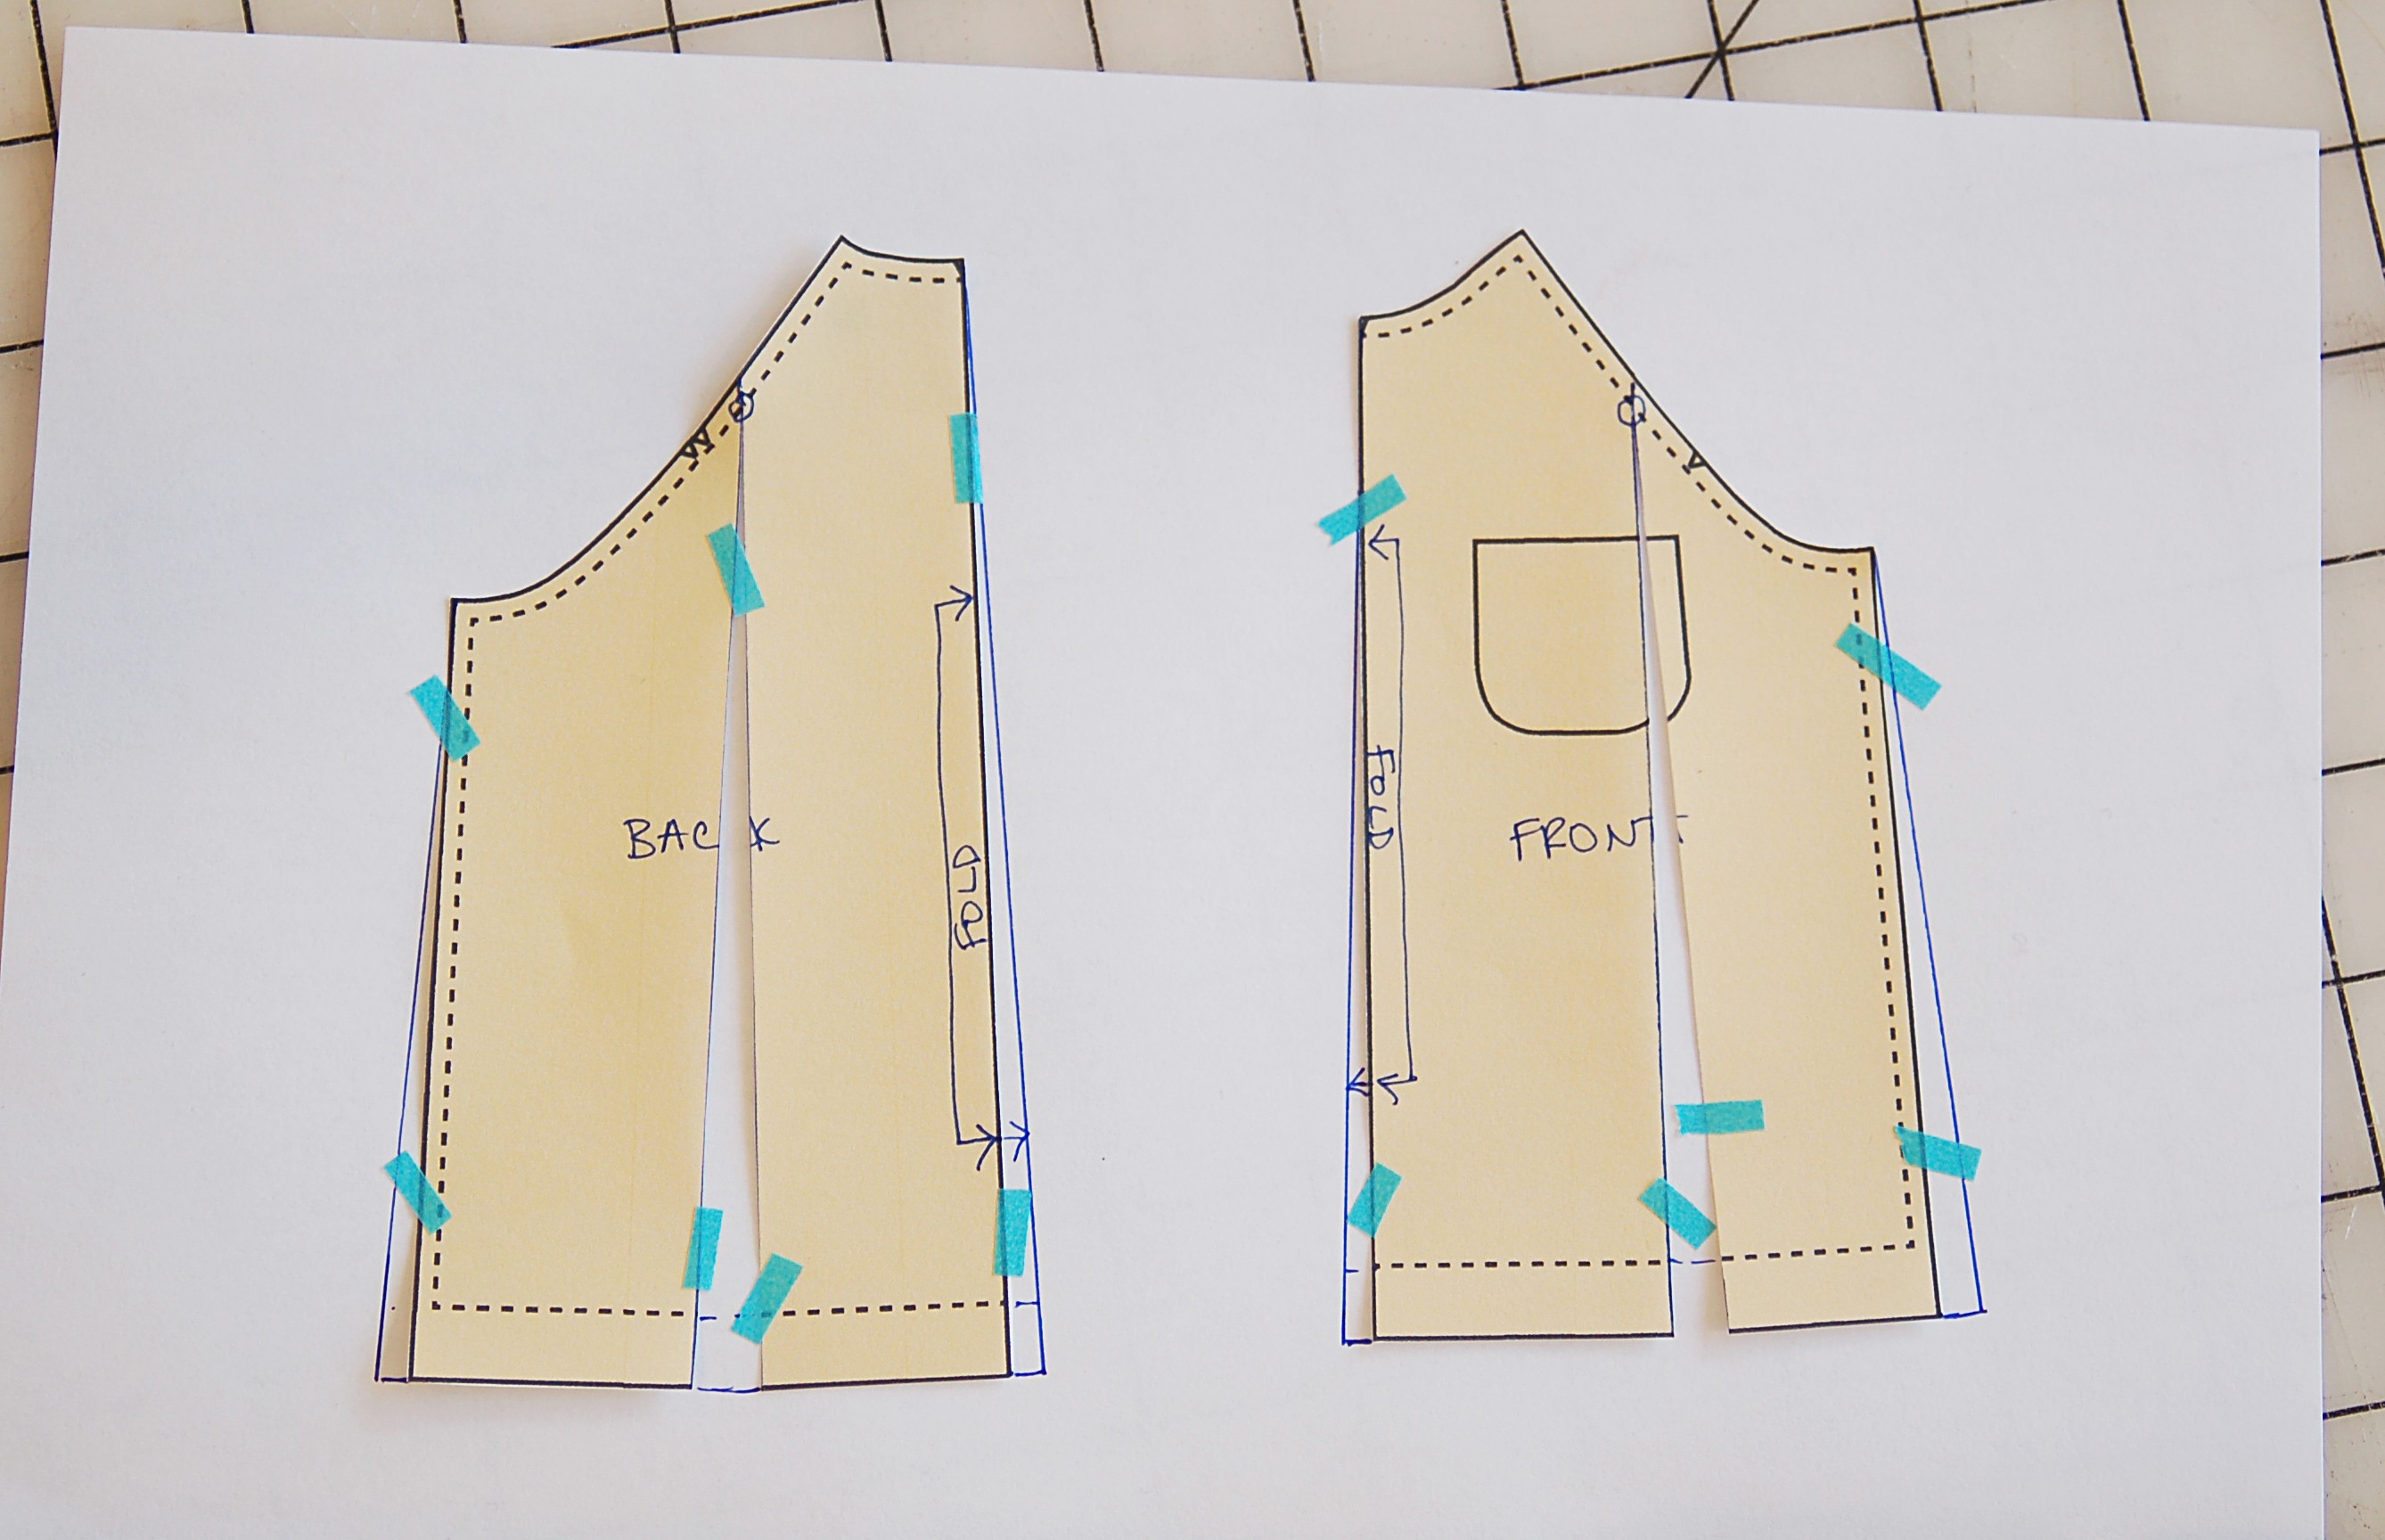
Try to add the same amount of flare to the front and back pieces, and keep in mind that 1″ of additional width at the hem will become 4″ of width when the dress or top is sewn. In other words, don’t go crazy with adding a lot of width. It adds up quickly!
When you split up the added width into three different spots like this you’re allowing the top or dress to flare all the way around instead of just at the side seams. And you’re changing the shape of the armhole/raglan sleeve and neckline a bit, which is why it flares all the way around instead of just at the side seams. Does that make sense? Just be sure that you choose a size that will fit well across the chest so it doesn’t look too big when the hem is flared.
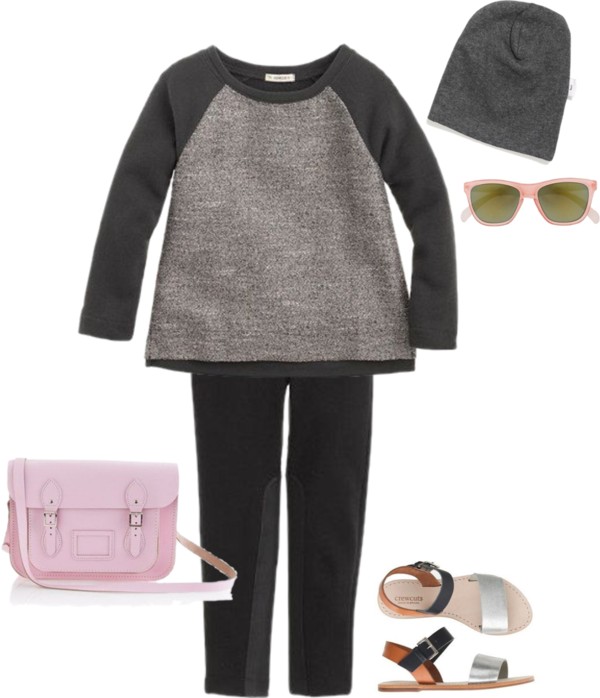
You know I had to style one for you. I love this outfit.
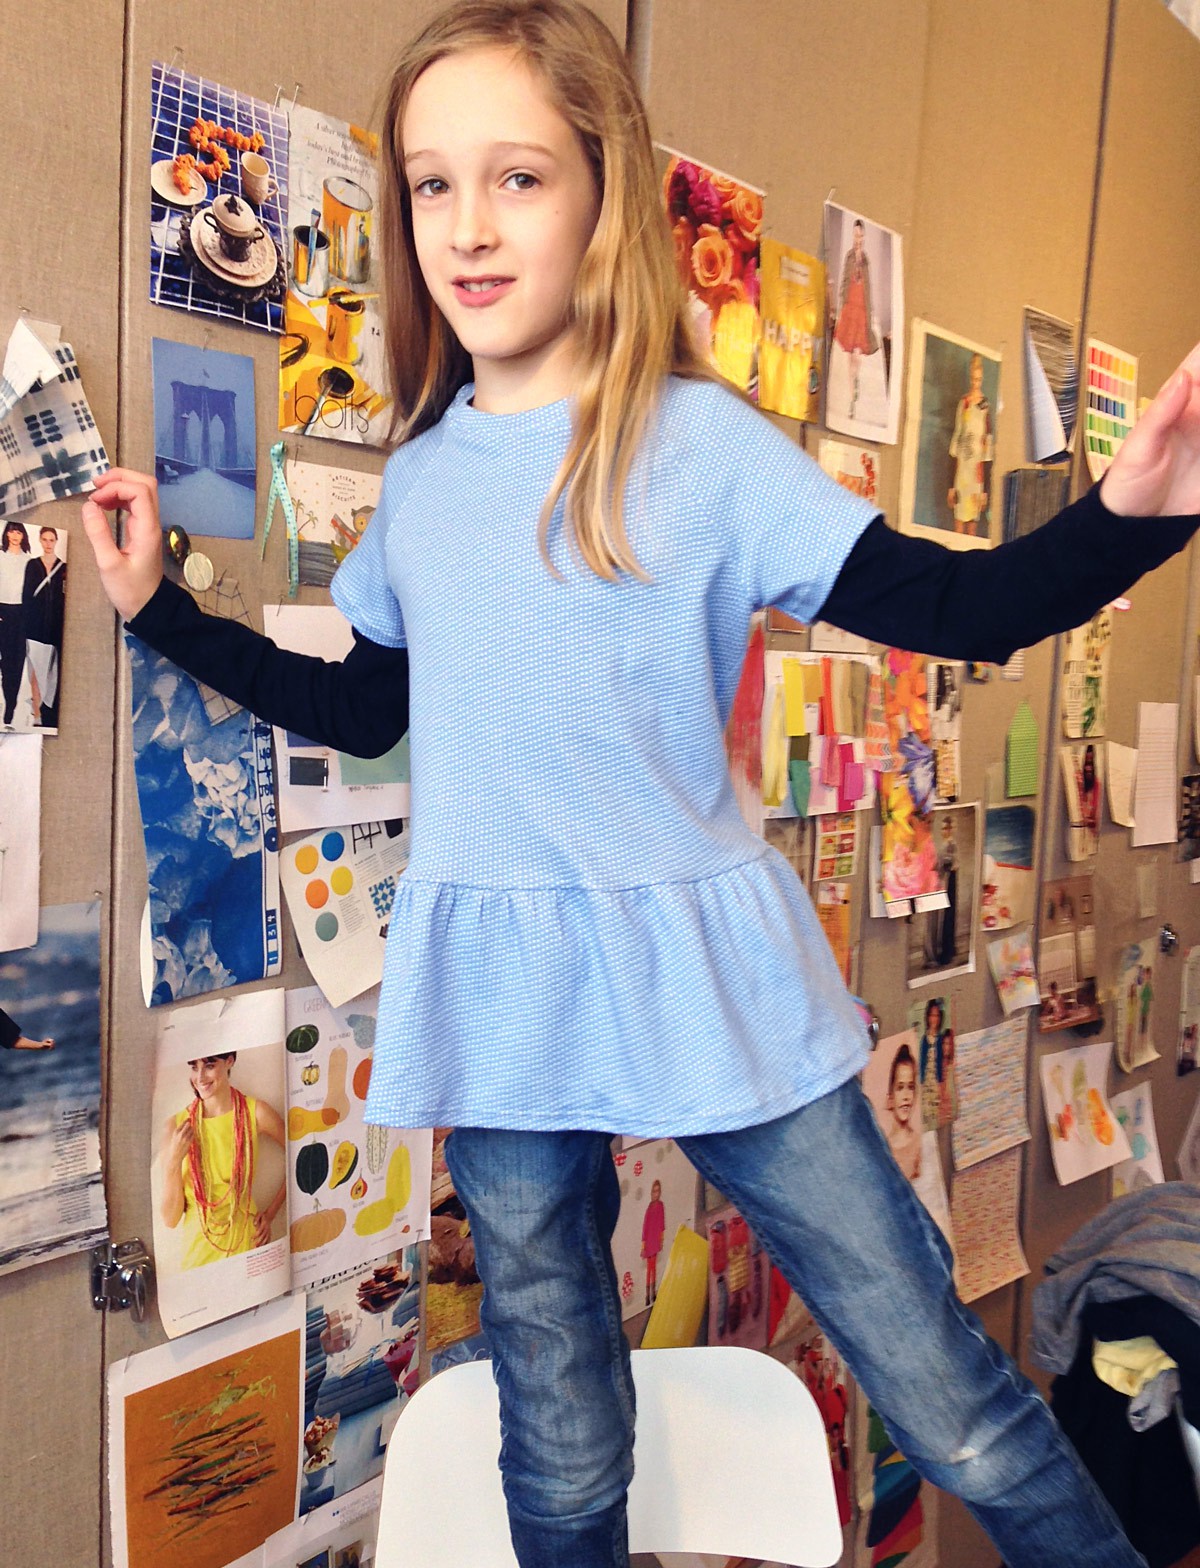
Oh, and I promised a photo of S in her short sleeved raglan peplum top. Here she is!
We’re digging in and watching the snow and ice pile up around us. Have a great day!
Ah, great instructions! I would have been one of those people doing it wrong. This is very clear and I’m going to use it with an adult raglan t pattern I have – and I really appreciate that you give the why as well as the how. Thanks, Liesl!
Thanks for the “right” instructions and reasons behind them. I have a request for one of these dresses and I love the idea of adding the width in multiple places so the flare is more even. 🙂
Awesome! Perfect visual!
Yep, I’ve been doing it all wrong. Just another much needed O+S sewing lesson!
Of course! Seems obvious now you point it out. Your method also gets around the potential for weird, pointy bits at the bottom of the side seams.
Oh, thanks for this and the fantastic visual! I made a dress version this winter by laying my pattern pieces over those from the jumprope dress. It has been worn and loved plenty, but I knew something “wasn’t quite right” and couldn’t put my finger on it!
….and S looks great in her peplum top!
This is great! Thanks for the lesson…is this the way to give the sailboat top turned dress a bit of a line flair?
Erin, great question! Yes, although I would make the cut go into the armhole for that pattern instead of cutting to the shoulder. And when you add width to the center front/back be sure to add the same amount to the facings so they’ll still match. Does that make sense?
Thanks so much for posting this! I have been thinking about a couple A-line-dress-from-shirt ideas recently and would have totally done it wrong without this!
Great tutorial, just what I needed to learn. It’s all beginning to make sense now. Thanks for explaining the reasons. It has been baffling me for a while.
I just made it!! Thank you Liesl for this tutorial 🙂 I am happy and feel acomplished!
Hi!
Thank you for a great tutorial, made sense of a lot of things a-line.
Just have one question: does anything happen to the sleeves with this method? I mean, not necessarily for this project (although here you are effectively cutting into the “armscye” if it can be called that with raglan), any cut-and spread – for example if you would do this with an in-set sleeve pattern, you would cut at mid neck and mid shoulder, right? Which means that while the actual curve would stay the same, its angle in relation to the grainline would be different..does that make sense?
My question is, do you need to alter the sleeve pattern in any way when adding flare to the bodice? Ever?
Good question, Elena, and the answer is that you don’t change the sleeve at all. The curve of the armscye (I really dislike that word for some reason)/armhole changes the curve a bit to allow for more flare, but the length of the armhole doesn’t change so you don’t need to do anything to the sleeve. It would be the same case for a set-in sleeve. I hope that helps!
Yes it does, thank you. Just out of curiosity, what happens to a kimono sleeve block in this case/ how would you add flare to a kimono block? =)
This is such a great tutorial, thank you so much! I used it to turn the School Bus T-shirt pattern into t-shirt dresses for my girls, and it worked really well! It was the first major pattern alteration I’ve made, and it was so nice to have instructions to follow. Just one question: if I wanted to keep the slimmer fit of the t-shirt on the top of the dress but make the dress A-line from the waist down (does that make sense?), could I still use this method but just apply it to the ‘lengthened’ section of the new dress pattern, and then curve the side seams?
p.s. Here are my School Bus T-shirt Dresses, turned into “Lola Lotta dresses” for Kids Clothes Week! https://esmeintheattic.wordpress.com/2014/10/26/kcw-lola-lotta-dresses/