I recently saw this adorable photo of an Ice Cream Blouse show up in the Oliver + S Flickr group, and I followed the link through to the creator’s blog post about the outfit.
I so loved the unique smocked detail at the blouse’s neck that I contacted Ana Sofia to ask if she would contribute a short guest tutorial showing how she did it for our Customizing with Oliver + S series, and she agreed. Follow along through her tutorial, and this is what she’ll show you how to do.

So, without further ado, I’ll turn this post over to Ana Sofia. Thanks Ana Sofia for this wonderful tutorial!
I never learned how to smock, but since I started to sew for my daughter a couple of years ago, I have always admired beautiful smocked garments. I always knew it was something I would love to try one day.
Learning how to smock became one of these projects that I kept avoiding because I can never find the time or the right person to guide and teach me. But when I came across a video tutorial on the internet I decided to give it try.
After the initial trial I recalled a gorgeous smocked version of the Ice Cream Dress and decided to make an attempt using the blouse version. I was delighted with the outcome (and the feedback I got from it).
Being a novice at smocking, I was surprised when Liesl contacted me to ask if I would be willing to share the process in a guest post for the Customizing with Oliver + S series. But you can’t say no to Liesl, can you? Obviously, I had to accept the challenge.
I was in the process of making another version of the Ice Cream smocked blouse (already smocked), but I had plans to sew another white version for my girl’s summer wardrobe (I find white pique so perfect for hot summer days), so for this tutorial I took some pictures while making the white pique version.
When reading through the tutorial bellow please bear in mind that 1) this is my first attempt making a tutorial (ever!), 2) I’m currently teaching myself to smock so don’t have high expectations – there are a number of seamstress that provide valuable resources and expert information on smocking (please refer to them) and finally 3) making a tutorial using white fabric and light blue thread was definitely not the best option (sorry!).
You can click on any of the images to enlarge them to see the detail. Enjoy!
1. Prepare the front blouse piece

You will start by cutting the front blouse piece.
For cutting the blouse front pattern, fold the pattern piece in half (you will cut the front pattern with the fabric folded) and add 1 inch between the fabric fold and the pattern piece before cutting. Cut one front blouse piece on the fold.
Note: as per the pattern instructions, you should cut 2 blouse top panel pieces (1 front and 1 back). For cutting the back piece follow the pattern instructions. Don’t fold the pattern piece, and don’t add 1 inch.
2. Draw the dots

Draw the dots onto your fabric (using an erasable pen or similar). Start drawing the dots 1 inch bellow the top of the blouse. Draw a vertical line to mark the centre of the front panel. You will draw 8 dots on each side of the centre line.
Draw the dots as follows:
- Working on each side of the center line: draw the first dot ¼ inch from the center line.
- Still on the same side of the center line, draw the following 7 dots, ½ inch apart, until you have a total of 8 dots.
- Next, repeat steps 1-2 for the other side of the center line. Draw 1 dot, ¼ inch from the center line and 7 dots, ½ inch apart, until you have a total of 8 dots.
- Each line should have 8 dots on each side of the center line (a total of 16 dots per line).

- Repeat steps 1-4, until you have 6 similar lines (each with 16 dots). Each line will be separated ½ inch.

3. Smocking
Select your embroidery thread (my local shop carries DMC) and thread a needle (I used three strands of thread) knotting at the end. From the back of the fabric, pass the needle through the first dot (upper right end of your “dot grid”), picking a couple of fabric threads. Then pass the needle to the dot beside it, also grabbing a few threads of fabric.

Pull them (the 2 dots) together.

Add a stitch to secure the dots.

Proceed to the following dot in the line bellow and repeat the process.

Then go up a line and re-start the process. Proceed until you finish smocking lines 1 and 2 and start again with the following 2 lines (lines 3 and 4) and afterwards do the same for lines 5 and 6.
4. Final blouse panel
After smocking the 6 lines, your front blouse panel will look like this:


Here is a sneak peek of a Liberty smocked version (my current work in progress).

The blouse front panel is now ready and you can proceed constructing the blouse (or dress) following the pattern instructions.
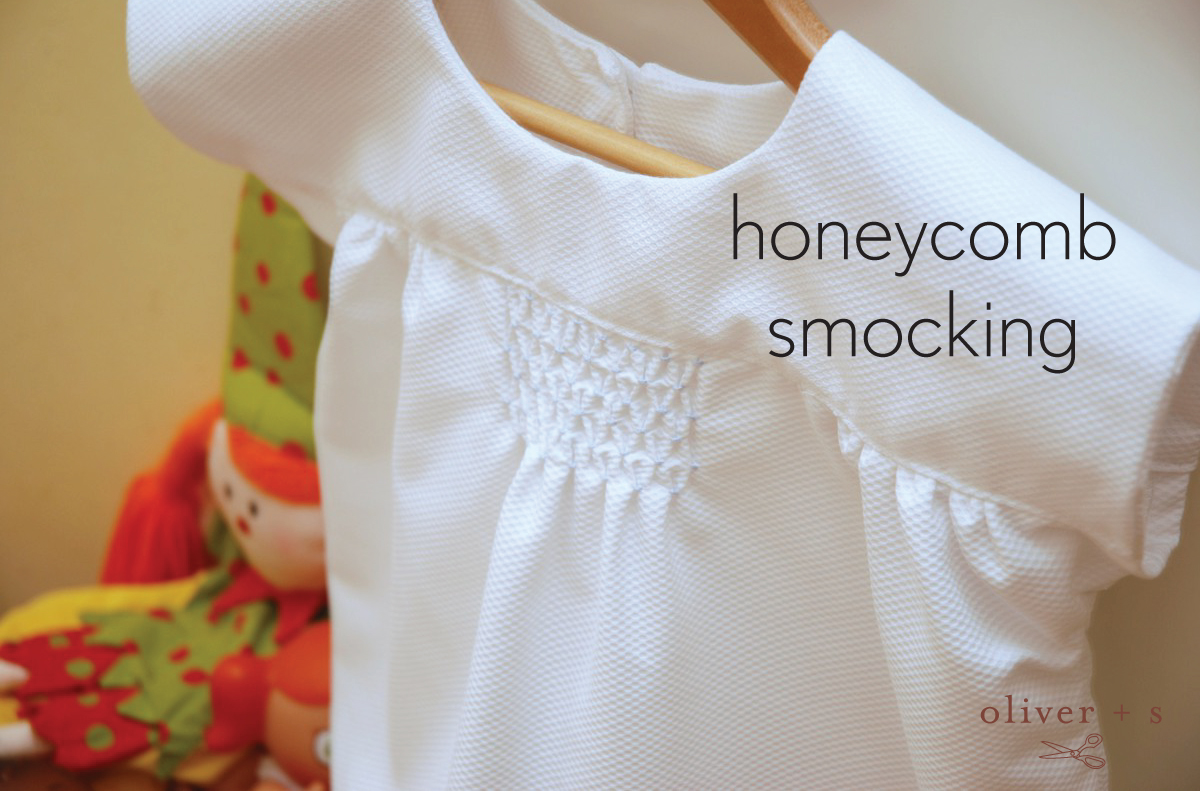
The final result:


Detail of the added honeycomb smock:

Of course, I couldn’t resist trying it on my favourite model (perfect with jeans and a red bow):

The honeycomb smock was really fun to make and was the perfect embellishment to a favorite pattern. And it was much easier to accomplish than expected!
There are many other Oliver+S patterns that would also be perfect for a bit of smocking, such as the Family Reunion Dress, the Birthday Party Dress and the 2+2 Blouse.
beautiful! i always love ana sofia’s creations in the flickr group, and i didn’t realize she just started a blog recently too! yay!
Wonderful tute, Ana Sofia! I love your smocking and have been wanting to try. Thanks for the lesson!
Fabulous! You did a great job on the blouse and the tutorial!
Keep smocking… and give a holler if there’s ever anything I can help you with smocking-wise.
Great job on the tutorial, Ana Sofia! Love the new top!
Well done, Anna Sofia!
Thanks so much for sharing this idea!
I love sewing Oliver and S patterns on plain colour fabrics because their details stand out better and this is perfect for that. Will give it a try this summer!
María
Thank you all so much for your comments and feedback. Despite being a novice to smocking (any type of smocking really), Oliver and S patterns are perfect for trying out new techniques and I strongly believe that a unique embellishment makes a handmade garment a unique piece that your kid will love to wear. Of course, now I feel ready for smocking everything. Thank you Liesl!
I’ve seen this kind of embellishment done first then cut out the piece. No guessing required.
GRACIAS POR TODO LO ENSEÑADO… UN ABRAZO..