Today we are happy to welcome Melissa. She recently sewed up a Library Dress using knit fabric and has graciously put together a tutorial so we can all learn how to make one, too. Thanks so much for being here Melissa!
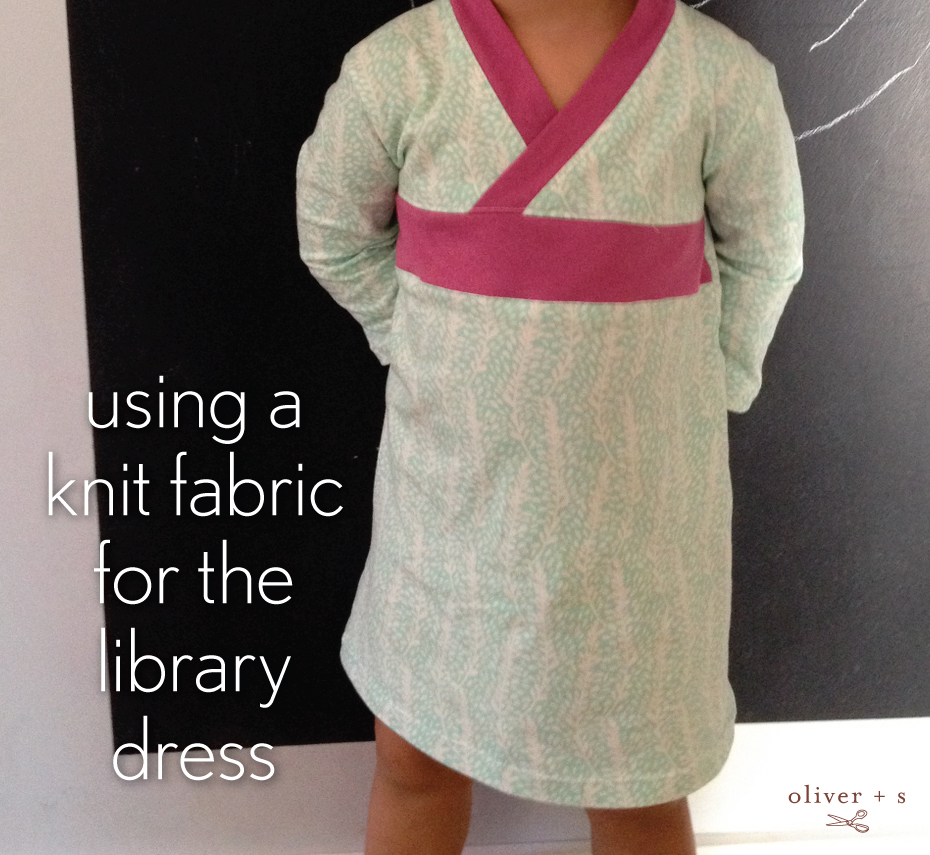
As part of the Knock It Off series hosted by Elegance and Elephants, I decided to re-create a knit Tea Collection dress. It was one of our go-to day care dresses last winter. I used the Library Dress pattern as my starting point since it is similar in appearance. I love that there are no closures on this knit dress – that’s always my least favorite part of sewing (and buttons and cranky toddlers really don’t mix).
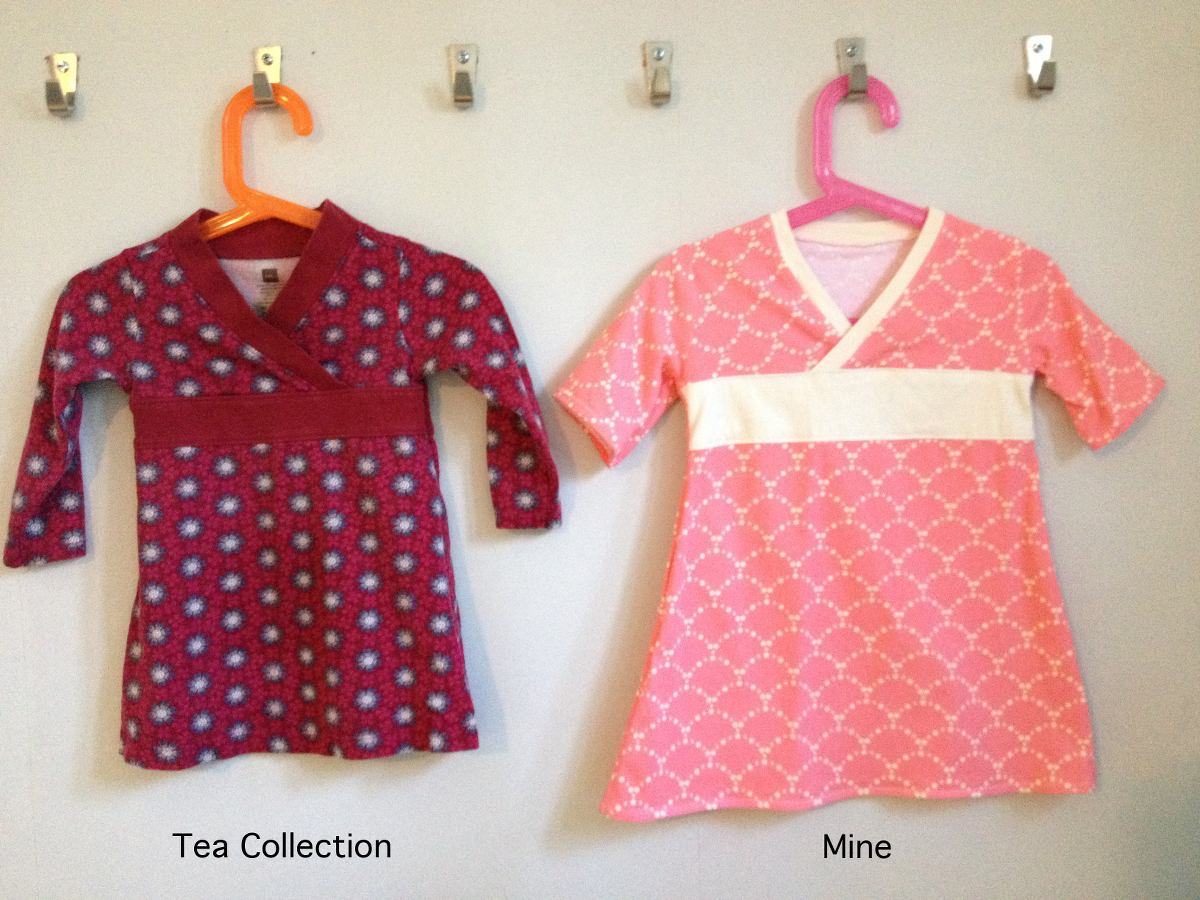
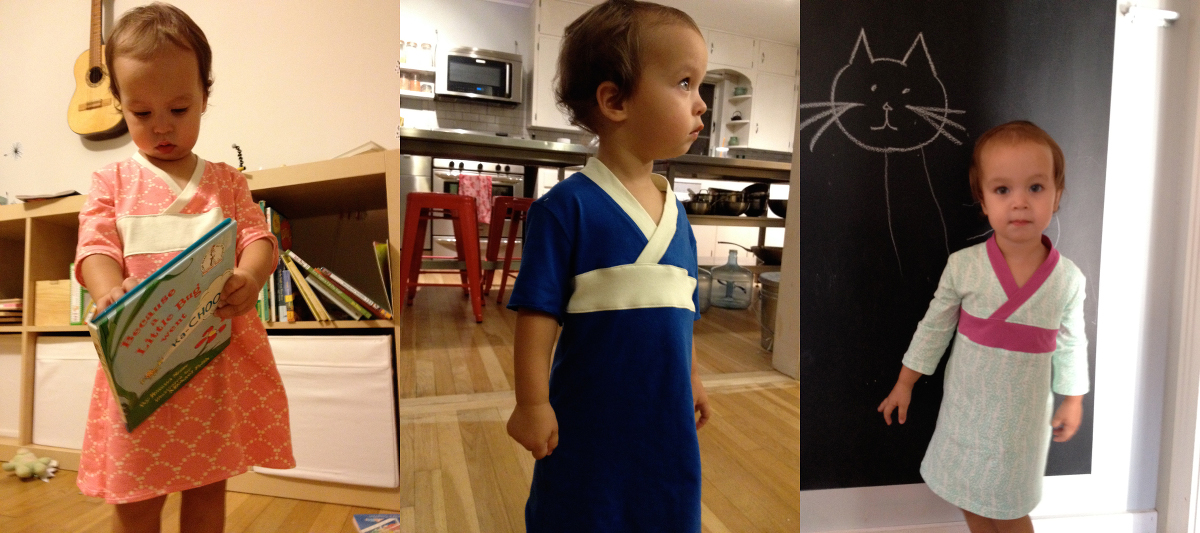
For all of my dresses I used a medium weight cotton jersey or jersey blend. I started one with a lighter weight knit and realized right away that it would not hold its shape for this style. I used Art Gallery knits for the pink and light blue dress and cannot recommend them enough. They are soft, stretchy (but not too stretchy), hold their shape well, and are not too thick. I squeezed a full dress out of a half-yard and still have some scraps left for another project. The pink dress is made with Ripples Rose from the Emmy Grace collection by Bari J. and the light blue dress is Frilly Flutters from Bonnie Christine’s Winged collection.
The first time I made the dress, I went down one size. My daughter is a small 2T and I used 12-18M. That was still too big for her tiny upper body. The next time, I went down a size and took in the sides a little more, and it still wasn’t right. The third time, I went down two sizes and was really happy with the results. They are all wearble and cute on her; it’s just a personal preference on the fit. I wanted the bodice to be snug.
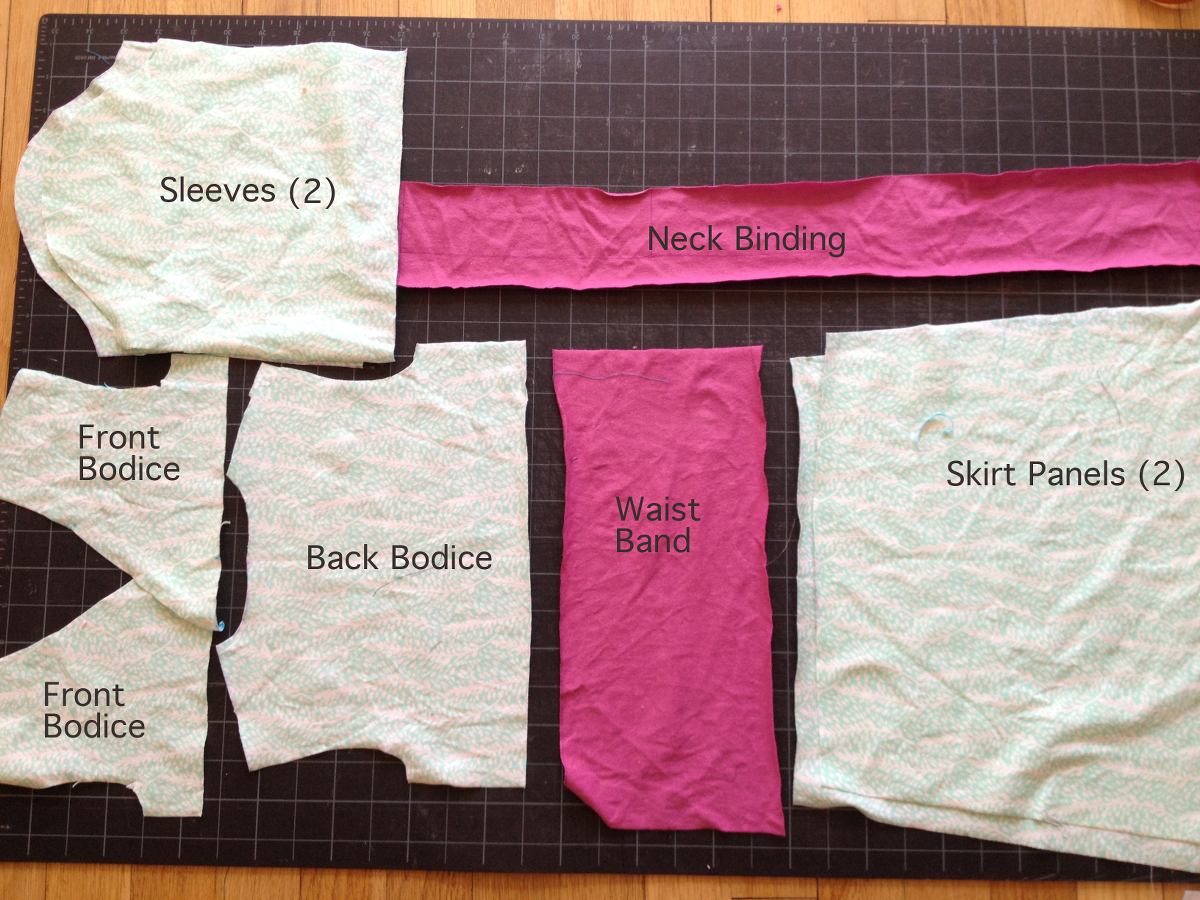
I used four of the Library Pattern pieces: the front bodice, back bodice, 3/4 sleeve, and the front skirt panel.
Instructions:
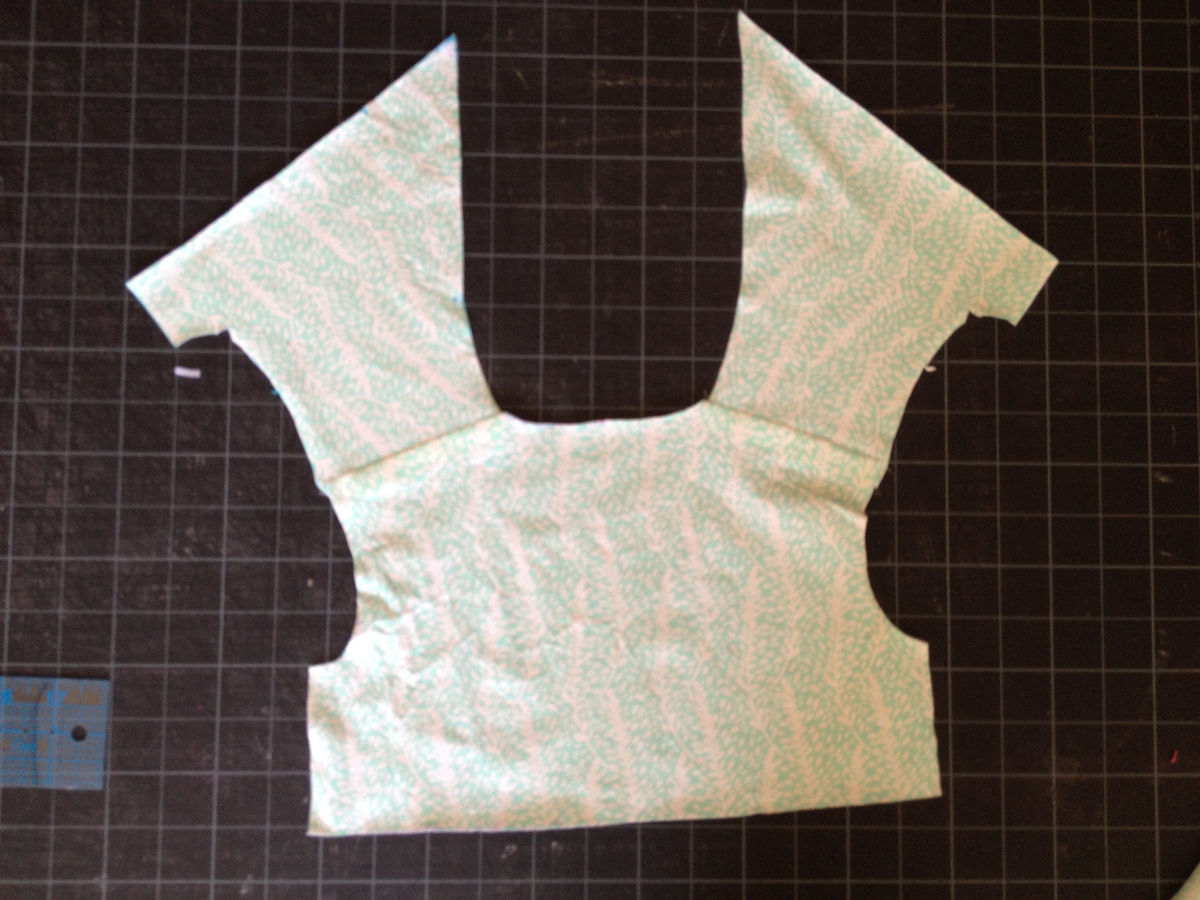
Take 1 inch off the right side of the back bodice piece (to account for the button placket we will not be sewing). Take 1/2 inch off of the bottom left side (at the seam) of the front bodice. Take 1/2 inch off each side of the sleeve pattern and straighten out the bottom edge of the sleeve. Now, for the skirt panels, you can do one of two things: draft your own to match the bodice or fold the pleats up on the front paper skirt pattern and you should have a template that fits. Remember if you are sizing down your dress, you may want to add some length to the skirt panels.
Cut 1 back bodice piece and 2 skirt pieces on the fold. Cut two front bodice pieces as mirror images. Cut two sleeve pieces.
You will also need to make the binding strips for the neck binding and the waistband on the front of the dress. For the neck binding, cut a strip that is 3 inches wide by however long you need it to be to bind the entire neckline all the way around. My neck binding strip was 25 inches long and I had plenty left over. For the waistband, cut a strip that is 6 inches wide by however long you need it to be to match your pattern waistline. My waistband was 6 inches by 12.5 inches and I still had a bit extra (that’s fine- you can cut it off later).
Remember if you are using a directional print to take that into account when cutting. When you’re done cutting, you should have the following pieces: two sleeves, two front bodice pieces, one back bodice piece, two skirt panels, one waistband and one long binding strip.
I used a 1/2 inch seam allowance and a very narrow zigzag for most of this project. I don’t have a serger so this was all done on my machine and edges were finished with a zigzag.
Start by lining up the front and back bodice pieces at the shoulders and sew them right sides together at the shoulder seam. Sew both shoulders that way. Finish and press seams.
Now take your neck binding strip and fold it in half wrong sides together and press to get a nice even strip. Sew the binding to the neckline right sides together and raw edges aligned.

Finish seam allowance as desired. Flip the binding around to the right side and press. Now topstitch the seam allowance of the binding to the dress, all the way around the neck line of the bodice. I used a double needle for this step. Make sure you have the right color thread when you do this since the seam will be visible.

Now take the bodice and line all the seams up. Overlap the front bodice pieces until the side seams meet. Pin and baste the front bodice pieces together at the bottom to keep them in place. Once they are basted and you are happy with how it lines up, you can trim off any excess.
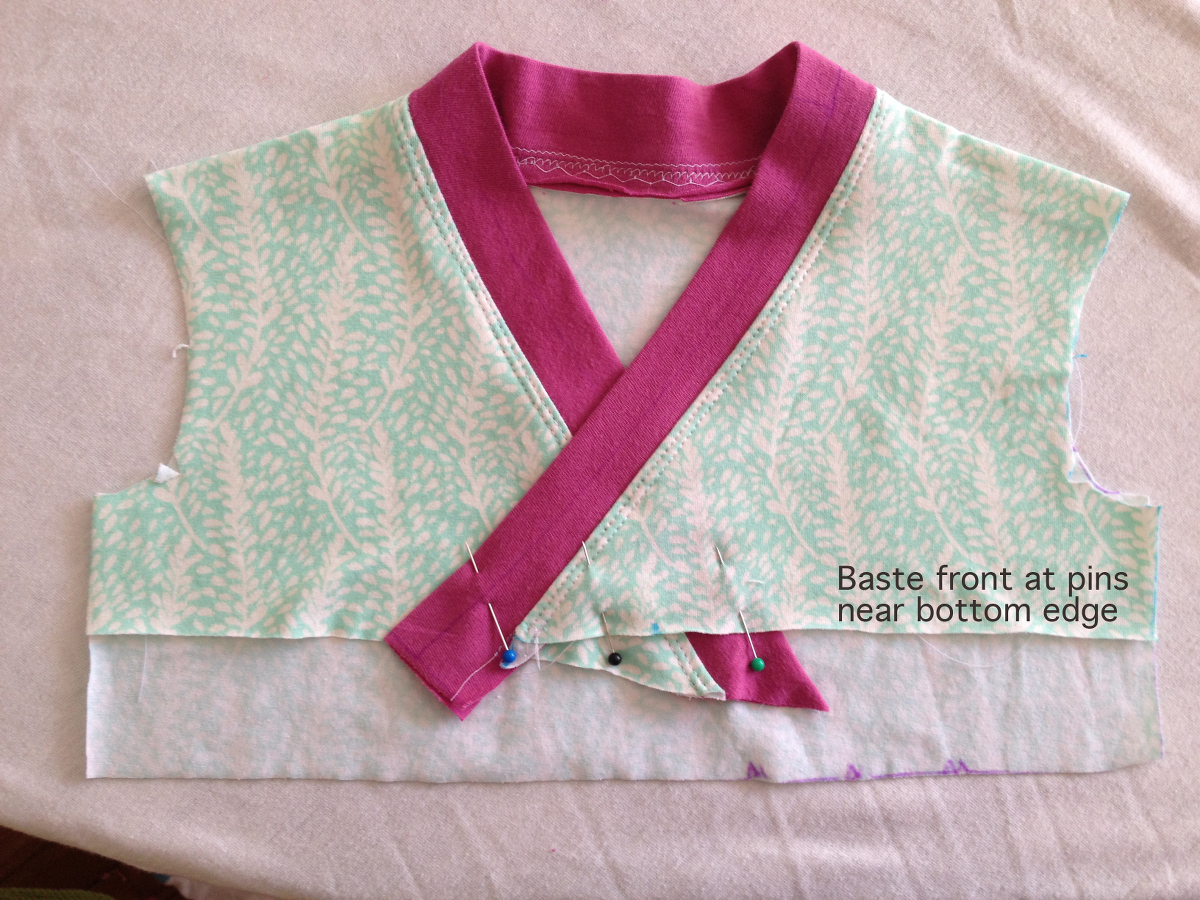
Fold the waistband in half, wrong sides together and press. Sew on the waistband by lining it up with the bottom of the front bodice, right sides together. Press the seam and topstitch the waistband to the bodice. I used a very narrow zigzag for this but you could also use a twin needle.
Sew the sleeves to the bodice. Press and finish seams as desired.
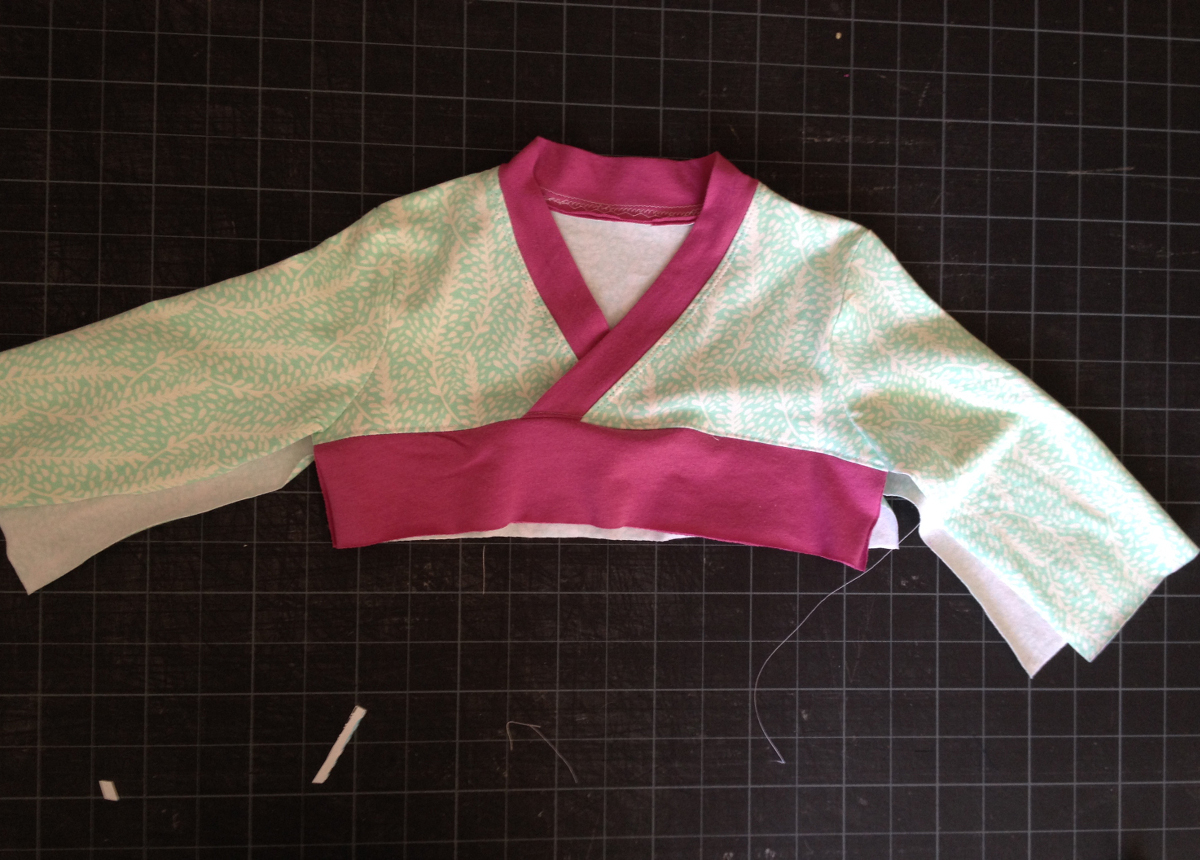
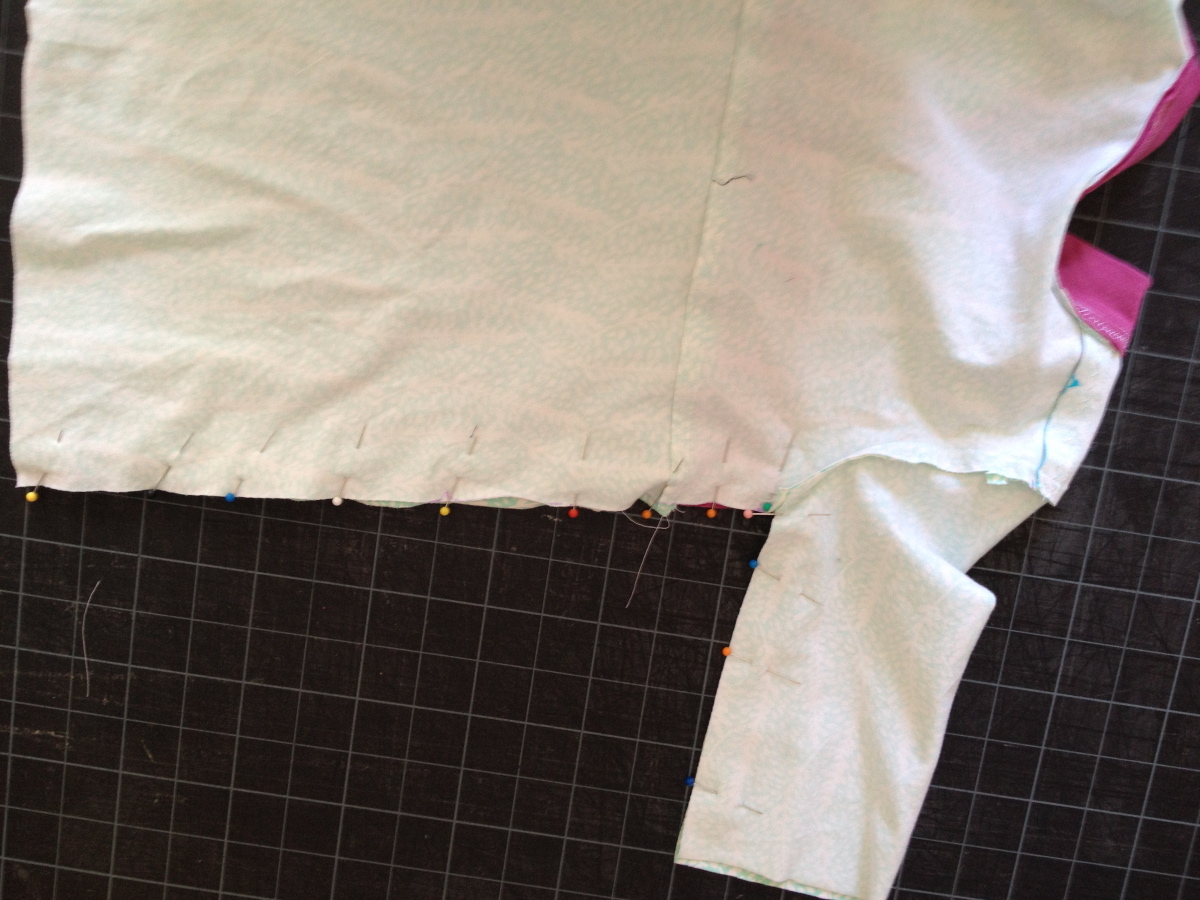
At this point you want to make sure that the front (with the waistband sewn on) and back bodice line up when you lay the dress down together. If they are off, trim it to make them even. My waistband was a little too big so I had to trim some off. Attach the skirt panels to both front and back.
Sew the skirt panels to the front bodice and then the back bodice. Topstitch both front and back seams. Your dress should look like this.
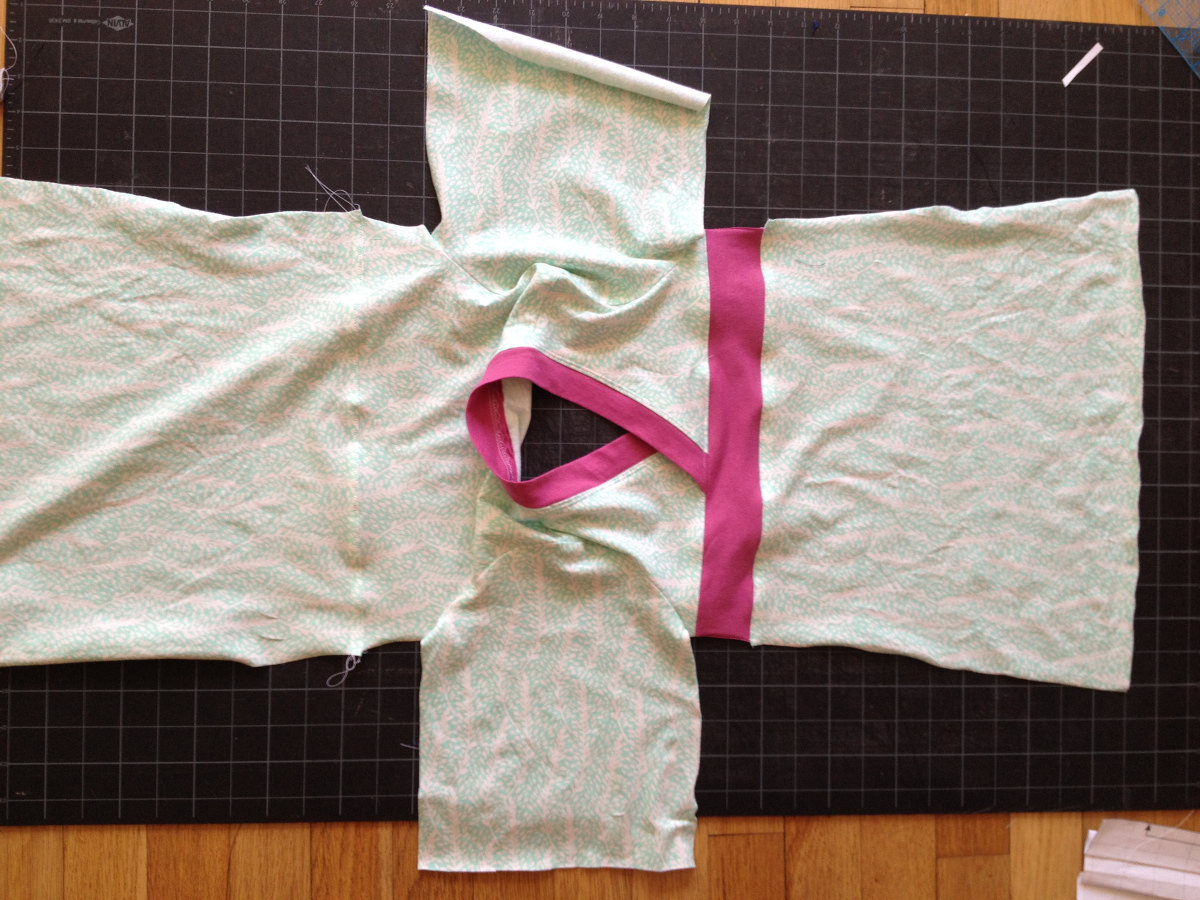
Now pin your dress right sides together, matching the seams at the armpit and the skirt panel seams (the seam at the bottom of the waistband should match the seam at the back skirt panel).
Sew together from the bottom of the sleeve to the bottom of the skirt panel. Now you should have an almost finished dress (minus the hems). I suggest at this point that you try the dress on. If it’s too big you can always make adjustments here to the side seams.
The last step is to hem the sleeves and skirt. I used a twin needle for this step but there are several ways you could finish the hem or you could also leave them unfinished and I think it would still look nice.
Here’s the finished result. She looks skeptical but that’s only because I wouldn’t give her the chalk she wanted until she turned around for a photo. It’s OK to bribe a toddler for a photo, right?

Thank you for this! I’ve made the dress twice but I can’t deal with the buttons on my squirmy 2 1/2 year old. I can’t wait to try it in a knit!
Very cute!
This looks so cute! I love making knit dresses for my daughter, so I will definitely give this a try!
Jeez! Now I’ll stop buying a gazillion Tea Collection dresses!
I’m with Laura, you just saved me a lot of money!
Thank you so very much for this tutorial. The Tea Collection Wrap dress is one of my favorite dresses and I can’t tell you how long I’ve been looking for a pattern to make a dress just like it.
Melissa, I made it! Reviewed here. Thanks again for your tutorial.
Deepika, Your dress is beautiful. Ii like how you added the band to the back as well. I had to laugh when I read your review because I made the same mistake cutting the extra binding off.
Love this, and am going to try it out right away. N had the Tea collection dress like this, and I have often pondered how to convert the library dress pattern into one. Many many thanks for what looks like an excellent tutorial.
Thank you for the tutorial, I’m confused on the second instruction, take 1/2″ off the bottom left side seam. I am assuming you mean take off 1/2 at the seam from the size we are using so if it’s a 6 come in 1/2″ from the seam line?