When I first saw Vivian’s After-School Shirt pop up in our Flickr group, I knew she would be the perfect person to do a tutorial on piping. And sure enough, she jumped right into the project and did a bang-up job with it, making a second version of the shirt for her younger son in the process.
I love her fabric choices, too. The brown and robin’s egg blue gingham paired with matching blue for the piping really make this shirt great for boys, don’t they? And you may also have noticed this version of the shirt, which she also made and I adore. So let me introduce Vivian and let her get started with her tutorial. Thanks so much for this great piece, Vivian!


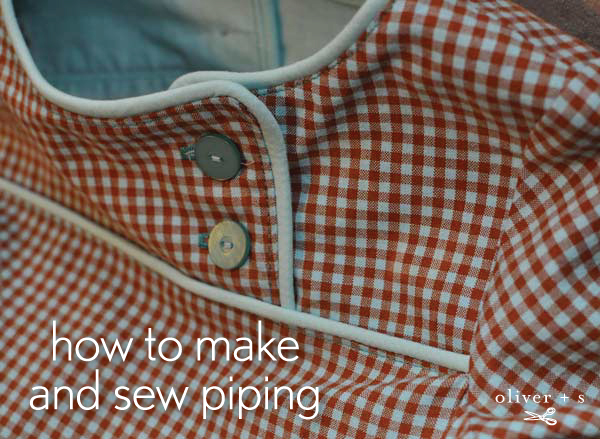
HOW TO ADD PIPING TO THE AFTER-SCHOOL SHIRT
The lines of the After-School Shirt are so gorgeous that I didn’t want them to be lost in the pattern of my fabric. I added piping all around the neck opening as well as the yoke seam to highlight the design, and the results were well worth the effort. I’m not a professional seamstress by any means, so give it a try because it’s easier than you think!
PREPARE THE PIECES FOR PIPING
Cut out all your fabric pieces. Interface the yoke facing according to the pattern instructions. (Please note that I cut the facing pieces out of a solid aqua cotton and so my photos may look slightly different than yours.)
Assemble the shoulder seams of the front and back pieces of the yoke. Do the same for the front and back yoke facings. Do NOT sew the yoke to the yoke facings yet.
 yoke shoulders sewn
 yoke facing shoulders sewn
MEASURE FOR THE PIPING
Figure how much piping is needed by measuring along the edges where the piping will be with a tape measure. Measure: A) short ends and neckline of right yoke + B) short ends and neckline of left yoke + C) top edge of the front shirt piece + D) top edge of the back shirt piece.
 yoke labeled A B
 shirt labeled C D
For a size 3T, I measured about 62″ in total. Add 10″ to your measurement to make sure you don’t run out of piping, so a size 3T shirt would require approximately 72″ of piping.
You can purchase pre-made piping from the store or make your own. There are numerous helpful on-line tutorials on how to make your own piping (e.g., Prudent Baby’s how-to sew piping tutorial)
 prepared piping
TRIM THE PIPING
I made my piping using 1/4″ wide cording and trimmed the seam allowance to 1/2″, which is the same as the seam allowance of the After-School Shirt pattern. This makes the piping easier to work with, as the cut edge of the piping will line up with the fabric cut edge.
 piping with 1/2’’ seam and how cut edge would match
When you are trimming the seam allowance of the piping, make sure you are measuring from as close to the cording as possible to the piping cut edge. Our final seam will be butted up next to the cording.
 measuring seam allowance of piping
If you are using purchased piping, it is perfectly fine if the seam allowance is narrower than 1/2″. The only difference is that the cut edge of the piping will not line up with the cut edge of the fabric.
 purchased piping pinned on fabric
PIN THE PIPING IN PLACE
Attach the piping to the right side of the left yoke (not to the yoke facing). Pin the piping onto the yoke with a 1/2″ seam allowance so the seam line will be right up against the enclosed cording.
As you approach a corner, stop and make a mark on your piping 1/2″ from the fabric edge. Cut a diagonal slit into the seam allowance of your piping to that mark so you can bend your piping around the corner. Be careful not to cut the stitches enclosing the cording.
 approaching the corner
 diagonal cut
 pinned around the corner
Shape the piping along the curves as you pin.
 pin piping on curve
You may need to clip the piping seam allowance along the curves in order for the piping to lay flat.
 clipped piping on curves
You don’t have to start or finish the piping in any special way. Just trim it even with the cut edge of your fabric as it will later be enclosed in other seams.
 beginning of piping
ATTACH THE PIPING
Sew the piping to the yoke by using a zipper foot and sewing with the stitching line ALMOST butted up to the cording. I like to leave a little space between this stitching line and the edge of the cording because I don’t want any of these stitches to show accidentally when sewing the yoke to the facing.
 sewing piping on almost butted up
There are four corners on the yoke pieces to deal with, so you will be an expert at sewing piping around corners when you’re done! I find it difficult to turn a 90 degree corner when sewing on piping, so here is how I make sharp corners. Sew your piping along the cording and stop at the corner (should be 1/2″ from the fabric edge).
 stopped at corner
Lift up the presser foot and pivot your fabric clockwise 45 degrees and sew 2-3 stitches to cut across the corner, being careful to keep the cording out of the stitching. You may want to hand crank the machine for these 2-3 stitches.
 stitches cutting corner
Pivot the fabric clockwise 45 degrees again to finish rounding the corner and continue sewing on the piping.
 rounding the corner
Attach and sew the piping in the same manner to the other yoke piece.
 attached piping yoke
ATTACH THE PIPING TO THE FRONT AND BACK SHIRT
In a similar manner to how we attached the piping to the yoke, sew the piping to the top edge of the front shirt piece with a 1/2” seam allowance. This should be easy compared to the corners and curves of the yoke as it is only a straight line of stitching. Do the same for the back shirt piece.
 attached piping on front shirt
ASSEMBLE THE YOKES
Follow the pattern instructions and pin the yoke facings to the corresponding outer yoke with right sides together. Keep the outer yoke pieces with the piping as the top layer and the yoke facings on the bottom, with the piping sandwiched in between.
 top layer pinned with piping
TIPS FOR SEWING PIPING
Tip: I like to pin my piping with the pins running vertically and butted against the cording so that they can be a guide for my stitching line. Make sure you remove your pins before the machine needle reaches it so that you don’t damage your needle.
 vertical pins on piping
Tip: Using your zipper foot (or a piping foot if you have one), sew with your stitching butted up as close to your cording as possible without sewing onto the actual cording. Your previous stitching from attaching the piping also serves as a guide–you want to sew to the left of that stitching.
 sewing left of previous stitching line
Tip: Use your finger tips to feel for the bump of the cording as you guide the fabric. Go nice and slow, and watch your finger tips!
As per the pattern instructions, trim the seam allowances to 1/4″, trim the corners, and clip the curves.
 trimmed and clipped yoke
Turn the yoke to the right side and admire a line of clean, even, lovely piping. Employ the seam ripper and re-sew any little “accidents” as needed.
 finished piped yoke turned right side
OPTIONAL: EDGESTITCH THE YOKE
If desired, edgestitch the short edges and the neckline of the yoke. I did not use my zipper foot and simply used my regular foot on top of the piping.
 regular foot edgestitching
 finished edgestitching on yoke
You now have the left and the right yoke piped and turned right side out. Note that as per pattern instructions, the button holes have been made and the remaining raw edges of the yoke and where the yoke overlaps on the bottom edge are basted together.
 piped and edgestitched yokes
ATTACH THE YOKES TO THE SHIRT
Pin and sew the front and back shirt pieces to the front and back yoke pieces respectively. Use a zipper foot (or a piping foot) with the stitching line butted against the cording.
 sewing the yoke to the shirt
As per the pattern instructions, finish the seam allowances together on the yoke seam. If you find this seam too bulky, do not trim all the seam allowances to 1/4″, but instead open the layers of seam allowances and trim some of the interior seams to 1/4″ prior to finishing with your preferred method.
 trim interior seam allowances
 serged seam allowance
EDGESTITCH THE YOKE SEAM
Use your regular foot to edgestitch the yoke seam on the front shirt piece. Do the same for the back shirt piece.
 edgestitching the yoke seam
 finished piping
Continue to follow pattern instructions to complete the shirt. Finally, admire your finished project!

finished shirts
 baby shirt close up
Happy sewing,
Vivian
What adorable kids, and they look great in their tops. I especially like the denim version with the red piping. So cheery for summer. I have this top cut out for KCWC and am hoping to get started tomorrow, thanks for a timely post!
Love this pattern, the fabric choices are great, and the kids are super cute to boot!
oh, thanks so much! I have been afraid of piping and now I think I might give it a shot. Thanks again, and tops look great and the boys are adorable!
Thank you for such a good tutorial! I truly appreciate all the pictures.
One thing to consider too, would be to shorten one’s stitch length when approaching a corner or going around the curves. This helps with accuracy and holding everything tightly in place. I’ve found that if I leave my stitch length at 2.5 sometimes there are little gaps at the corners or curves; dropping down to 1.5 allows me to take nice short stitches especially when doing the 45 degree step at the corners.
Beautiful shirts and handsome boys! thank you again for sharing.
these are such super great shirts, and i’m totally inspired now to go make one of my own versions. i see so many people do projects with piping, and i’ve never done it, other than some flap piping on the tea party dress.
thanks!
Love the tip about clipping the piping hard at the corner-fantastic!
Great tutorial.
Great tutorial. Congratulations Vivian.
Glad you are liking the tutorial. Yes, great tip about decreasing the stitch length. I’m so excited to see all your piped creations! I’m sure they will be wonderful and practice makes perfect.
Fantastic tutorial, thank you so much!!!!!!!!
When you’re pinning your piping, and it comes up to the seam line, pull the cording out of the piping and cut off the cording the amount of the seam allowance. Let the remaining cording retract into the piping fabric. Continue pinning the now flat piping until you reach the edge of the pattern piece. The flat piping reduces bulk in the seam allowance. It also helps when you have to match the piping with other piped pattern pieces to sew a seam, for example, lining up the front and back yokes and shirts at the side seams.
j’adore , ce site est plein de bonnes idées de détails qui font toute la différence ….une mine d’or
bravo !!