

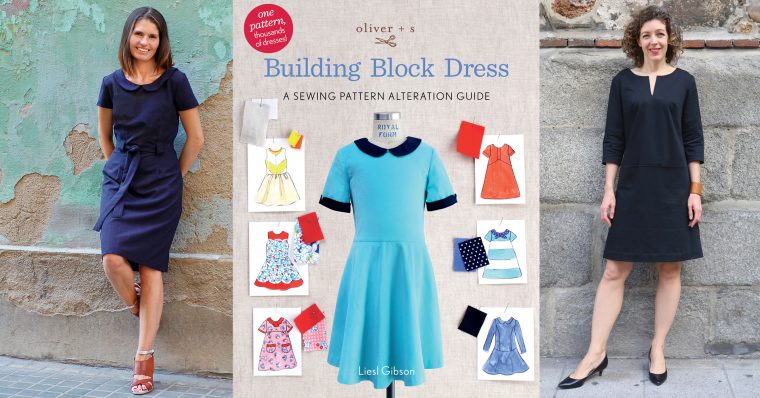
Many of you have asked about the Building Block Dress book and how it can be applied to other patterns, including women’s clothing. Here’s an example of how the book could inspire you to look at sewing patterns differently.
It’s my hope that once you start to alter patterns like the book shows you how to do, you’ll start to look at clothing differently. Rather than focusing on the pattern envelope image, you’ll look at the “bones” of the designs. It doesn’t matter what the fabric on the cover of the pattern is; what’s important is that you look at the structure of the design itself and think about how you could you alter that design to make other styles.

Here’s an example for you. For quite a while now I’ve had these two images saved in a Pinterest folder. Both dresses are really cute, and I thought it would be fun to make a similar style. I especially had my eye on the white Emerson Fry dress because I love the silhouette and the hip seam with pockets, and I had some perfect sateen from Robert Kaufman that I wanted to use for my dress.
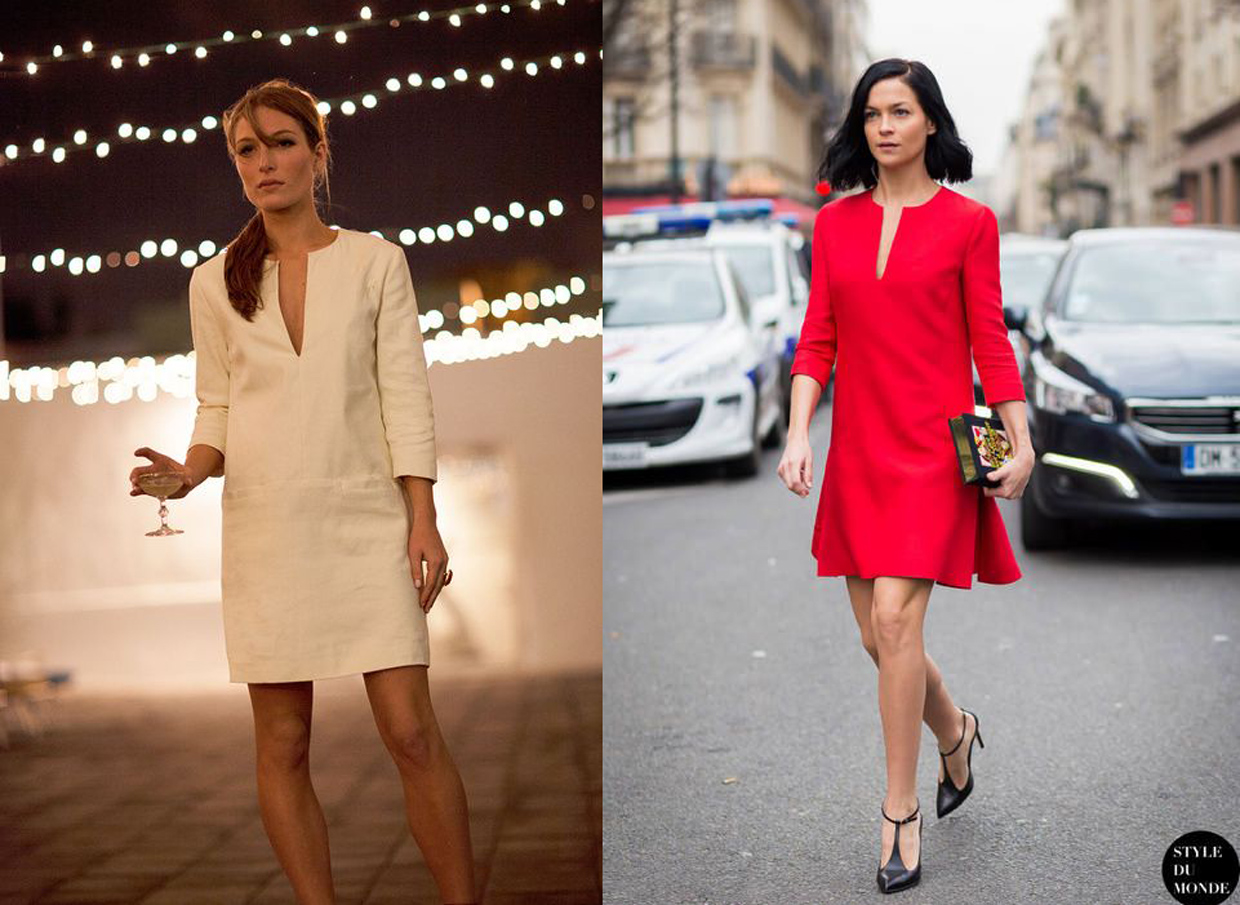
So I decided to start with one of the patterns I’m most proud of developing, our Liesl + Co Bistro Dress. It doesn’t look much like the photos above, does it?


This is a classic sheath dress pattern, and I’m especially proud of this pattern because I spent a lot of time getting the structure and details just right. It’s one of my block patterns, and I’m especially happy with the armhole and sleeve, which turned out beautifully. I knew this pattern would be a great place to begin, even though it looks nothing like the inspirational images. So here’s how I did it:
1. I started with the front and back dress pieces. Right away I made a muslin (details on page 7-11 of the Building Block Dress book), eliminating the waist darts on both pieces to get a looser fit through the waist in order to get closer to the inspiration photo.
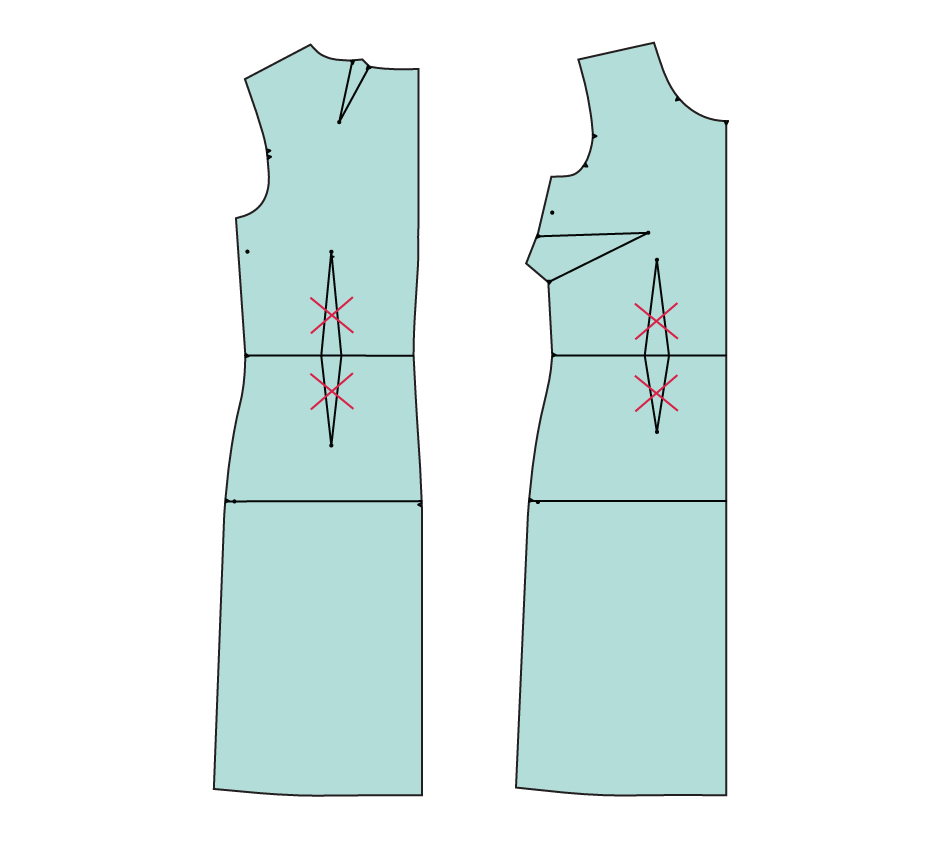
Then I used the muslin to determine where I wanted to make changes to the basic pattern. Here are the changes:
- I drew where I wanted the hip seam to be positioned on my body, which is about 1/2″ below the tip of the un-sewn dart. (See the red line on the illustration below and refer to Color Blocking on page 90 of the Building Block Dress book).
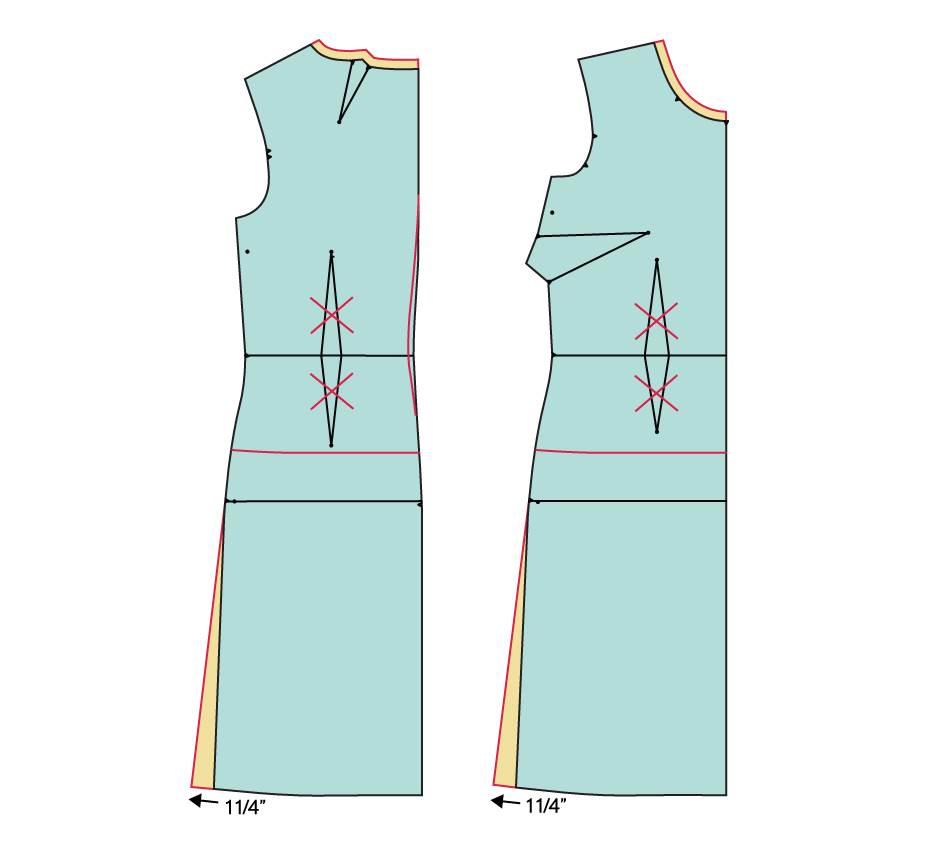
- I also added a little width to the skirt itself, starting from the hip line on the pattern piece and increasing by 1 1/4″ at the hem. (This is a modification to the A-line dress instructions on page 82 of the book, since I only flared at the side seam.)
- I shortened the hem to a few inches above my knee (see Lengthening and Shorting a Pattern on page 12) and determined how deep I wanted the neckline to be. I marked the neckline depth on my muslin. (See Shaped Neckline, page 117.)
- I kept the back seam of the original pattern so I could contour the back of the dress a bit. The side seams of the dress already have a nice curve to them, and I wanted to curve the dress back a little more since I eliminated the darts. So I pinned the muslin in a few spots along the back seam to determine how much I wanted it to contour. (The sewing term for this is a “swayback,” but that makes me think of an old horse so I avoid the term when I can, thank you very much.)
- Also, I forgot to do it for this dress, but for the next one I want the neckline to be higher and narrower, so I’ll raise it by 1/2″. This is the same amount as the seam allowance, so I just need to add 1/2″ seam allowance to the existing neckline.
Here are some photos of the muslin itself, for your reference. You can see how I used it as a working draft of the dress. This allowed me to figure out all the details and changes I wanted to make to the pattern before I cut into my fabric. I determined how low the neckline should be, where to add the hip seam, and how much flare to add to the skirt. It also meant I didn’t need to worry about anything when it came time to sew the dress itself. I could check to be sure I wouldn’t need a zipper, confirm that I liked the shape and the position of all the details, etc.
Here’s a quick look at my muslin.
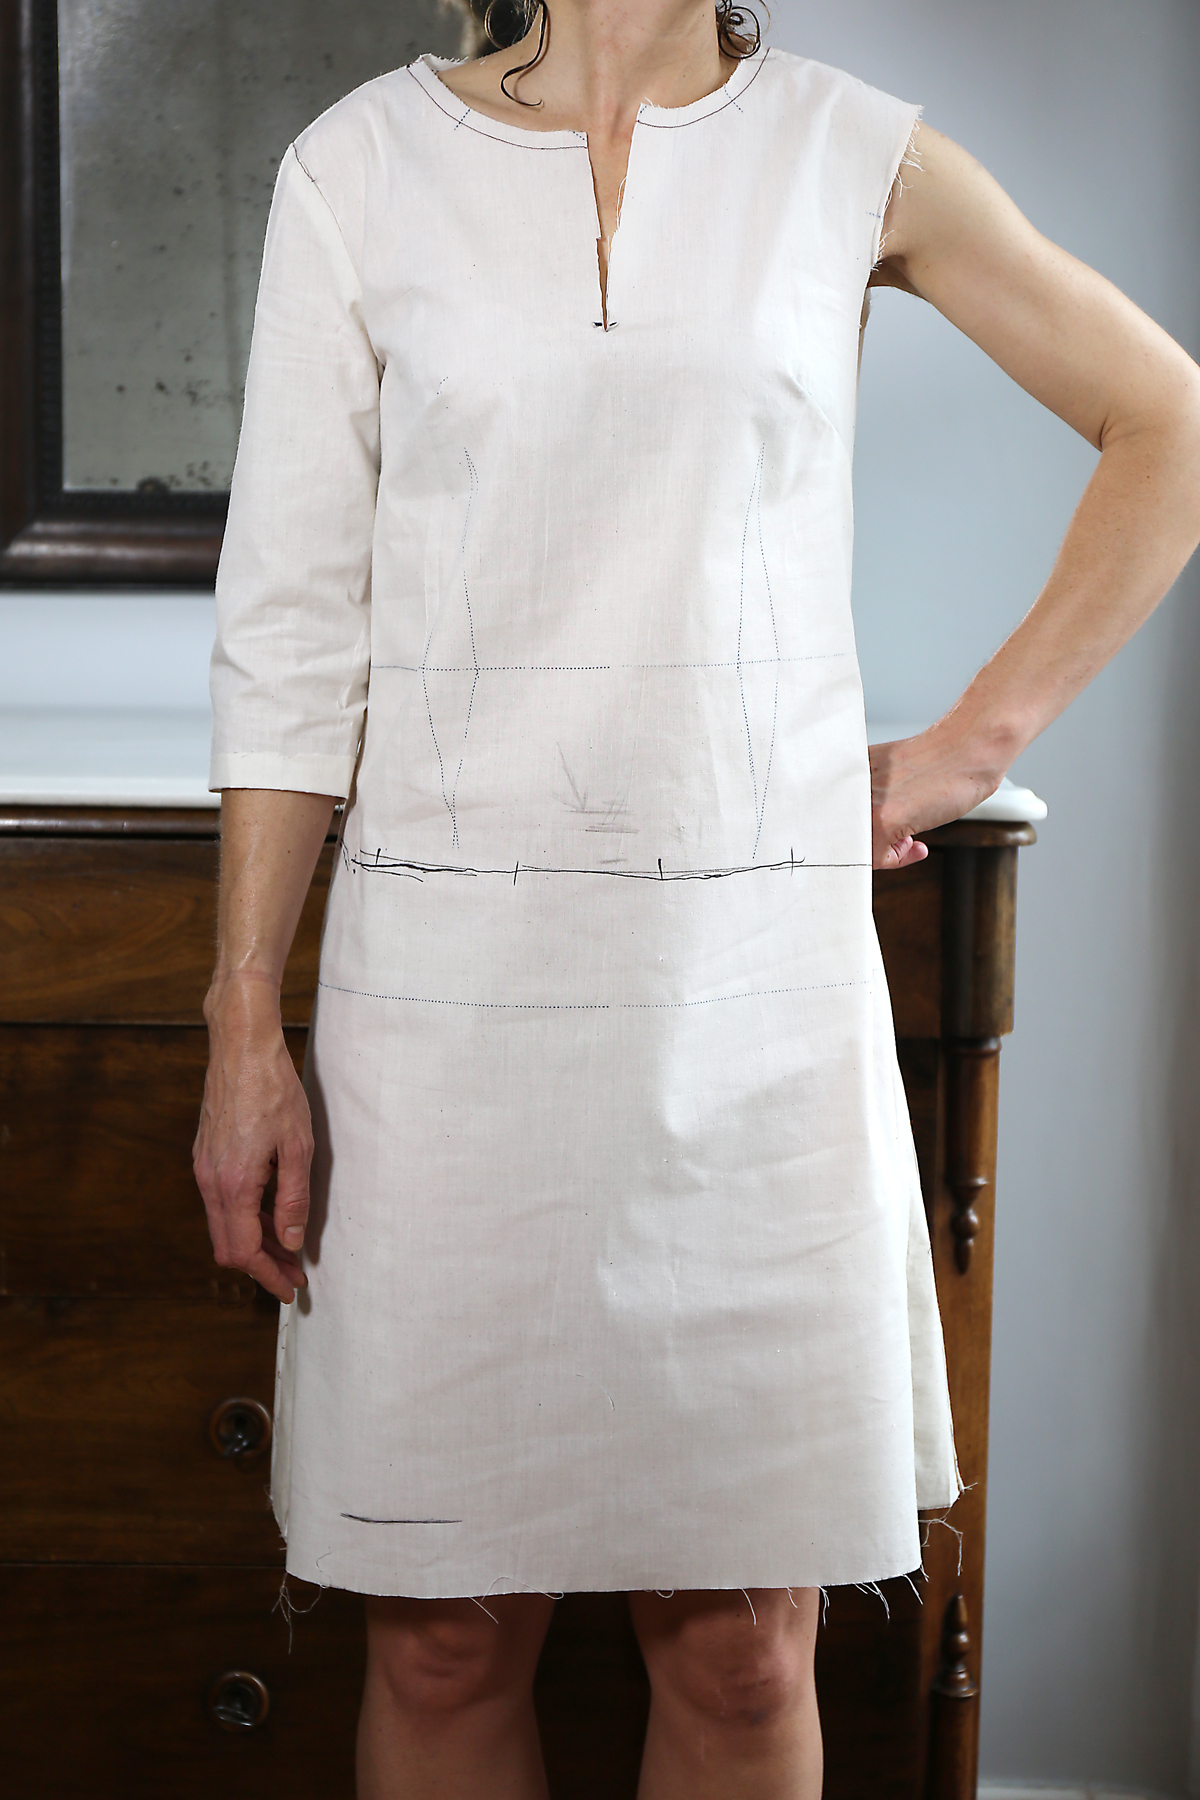
You can see in this photo where I indicated the final length of the hem. It’s always a good idea to try on your muslin with undergarments and shoes like you’ll wear with the finished garment because you’ll get a better idea of the final appearance.
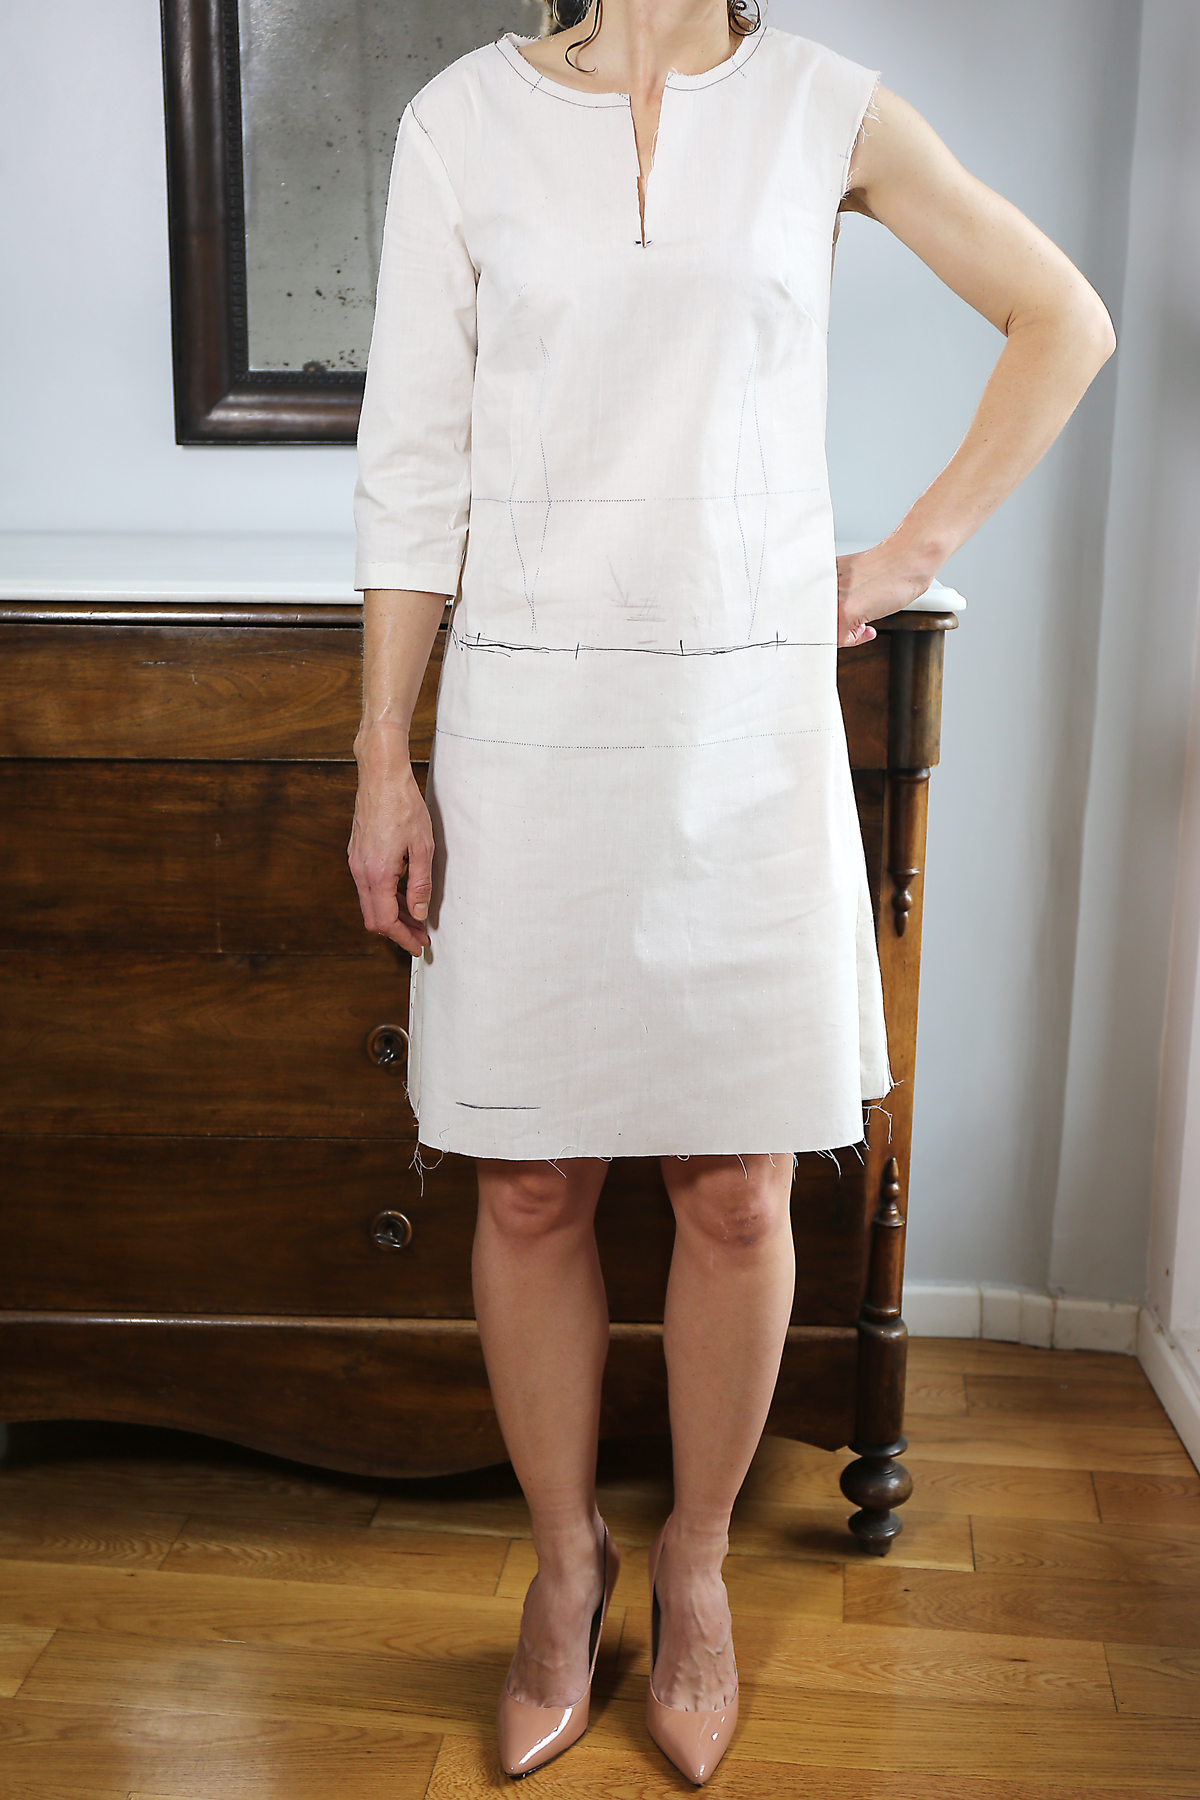
Here is a close-up of the side seam at the hem where I added a wedge of fabric to flare the skirt a bit. As you can see, I also drew on the dress with a Sharpie while I was wearing it to indicate approximately where I wanted the hip seam to be located. Muslins are your working draft; use them to your benefit!

2. Once I was done fitting the muslin, I transferred the changes back to my pattern pieces and added hip seam pockets to the front pattern pieces. (I modified the In-Seam Pockets instructions on page 98 of the book.) The pockets are similar to the pockets on our Liesl + Co Bento Tee as well as the Oliver + S Book Report Dress and Lunch Box Tee, if you already own any of those patterns.

3. Then I turned my attention to the facings. I raised the neckline of the facings by 1/2″ to match the revised neckline of the dress and added to the bottom of the front facing to accommodate the deep V of the new neckline. (See Internal Neck Facing on page 118.)

4. I also shortened the sleeve, marking the desired finished length on my muslin so I could check the proportions on my body.

After that, sewing the dress was very easy and fast, especially since I knew I didn’t need the side zipper for this version. Everything was straightforward, especially if you’ve sewn some of our other patterns before. If you’re not sure how to sew any of the changes you made to the pattern, refer to the sewing instruction for that section in the Building Block Dress book itself. I really made sure to design the Building Block Dress book so you can refer to each section and assemble the dress based on the changes you make to the pattern. The sewing instructions are a huge part of this book; they’re thorough so you don’t get lost once you’ve altered the pattern.
And here is my finished dress! I wore it quite a bit on my trip last month and got lots of compliments.

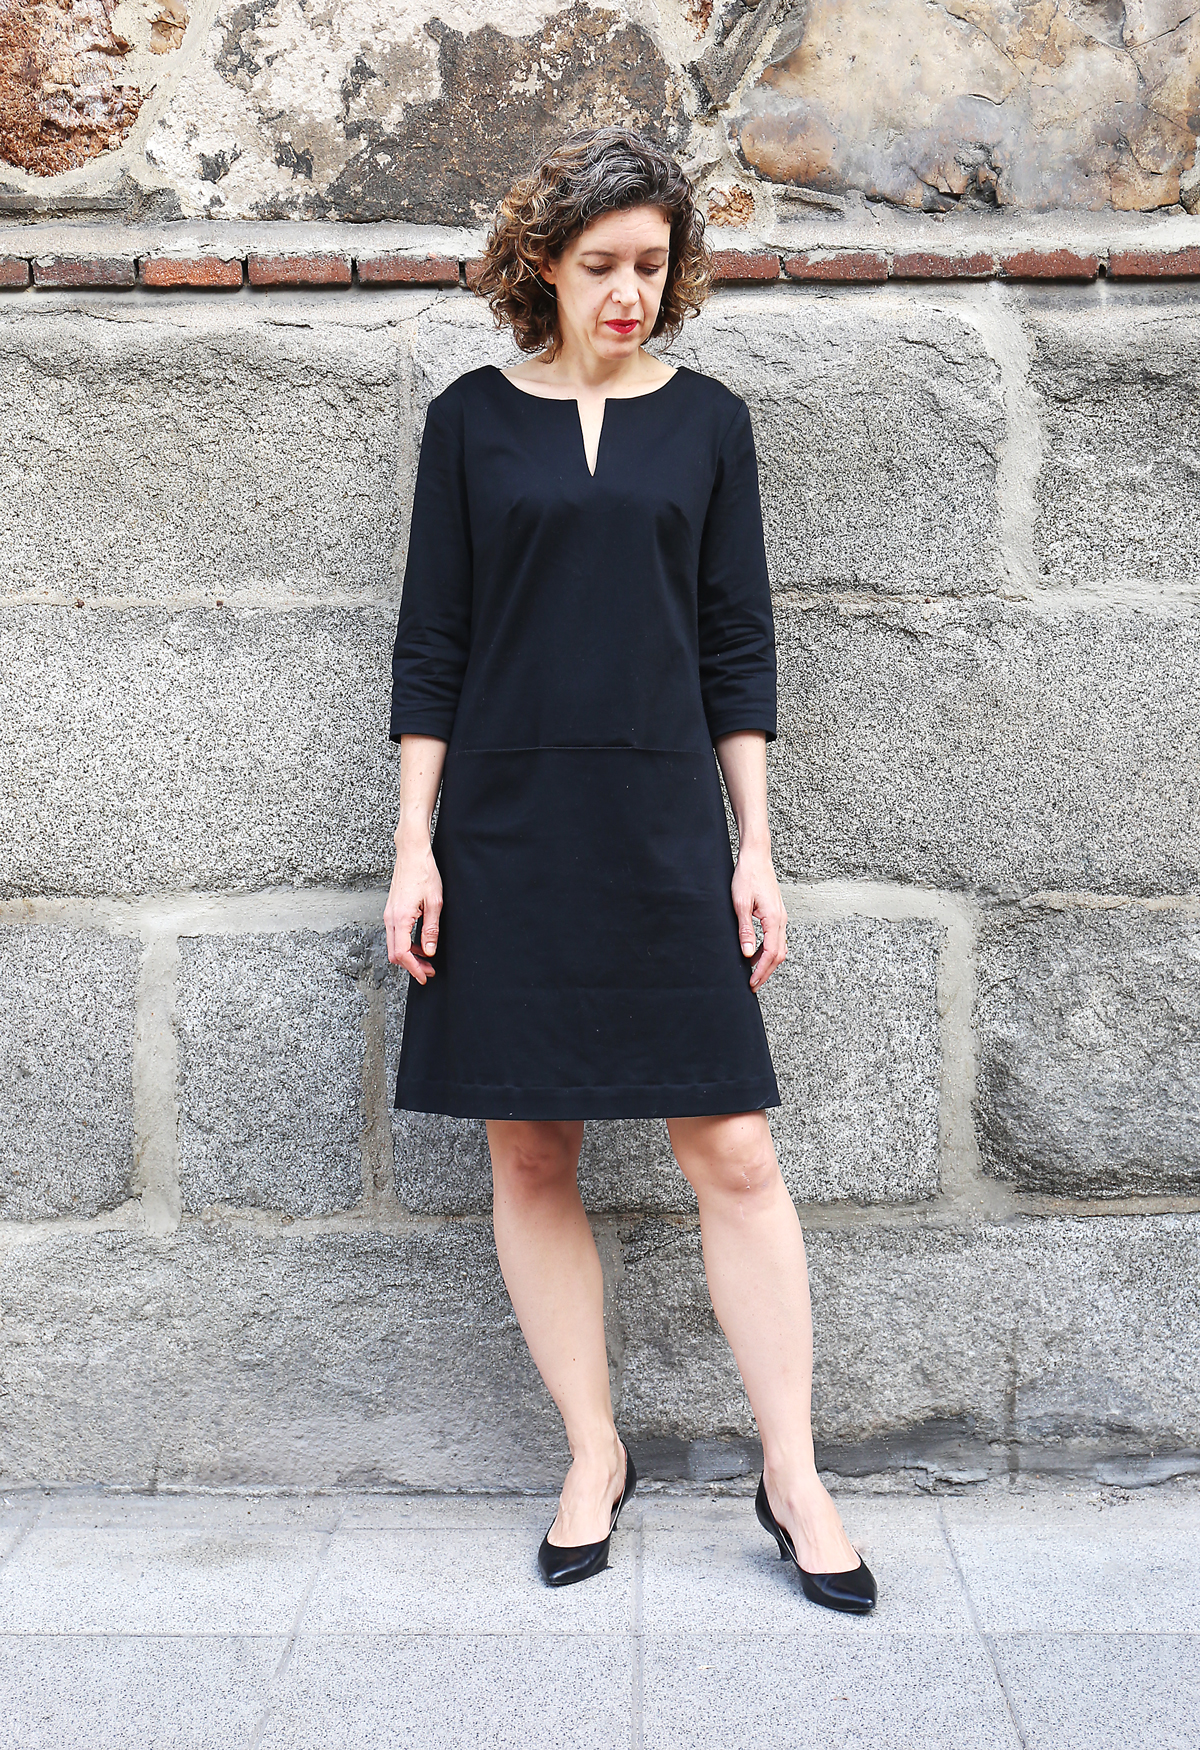
I like it so much that I’m busy sewing another one in silk velvet for the holidays, which I’ll show you as soon as it’s finished. It’s been slow going since each seam needs to be hand basted before machine stitching, but now that I have the altered pattern I can sew it as many time as I want. Or make other changes to the pattern using the techniques from the book, whenever I have new ideas for changing it.
I hope this gives you a good sense of how you can use the Building Block Dress book in sewing for yourself as well as sewing for the girls in your life.
Save