

Here is the next installment of the “My Favorite Oliver + S Pattern” series. It’s where we ask Oliver + S fans to share a bit about their favorite Oliver + S pattern, telling us why they like it, what they learned from it, and to show off the multiple times they’ve made it. Today we have Genevieve from The Orla Project. Her favorite Oliver + S pattern comes from the Little Things to Sew book. Here she is.
Thank you so much to Oliver + S for letting me share why I love their Reversible Bucket Hat pattern, a few tips for sewing the hat that I hope you may find useful, and a little about myself. My name is Genevieve, The Orla Project on Instagram, and I’m from Brisbane, Australia. I am a self-taught sewist and crafter and I’ve loved everything creative and art related since I was very young. I started sewing garments about 20 years ago then moved on to handbags, home decor items like cushions and door stops, toys, jewellery, and leatherwork such as journals, bags, and pen pouches. I always have something on the go. If there is a craft to try I’ll try it! Two years ago I started quilting, and it has become my main sewing obsession. I also love to crochet and I’ve been working on my garment drafting and sewing skills, and some amateur photography. Experimenting with colour in any form is my passion.
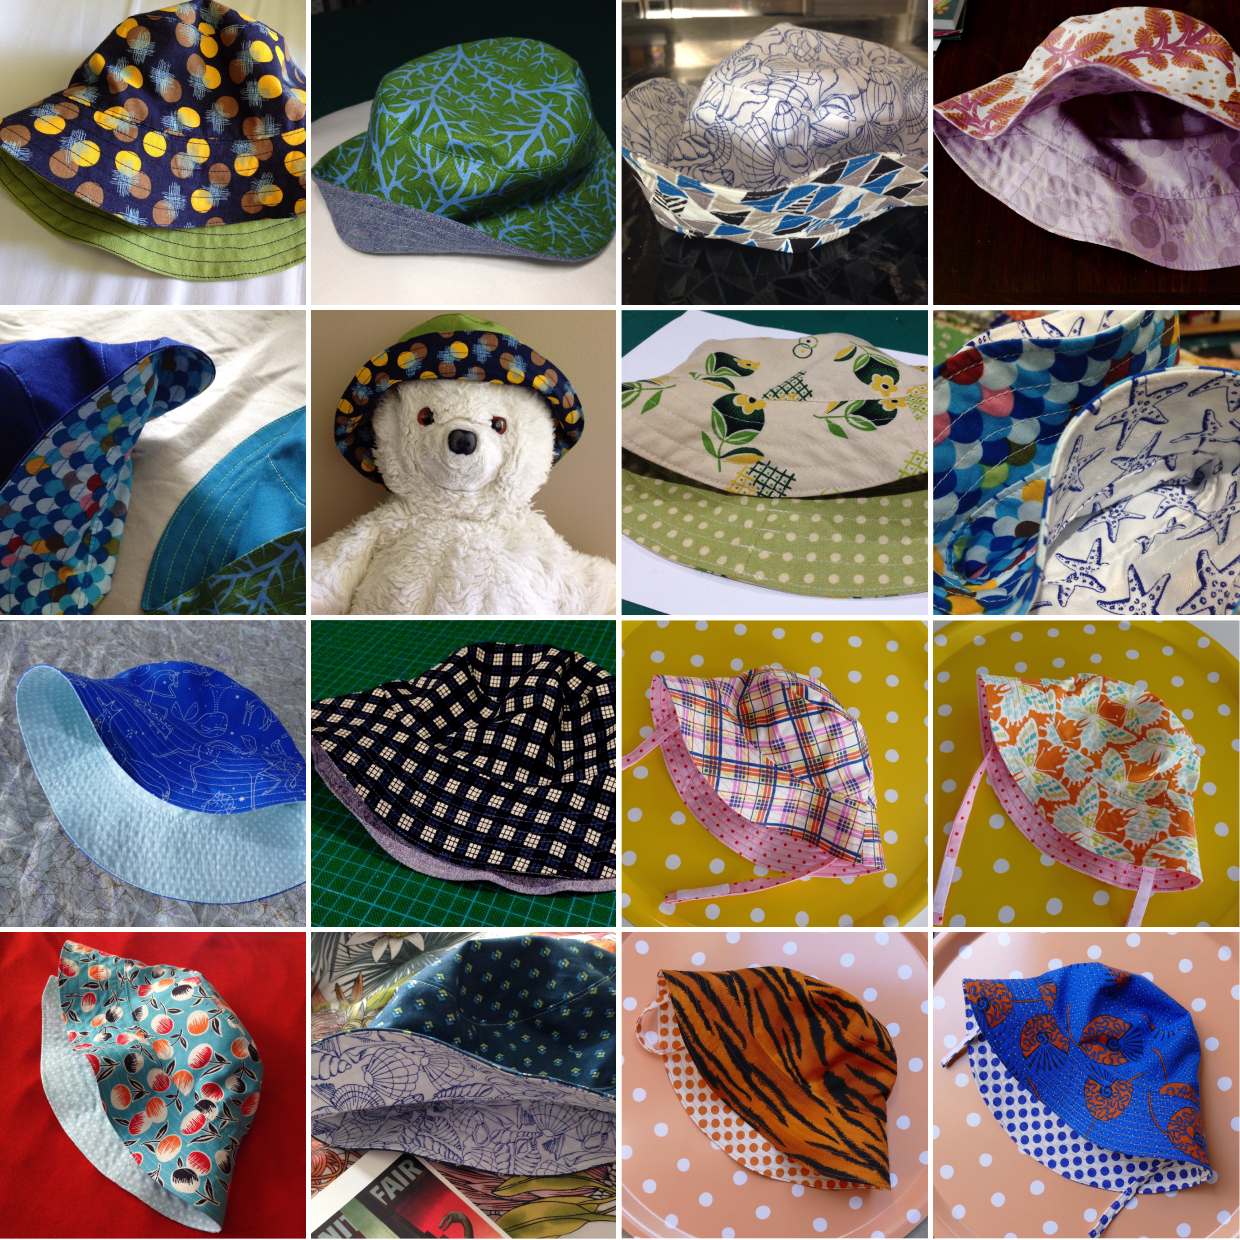
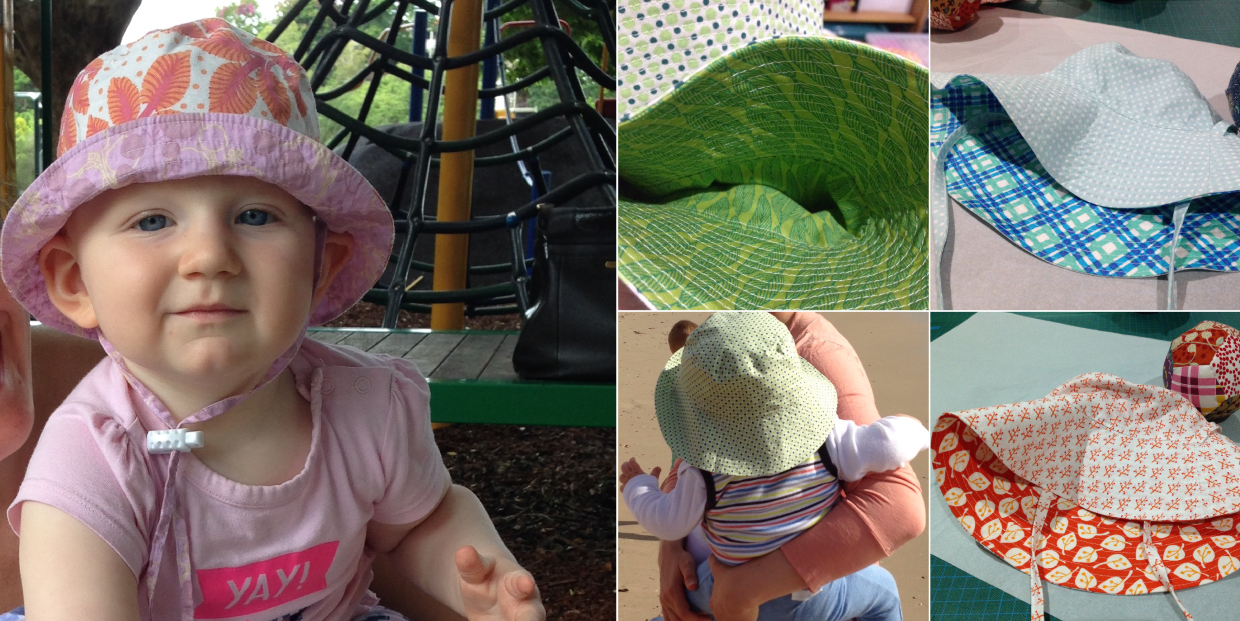
My favourite Oliver + S pattern…is the one I have made most often, the Bucket Hat. I found the bucket hat pattern three years ago and it has become an absolute go-to for birthdays, Christmas and “just because.” They fit well, are comfy and are a clear winner with the kids, even the ones who don’t always love wearing a hat. I love choosing the fabrics to coordinate for the reversible style, always with a main and lining print in mind.
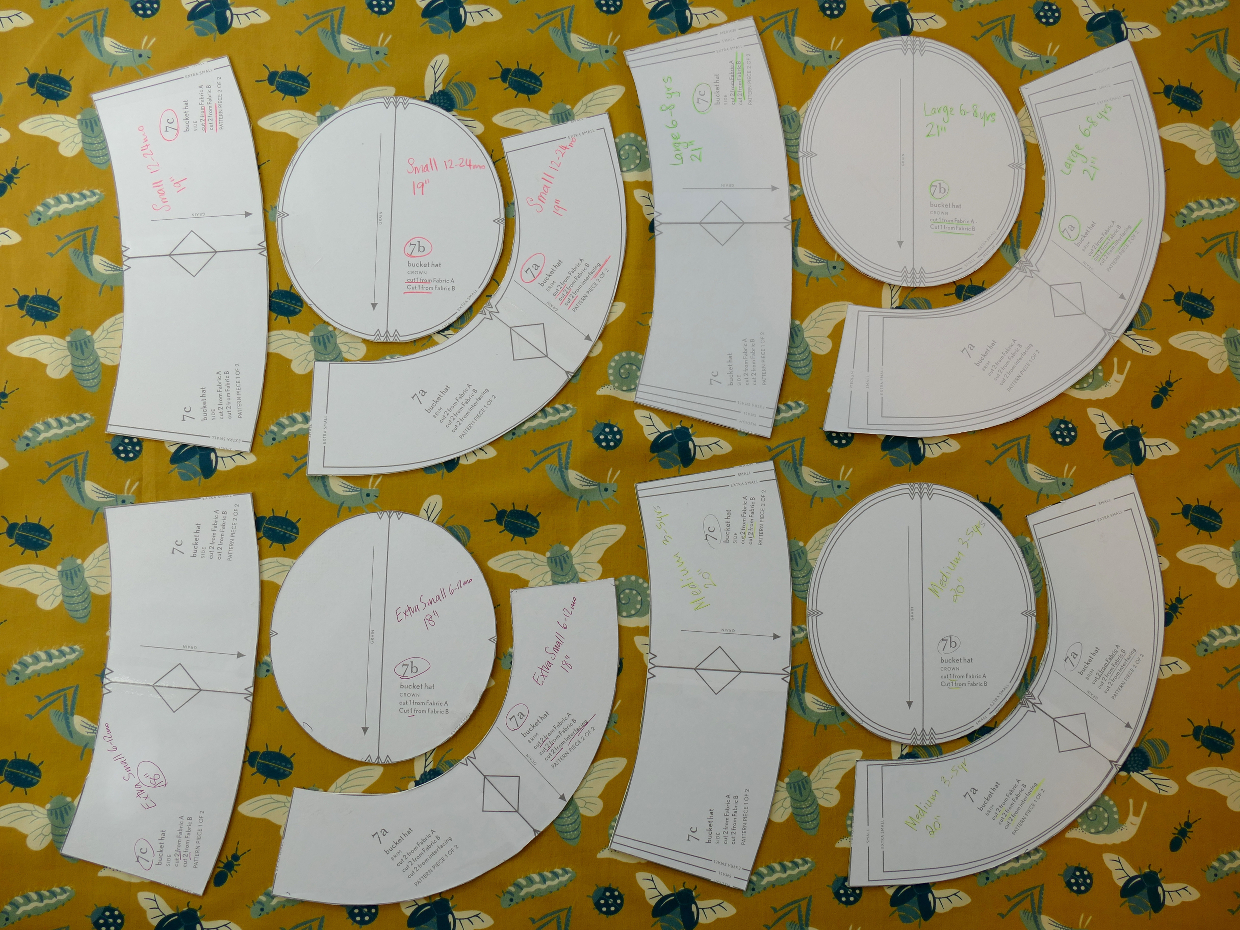
Once I’d made a couple of hats, I knew it would be a great staple gift, so I decided to make templates for all the different sizes of the pattern – Extra Small (6m-12m), Small (12m-24m), Medium (3-5 yrs) and Large (6-8 yrs). Using offcuts of picture mount board from my local “reverse garbage,” I cut them out and glued on the printed pattern pieces to keep all the markings and details. They are easy to cut around with the rotary cutter.
Despite sewing the bucket hat pattern 21 times, I still keep the instructions nearby while I sew! The instructions are set out very simply and are easy to follow too, which is great. A quick glance to double check the seam allowance or grading or clipping for a particular seam is very reassuring, especially if it’s been a little while.
Along the way I’ve learned a few things about sewing techniques, notions and adapting patterns. These are probably well known to experienced sewers, but it can never hurt to share things that you’ve discovered!
- I like to make the hats a couple at a time and batch the sewing steps – sew the seams using the chain piecing technique, take them all to the ironing board for pressing, trim all the allowances, then clip and attach the sides to the crowns, then attach the brims to the sides.
- Using a sleeve board to press the seams open is very handy, given all the curves.
- Wonder clips are fabulous to hold seams together before/while you sew, especially to line up where seams join. However, I still find it best to pin to ease in a seam and attach the crown to the side where it’s clipped.
- If you fold the fabric right sides together to cut two pieces at once, you don’t have to handle it again or line up the seams before you sew…straight to the machine.
- You can get one side of a hat out of a fat quarter – so it’s fat quarter friendly – as long as you cut each piece separately, not on a fold. By the time you get to the Large pattern size, this becomes a bit of a game of Tetris. So trace out with a removable marker where you want all the pieces to go before you cut.
- If you’ve got some extra fabric to play with, you can fussy cut a fun print, especially for the crown of the hat and maybe the sides (the brim is a little harder on the curve).

I have experimented with some adaptations. It’s easy to increase the depth of the brim by extending the pattern piece straight out at the side seams and following the curve. I made a Small hat with a very widened brim, but it proved a little hard to see out from under! I think about ½” on the XS and S, and 1” on the M and L would work well. I tried a couple more with a wide brim and added a tie that went through buttonholes to sit on the outside of the hat and allow it to still be reversible. I also did a version with a strap that tightens with a toggle and goes through a large buttonhole to swap sides – but I don’t think it’s quick enough for parents to change back and forth with ease, so it’s not really practical. The toggle would work well with sewn in long straps.
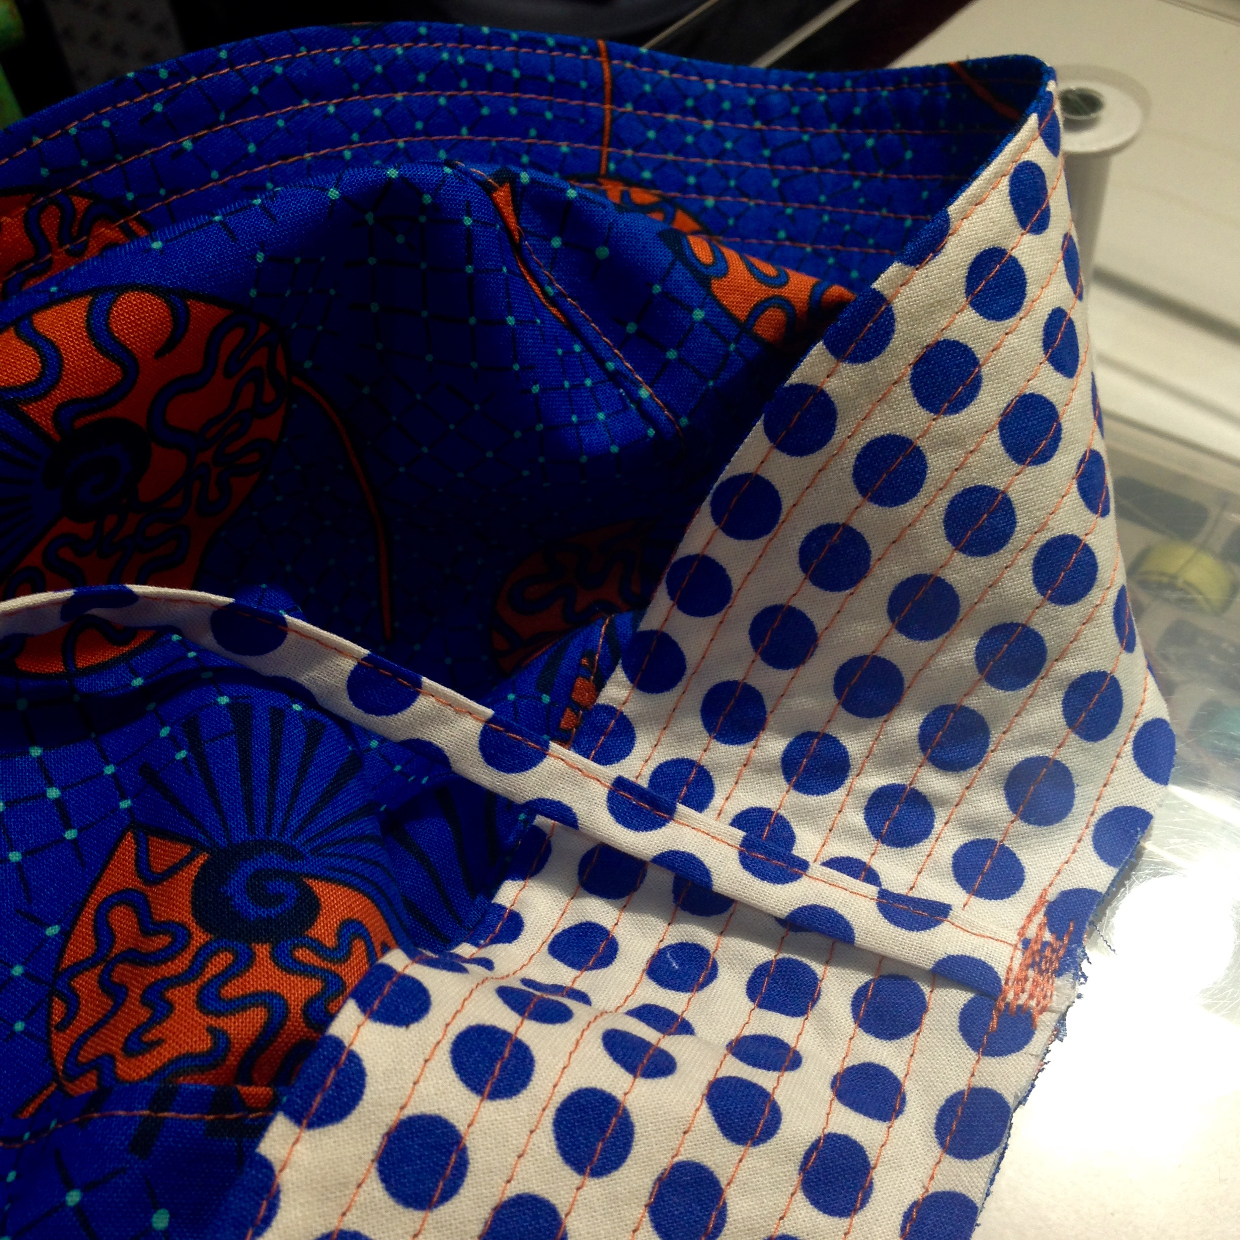
The recent feedback has been in favor of a strap, especially since it can get very windy on our sunny Aussie beaches. So I have settled on an addition of a strap with a long strip of soft flexible Velcro to allow for various sized heads. I sew the straps into the hat at the side seams, after step six, with lots of stitches just to be sure. You can’t see them after the lining piece has been added anyway. I make one strap longer than the other so it does up to the side which is easier for an adult to reach over and do up. Also seems to be a little bit more comfy too. As a rough guide, I make the straps these lengths – XS and S: 6.5” + 4.5”; M: 7.5” + 5.5”; L: 8.5” + 6.5″. But it’s always best to measure the child if you can.
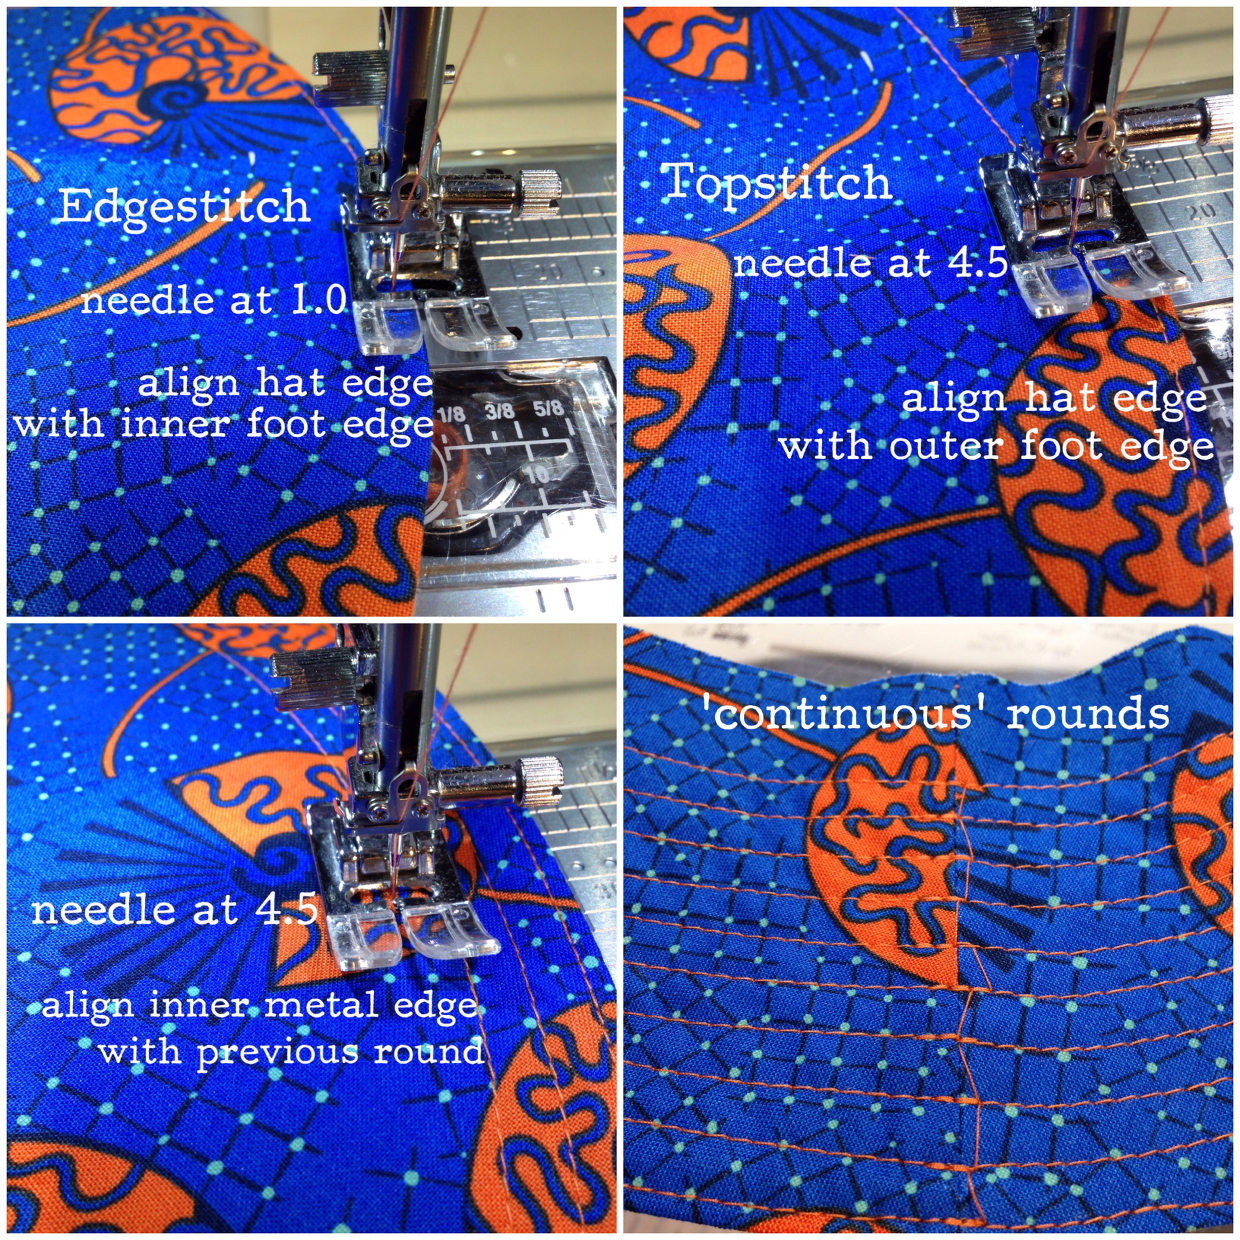
Topstitching the brim is a great way of making it more solid. Each time I sew one I try to improve my stitch accuracy (which always needs work) and find new ways of using my machine’s guidelines and the edge of the foot to get even spacing. I increase the stitch length to 2.8 when topstitching and go fairly slowly to keep the lines even and aim to line up the backstitching, minimising bulky stitches. Also, you don’t have to cut the threads each time you go around…just lift up the needle, move across and do the next round. Saves time and just snip the connecting threads at the end.
I discovered Liesl Gibson and her fabulous designs a few years ago, and started buying up the patterns. My godson inspired me to start making cute little outfits. The first Oliver + S pattern I bought and made was the Bedtime Story Pajama top. So far I have made only a couple of the other Oliver + S patterns I’ve collected, including a short and a long sleeve version of the Sketchbook Shirt. The Forget-Me-Not Jewellery Pouch pattern from Straight Stitch Society got a workout last Christmas. I made templates for this pattern too, as I know it will get a lot more use. All my other Oliver + S patterns (26 of them… including multiple sizes and digital patterns) are waiting patiently for the little ones to grow up and for me to get some extra spare time to make them up. I can’t wait!


The bucket hat is a pretty quick finish. It is very rewarding to see them being used and enjoyed and most importantly keeping the harsh sun off those precious faces. The best bit is…the kids keep growing, so they’ll always need a new hat in a bigger size or a fresh new color for the summer holidays. Thanks to my lovely friends and family for sharing their adorable hat models.
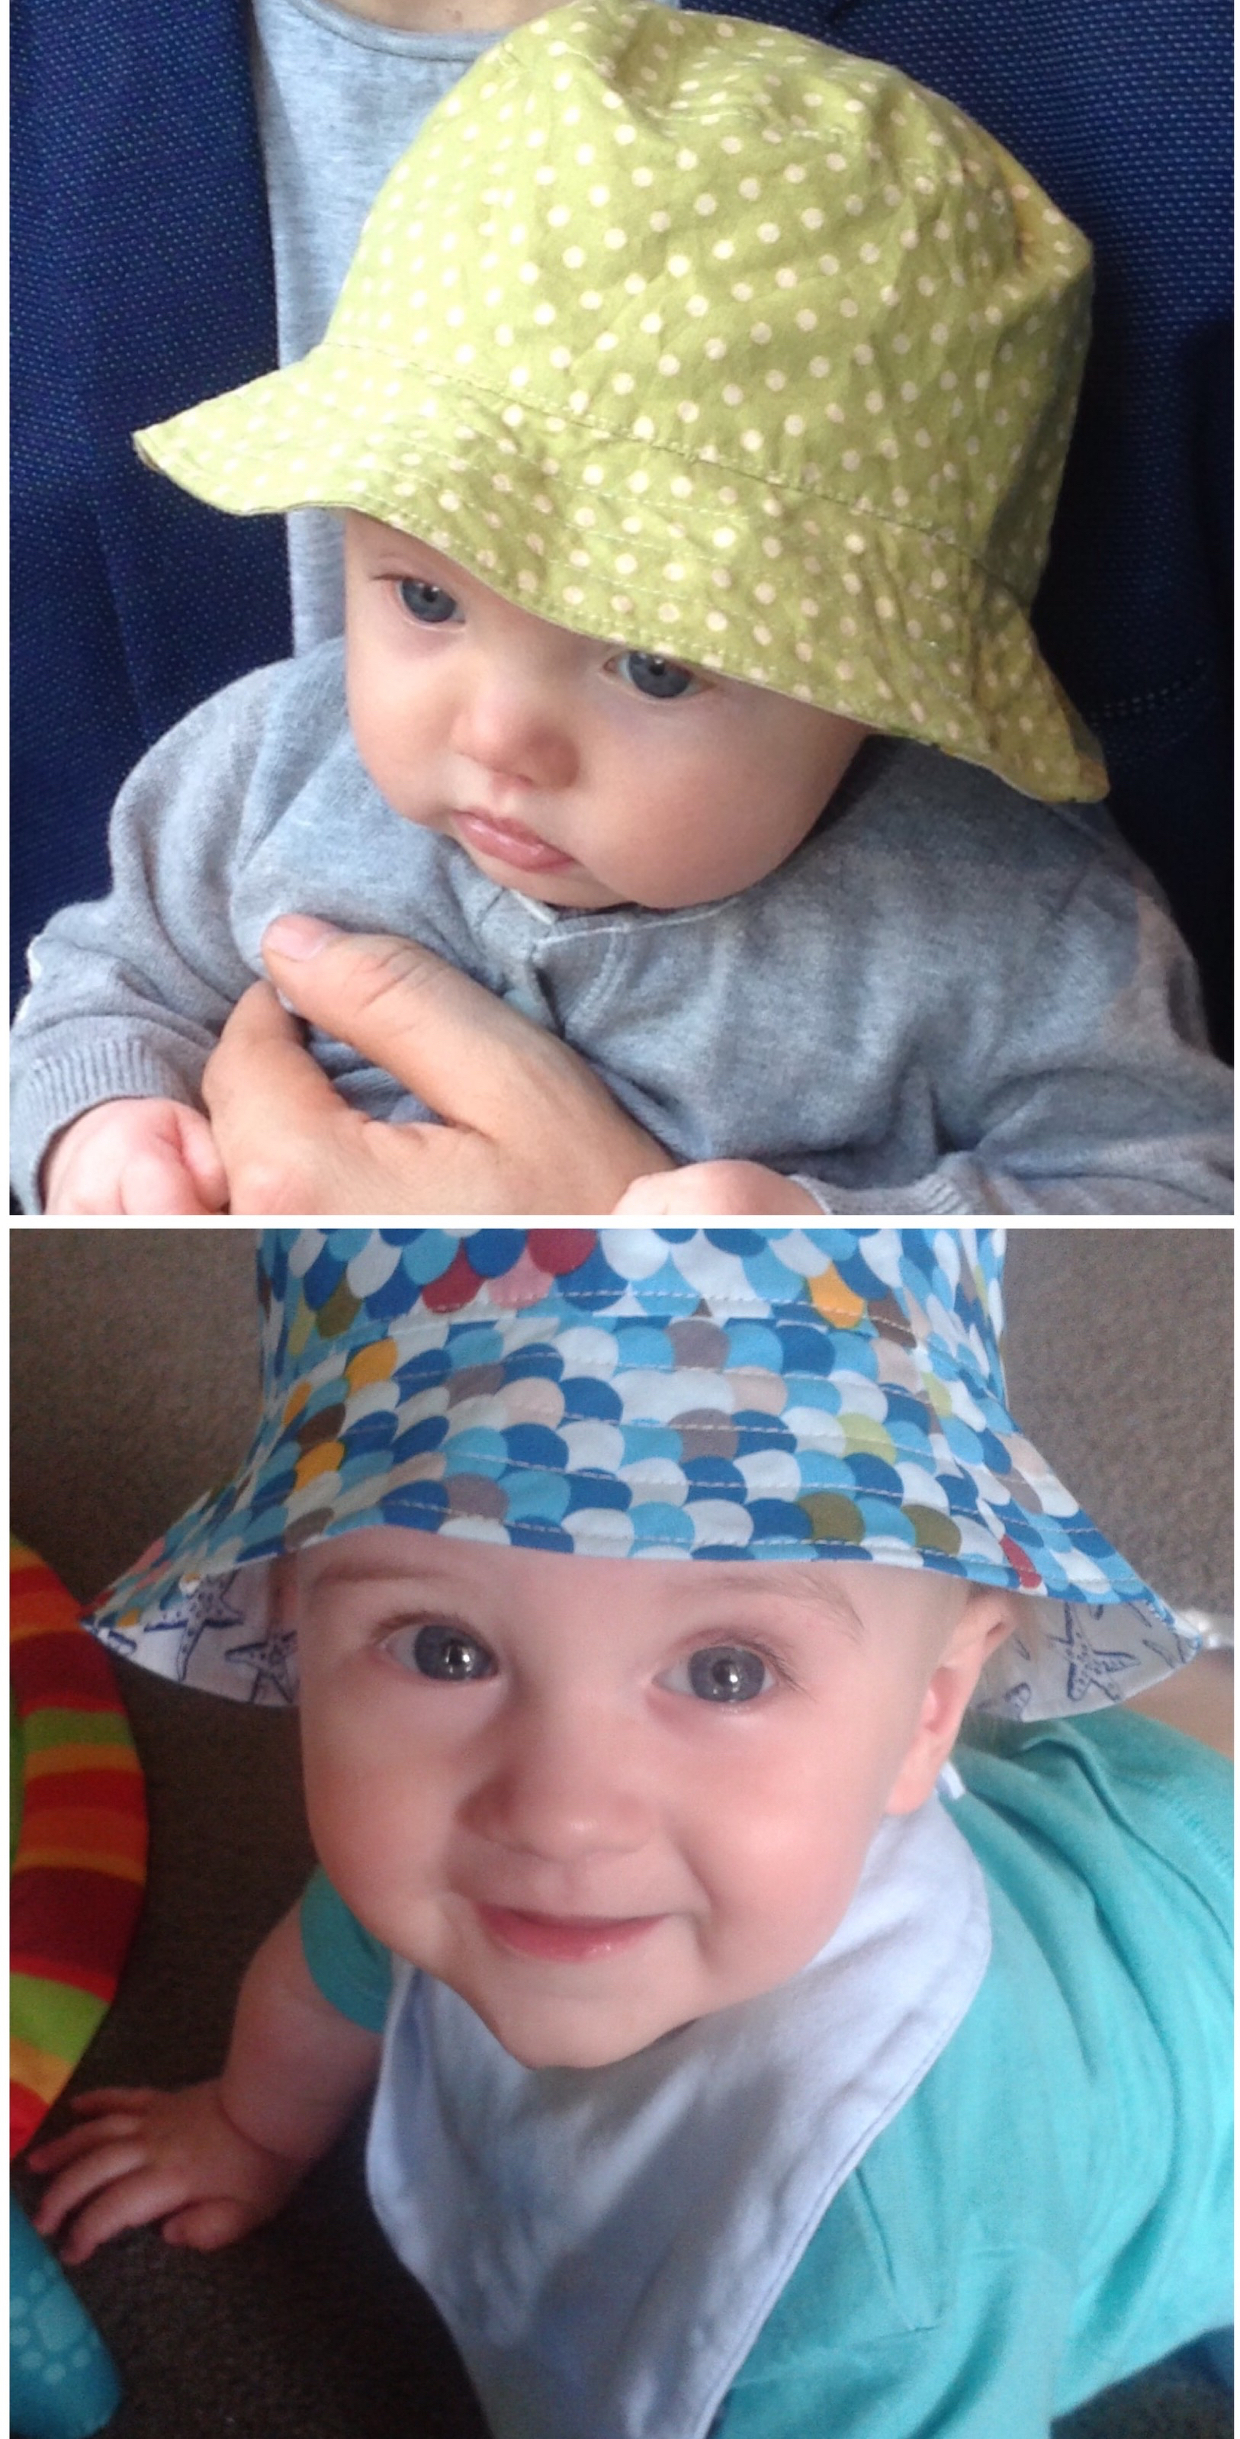
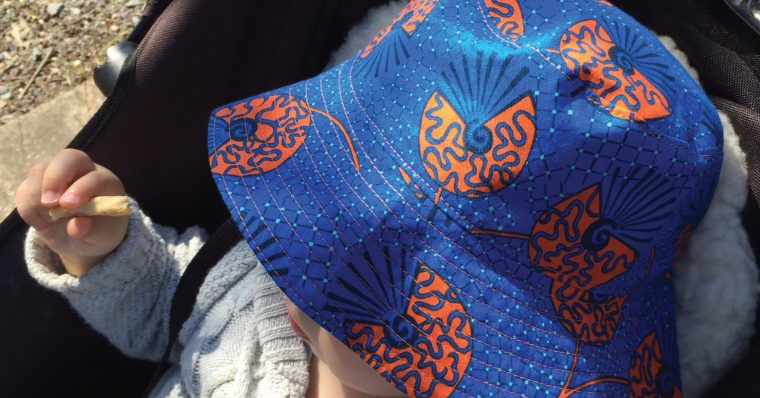
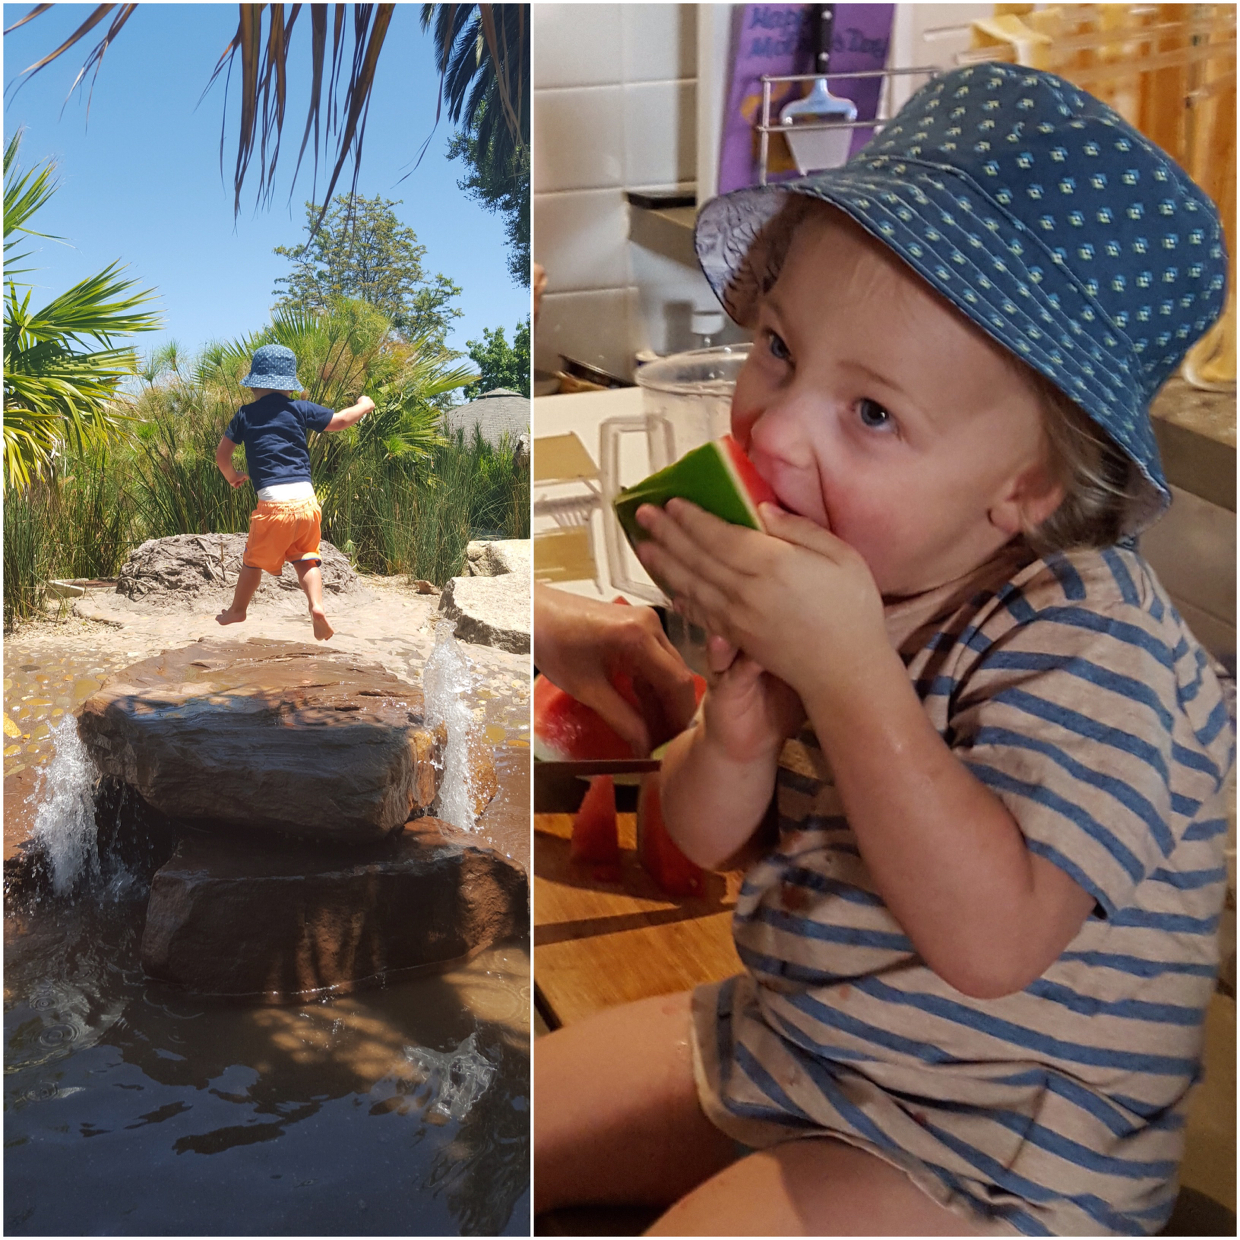
Works well for the really little ones.
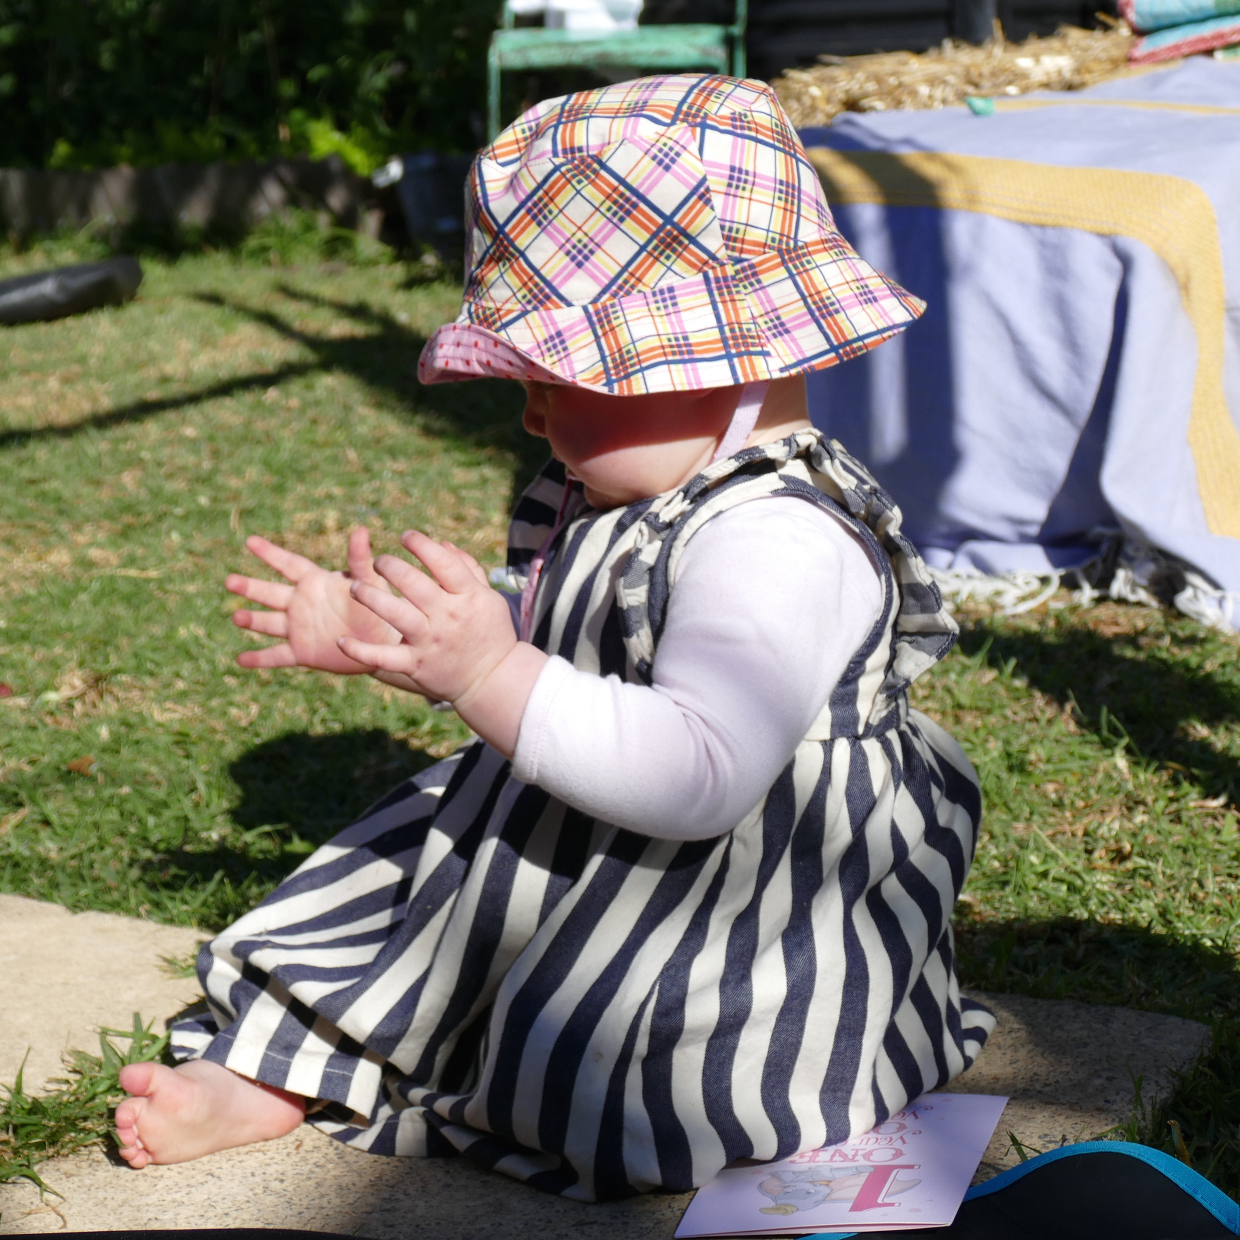
In one household, I’m pleased to say the bucket hat has become known as “the Gen hat” and can be worn at all times, even inside!
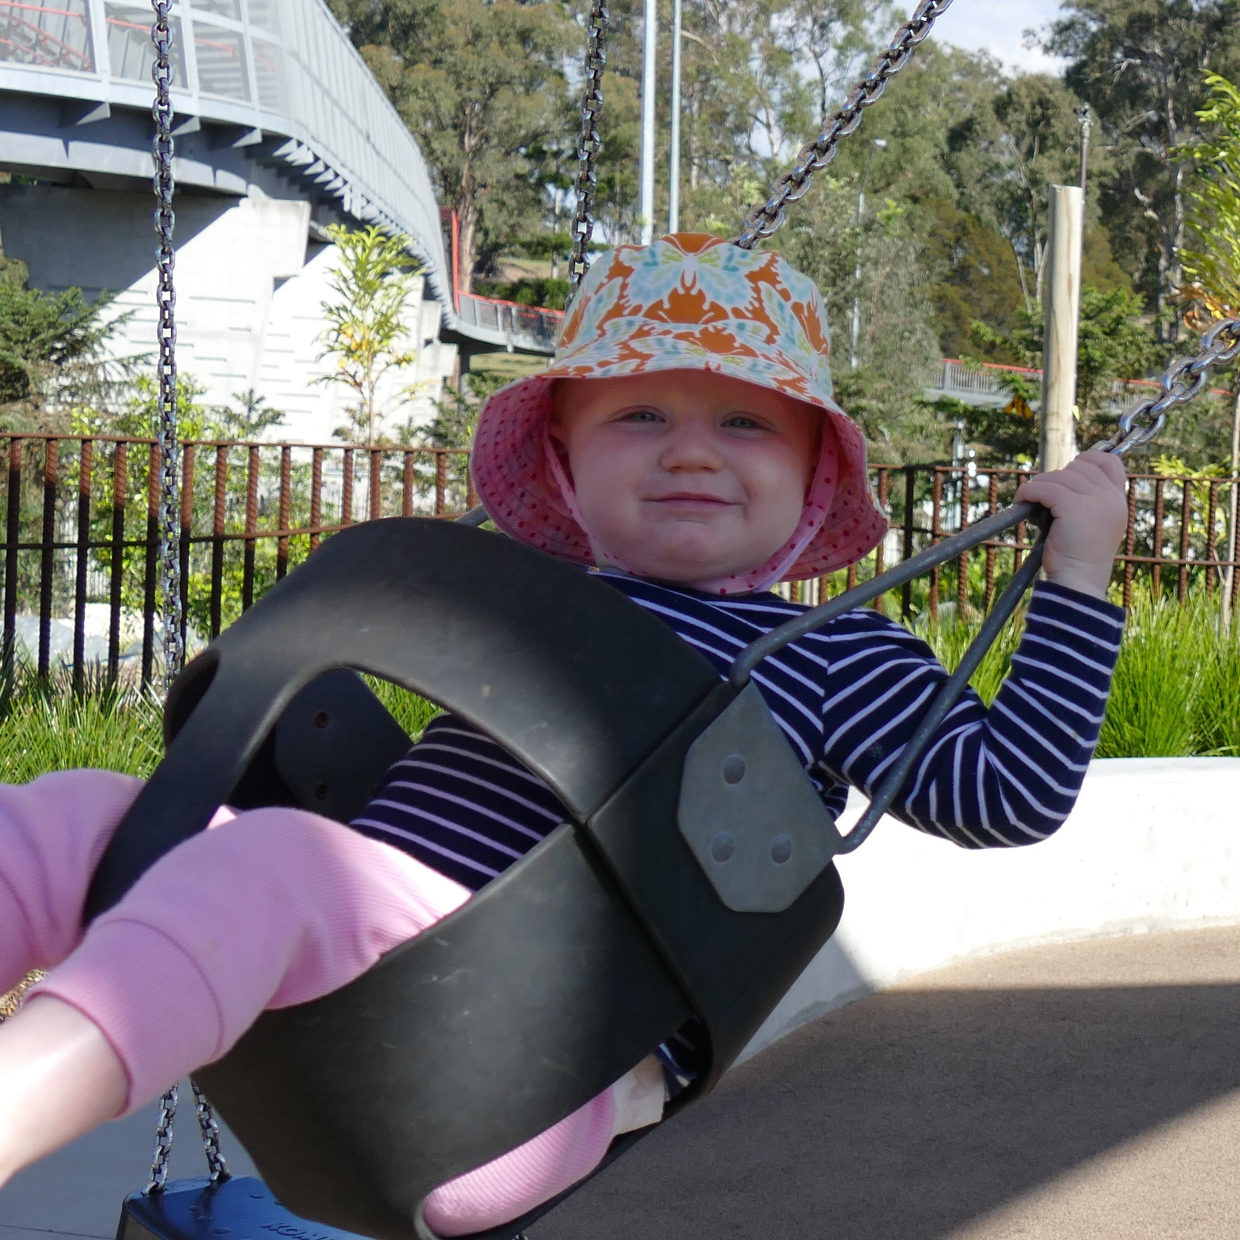
Stays on at the playground.

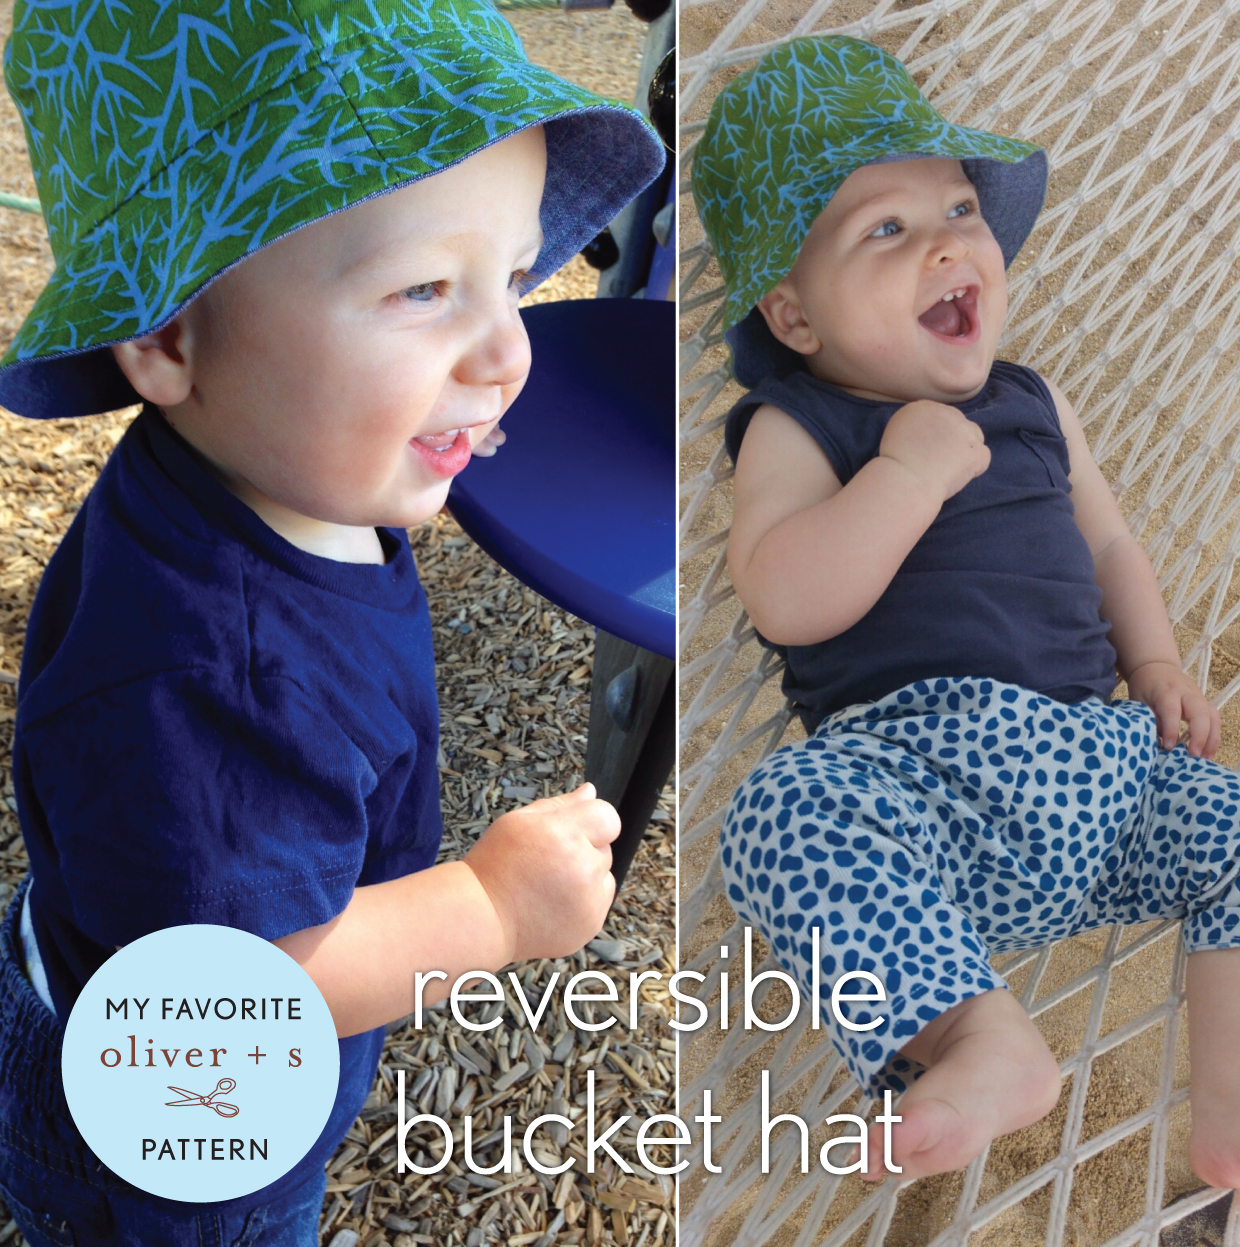
Perfect for a stroll in the park.
Fresh colors for Spring.
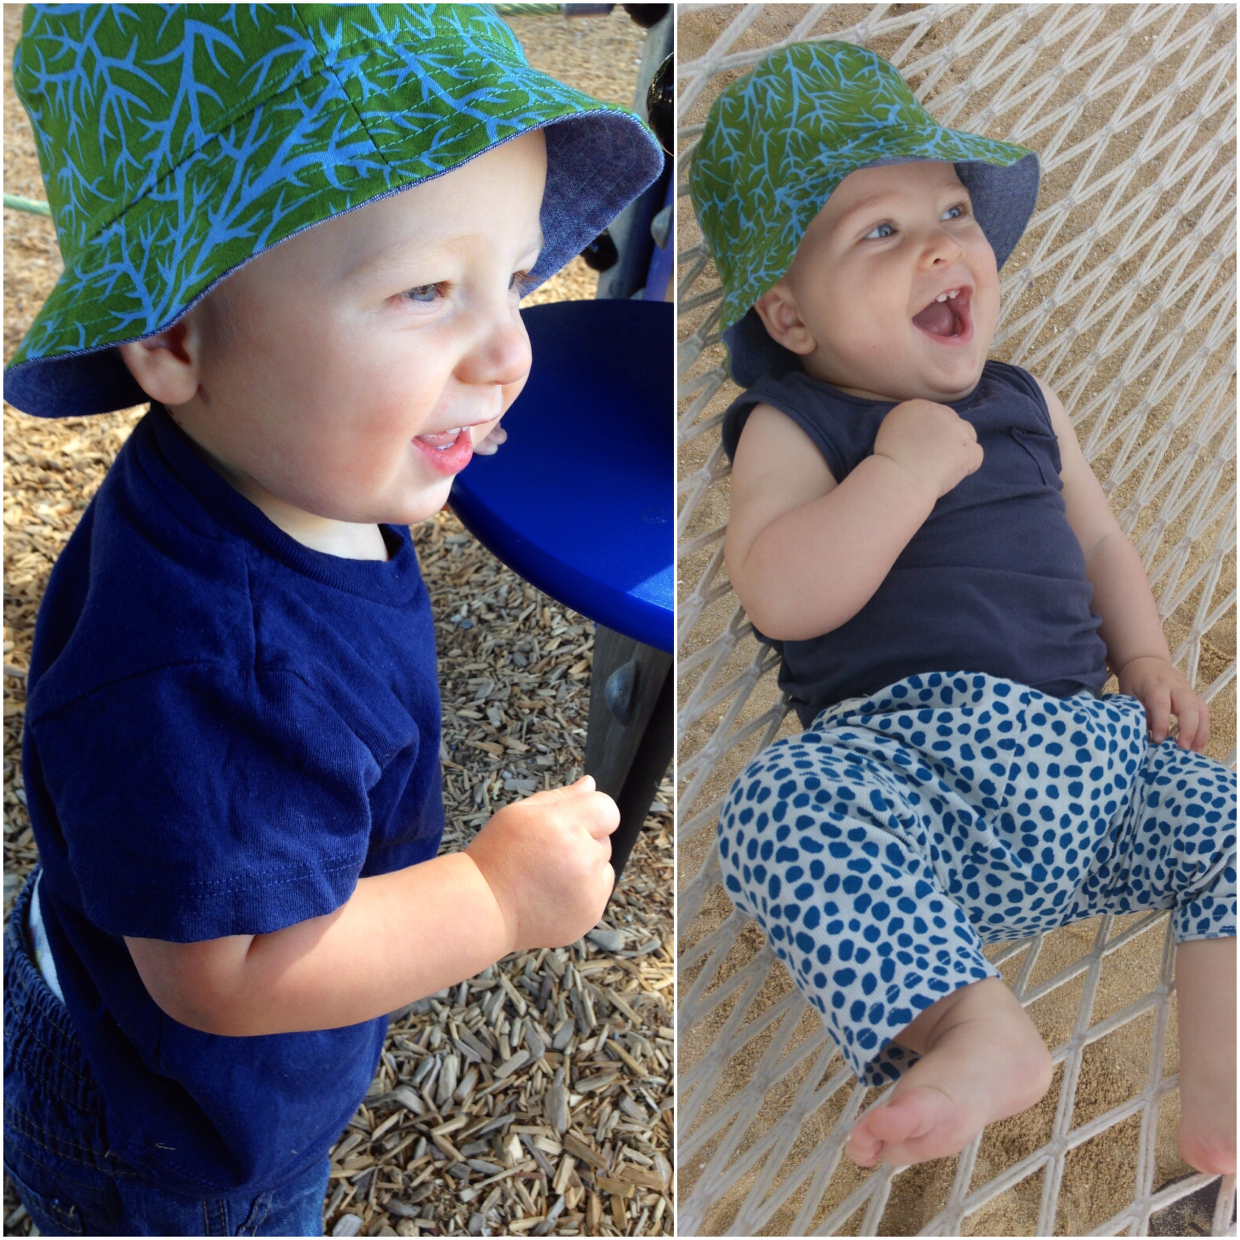
This hat has been passed down between brothers and been on a trip to Thailand!
Thanks for having me Oliver + S and happy sewing everyone!
Thanks Genevieve!
If you enjoyed this post, you might also like our Reversible Bucket Hat sew-along.