
A couple of months ago S and I purchased an indigo tie-dye kit from Dharma Trading. We assembled all the materials we needed (see the end of this post for a list) and spent an afternoon trying out shibori on the roof of the studio one beautiful spring day.
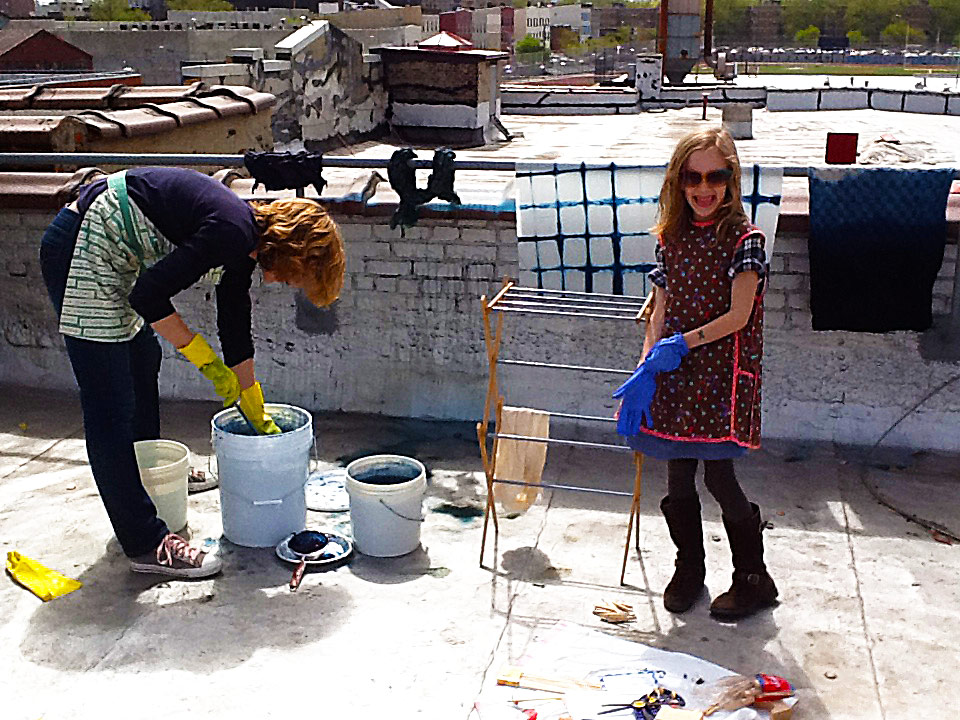
I had few techniques I really wanted to try, and S is really independent when it comes to crafting (she takes DIY literally, and her mantra is “Don’t help me, Mommy!”), so I I bought her a package of unbleached bandannas to experiment with. I also ordered a couple silk scarves that we dyed for the grandmas, so we had some nice Mother’s Day gifts when we were finished. And we had loads of fun doing it! Here’s a funny photo that Todd snapped, with me slaving over the indigo dye bucket and S sporting giant sunglasses and a goofy grin.
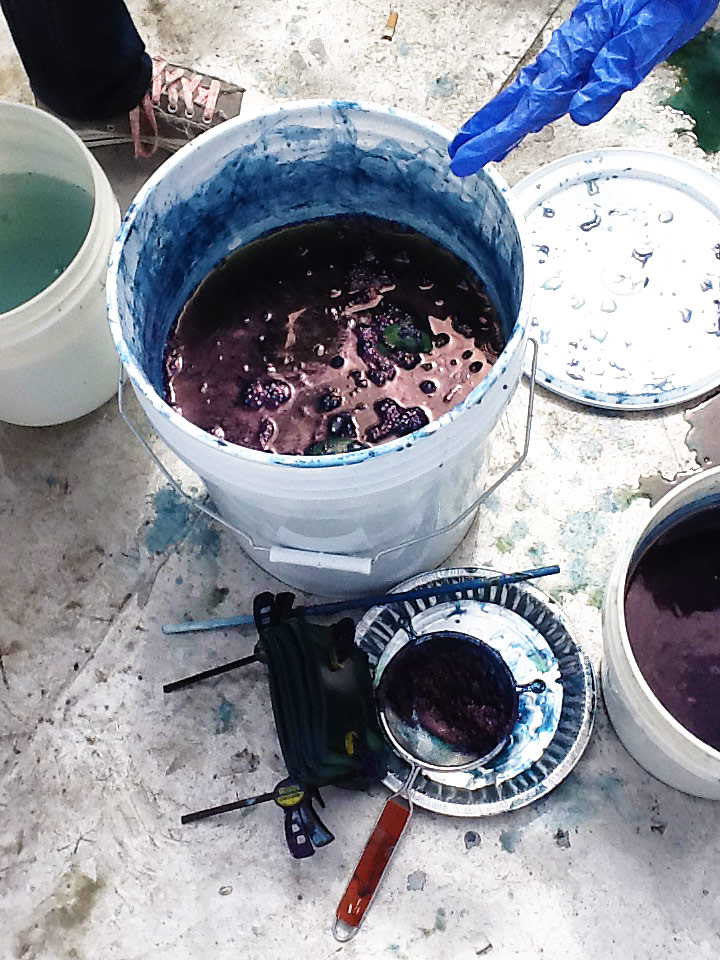
Indigo is a great way to start out if you’re interested in dyeing fabric because it works with a variety of natural fabrics and is easy to do. Plus, it’s just neat to watch the color develop. Indigo works when the dyed fibers are exposed to oxygen, so the more times you pull the fabric out of the dye and let it oxidize (i.e., expose it to the fresh air), the darker the color that develops.
We dyed all sorts of different things that afternoon, and I thought you might like to see some of them.
Here’s a skirt that I made for myself from two fabric panels I dyed with the accordion shibori technique. You can see the fabric hanging behind S in the first photo. Basically, to do this technique you fold the fabric accordion-style and then clamp it between two blocks of wood so the dye can’t penetrate the fibers where it’s clamped. (This is called “resist,” and all shibori or tie-dye methods are based on this principle.) The accordion method is really fun and fast (I loved seeing it in action during Kaari’s class at the Makerie!), and I was amazed at how easy it is. It’s like instant gratification!

I’ll be exploring this technique a lot more, especially now that I’ve seen this spectacular Tori Burch dress, which the website describes as being “hand-dyed by women artisans from the Kindia region of Guinea.” I’m pretty sure that’s the shibori method. Love it. I think you could get this result if you used craft-sized popsicle sticks. I’m sort of obsessed with this right now.

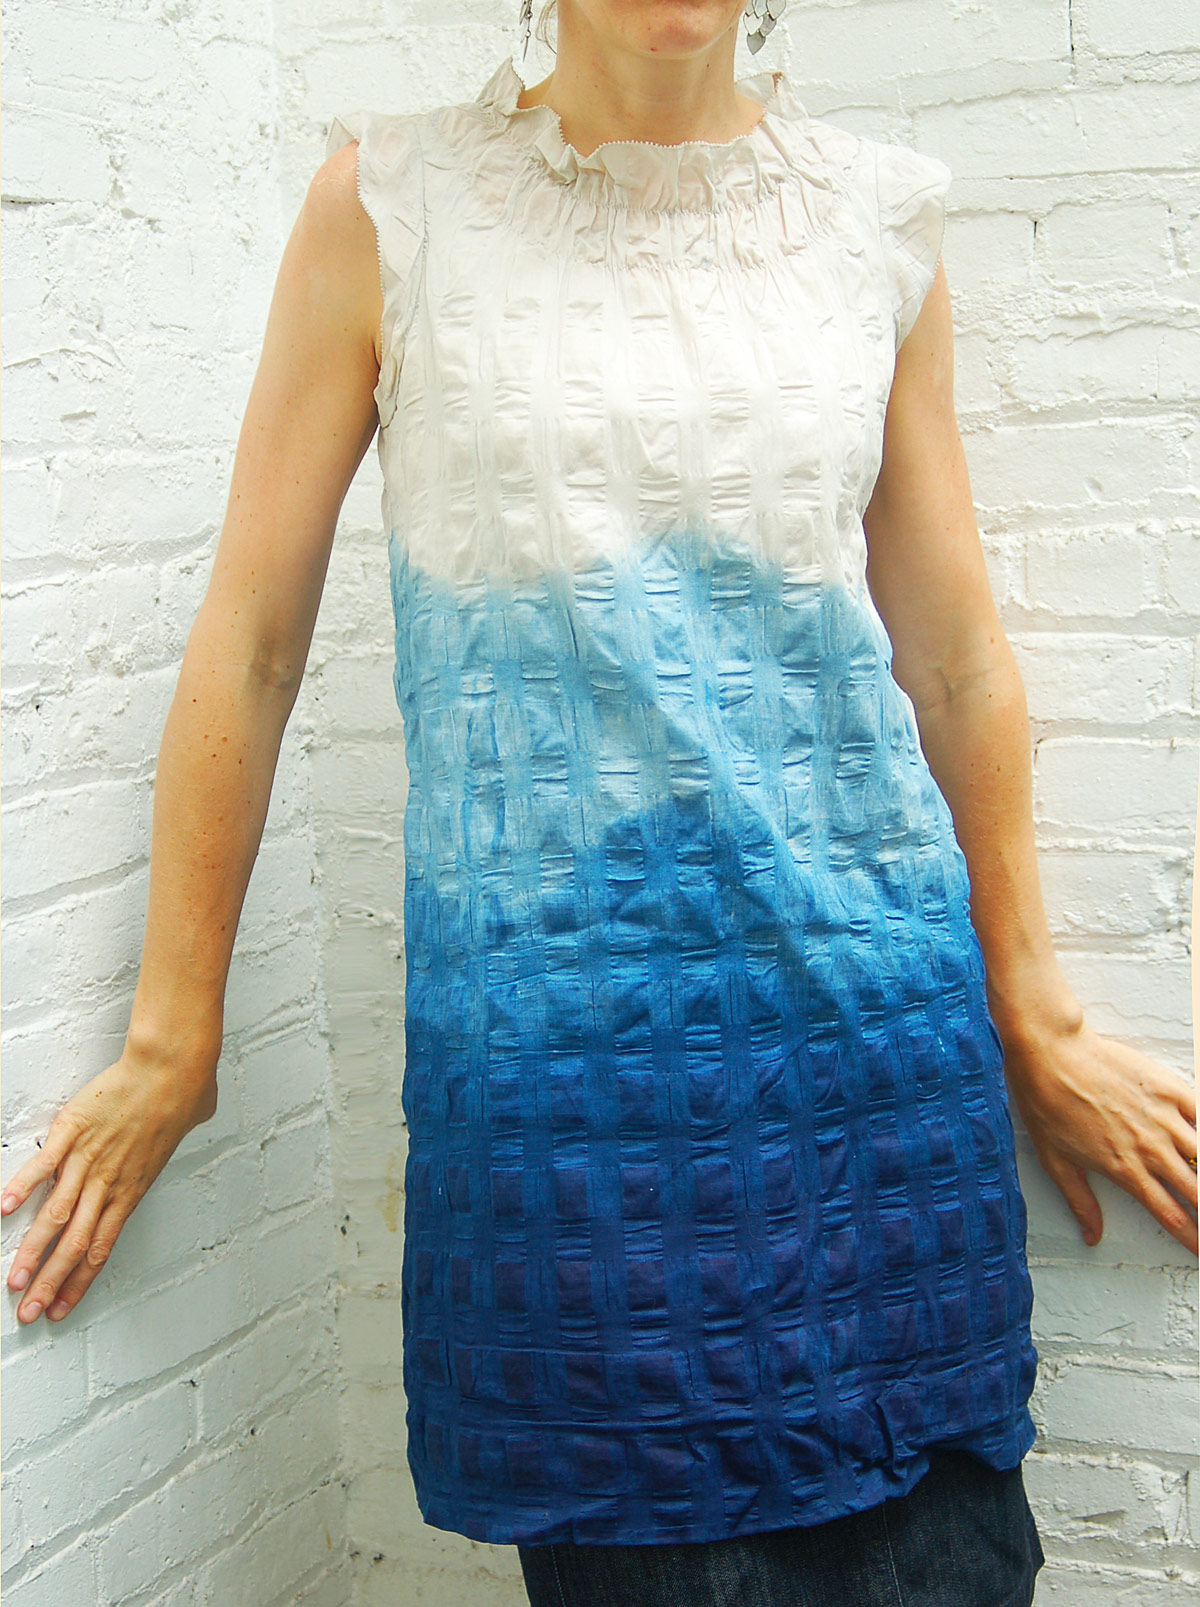
I also took a cream-colored seersucker dress and dip-dyed it. I wasn’t wearing it much (ever?) before I dyed it (the color wasn’t very inspiring, especially with the shape), and now I wear it all the time. Ombre is also incredibly easy to do, and I would imagine that you’ve been seeing tutorials for this all over the place. (Right? I certainly have. Just Google “dip dye fabric” or “ombre fabric tutorial” and you’ll see what I mean.) To dye ombre, you submerge all but the very top of the dress into the fabric. The palest blue at the top edge stays in the indigo dye for about a second. Gradually you pull the rest of the fabric out of the dye so the part that stays in the longest also has the darkest color. To get the really dark part at the hem I dipped and oxidized the fabric repeatedly.
Meanwhile, S got busy with rubber bands and marbles and bits of hardware that we assembled. She mostly enjoyed wrapping rubber bands around little sections of the fabric to make little starburst dot patterns. You’ve done this before it you’ve tried tie-dye. She gave most of the bandannas to her friends at school and was just thrilled to share with them. I’m sorry I didn’t take any photos before she gave them away!

And my favorite technique of all took a little more time than the others. Following Kaari’s lead, I hand stitched wavy running stitches across a piece of linen using strong hand quilting thread and leaving long thread tails.Here’s a photo of the scarf Kaari was stitching when we were at the Makerie.
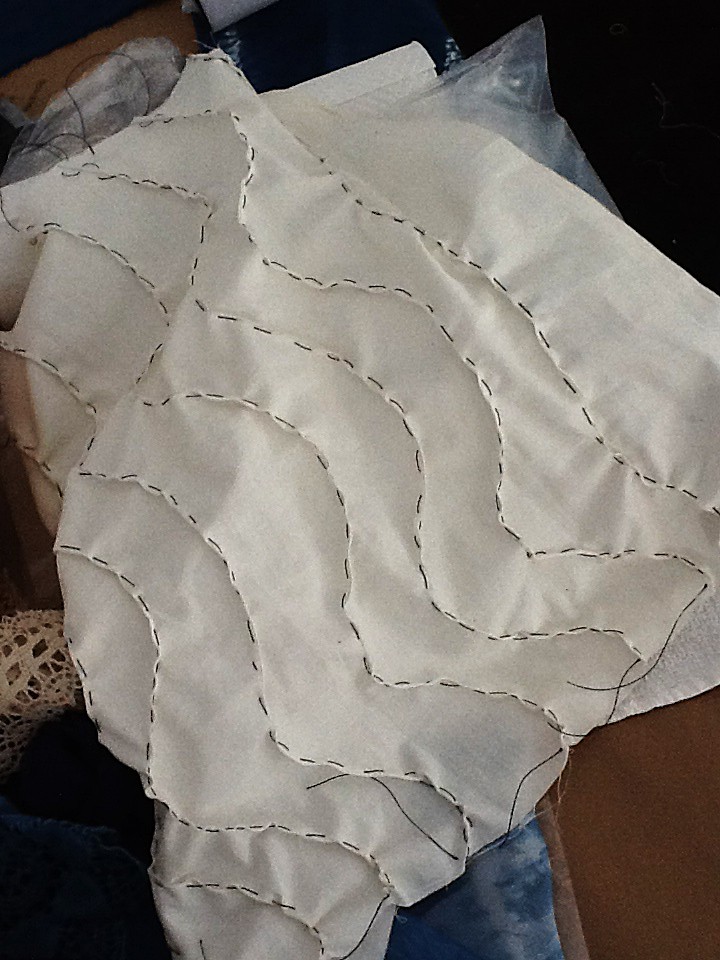
When all the rows were stitched (it takes a while, so do this while you’re waiting for your indigo kit to arrive), I pulled the threads ends really tight and knotted them together. It looked a bit like a wrinkly snake, and again I’m sorry I didn’t think to take a photograph for you. But when the fabric is submerged in the dye solution, the dye doesn’t penetrate the areas where the threads are pulled tight. (Again, the resist.) So the result, when the fabric is rinsed and the threads were cut and removed? This amazing wavy pattern!

I was nervous, dyeing this one. I mean, I spent so much time stitching it! I wasn’t convinced the dye wouldn’t reach the resist areas, so I didn’t dip and oxidize it as many times as I would have liked. But now that I’ve experienced it, I can’t wait to do it again and dye it darker.
If you’d like to try indigo shibori yourself, I should warn you beforehand that it’s also messy and time-consuming to clean up. But it’s really a great chance to experiment, and I highly recommend it!
Here are some of the tools you’ll need:
- Indigo dye kit.
- Two or three five-gallon buckets: one for the dye solution and one or two filled with water for rinsing the dye from the fabric.
- Someplace to hang your finished pieces so they can dry.
- Rubber gloves! I wasn’t consistent about wearing mine and my hands were blue for days afterward (a pair comes with the kit, but if you’re doing this with a friend you’ll want an extra pair or two).
- A small sieve.
- Sticks or long spoon for stirring.
- Natural fiber fabrics (protein and cellulose) like cotton, linen, silk, and even rayon.
- Wood blocks and scraps: squares, rectangles and circles from the craft store are great. You can also use craft/popsicle sticks, which is what I’ll be trying next for that cool Tori Burch effect.
- Clamps for the accordion technique.
- Rubber bands.
- Metals washers (from the hardware store).
- Marbles.
- Needle and thread.
- Anything else that you want to use to create an area of resist so the dye can’t penetrate the fabric.
- A really good reference book, like this one.

Like I said, I’ll absolutely be doing this again, maybe in the fall, if anyone would like to join me. It would be fun to assemble a small group of maybe six people, for a day of shibori. Anyone interested? I’ll even do the clean up.
By the way, all this dyeing has gotten me thinking about textiles and color, so for the next few Fabric Friday posts I’ll talk more about the different ways of coloring textiles. Stay tuned!