You have seen Shelley here many times before and we are happy to announce that she will be here regularly in the future. Since it is October and there might be some sewists who are sewing Halloween costumes this month, I wanted to be sure to direct you to her Evel Knievel costume and Disco Pants. Today she is going to show how she customized a Liesl + Co. pattern. Thanks for sharing your tutorial Shelley!
Hello, Shelley from Bartacks and Singletrack here again. I’m very excited to have been invited to contribute a regular feature on the Oliver + S blog all about tinkering with patterns. A topic that’s close to my heart!
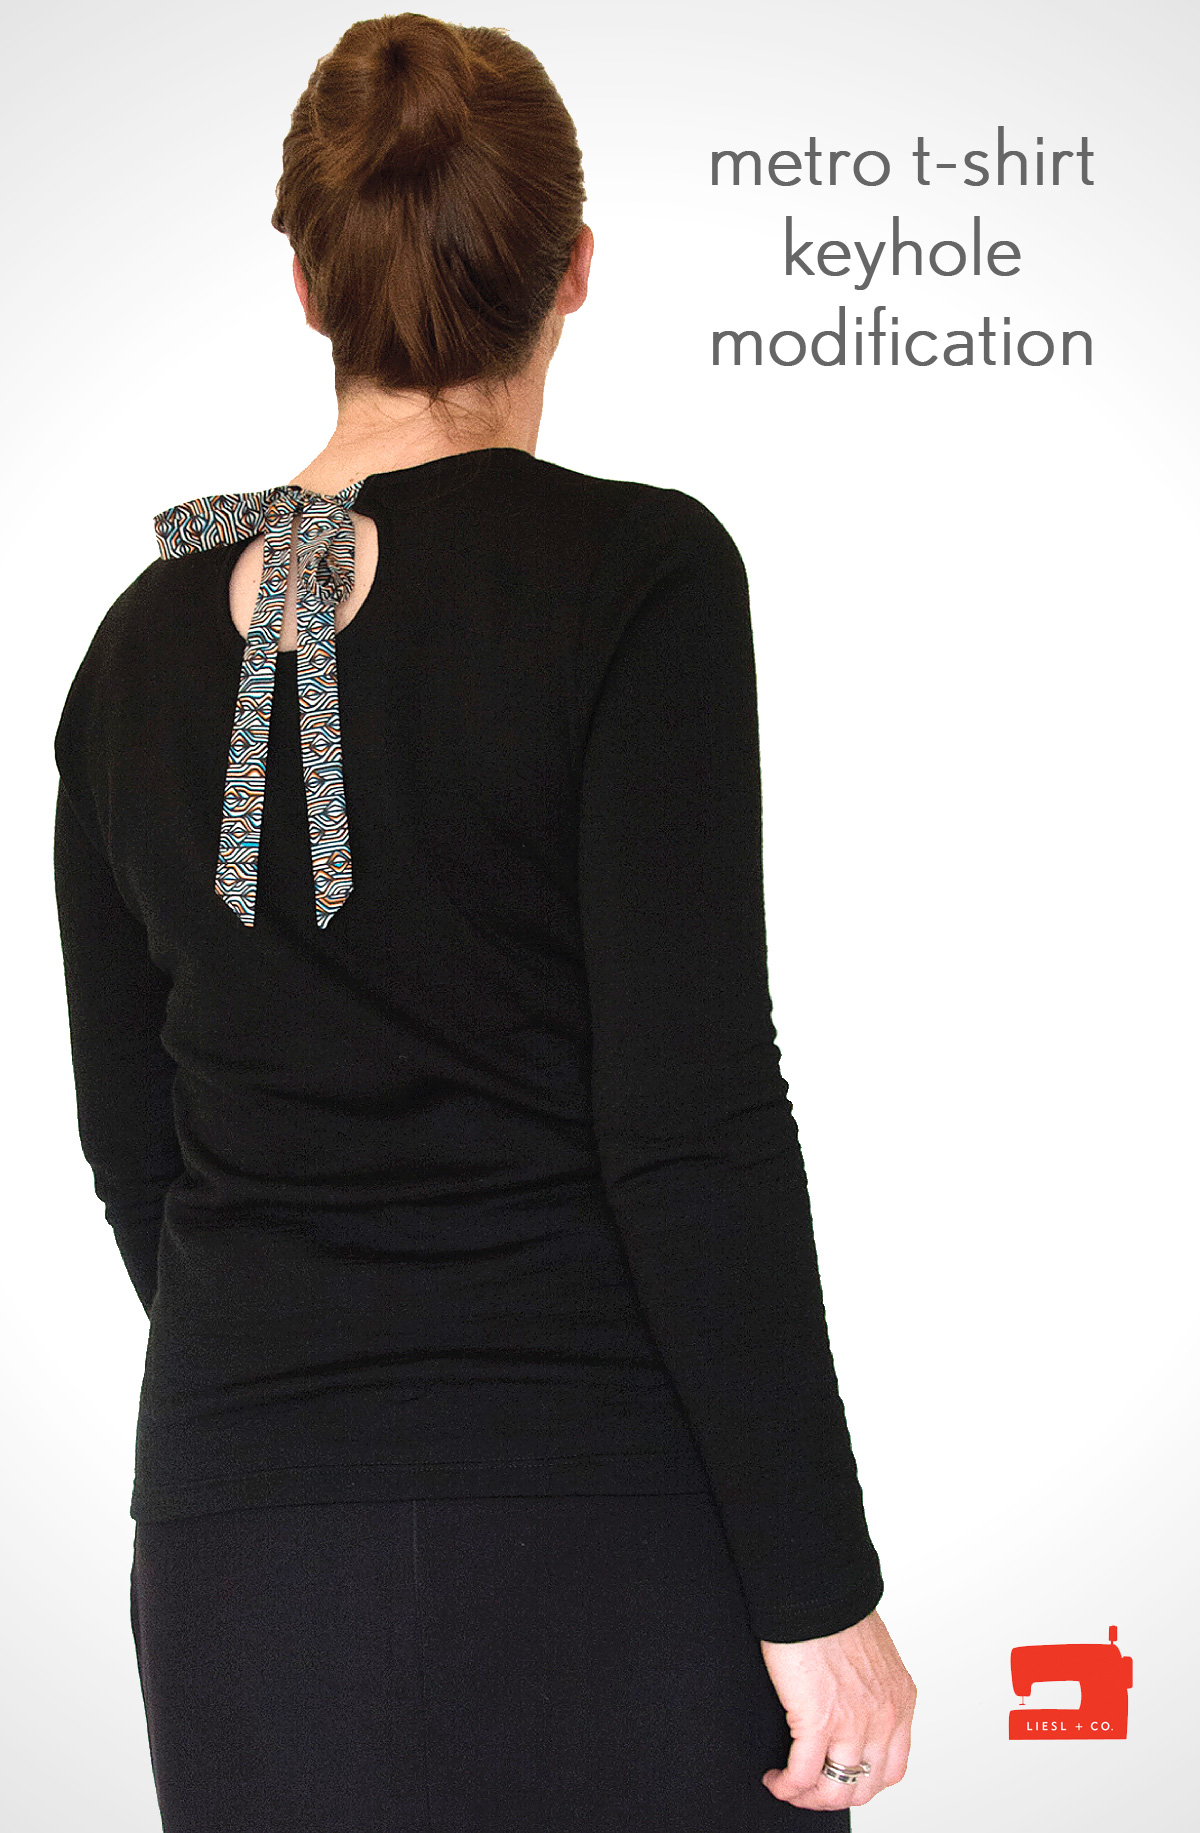
Today I’m going to share how I changed the women’s Metro T-shirt around to have a neckline with a facing and keyhole opening at the back. This can be a pretty feature for an otherwise simple T-shirt, but it can also have a practical application. If you use a fabric with less than the recommended stretch (or you have a big head) you may struggle to get your head through the neck hole. (Cutest T-shirt fail ever! )
Before we jump into the pictures and the sewing, let’s start with some math. With this formula you can change any top with a neckband to have a facing while preserving the pattern’s original intended neckline.
We’re going to be doing away with the neckband and its associated seam allowance, but adding some seam allowance for attaching our facing. What we want to know is how much to add to the neckline:
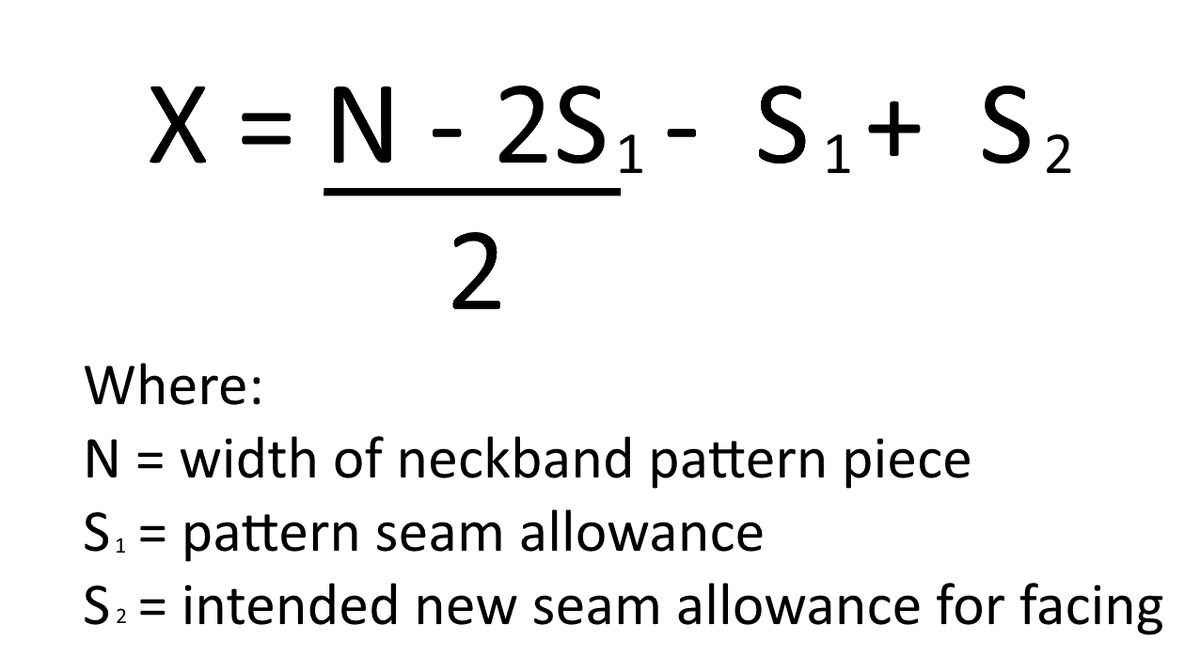
For example, the women’s Metro T-shirt has a neckband that is 1 1/4 inches (N) and a seam allowance of 1/4 inch (S1). If we want to use a 1/2 inch seam allowance to attach the facing (S2) then the above formula tells us we need to add 5/8 inch (X) to the neckline.
If that’s making your eyes mist over then here’s a cheat sheet:
Women’s Metro T-shirt: 5/8″
School Bus T-shirt (view B): 5/8″
Bento Tee: Technically 23/32″, which is so close to 5/8″ it’s not worth worrying about….
Lunch Box Tee: As above, let’s call it 5/8″
Yep, it would seem you can just add 5/8″ to pretty much any pattern. Here’s how:
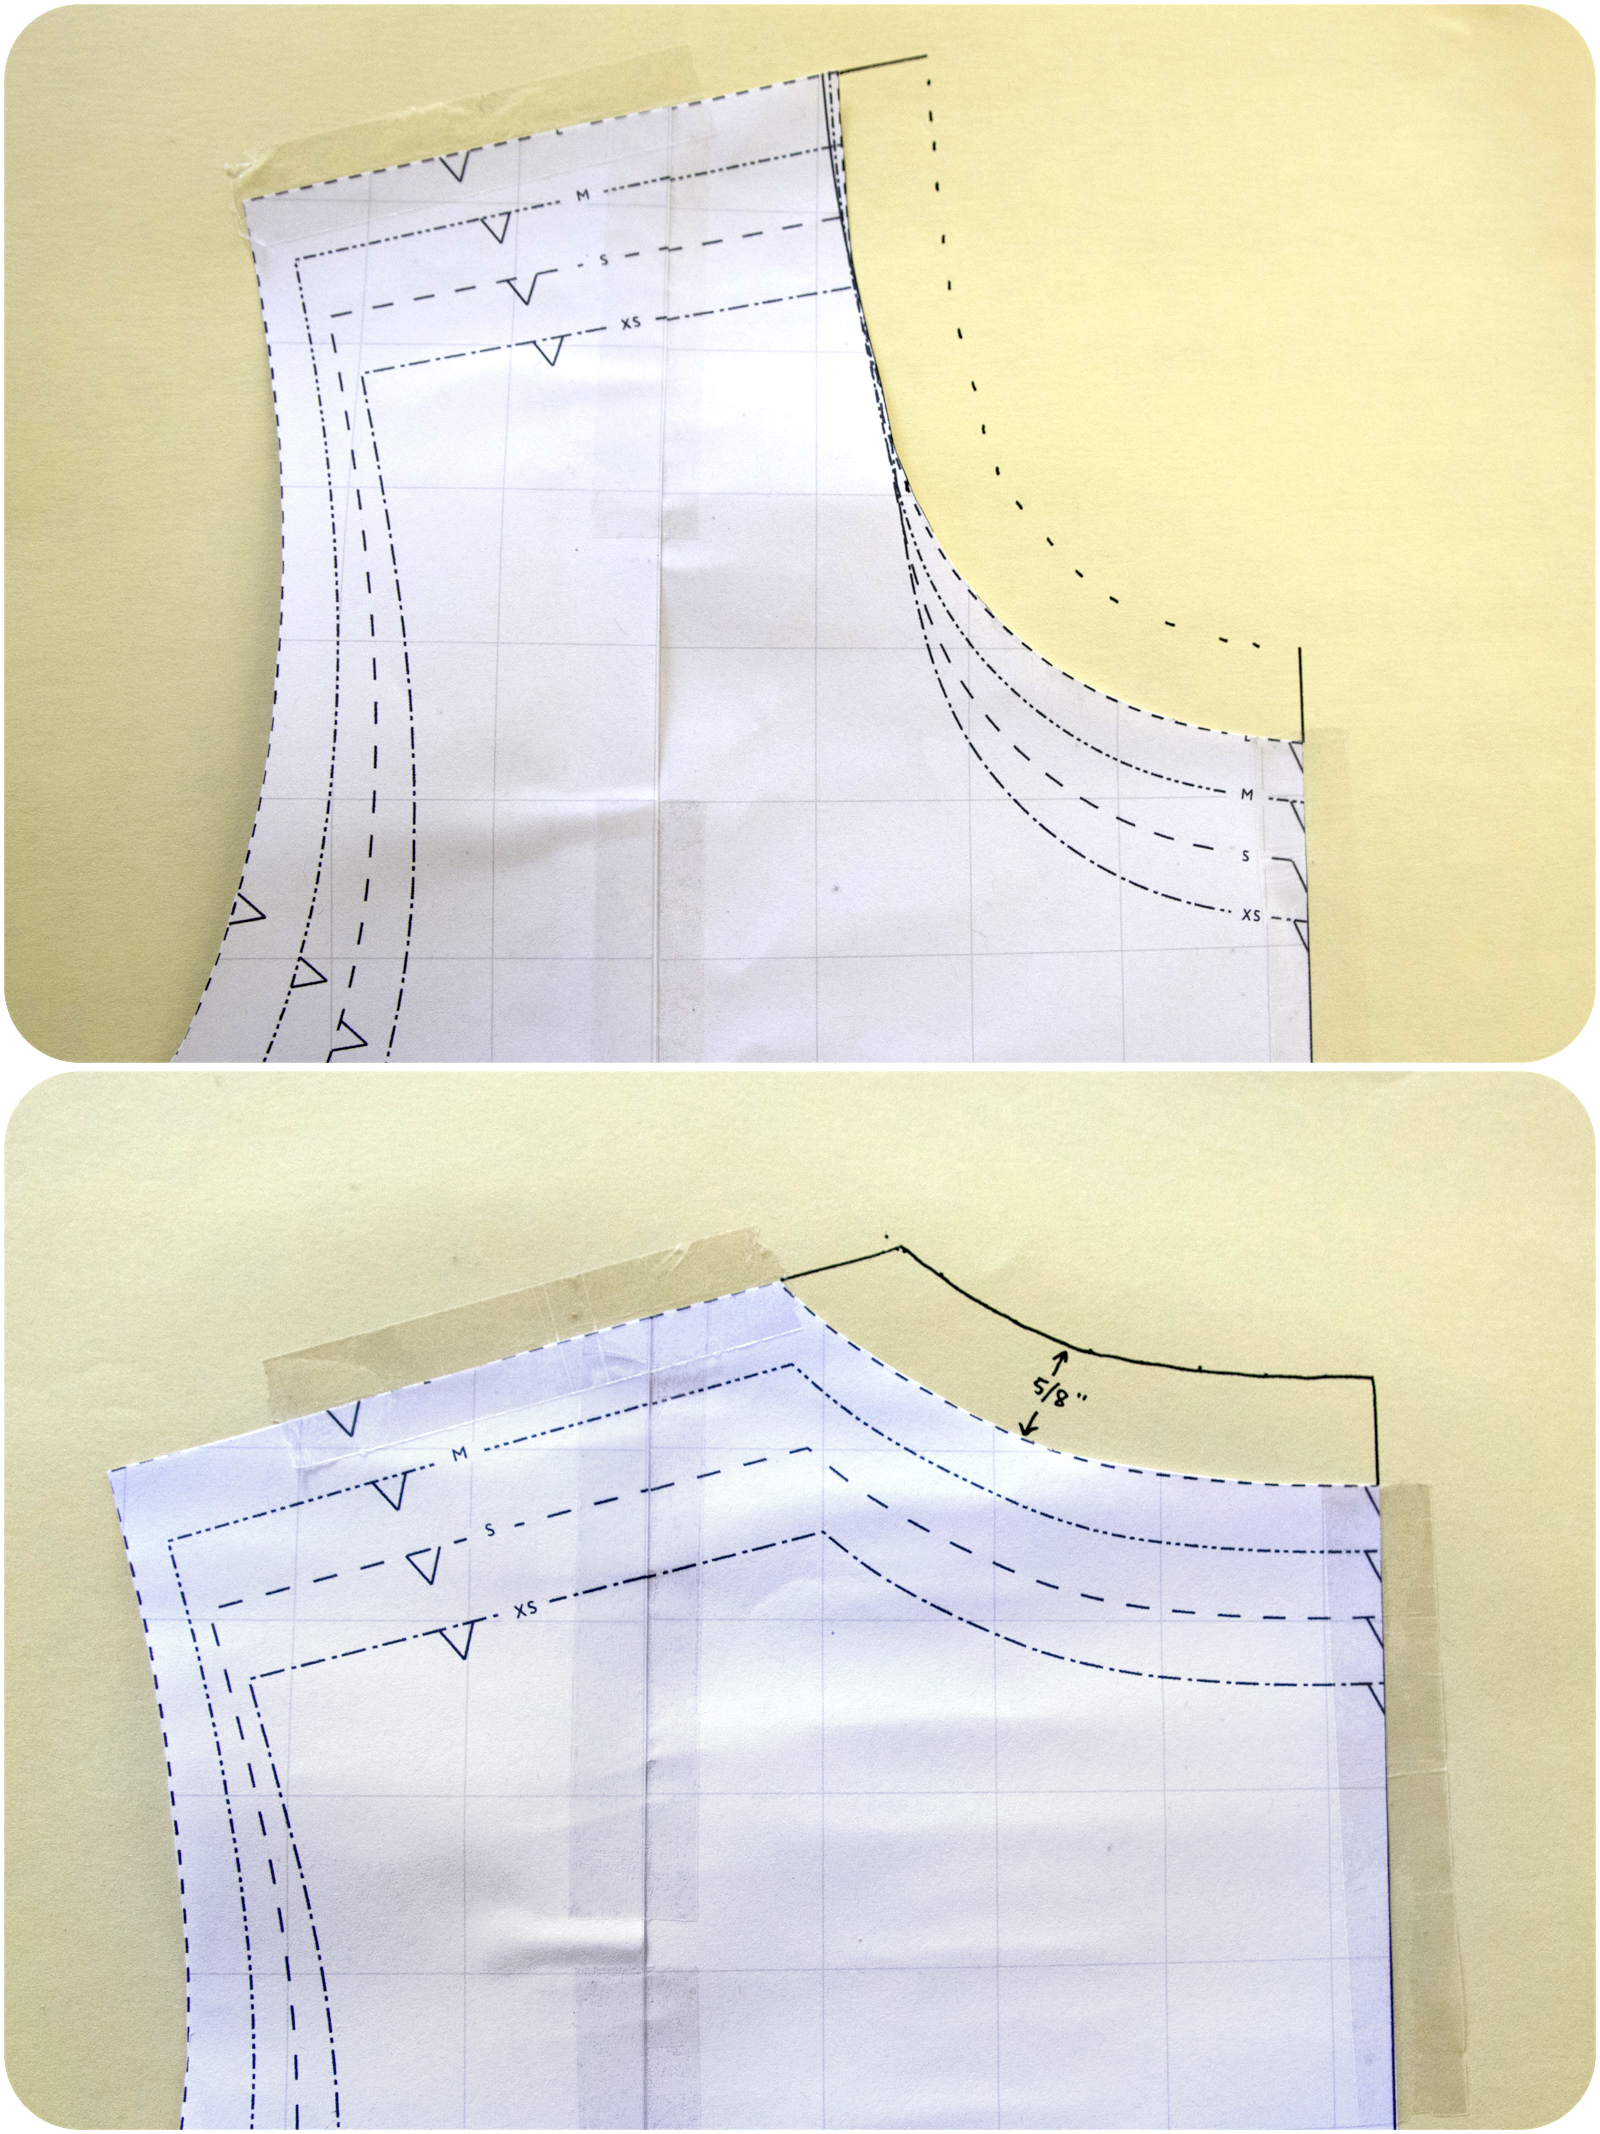
Working with the front and back pattern pieces, measure the correct distance from the neckline edge, then connect your dots with a smooth curve. Now trace your pattern pieces with the newly adjusted neckline.
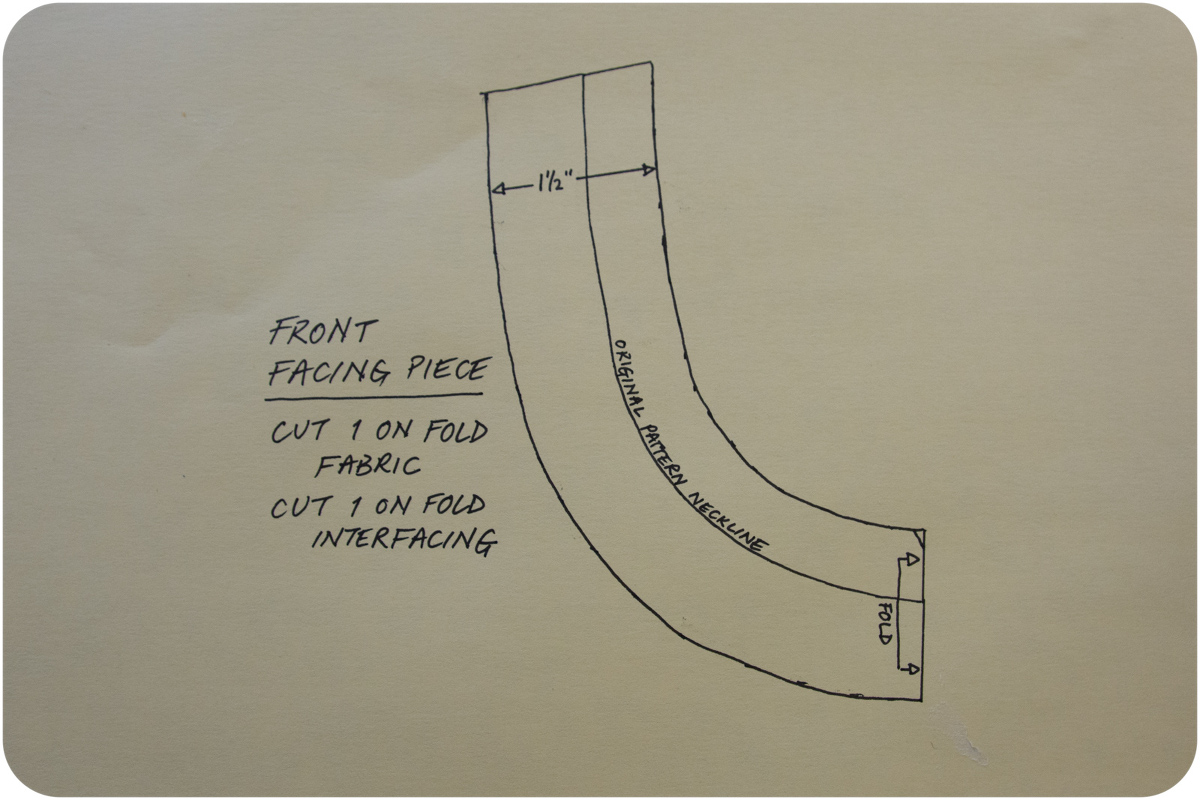
To create the facings you need to use the curves you just drew and add some width. The front facing is simple. Here I’ve added the 5/8″ required to the original neckline and then in the other direction 1″ of depth for the facing itself.
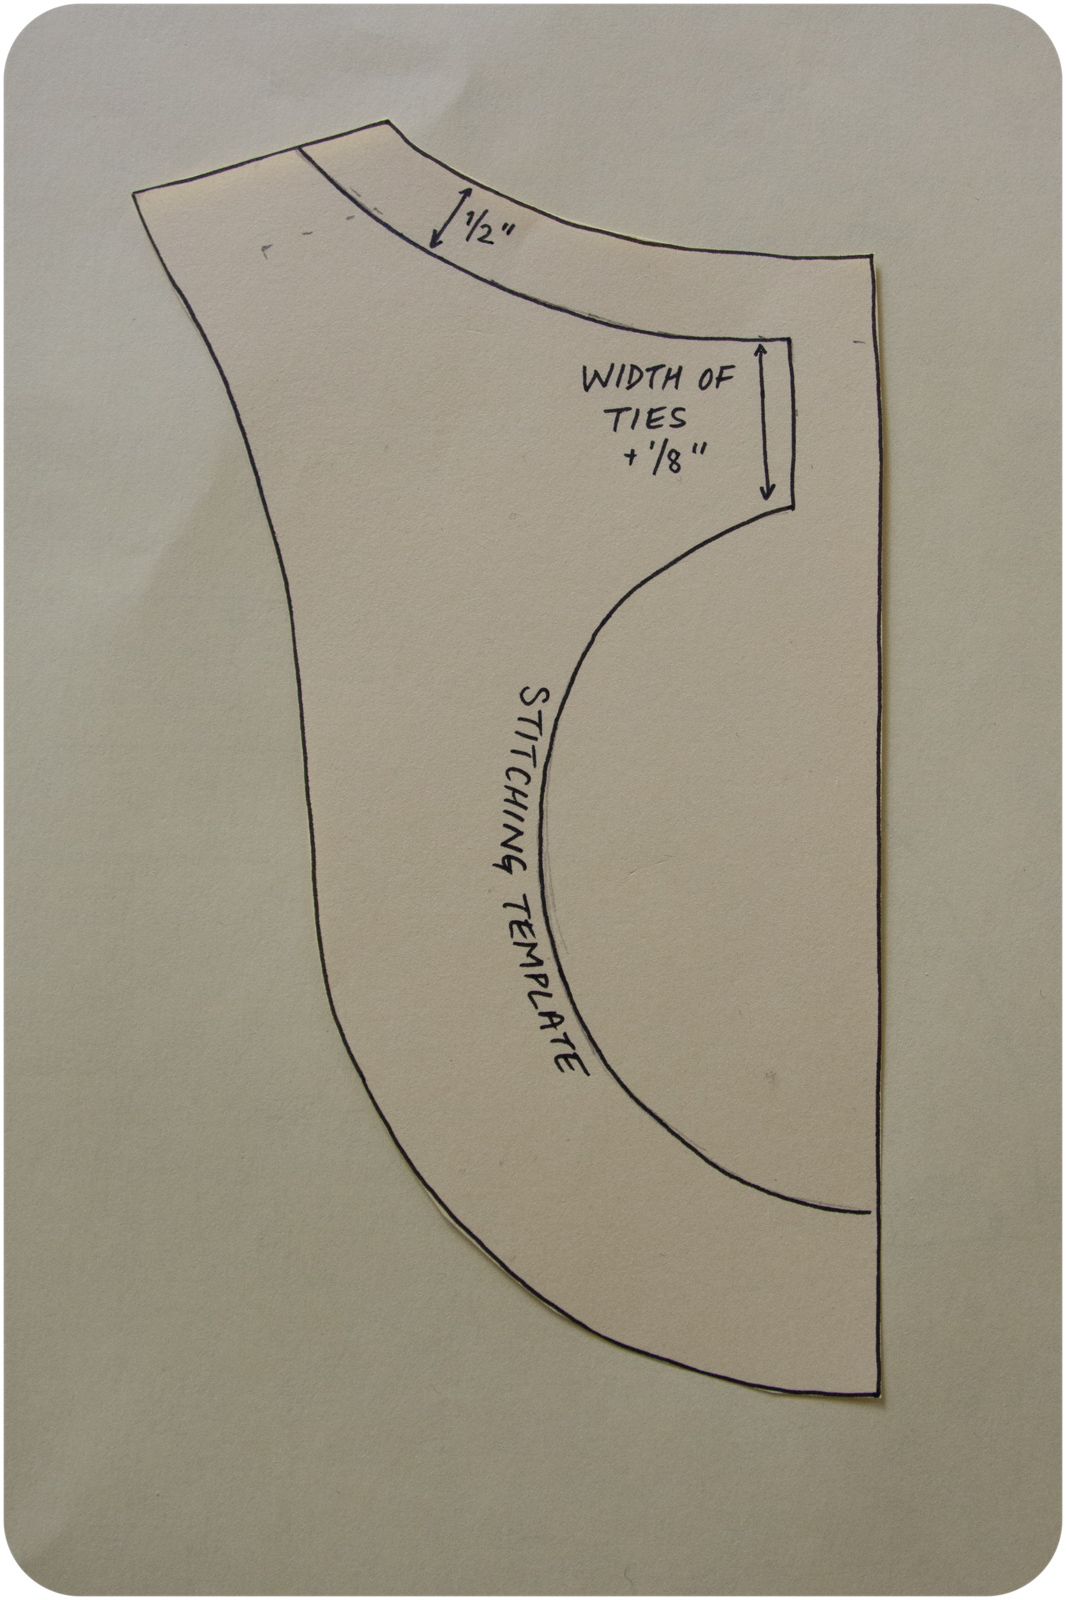
The back facing shape will depend a bit on what shape you want the keyhole opening to be. I’ve included some measurements on mine to help you out. Just make sure you have at least 1″ beyond your planned stitching line to give a consistently shaped facing.

The last bit of drawing is the stitching template for the opening itself. You can make this almost any shape you like!
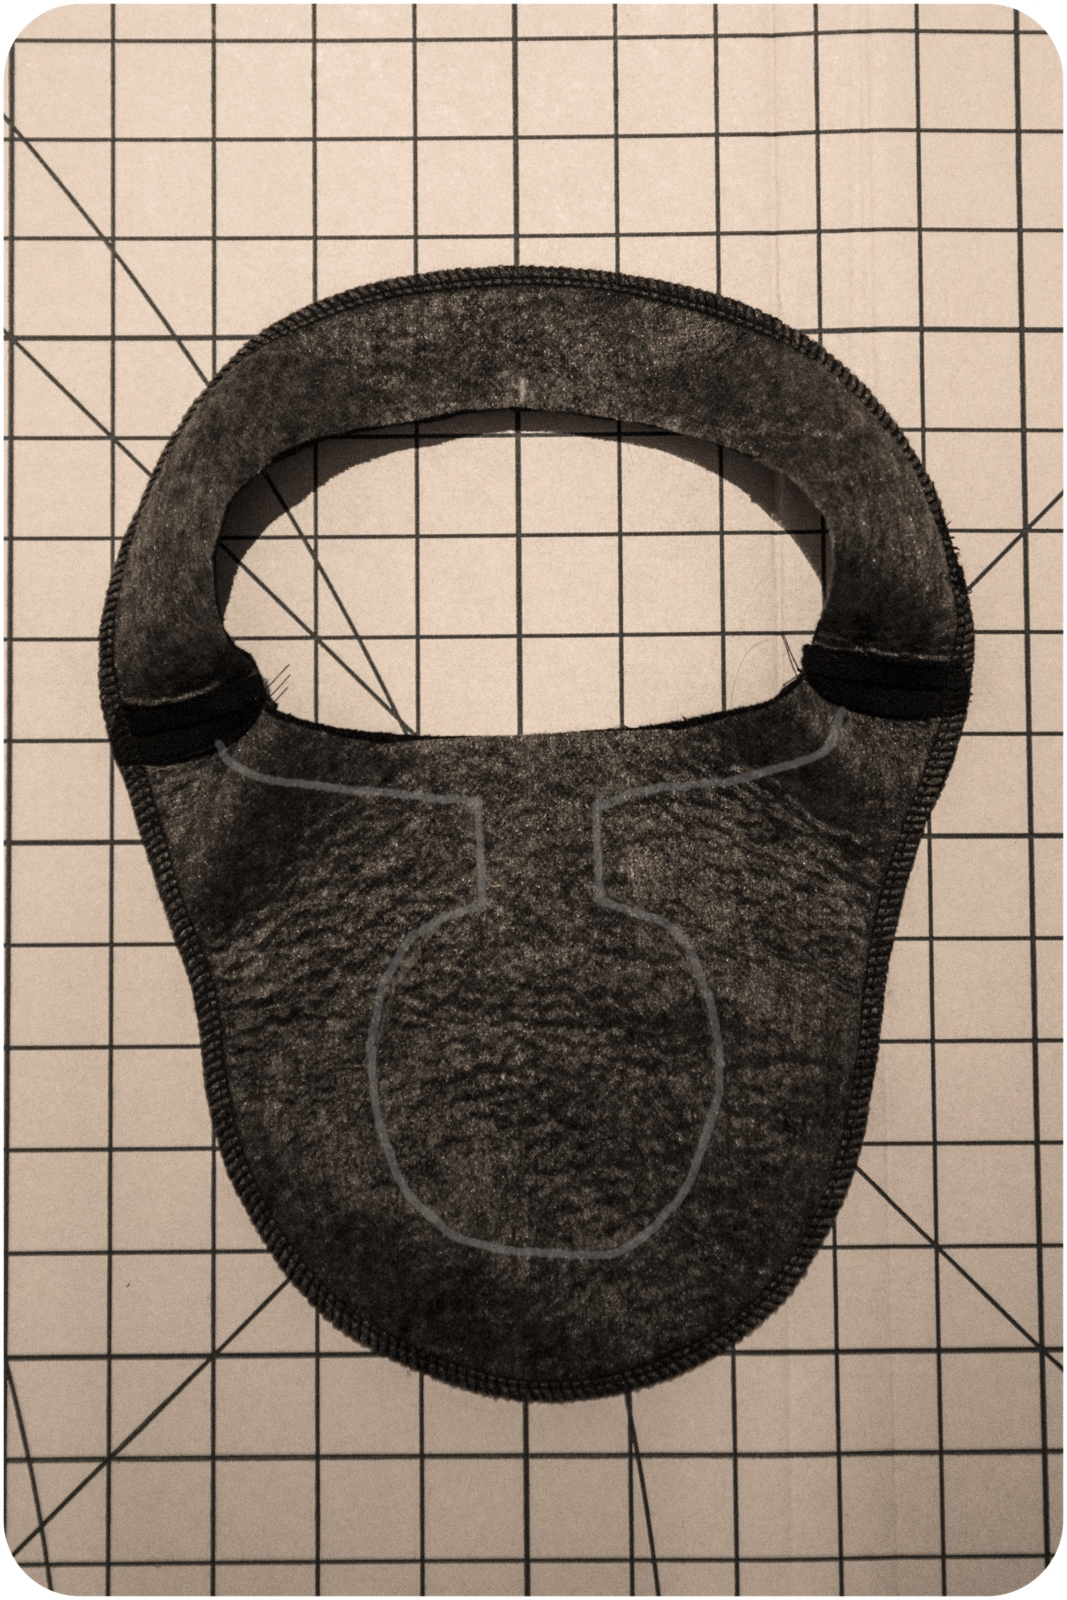
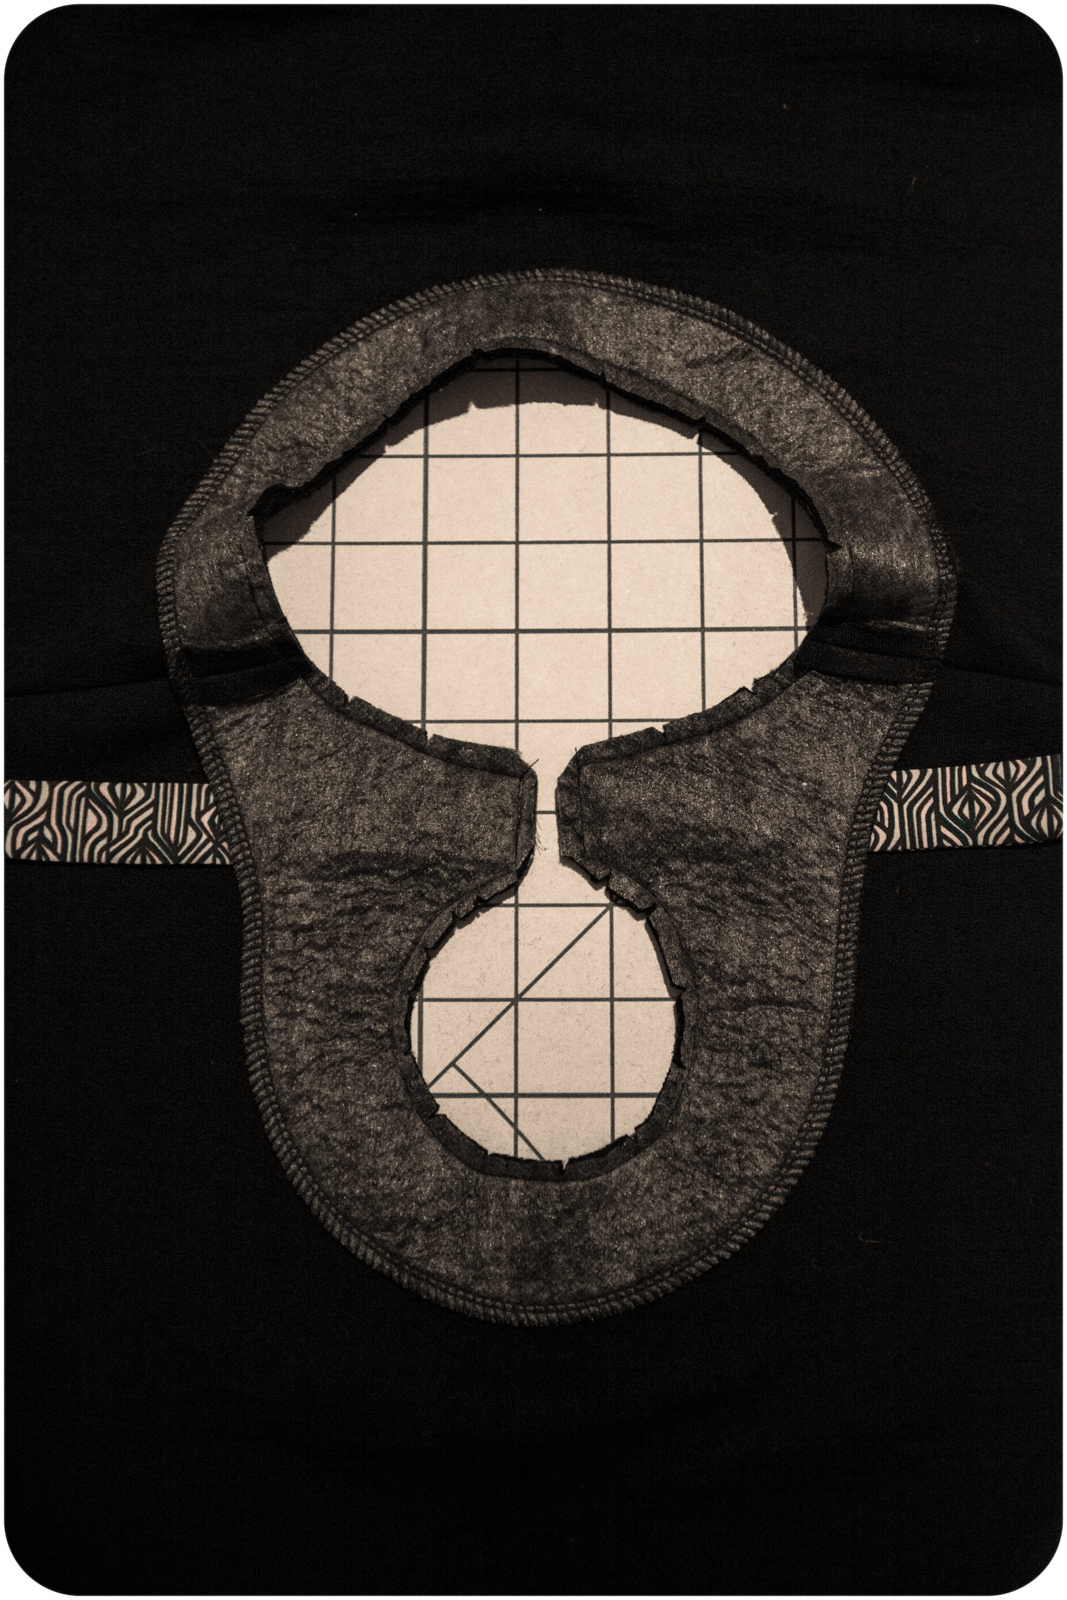
OK, now to the sewing. Join the front and back facings together at the shoulders, right sides facing, with a 1/4″ seam. Press the seam allowances open. Finish the entire outer edge of the facing. Serging or a zigzag will work best here as a folded hem may be too bulky and become visible from the outside.
Transfer your stitching template lines to the wrong sides of the back facing.
The depth of the sections where your ties exit will depend on how wide the ties themselves are. Allow about 1/8″ more than the width of your ties to prevent the ties getting caught in the stitching.
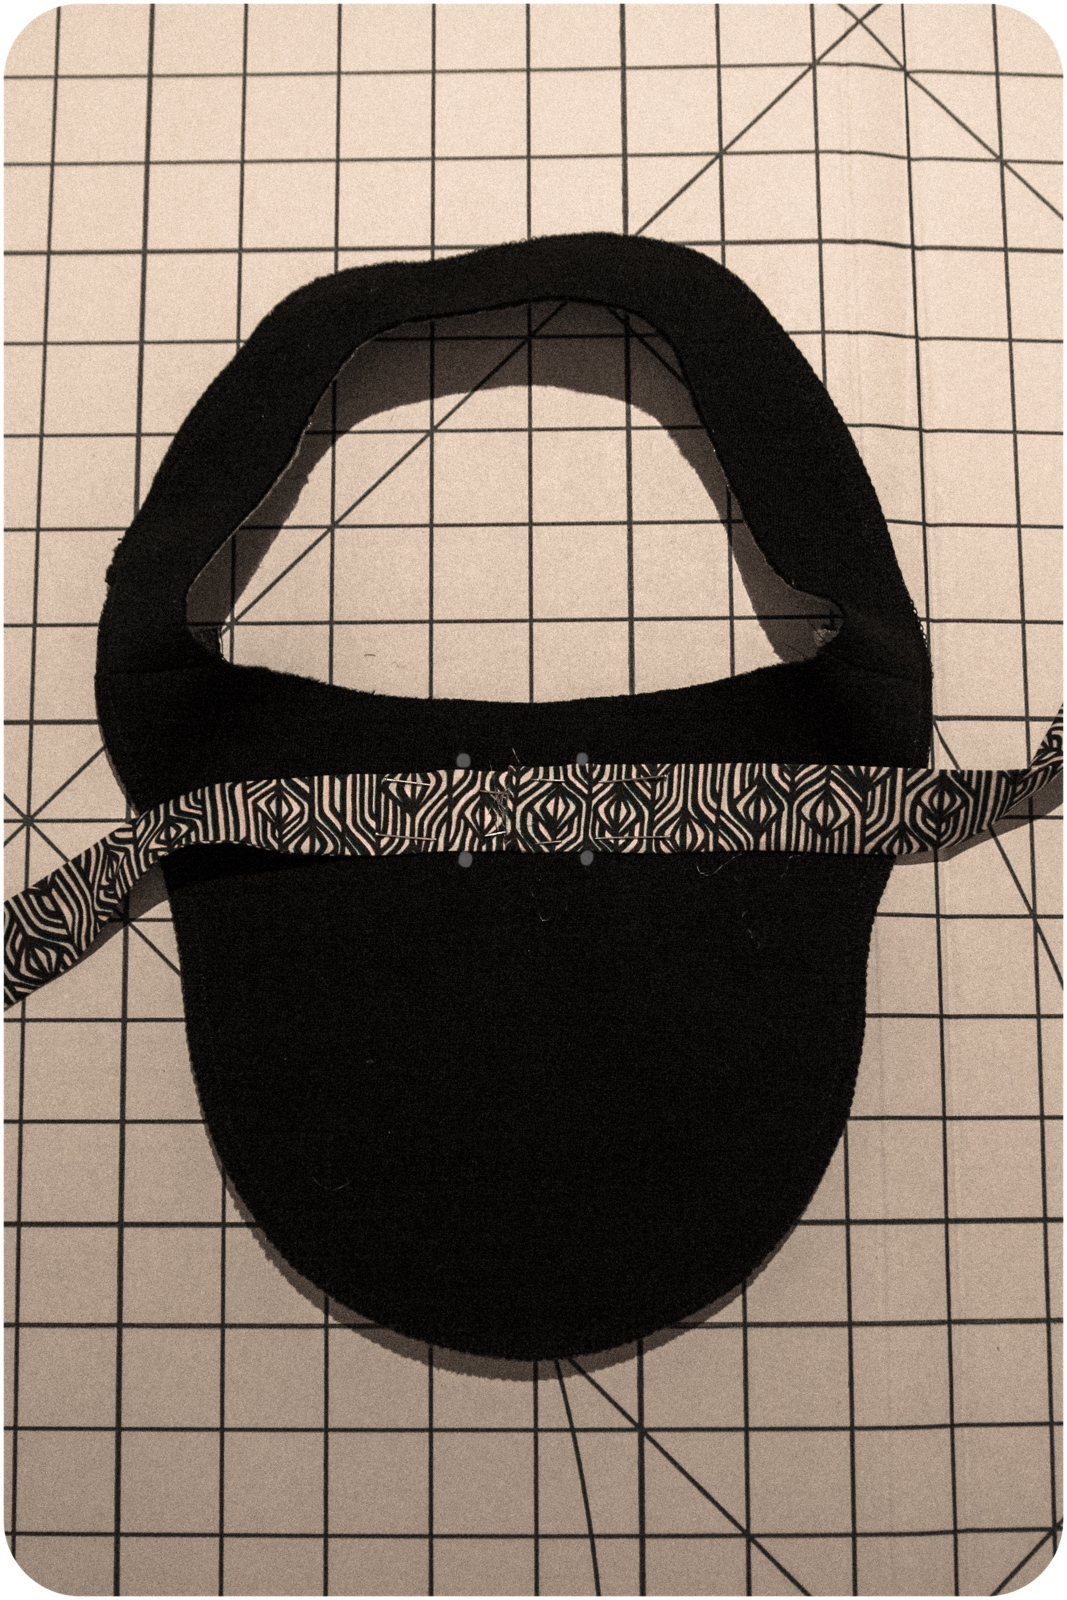
You can use ribbon or fabric for the ties. In this example I’ve used 2″ x 20″ strips of fabric, folded in half along the length and sewn with a 1/4″ seam then turned right side out. If you’re fond of florals and bigger bows, I think a fine-scale Liberty print cut into a shaped tie to give a fuller bow could be really cute.
On the right side of the facing mark the points where the stitching template pivots around the ties. Pin the ties right side up (if using one sided ribbon) between these dots with their raw edges touching at the midline. Baste the ties in place between the marked dots.
With right sides facing and matching the center front and center back notches and the shoulder seams, pin the facing to the neckline. Stitch the front neckline with a 1/2″ seam, continuing around the back neckline until you meet the stitching template markings for the back facing. Follow the stitching markings being careful not to catch the ties anywhere other than the point where you previously basted them.
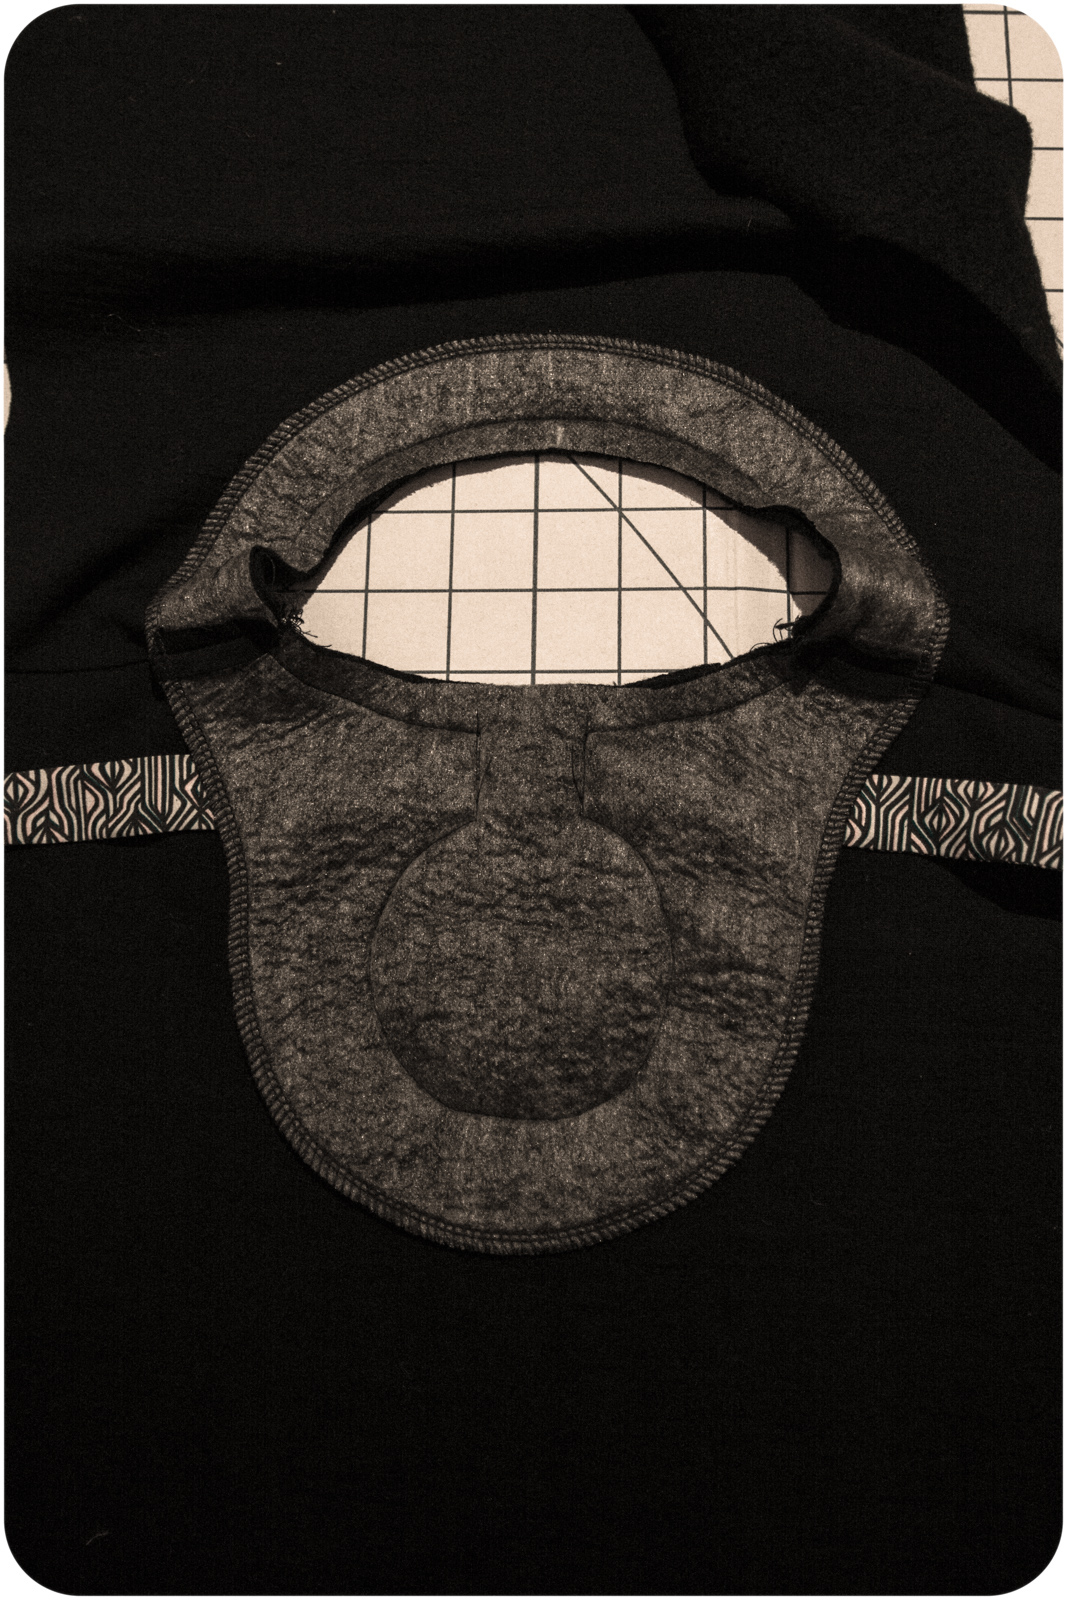
Now, the slightly scary part. Trim the neckline seam allowances to about 1/4″. Trim around the front neckline, around the back and then down into the center of the cut-out section. Clip the curves ready for turning the facing.
Turn the facing to the wrong side of the garment and use a point turner, and gentle traction on the ties to get the corners nice and crisp. Roll the seam slightly to the inside so it doesn’t show and press the neckline. Topstitch about 3/8″ from the edge to keep the facing in place.
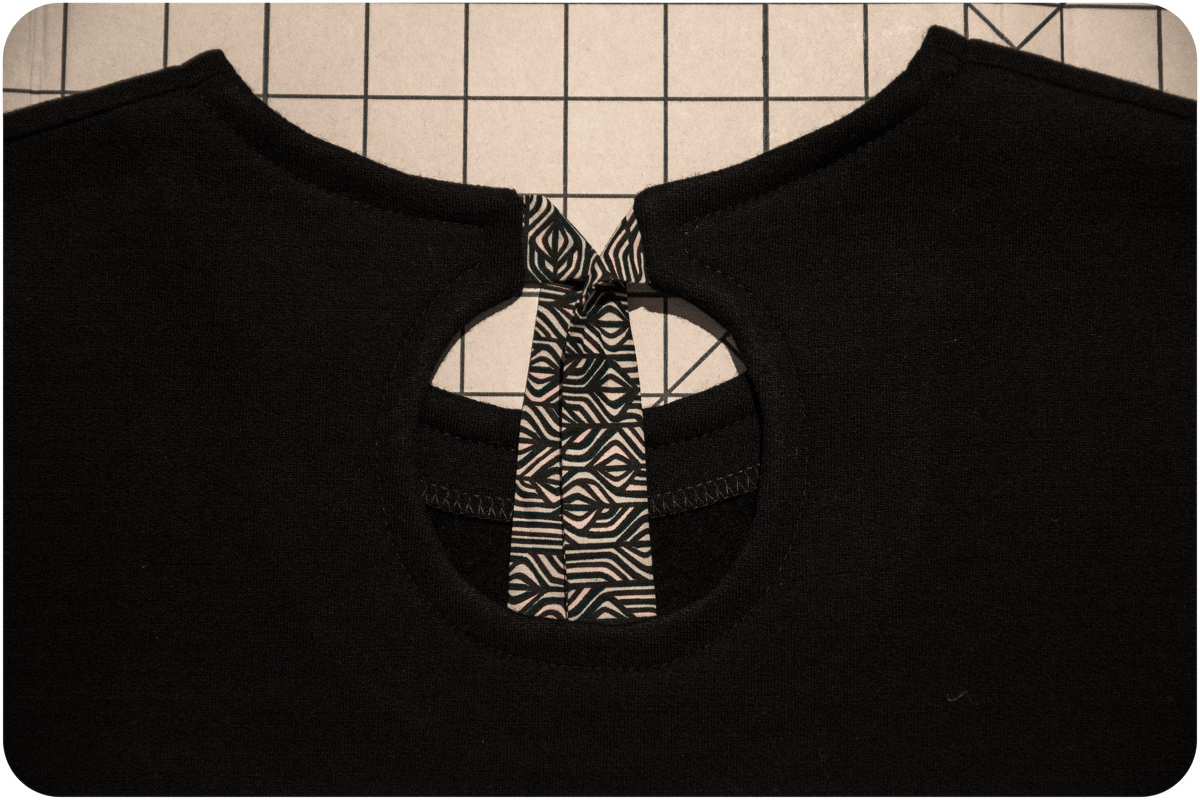
And there you have it! A t-shirt that is a bit more glamorous than your everyday t-shirt. I’ve used a merino fleece here and the reduced stretch would not have allowed me to do the standard neckband finish. It’s a lovely excuse to use some more luxurious fabrics and to treat yourself to 10 cm of some fancy tana lawn for the ties.
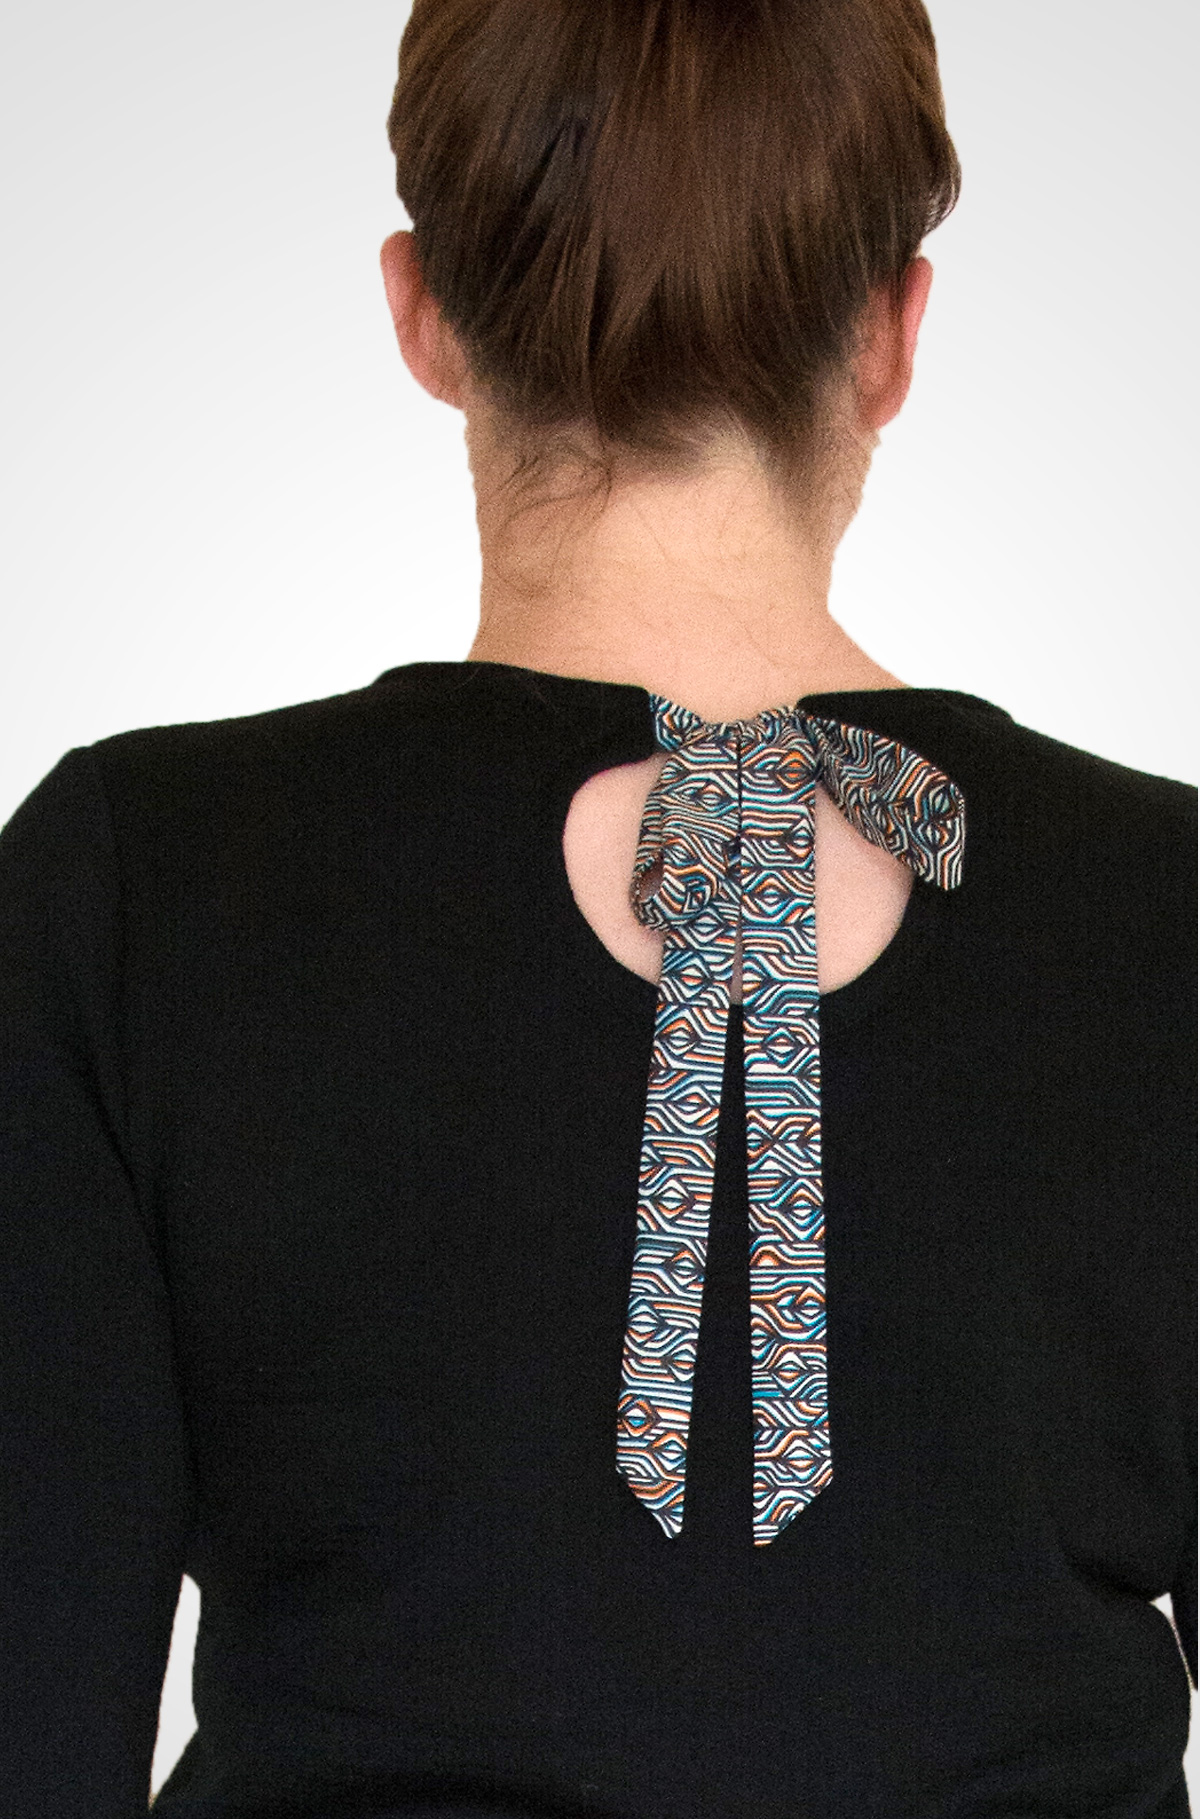
You can find a great tutorial for tying the perfect bow here. Don’t bother watching it yourself, as doing it upside down behind your back is a bit tricky, but bookmark it for a housemate! In reality, the 1″ gap and a gently tied bow has allowed me to take this top off and on without having to undo the ties.
My top is going back in the cupboard until summer is over, but I hope I’ve given you Northern Hemisphere folks some ideas for modifying a fall sweater.
Happy sewing,
Shelley
What a great way to add some style to a basic tee. Thanks for the tutorial!
Shelley, thank you so much. I did have the “cute” problem with the lunchbox tee trying a very beautiful, but not so stretchy sweatshirt fabric… now I have the answer!!! haha.. you have enlightend me 🙂
I really love this and have to try it out!
Thanks everyone. Maria you could definitely do this as a retro fit. Because you would end up with the neckhole bigger, you could probably just do a circular facing and skip the cutout and ties. Your neckhole will end up considerably bigger due to the lack of neckband and the bit used as a seam allowance.
HEY free TOOLS JOIN NOW CLICK HERE …