Today we are happy to welcome Meagan to the blog. She is going to show us how to do the sew and slash technique to create an amazing fabric texture to personalize an Oliver + S pattern. Thanks Meagan for this wonderful tutorial!
Hey everyone! I’m Meagan and I blog over at Ava’s Lookbook. I’m so excited to be here, thanks for having me! I’m here to show you how I created a faux chenille yoke for the Hide-and-Seek Dress + Tunic. I love that this pattern provides such a blank canvas for customization. I originally created this look for the denim challenge over at the Project Run and Play Sew-Along. I won the Sew-Along with this look. My first win ever! I changed up the way I used the technique for this tutorial, and got a completely different look, which proves just how versatile fabric manipulation techniques can be with small changes. So fun!

OK, let’s get started.
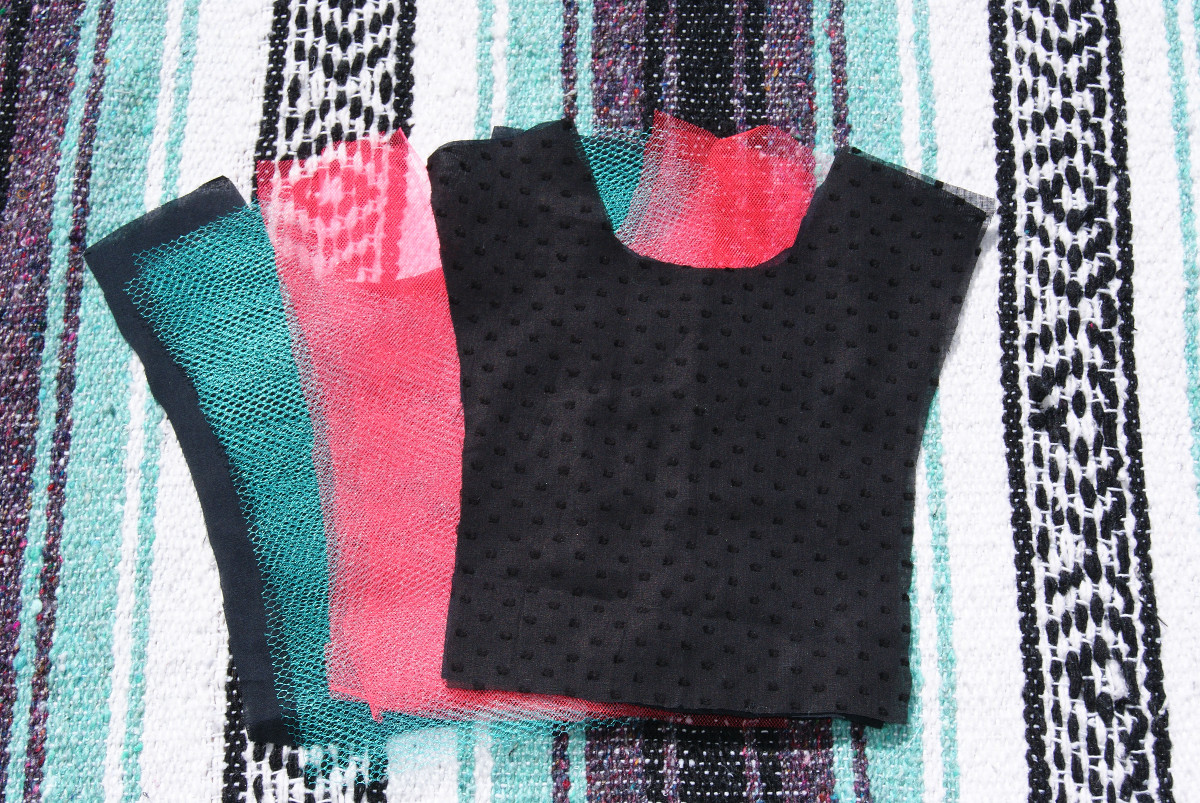
First you’re going to need to pick your fabrics. I think one of the main objectives for this technique is to create texture. Fabric choice is very important here. When I created the denim version, I had a hard time getting the fabric to do what I wanted. I think it’s because denim is such a heavy fabric. This time around I chose some fluorescent orange tulle, some teal netting, a black very thin Swiss dot, and a solid black quilting cotton for the base. It really helps to use a thin fabric for your top layer, so the Swiss dot was perfect. I chose tulle because of how light and fluffy it tends to be, and I used the netting to provide some stiffness to the “sandwich.”
Once you have your fabric choices locked down you’re then going to cut a few layers of the bodice pattern for each type of fabric you chose, I used four layers for the tulle, four layers for the netting, one layer for the Swiss dot, and one layer of the black solid for the base.
Once you get all your cutting done, you’re going to start to layer all the pieces on top of each other. This gets a little fussy, since all the tulle and netting wants to cling to each other awkwardly. Just take it slow and pin one layer at a time so you can get them lined up as accurately as possible.
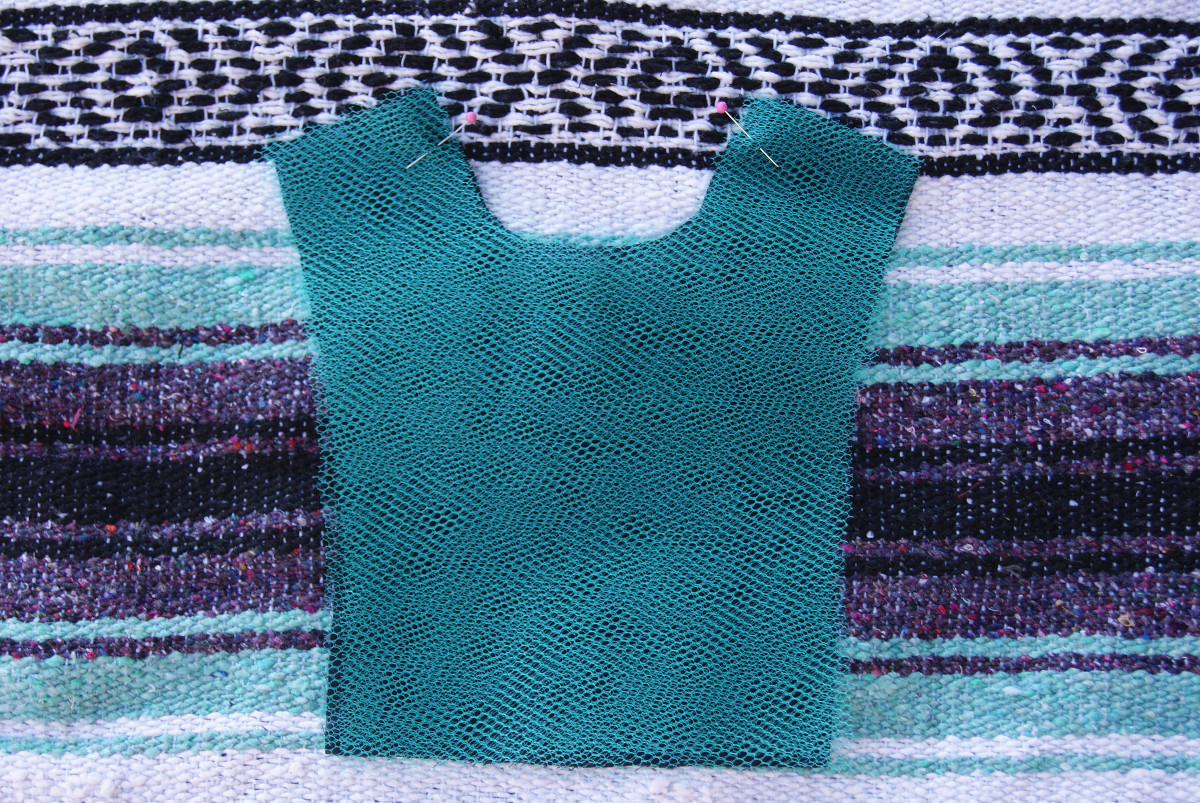

Next, you’re going to want to make sure you’ve pinned your “sandwich” pretty well so that once you start sewing, it doesn’t shift around too much. I used my walking foot for this part to really keep my layers evenly fed while I was sewing. You’re also going to need to decide on the design you want to create. The first time around I chose a diagonal design. This time, I wanted to see if I could create a bit of a chevron straight down the center. I got really lucky, because when I went to mark my sewing lines, the pattern of the Swiss dots were perfectly in line for my design. I would recommend marking your sewing lines prior to pinning your “sandwich” together. Since I had no need to mark them, I skipped this step. Basically, you’re going to mark lines half an inch away from each other in any pattern you’d like. I recommend using a ruler or straight edge so that everything is as neat as possible. Once your lines are marked, it’s time to sew!

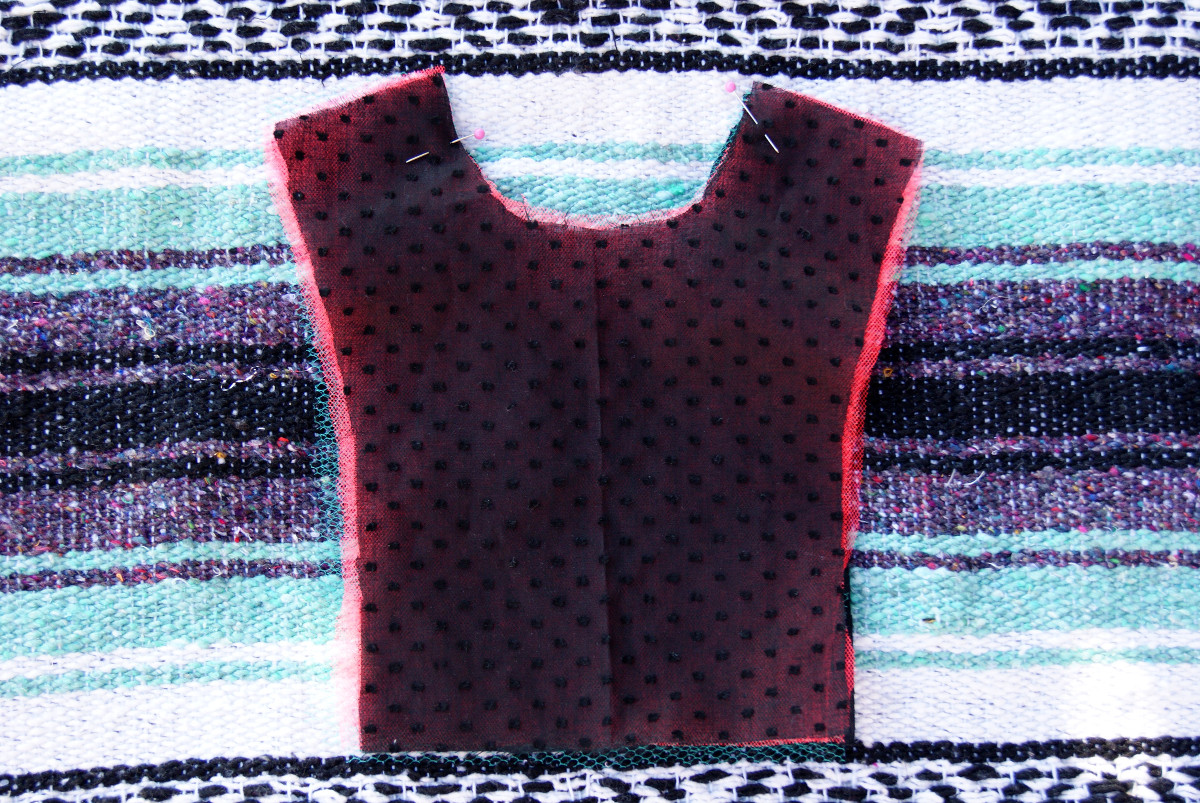
Now that you have your bodice is all quilted it should look something like this:
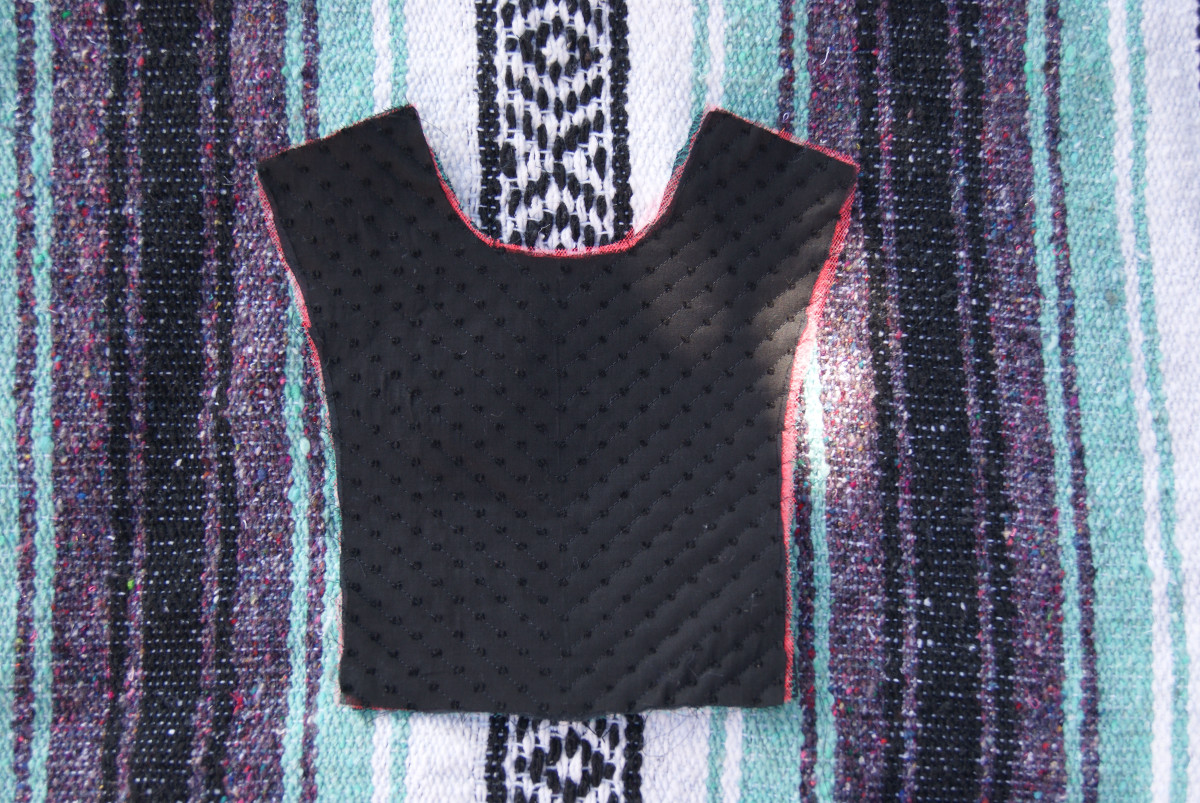
You’re then going to take all the layers except the base layer and cut straight through to the other edge of the pattern piece. It’s pretty important to go slowly during this step; you don’t want to accidentally cut through the base layer. Once you’re done, it should then look something like this:
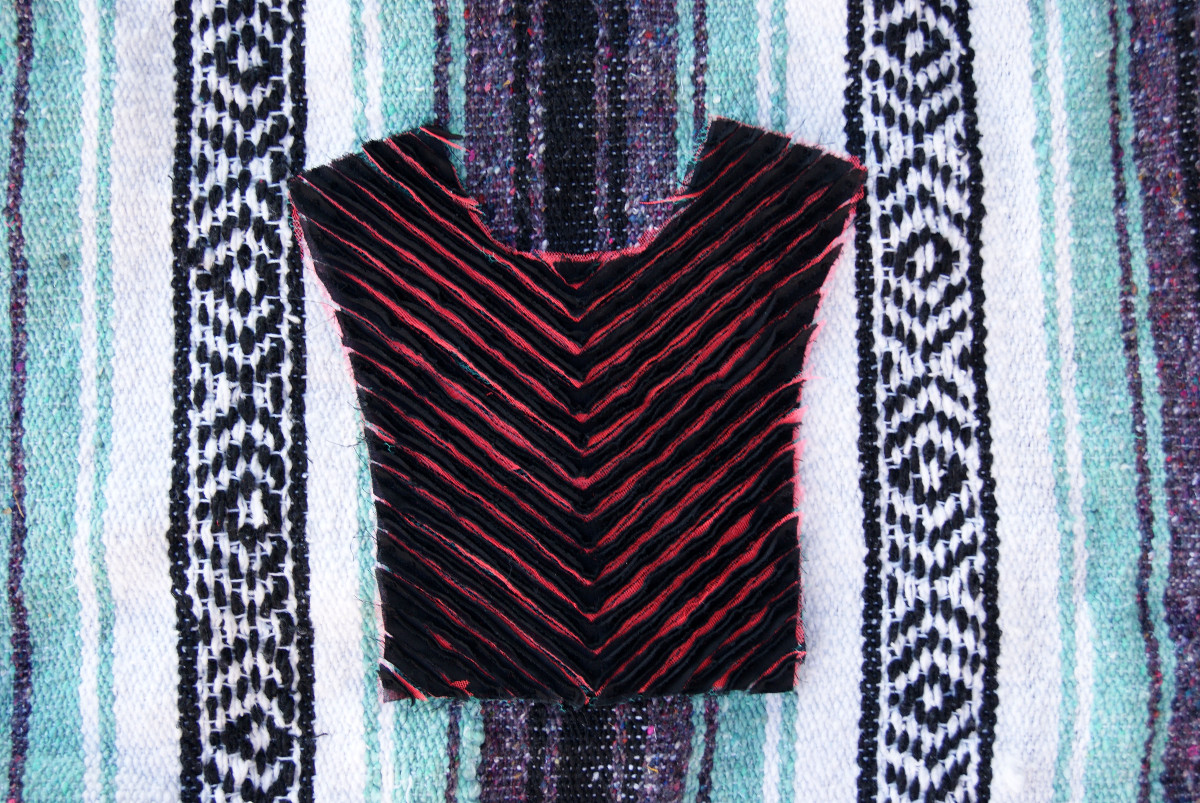
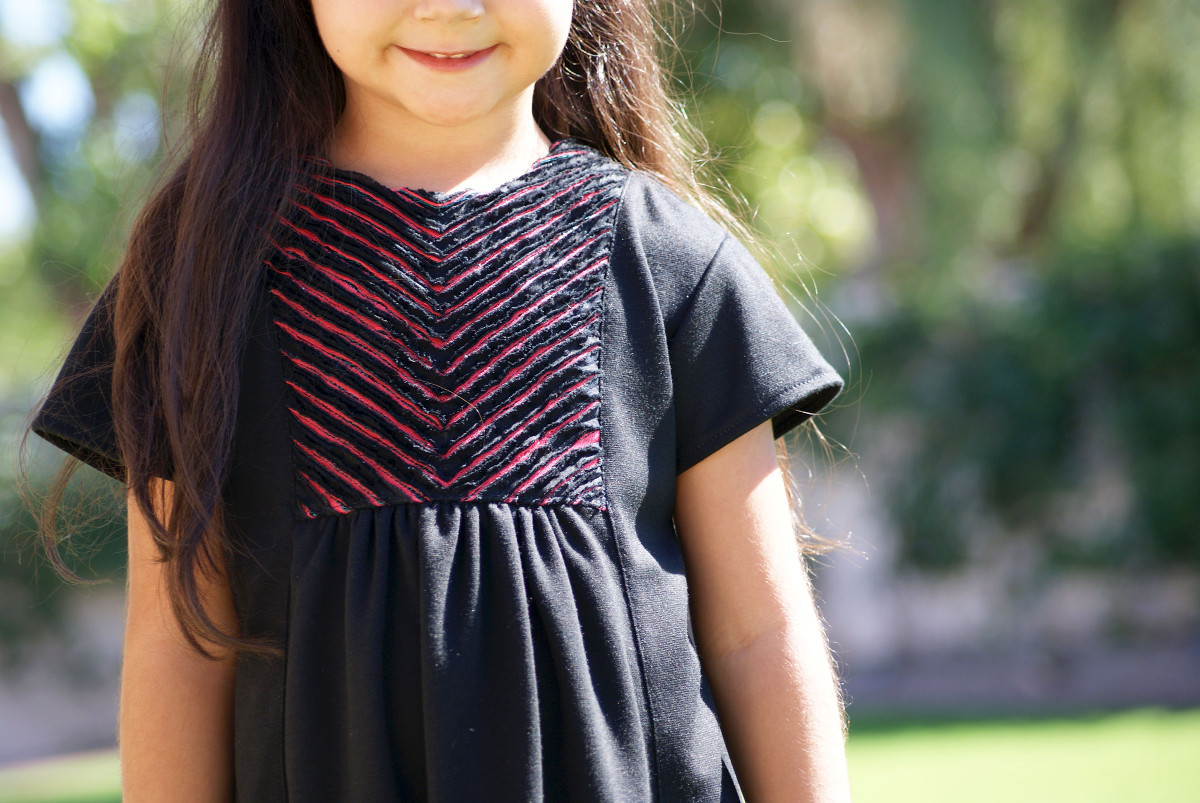
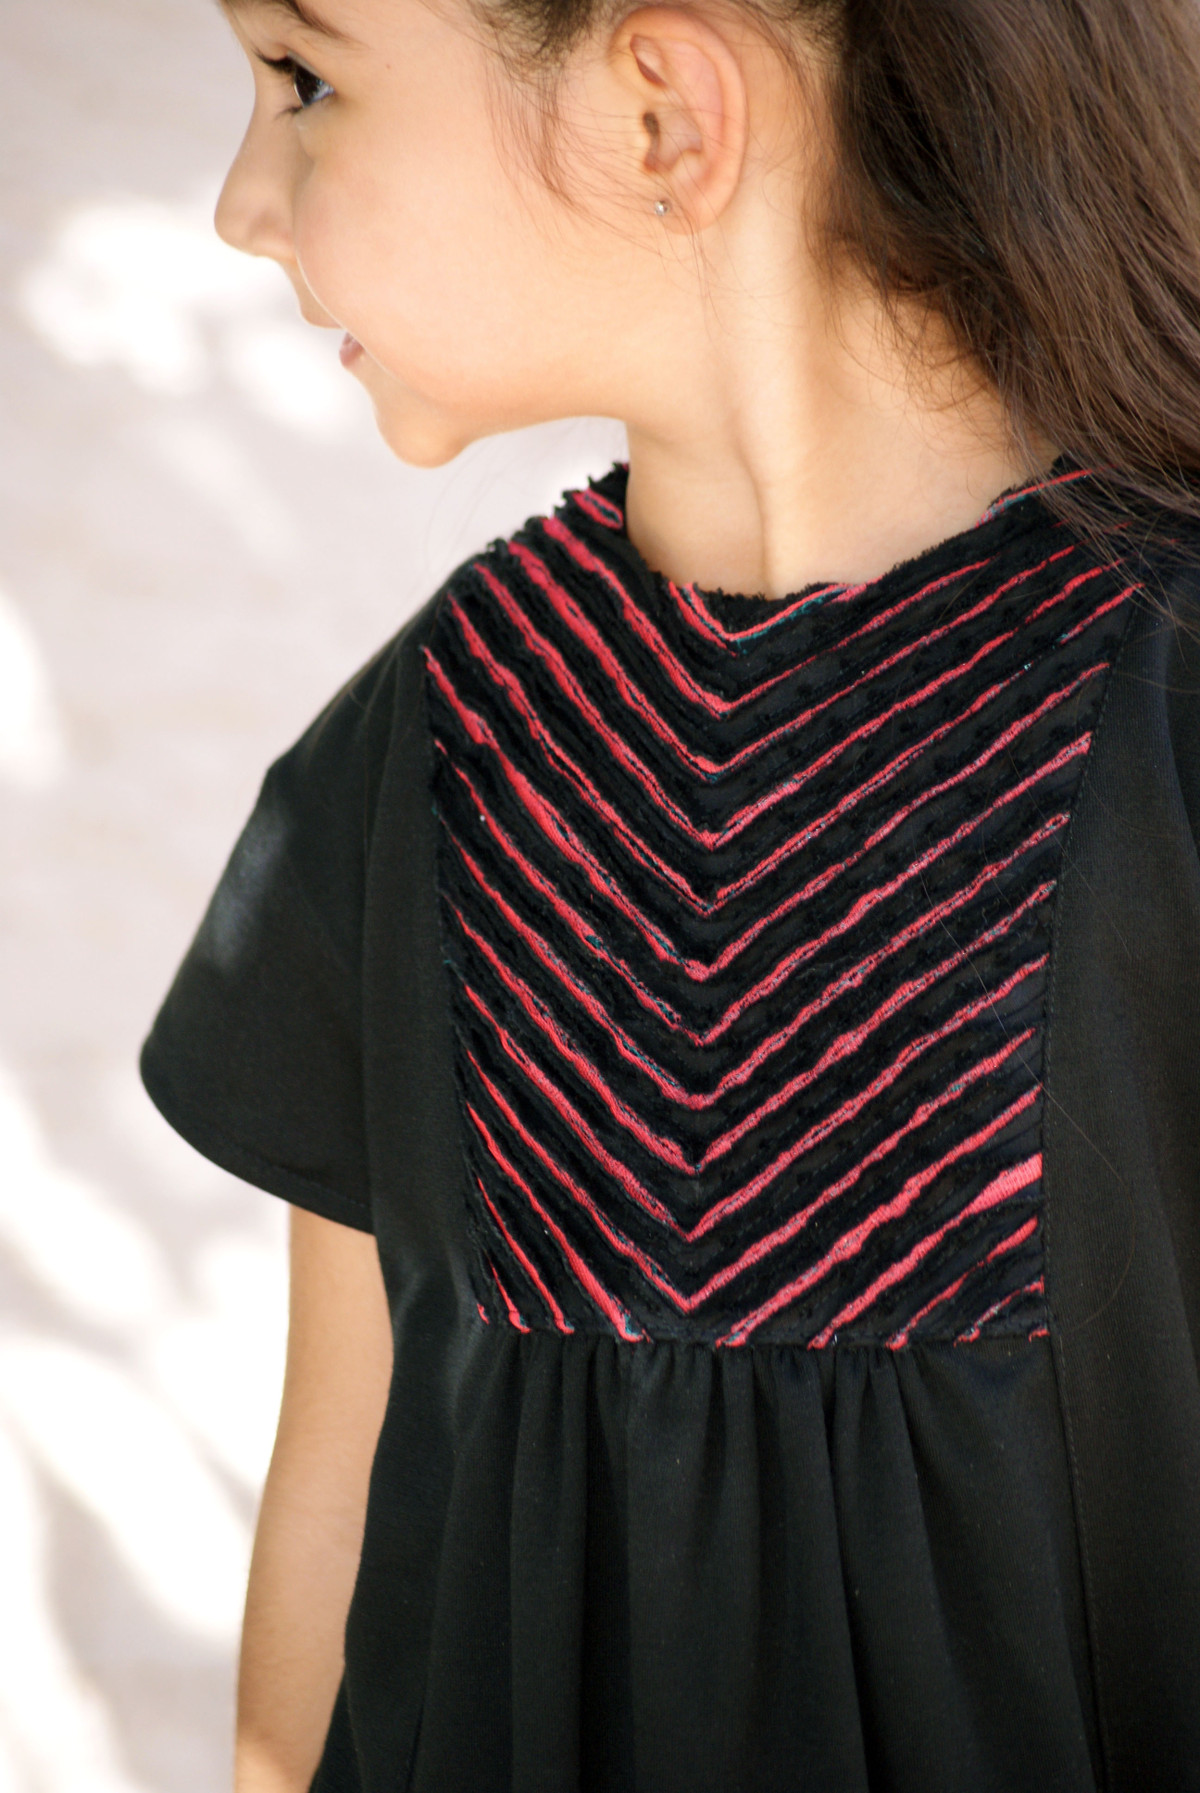
Fun right?!? Such a transformation, you’ve now created your own textile, congrats! Now you can construct the rest of the dress or tunic as you normally would, following the pattern instructions. I went ahead and used a black Ponte de Roma knit for the rest of my dress and loved the way it turned out. Perfect for fall!
Thanks again for having me!
This is just adorable, Meagan! I love that you used tulle, too. That keeps it nice and lightweight!
What a great look and super tutorial! I love your photos and finished dress. Thanks for sharing this!
Thank you both very much, it was so much fun to make! 🙂
It looks great and fun to do.
This is a brilliant idea for the bodice. I will have to experiment with fabric manipulation a bit more and will certainly give this a try. My daughter has this pattern on my to-do list for my granddaughters. It is her favourite Oliver & S pattern in my collection. Thank you for sharing your technique.
Cheers, Linda A
Ontario, Canada
I will really give it a try. It looks just great!! But I think for our fall here I must manage to make it with long sleeves. Thanks for the tuto!
I’ve done faux chenille many times on projects but never thought to use tulle. Brilliant idea!
Love this so much! Have you tried layering the fabrics before cutting and cutting everything as one piece or is that too many layers? I would think that would help keep everything lined up.
I love this idea! Thanks for the tutorial!
Tulle is a great idea! Love this look.