

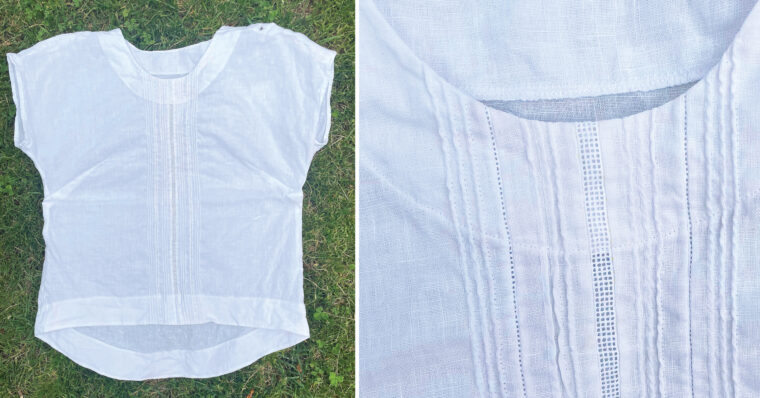
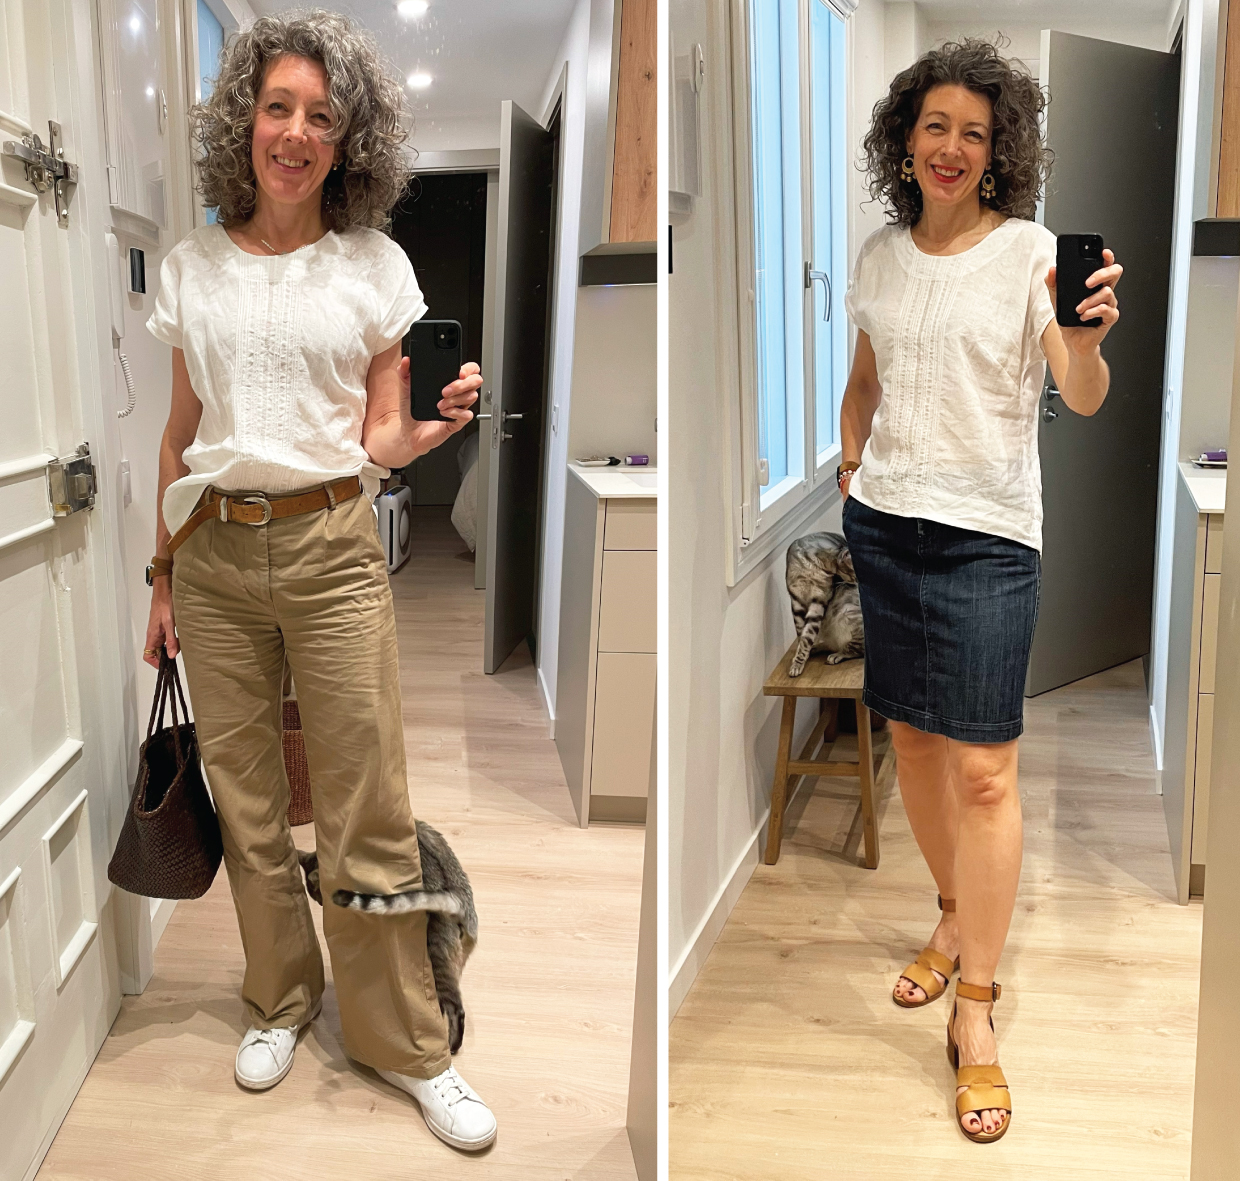
I posted a few photos of my new linen Verdun Woven Tee recently and quite a few of you asked about it. Here are the details.
This is a very easy but also impressive technique to use to embellish your sewing. I used two different techniques to do it. Faux pintucks using a twin needle and a pintucking foot. And I used entredeux, which is a special trim you can buy at heirloom shops like Farmhouse Fabrics. (It’s also very popular in traditional trim stores like Pontejos here in Madrid, so if you ever come to visit, stop and pick up some!)
I’ve written about these techniques before when I added them to a Butterfly Blouse for S, so I’m going to repeat them and add a little more information here.
Entredeux and hemstitching
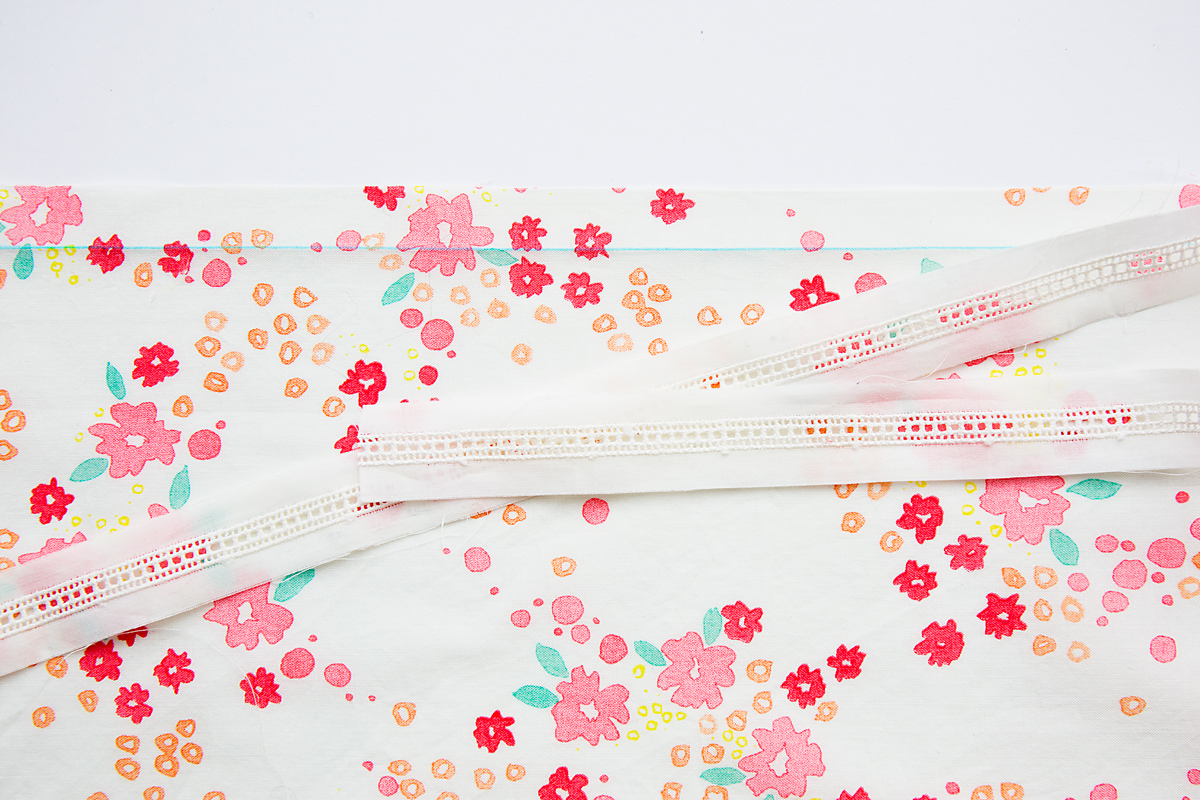
By way of introduction, entredeux translates from the French, meaning “between two,” which is a perfect description for this special trim. It’s simply a row of fancy hemstitching right down the center of a strip of lightweight fabric (usually batiste or organdy), so the hemstitching is literally positioned between two strips of fabric. When sewn, entredeux also joins two pieces of fabric, lace, or whatever else you want to join. Here is a strip of entredeux before sewing, shown with the fabric I used for S’s Butterfly Blouse. The solid edges that align the entredeux are the seam allowances, which will get trimmed after sewing. I’ll explain, don’t worry…
I’d also like to mention that, instead of using entredeux, you could simply hemstitch directly onto your fabric. Years ago my mom and I hand sewed a linen baptismal gown for the grand kids, and it was a very time-consuming project that included a lot of hemstitching. (My mom did most of the work; I think I contributed one sleeve.) To do traditional hemstitching, you pull a few threads from the warp or weft of your fabric and hand stitch the gap left behind to create little openings while pulling the remaining threads together in a pretty configuration. It’s gorgeous when done correctly. It also take a lot of time and patience and, if you’re like me, you probably don’t have so much of either of those in your life right now. (Something to look forward to doing in retirement, perhaps? I don’t know; I have a feeling my retirement is going to be busy, too…)
You can also “fake” hemstitching with a sewing machine and wing needle, but I’ll admit I’ve never really cared for the look. It’s difficult to set your sewing machine tension and stitching just right, and it just doesn’t look the same to my eye. Eventually I’ll get around fiddling with this technique more and maybe I’ll end up liking it, but in the meantime I prefer to buy prepared entredeux, which is how many heirloom sewists do it too. You can find entredeux at heirloom sewing stores and websites, and it looks great while also being really easy to sew. Like I said, you can order entredeux from the lovely folks at Farmhouse Fabrics. I can also get it locally here in Madrid because it’s used for the traditonal Chulapa costume for our fiestas.
So anyway, just as I did for S’s Butterfly Blouse, I decided to stitch the entredeux right down the center front of my Verdun Woven Tee, with several rows of pintucking and a second row of entredeux added on either side of the center entredeux. To get started, I cut a piece of linen several inches larger than the front blouse pattern. It’s easiest to do these heirloom techniques before you cut your pattern piece because you’ll lose some width due to the entredeux seam allowances and fabric uptake from the pintucks, so cut a piece of fabric large enough to leave yourself some extra room and you won’t need to try to calculate the exact amount of extra to leave.
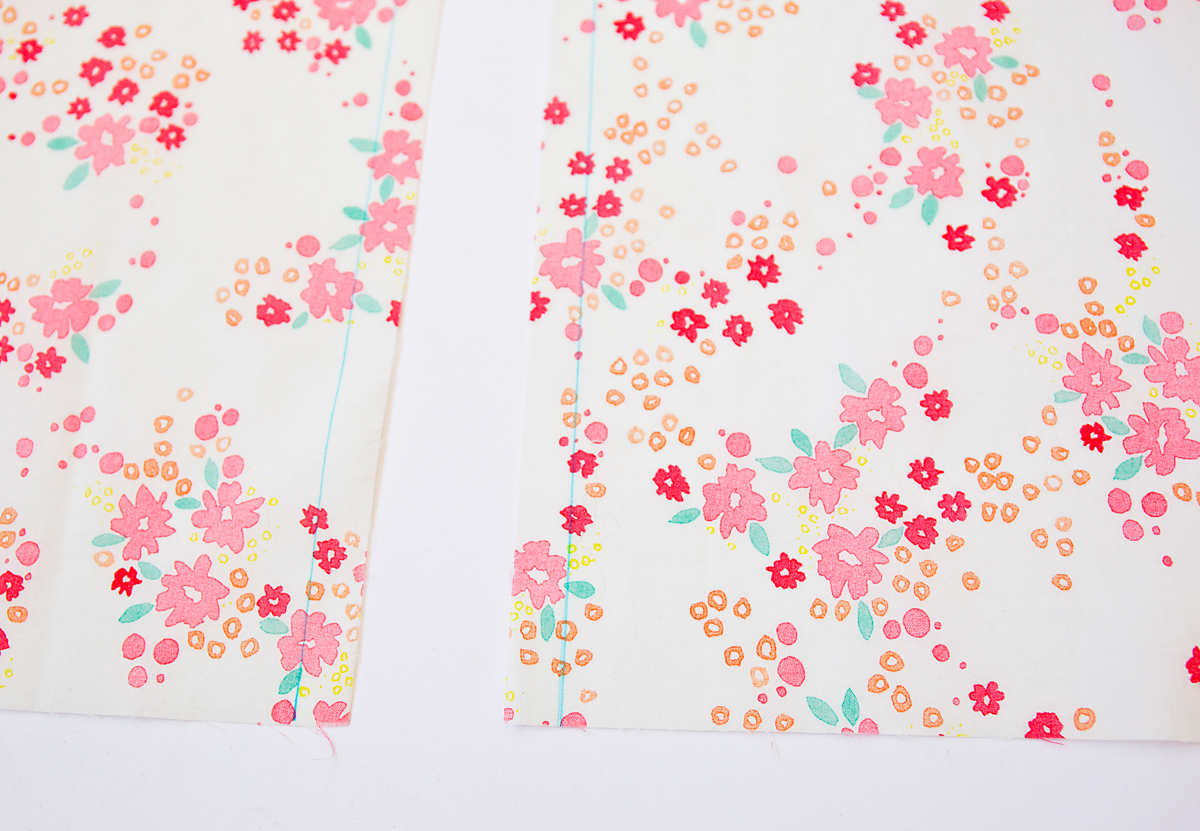
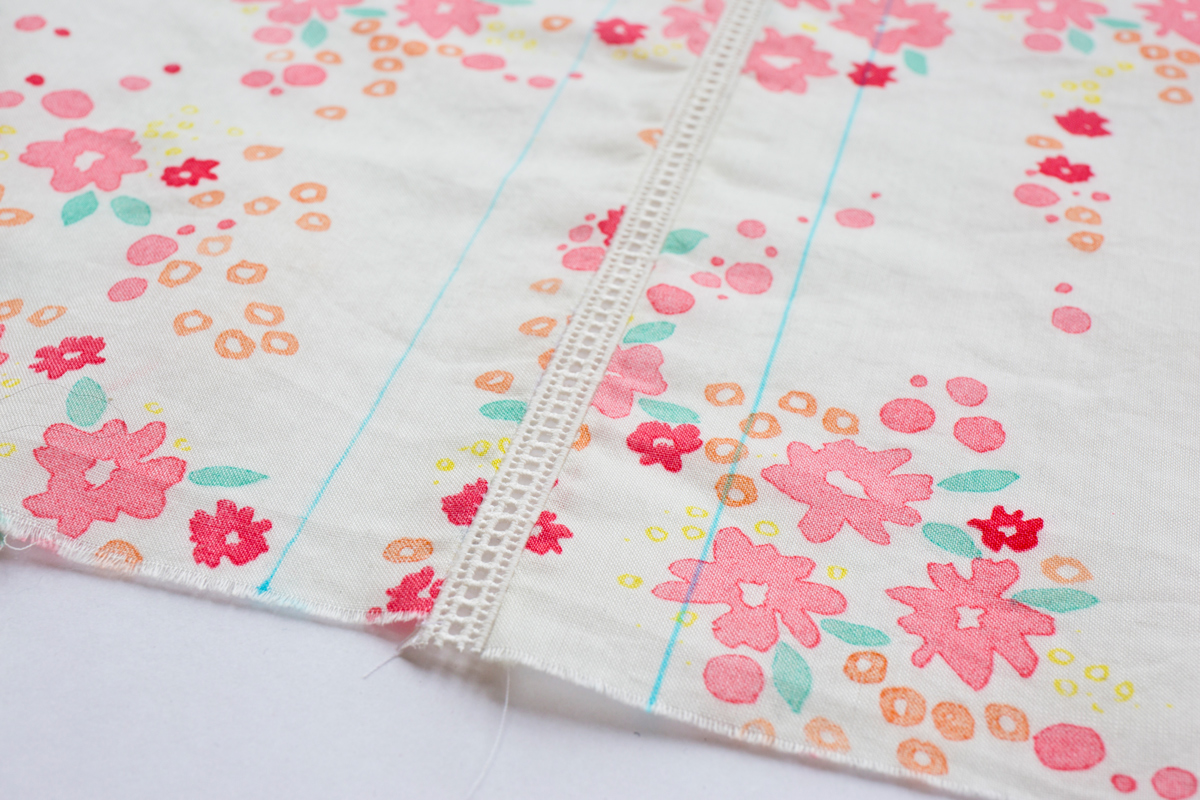
1. Just as I did for the Butterfly Blouse (shown in these photos), I cut my fabric down the center and used a water-soluble pen to mark a 1/2″ seam allowance on either side of my center cut. Try to do this as on grain as possible because you’ll get much better results. I like to pull a thread to be as accurate as I can, but I’m a little finicky about things like this.
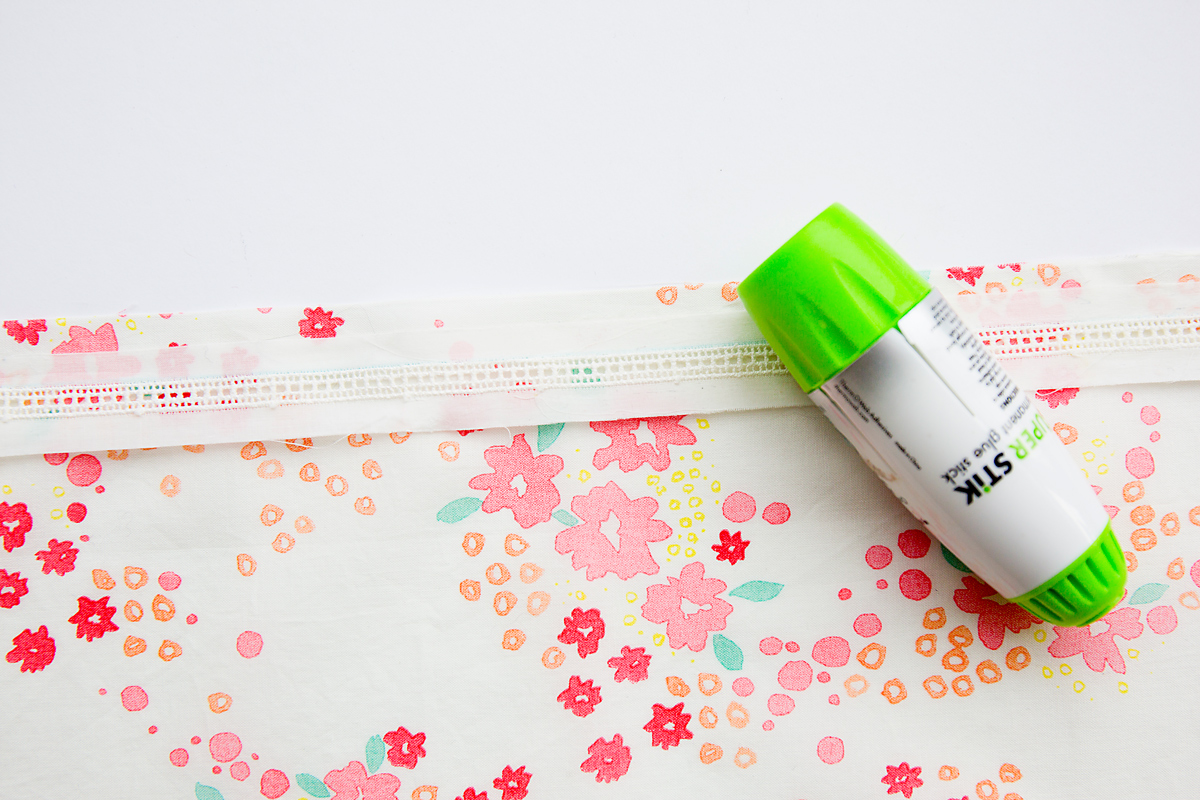
2. Grab a stick of fabric glue, because it’s the easiest way to do this. Really! (I’ve never used or liked fabric glue for any other sewing purposes, but it was great here.) Run the glue along the seam allowances of one fabric edge and stick the entredeux to the fabric, right sides together, so the edge of the entredeux abuts the line you drew. This is really easy with the white entredeux because you can see right through it. (When I use black entredeux on black fabric, I’ll try using a white chalk line to see if it’s also this visible. I suppose a row of basting stitches could be useful, too.)
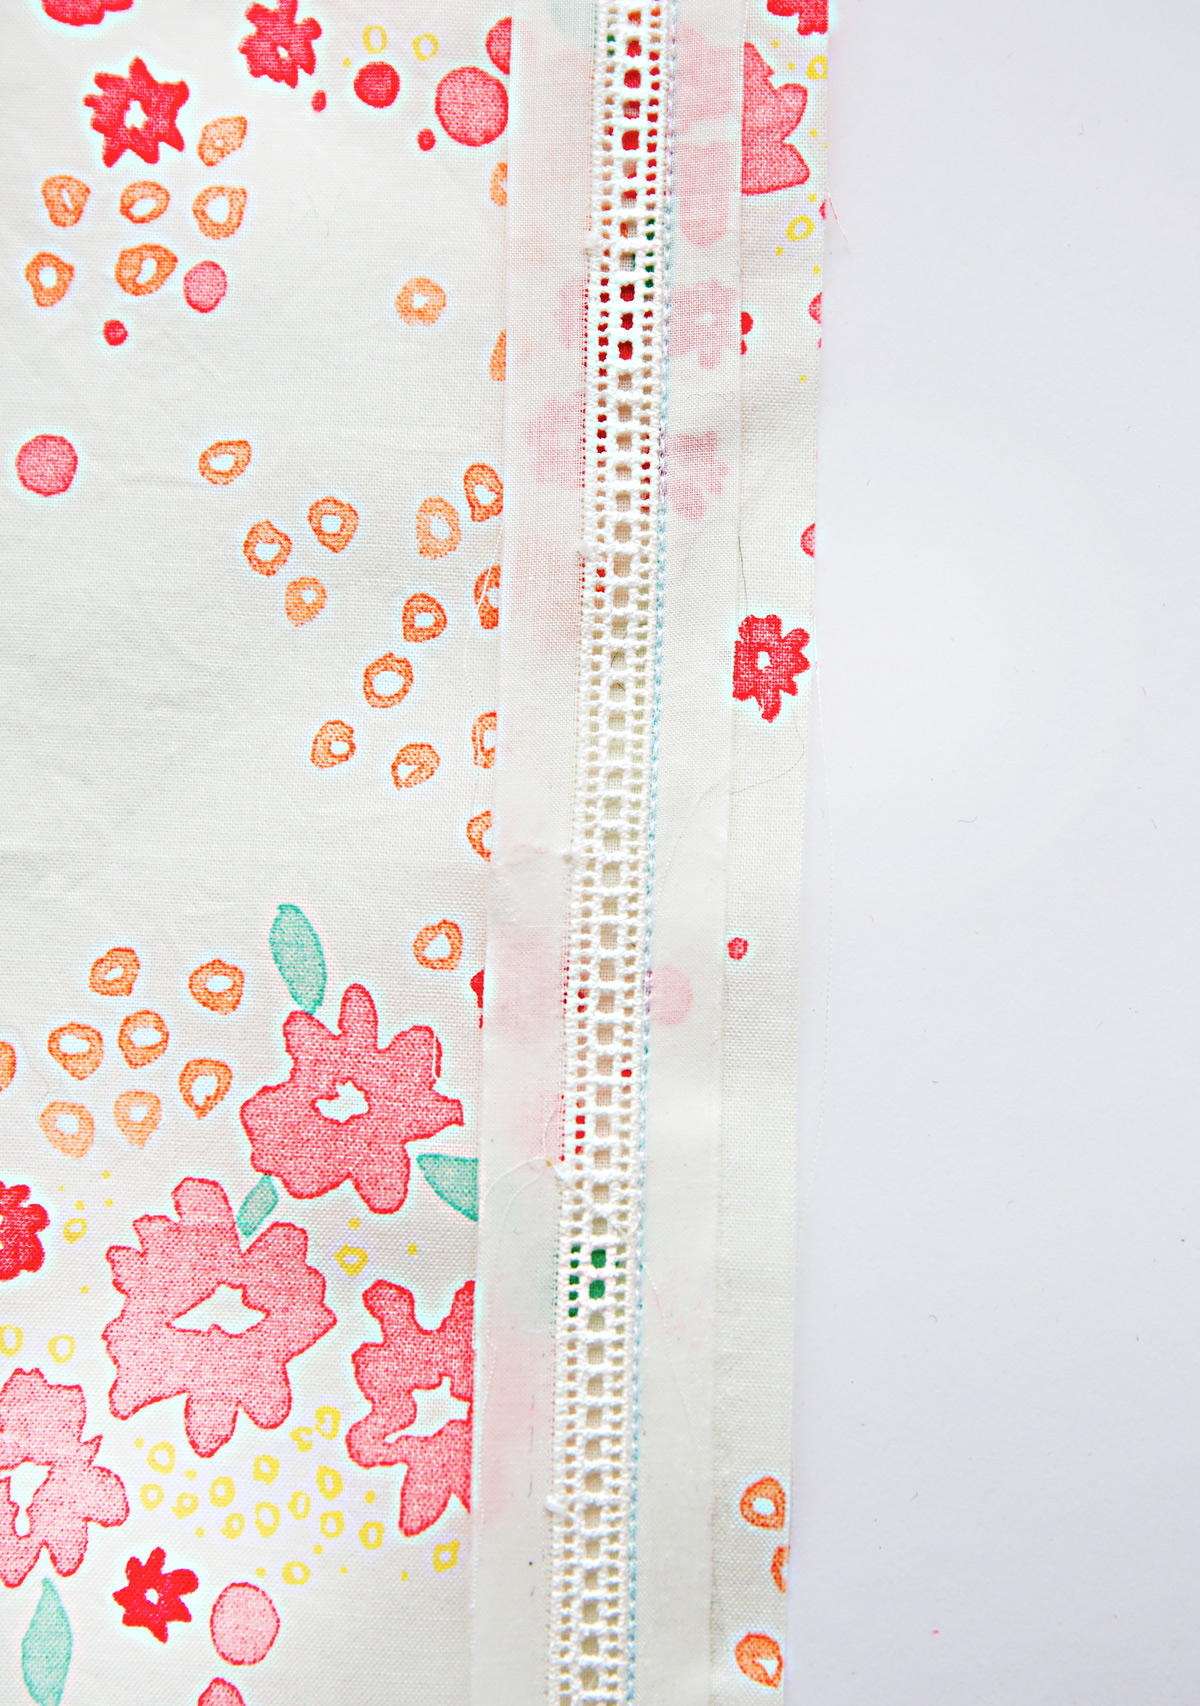
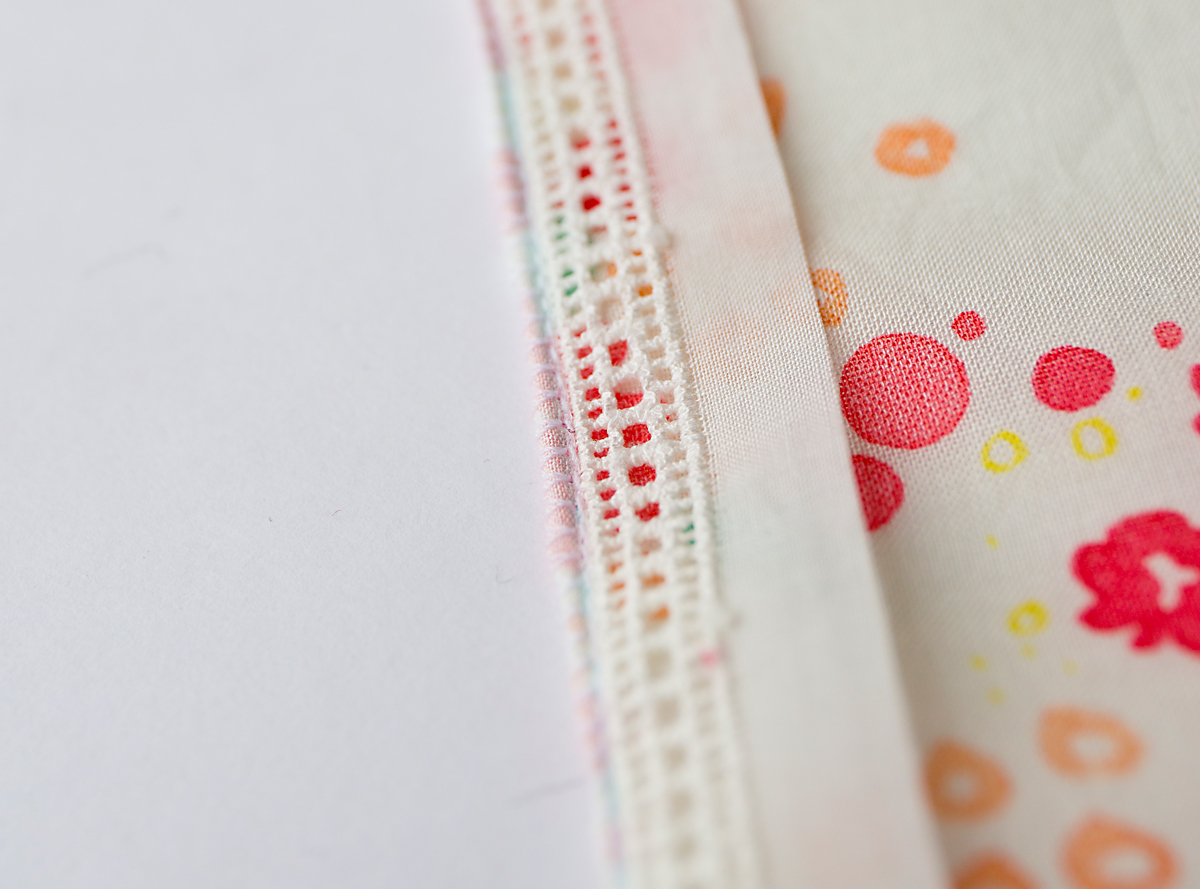
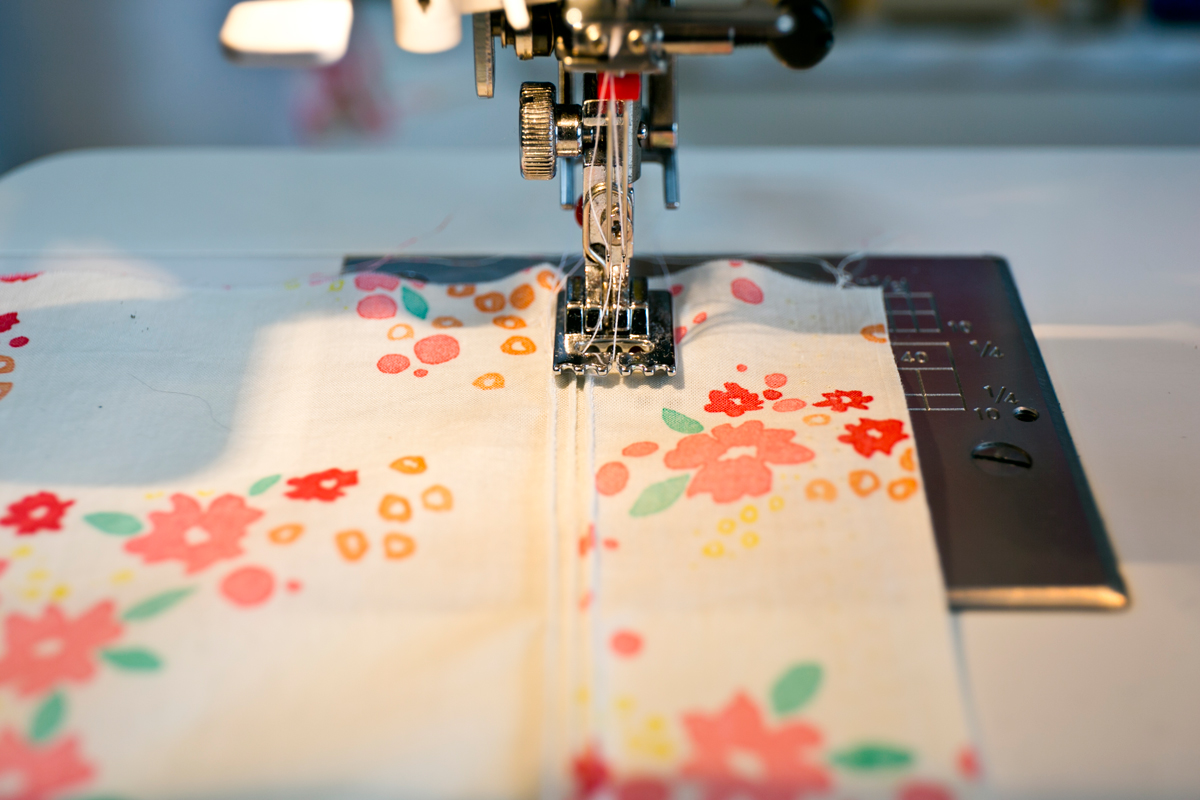
3. Once the glue is dry–and it doesn’t take long–set your sewing machine to a short stitch (2.0 is a good place to start) and stitch right along the edge of the entredeux, as close to the entredeux as you can. If you have an sewing machine foot with a stitching guide, use it here. Can you see the little guide right next to the entredeux in this photo?

4. Here is the stitching, very close to the edge of the entredeux:
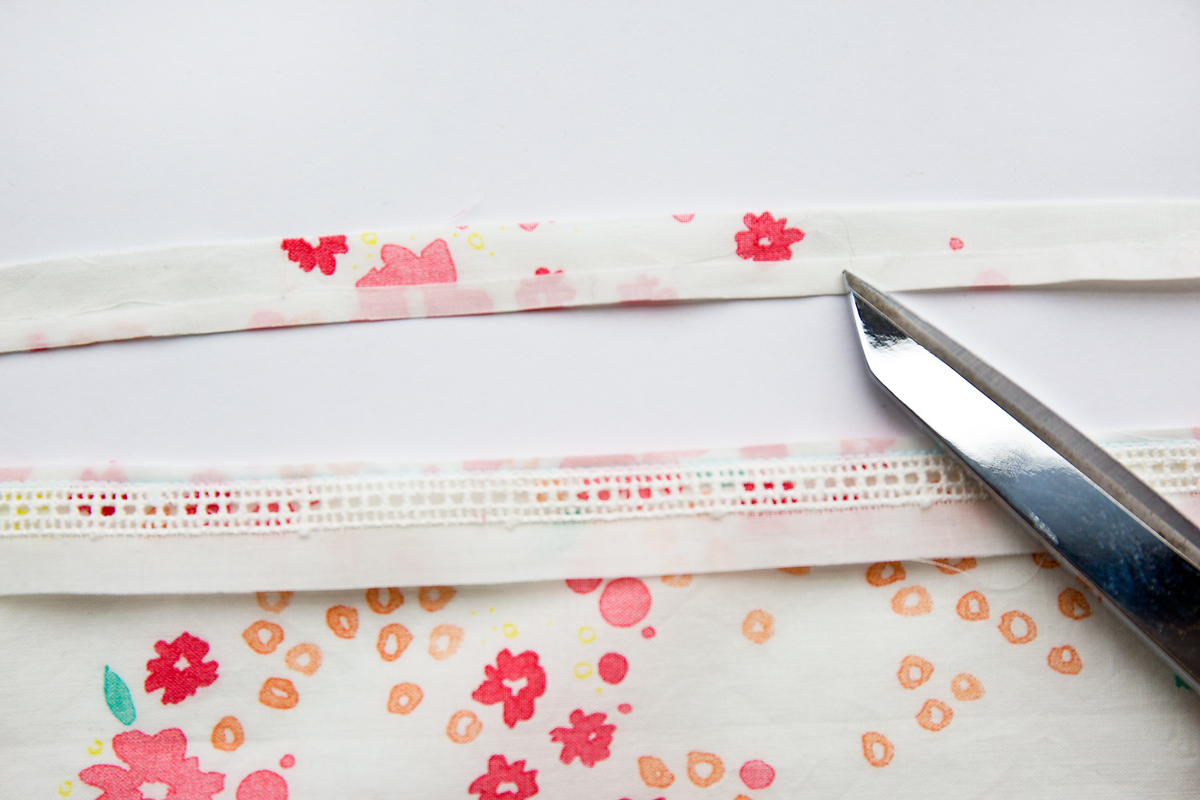
5. Once that’s taken care of you’re nearly finished! Next it’s time to trim the seam allowances to a scant 1/8″. Like this.
6. Next comes the fun part. I set my sewing machine to a small zigzag stitch and stitched over the seam allowances, rolling the seam allowances into a small bundle or almost a tube. To do this, you’ll want to set your machine so one side of the zigzag stitches next to your first stitching line and the other side drops off the cut edge of the fabric. The zigzag will pull the seam allowances together to make them narrow so they won’t show behind the entredeux. Like this:
See how the seam allowances sort of rolled together into a nice, neat finish? Easy, right? Fiddle with your machine settings until you get it right. My machine was set at 2.3 length and 1.0 length for this part. You may need slightly different settings depending on how wide you trim your seam allowances.
7. And that’s it! Press the seam allowances away from the entredeux, and sew and finish the opposite edge of the entredeux in the same way.
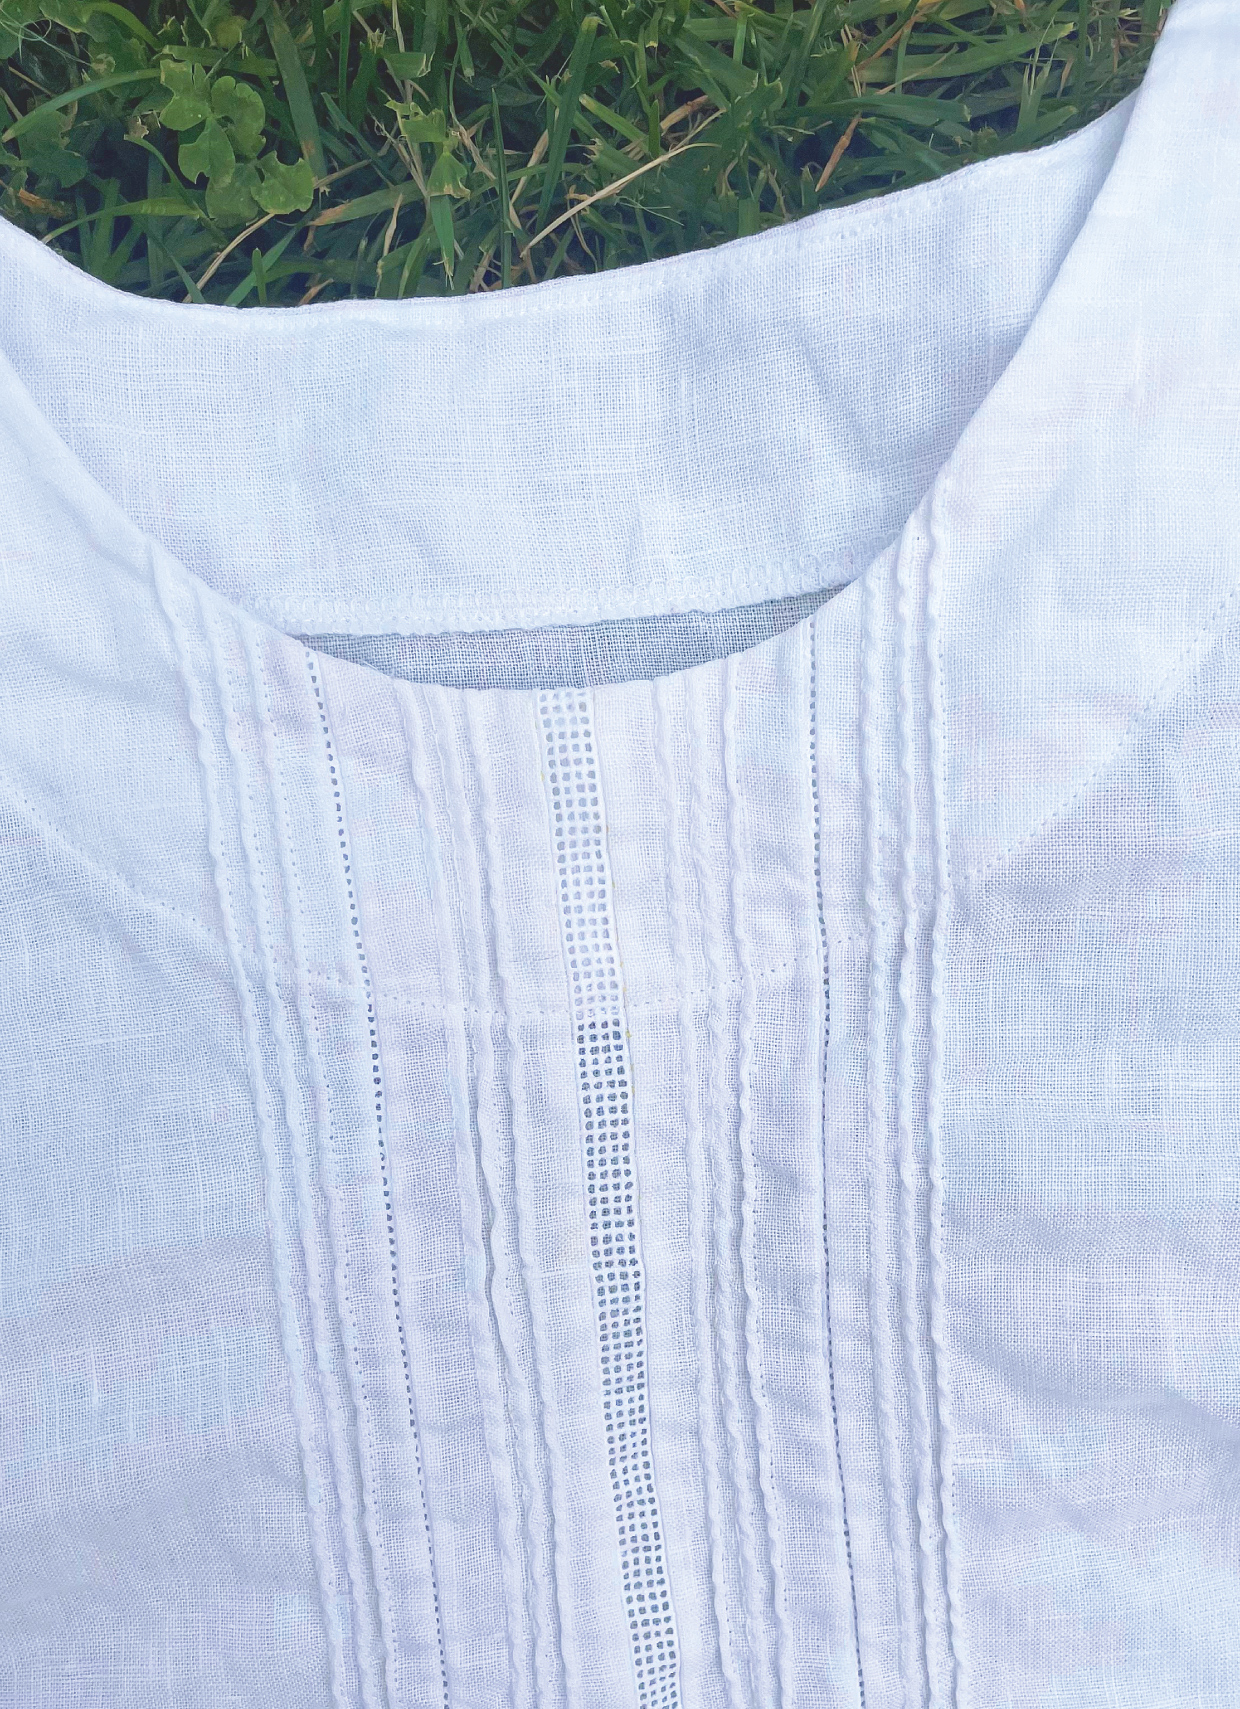
Each time I do this I keep thinking it should be more difficult to do that it is. But it’s not! Here is the finished entredeux down the center of the fabric. “Between two” pieces of fabric, as it were:
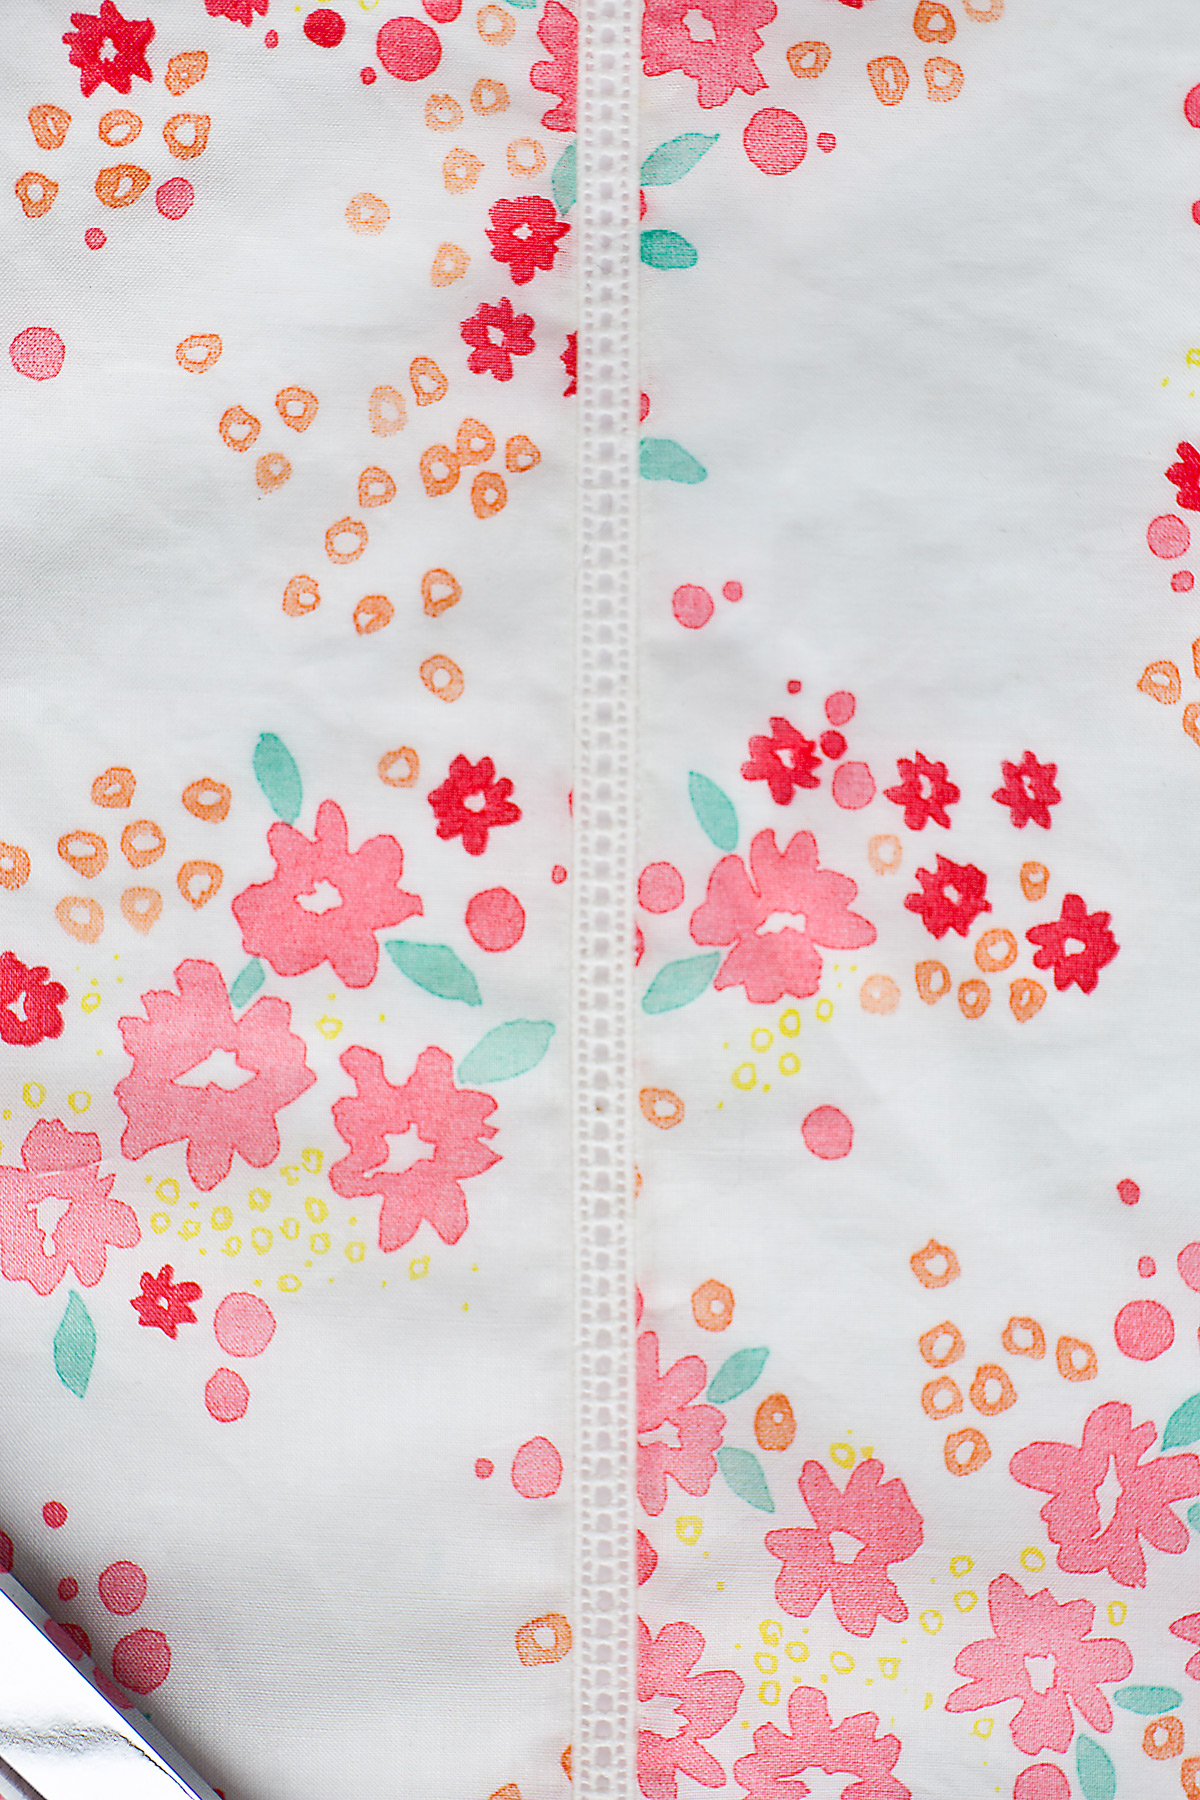
Impressive, and so easy! Cool, right? Now, on to the pintucks!
Pintucks
If you’ve sewn our children’s Family Reunion Dress or Music Class Blouse patterns you’re familiar with the basic pintuck. In essence, the fabric is folded with wrong sides together and stitched very close to the fold to create tiny tucks that look really pretty and delicate, especially when sewn in multiples. But it can also be really difficult to keep pintucks even and parallel, especially when you’re sewing a lot of them or are sewing really long rows tucks!
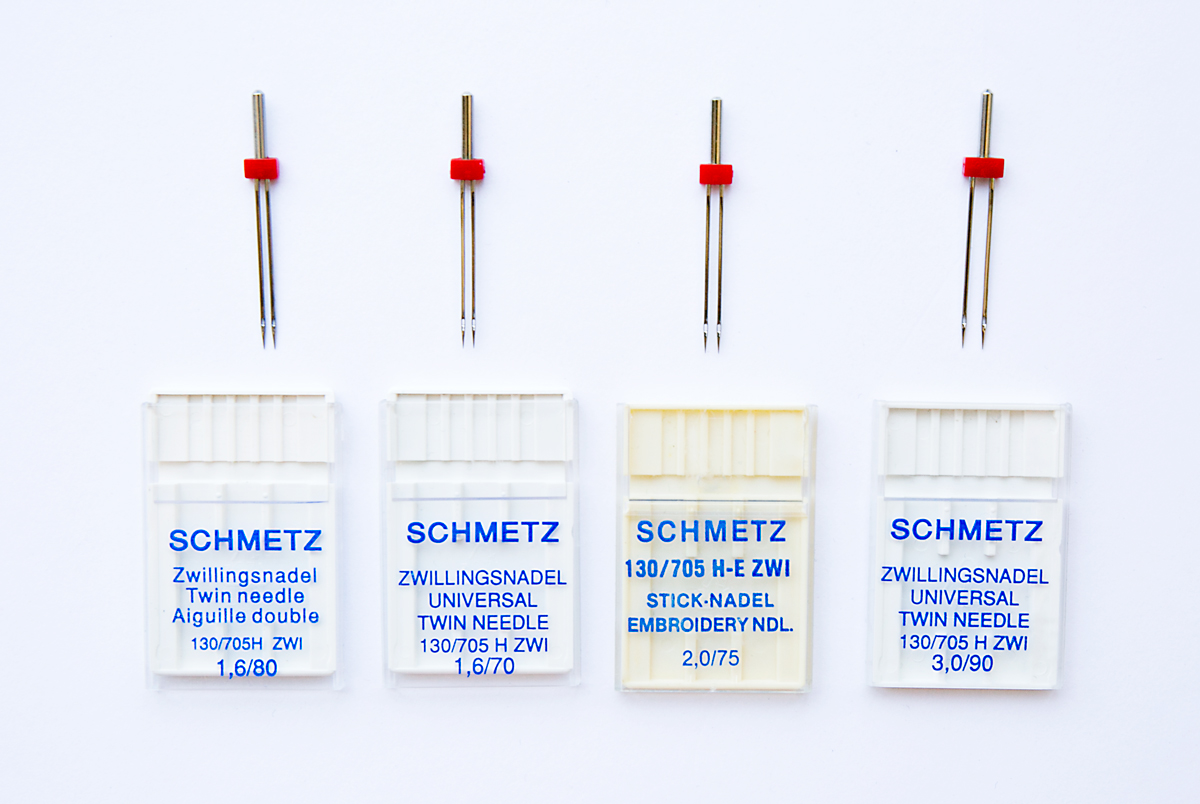
Enter the twin (or double) needle and the pintuck foot.
The twin needle creates the seam effect as a traditional pintuck by pulling the bottom thread tension really tight so the fabric puckers, creating a little pintuck in the process. Magic! The best size twin needles this pintucks seem to be either 1.6/70 or 2.0/80, depending on the size of the tuck you want. Keep in mind that this technique works best on lightweight fabrics like lawn, voile and batiste. Results may vary if you’re using a coarser quilting cotton.
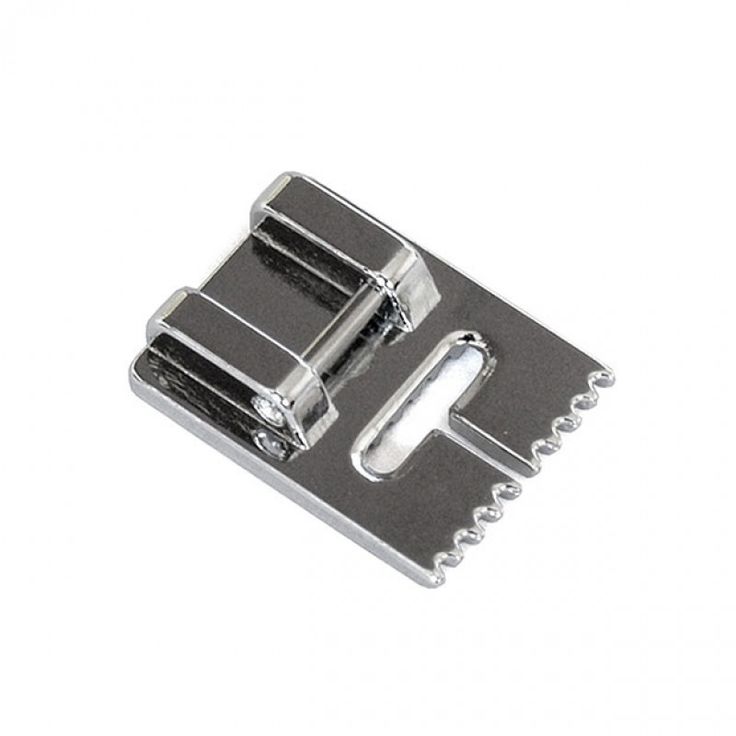
You can also buy a pintuck foot for most sewing machines. The pintuck foot has a series of grooves along the bottom that you can use to evenly space the pintucks. By positioning a groove in the pintuck foot over a previous row of pintucking, the foot keeps the pintucks evenly spaced. Nifty, yes? Pintuck feet come in different sizes, meaning that the grooves are spaced in varying widths. They’re also inexpensive, so they’re worth the small investment. I bought a set of two pintuck feet for my Janome machine for less than $20.
2. I loosened the top thread tension on my machine quite a bit. Then I threaded my double needle and tested the double needle stitching on a scrap of fabric to be sure I was happy with the results. After a few trials I settled on a stitch length of 2.0 for my pintucks. (By the way, Bernina has a really nice downloadable worksheet about pintucks if you’d like to read more about them. They have lots of great tips that will help you to get good results, including how to thread the machine to avoid skipped stitches.) Once I was happy with my settings, I carefully stitched down the drawn line for my first pintuck, and then for each consecutive pintuck I positioned the previous pintuck under a groove on the pintucking foot to evenly the pintucks as I stitched. I skipped a groove for each pintuck so they landed further apart. In the photo below I was testing the pintucks on a scrap of fabric, and you can see how close together my first pintucks were. Close-set tucks would be really pretty too, but I decided I wanted them to be spaced a little further apart for this blouse.
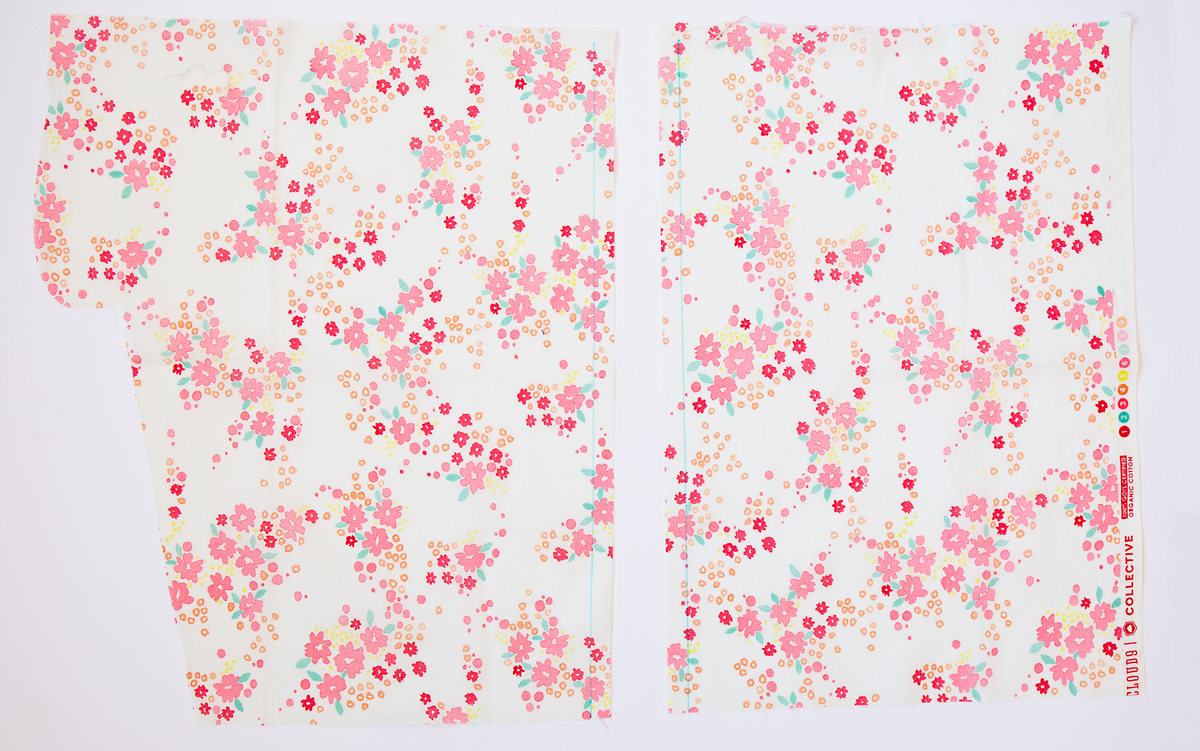
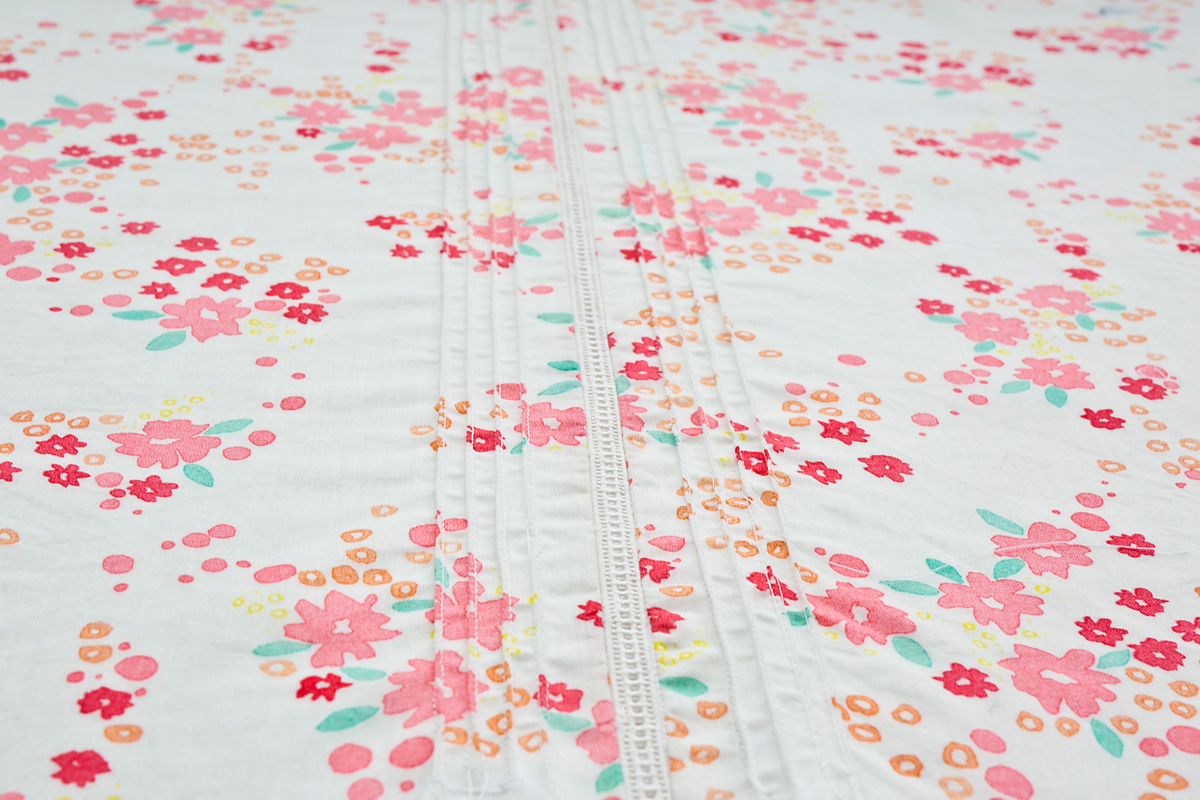
Here is the finished fabric panel before I cut it.
Here are a few additional tips to help you achieve this successfully:
- I wound a bobbin to use as my second thread with the twin needle, and I found that this works better than using two spools of thread, I think because the twist in the bobbin thread is opposite that of the spool thread. So they don’t twist together so much and create knots or break the thread. That’s my theory, in any case.
- Flip the bobbin so the thread is feeding off it the opposite direction as your spool. This keeps the two thread separate and helps to prevent tangling and broken thread.
- I used a thicker thread in the actual bobbin, which helped to create higher tension underneath the pintuck and made a more defined tuck. You can also tug on the bobbin thread a bit after sewing to tighten it more, so leave your thread tails and knot them by hand after sewing each tuck and that will give you more ability to control the tucks.
- Test everything a few times before you begin to be sure of your settings. You might want to mark them down for any future sewing as well.
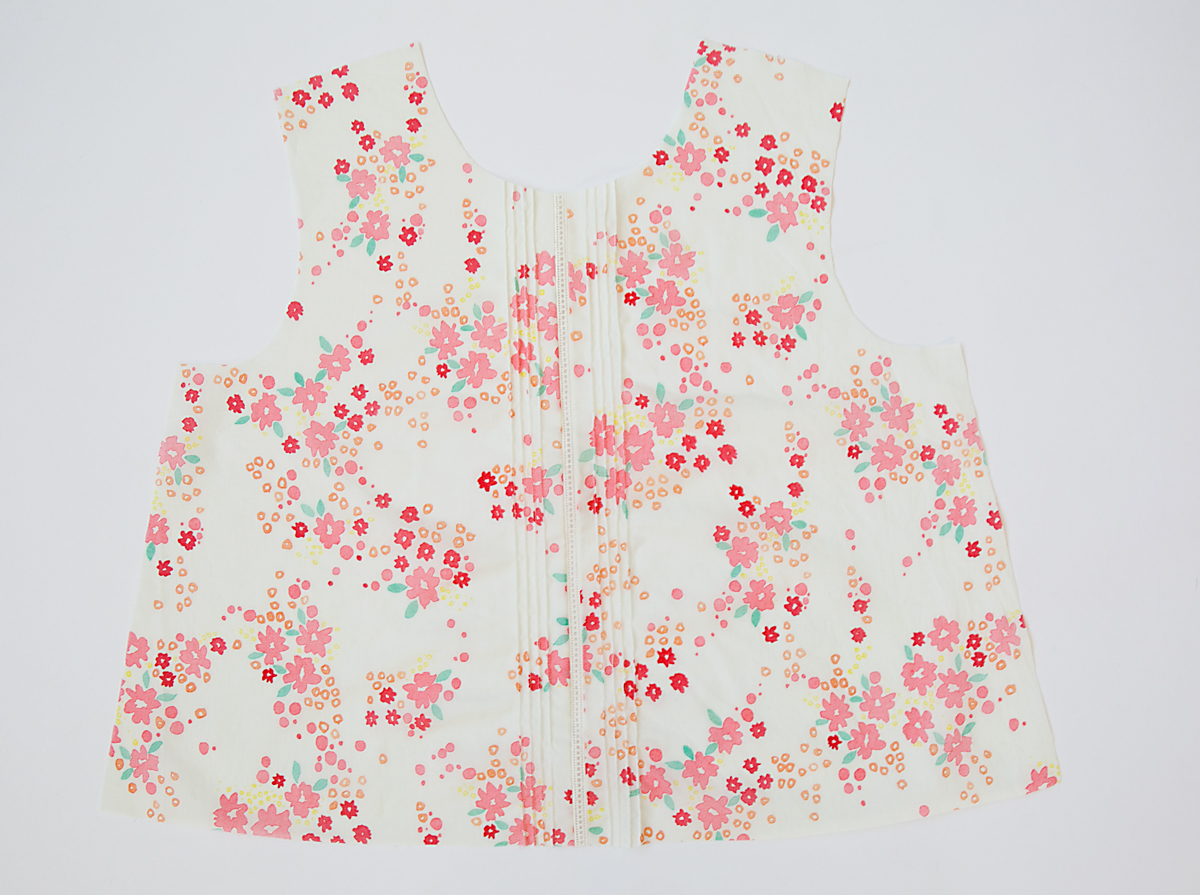
Here is the prepared front of the Butterfly Blouse piece, looking all fancy and heirloom-y. Once I was finished with the entredeux and pintucks I simply laid my pattern piece on top of the prepared panel and cut it out, one side at a time, so the entredeux was at the center front. And that’s all there was to it!
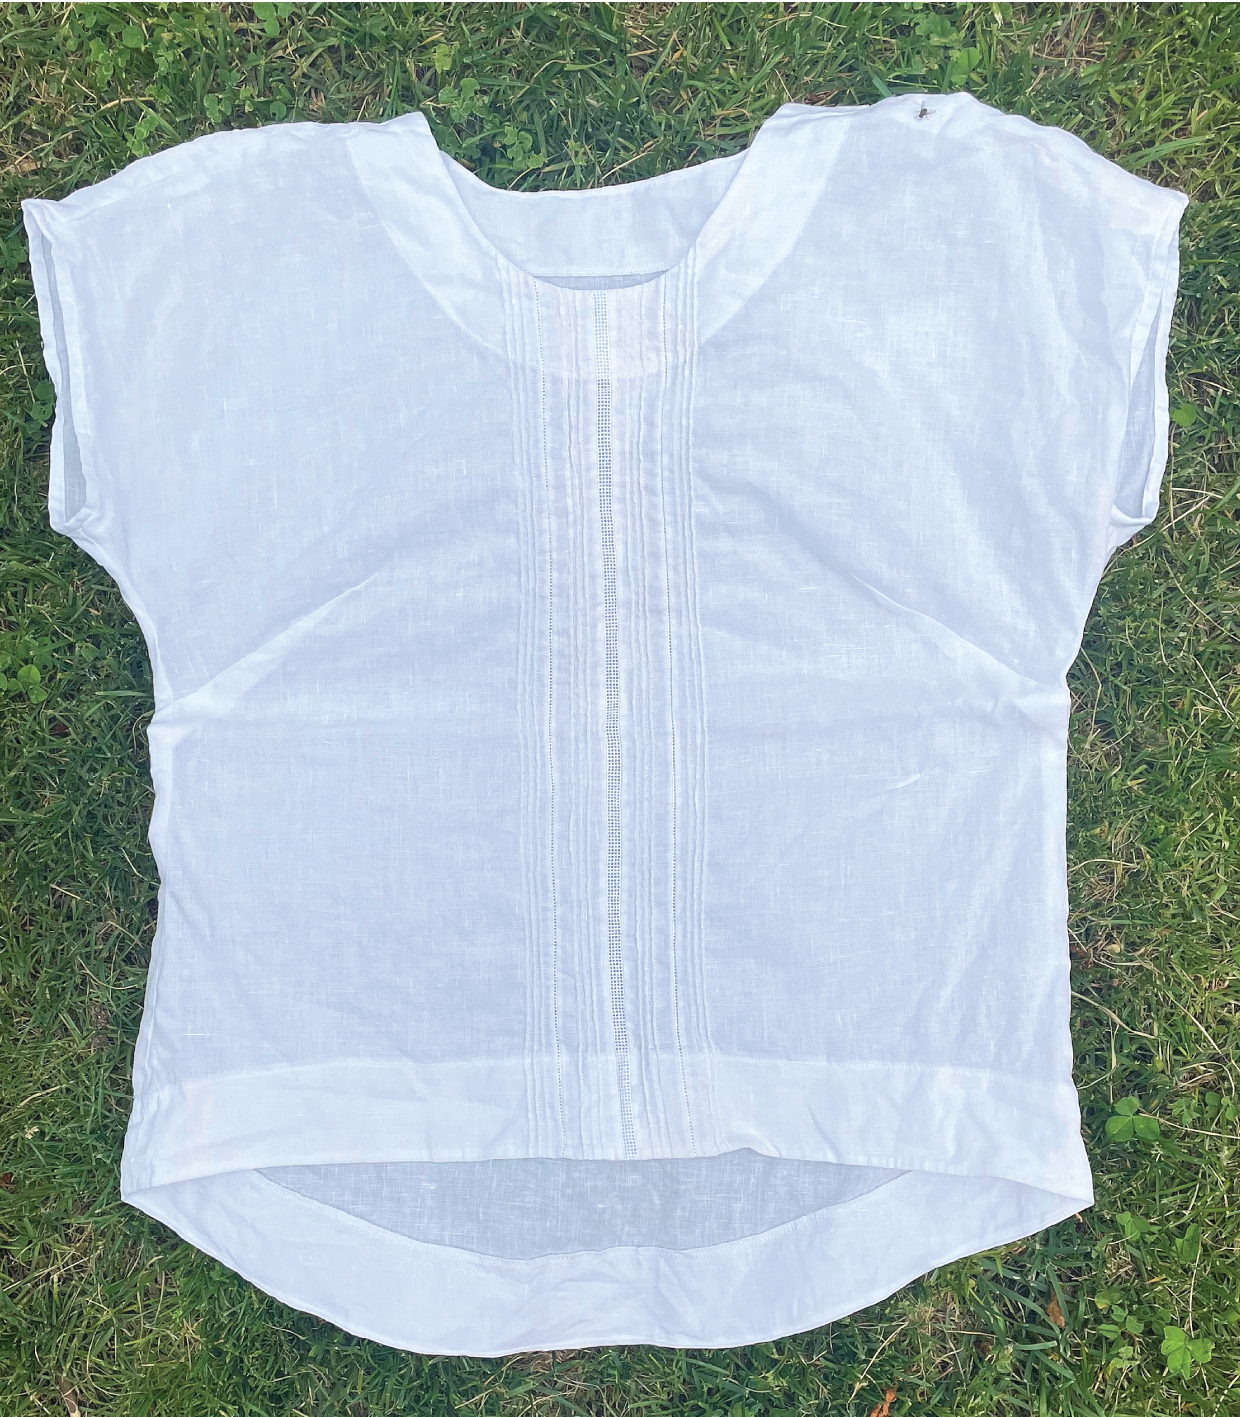
And here are a few shots of my Verdun Woven Tee using the same techniques. Unpressed and straight off the laundry line since I’m so busy finishing the fall patterns… I know you understand deadlines! But they look good, even in their unpressed uneven-ness, I promise. And I’m all about that in the summer–slightly rumpled and relaxed, since you’re going to be sweating anyway… Why start sweating at the iron before you’ve even gotten dressed, right?
From here you can cut the fabric using the pattern piece and proceed with the regular sewing instructions. Not so difficult, right? I hope you’ll have lots of fun with this technique! The results look so much more difficult than the actual sewing. Bookmark this page and you’ll have a reminder the next time you want to try it.
Pick up your own copy of the Verdun Woven Tee in paper or in digital format and I hope you’ll show us your results! Tag us #verdunwoventee and #lieslandco so we don’t miss it!