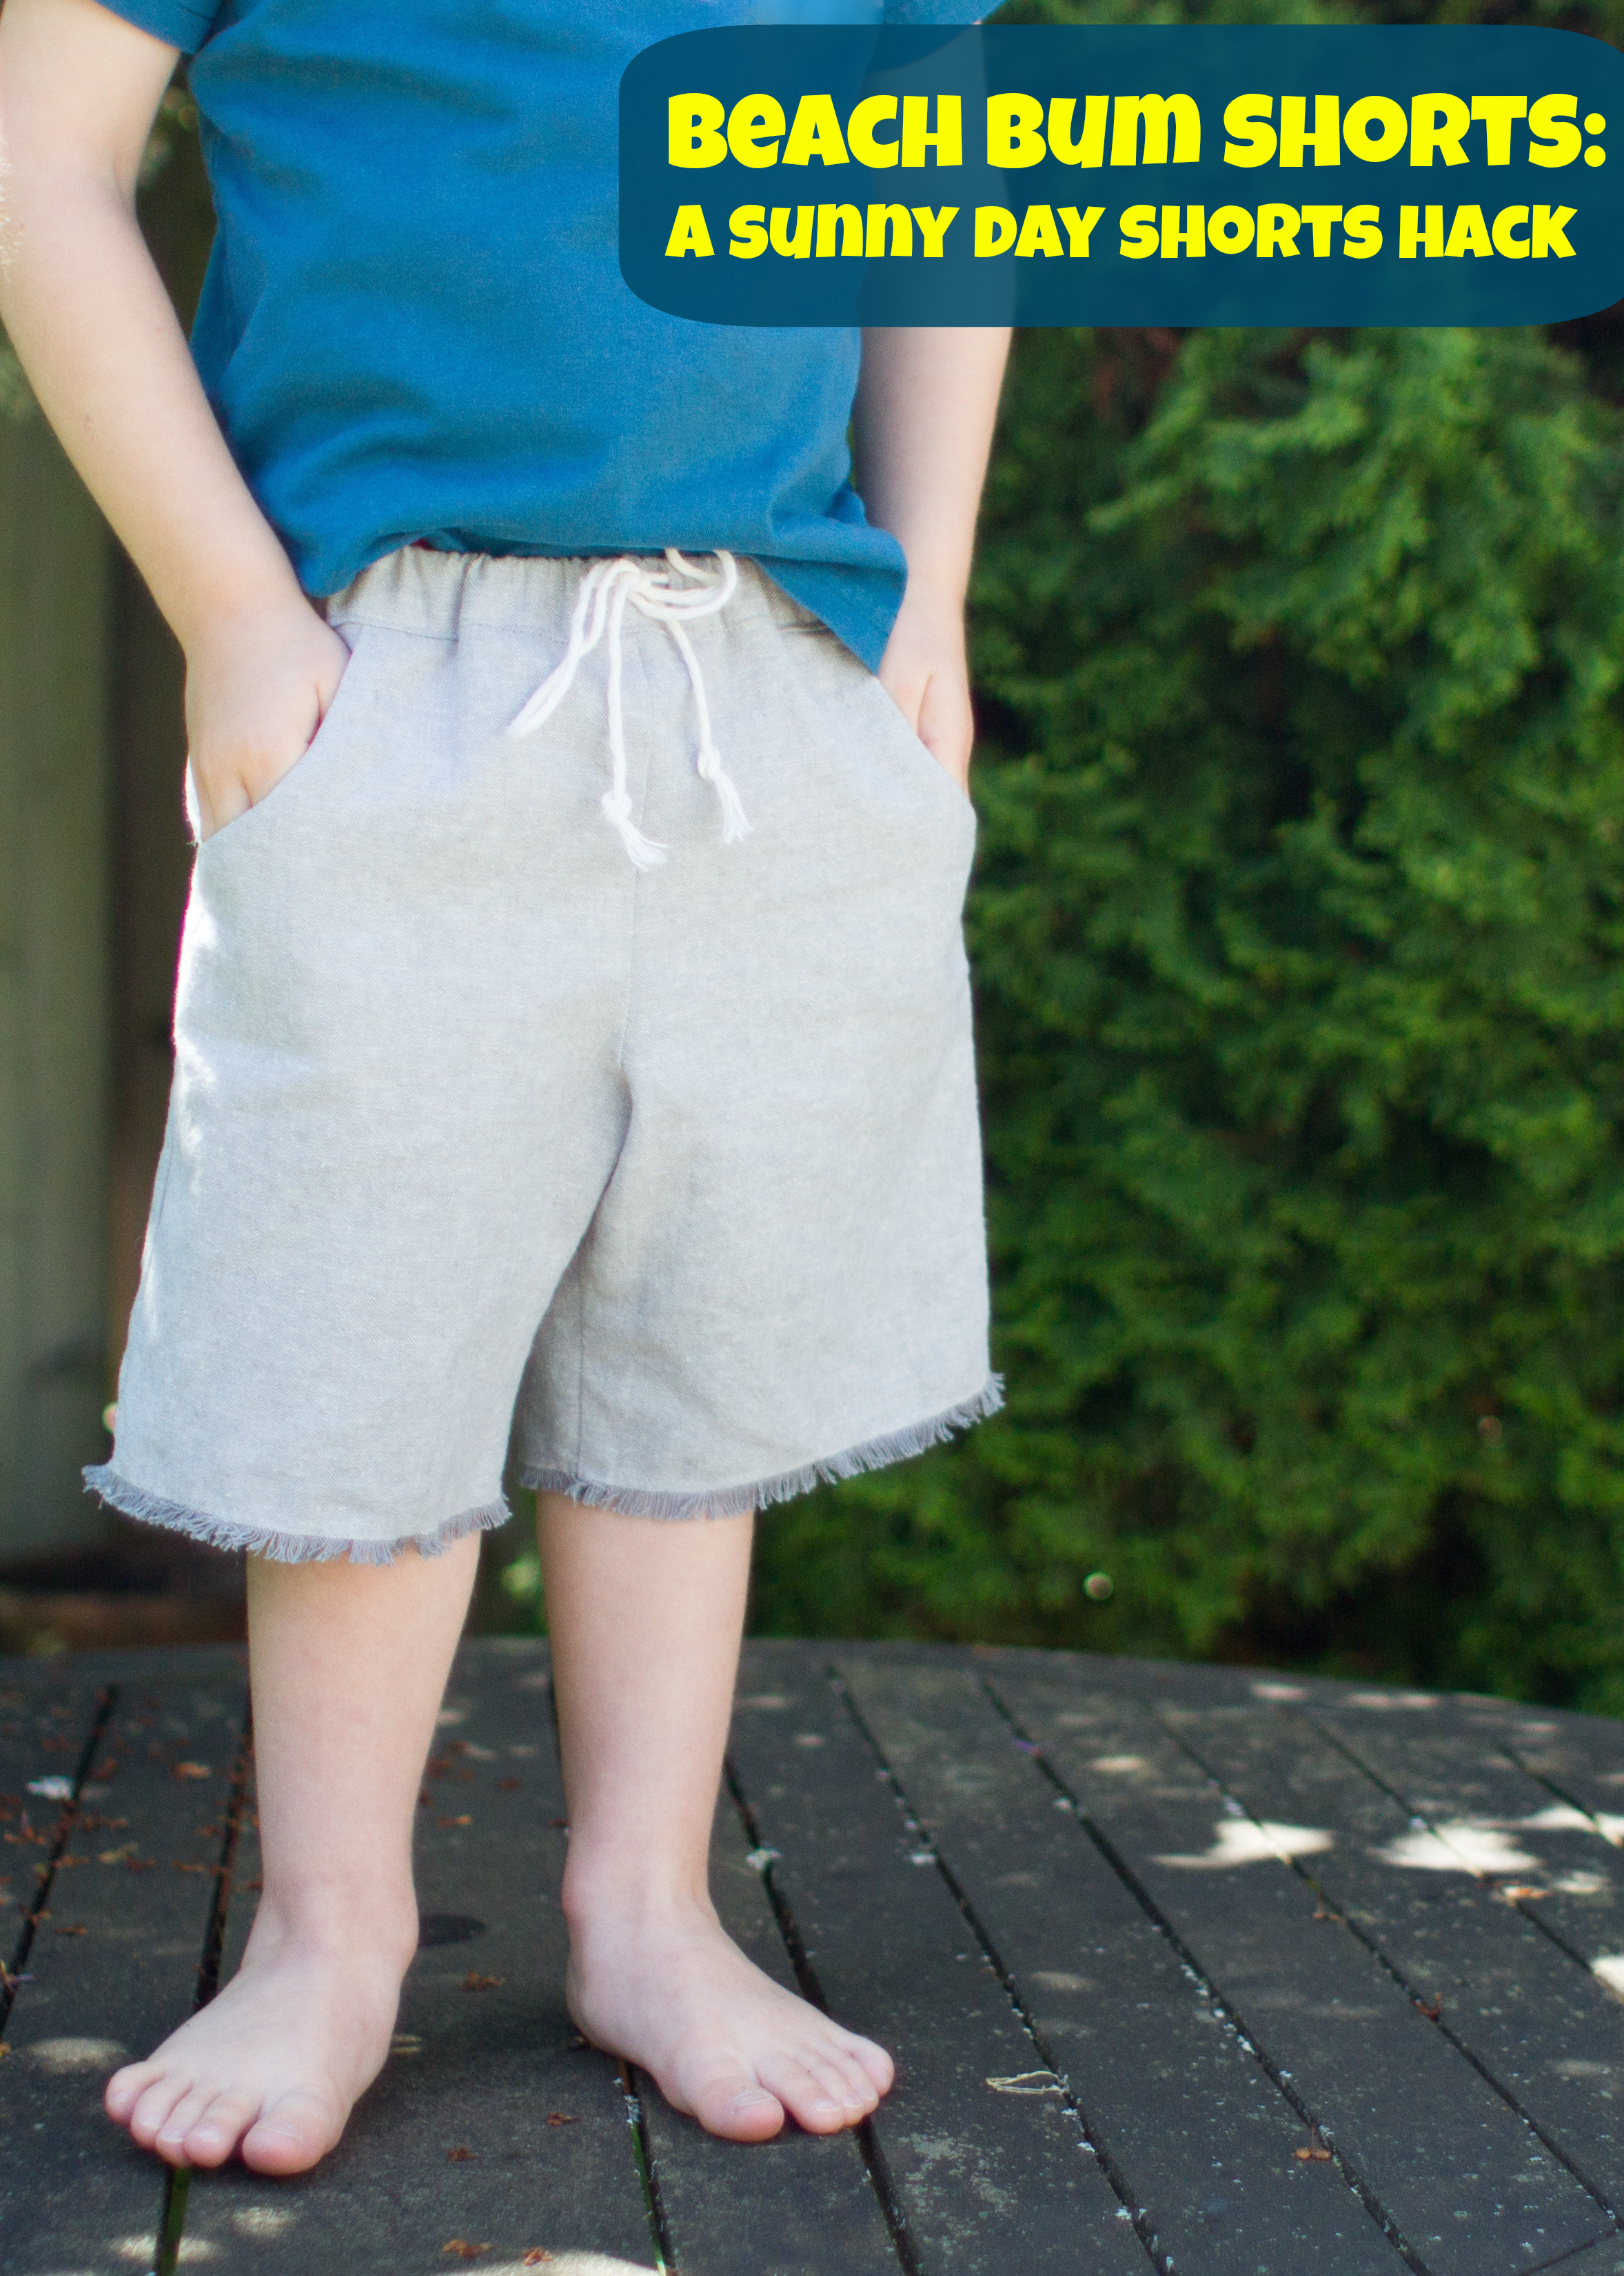
Kristin from skirt as top here with an easy and fun way to hack the Sunny Day Shorts pattern.
When I first saw the Sunny Day Shorts and saw that the pattern came with separate front, back, and waistband pieces, I knew it’d be really easy and fun to add front pockets and a drawstring for a beachy look. In this pair I’ve also added a frayed hem for an even more relaxed vibe! Today I’ll show you how to make them yourself with my Beach Bum Shorts tutorial.
To start, you’ll need the Sunny Day Shorts pattern and the amount of fabric it calls for, a scrap of fusible interfacing (about 2″ by 2″ square), plus something to use as a drawstring (waist measurement + 10″). I actually used some butcher’s twine, but you can use ribbon, cording, rope, leather, anything you can thread through that waistband!
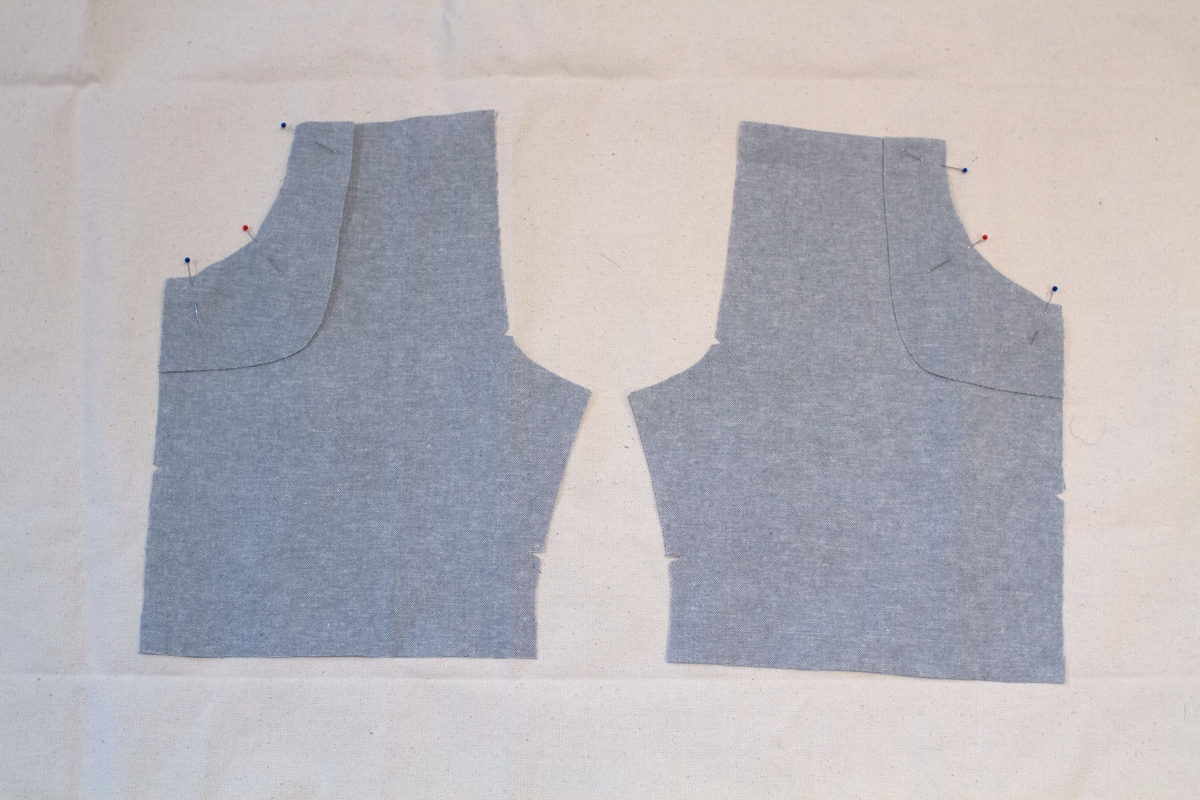
First, alter your shorts front and create your pocket pattern.
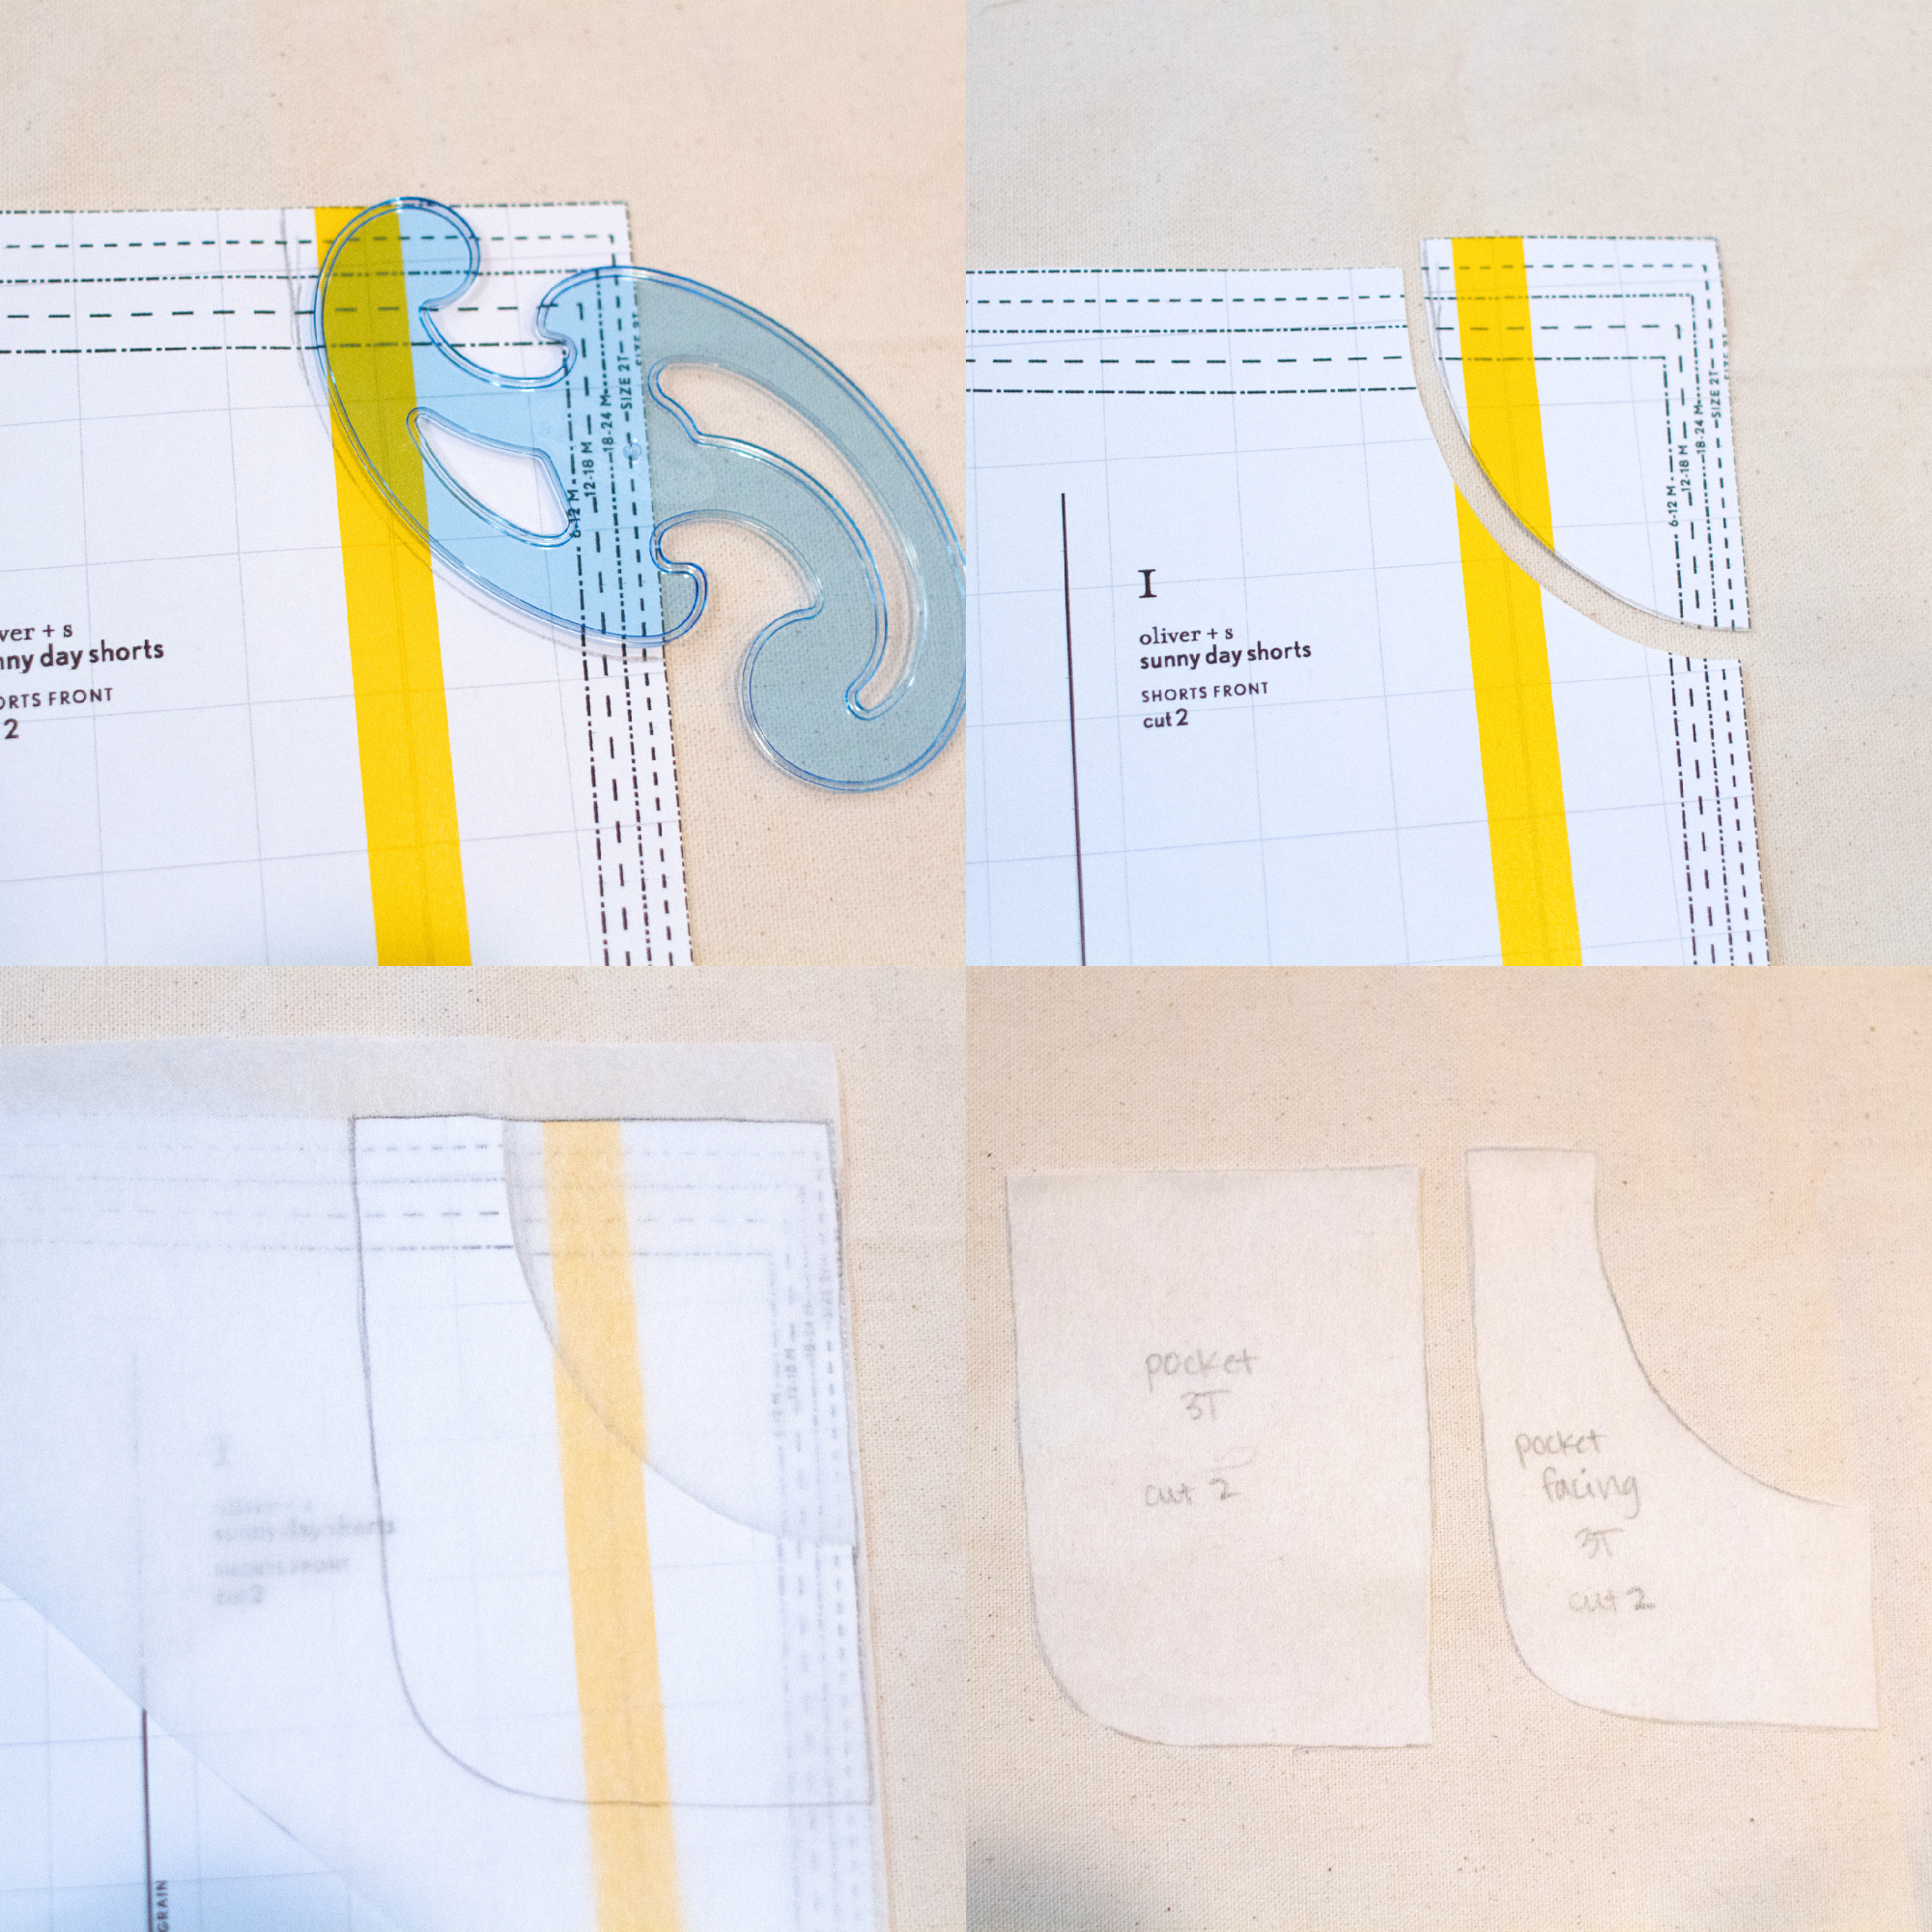
Using a french curve or other round template, create a pocket shape on the outer seam of the front shorts piece. Make the curve slightly shallower than you want the finished pocket to be, as it will be larger after sewing due to the seam allowance. Trace the top, side and a bottom curve for the actual pocket. Create a second pattern piece for the pocket facing following the pocket curve you drew.
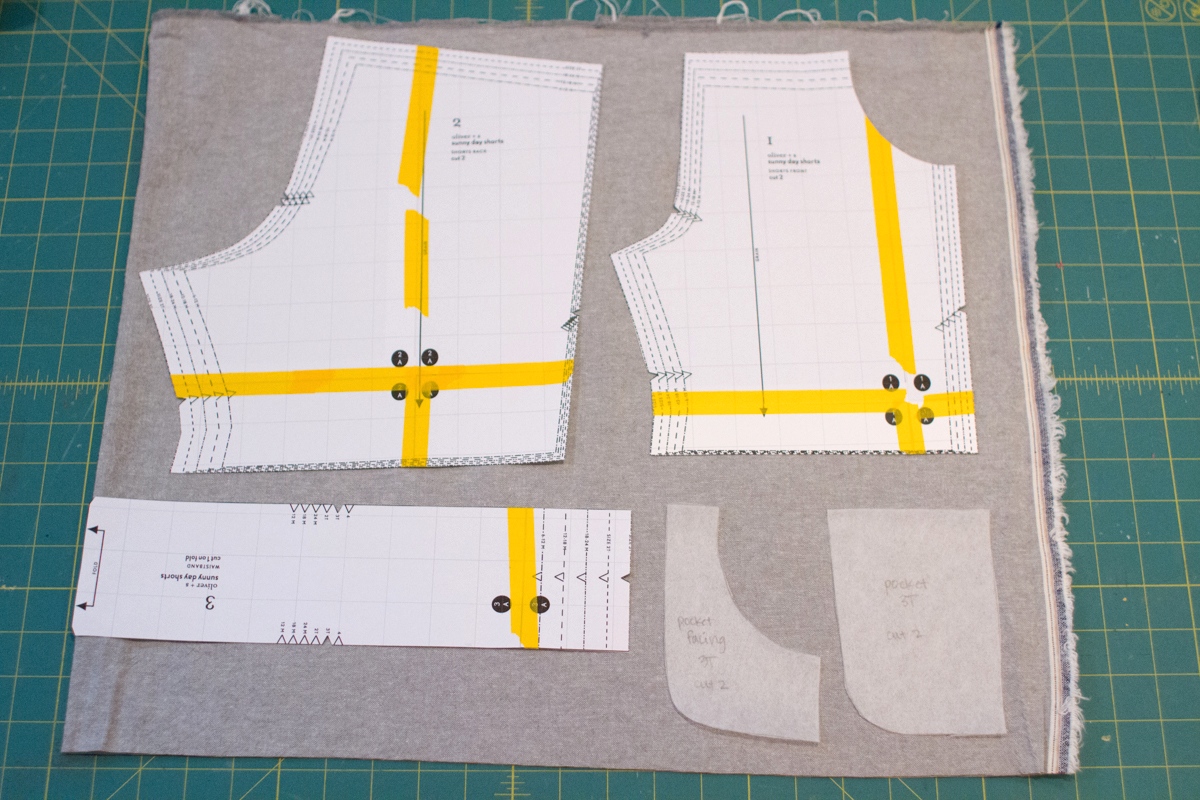
Cut out all pattern pieces, provided and those you just created. Cut out two pockets and two pocket facings.
Pin the pocket facings to the outer edge of the shorts fronts, and sew along the curve.
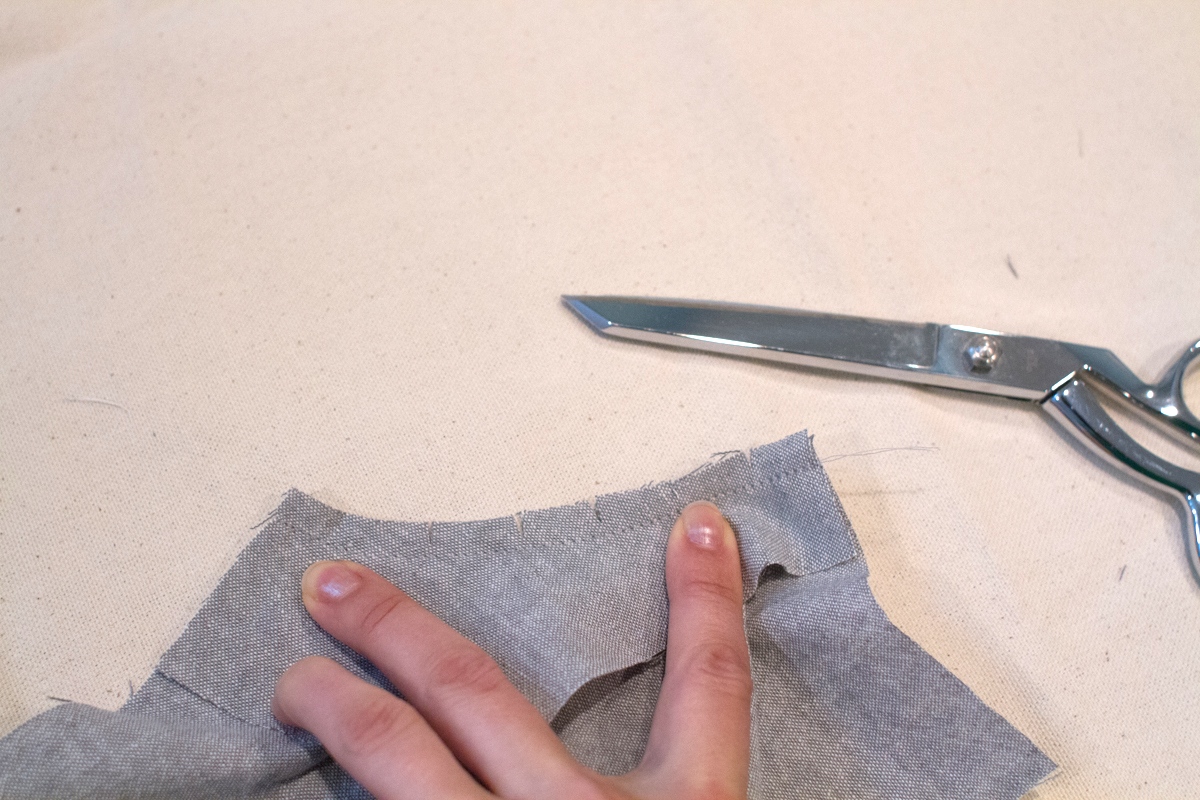
Trim into the seam allowance so the curve lays flat. First press the pocket facing away from the shorts, then under so you can’t see the facing fabric from the front. Either topstitch or understitch the pocket facing in place.

This is what it will look like from the right side with the pocket facing pressed to the wrong side. Repeat for the other leg.
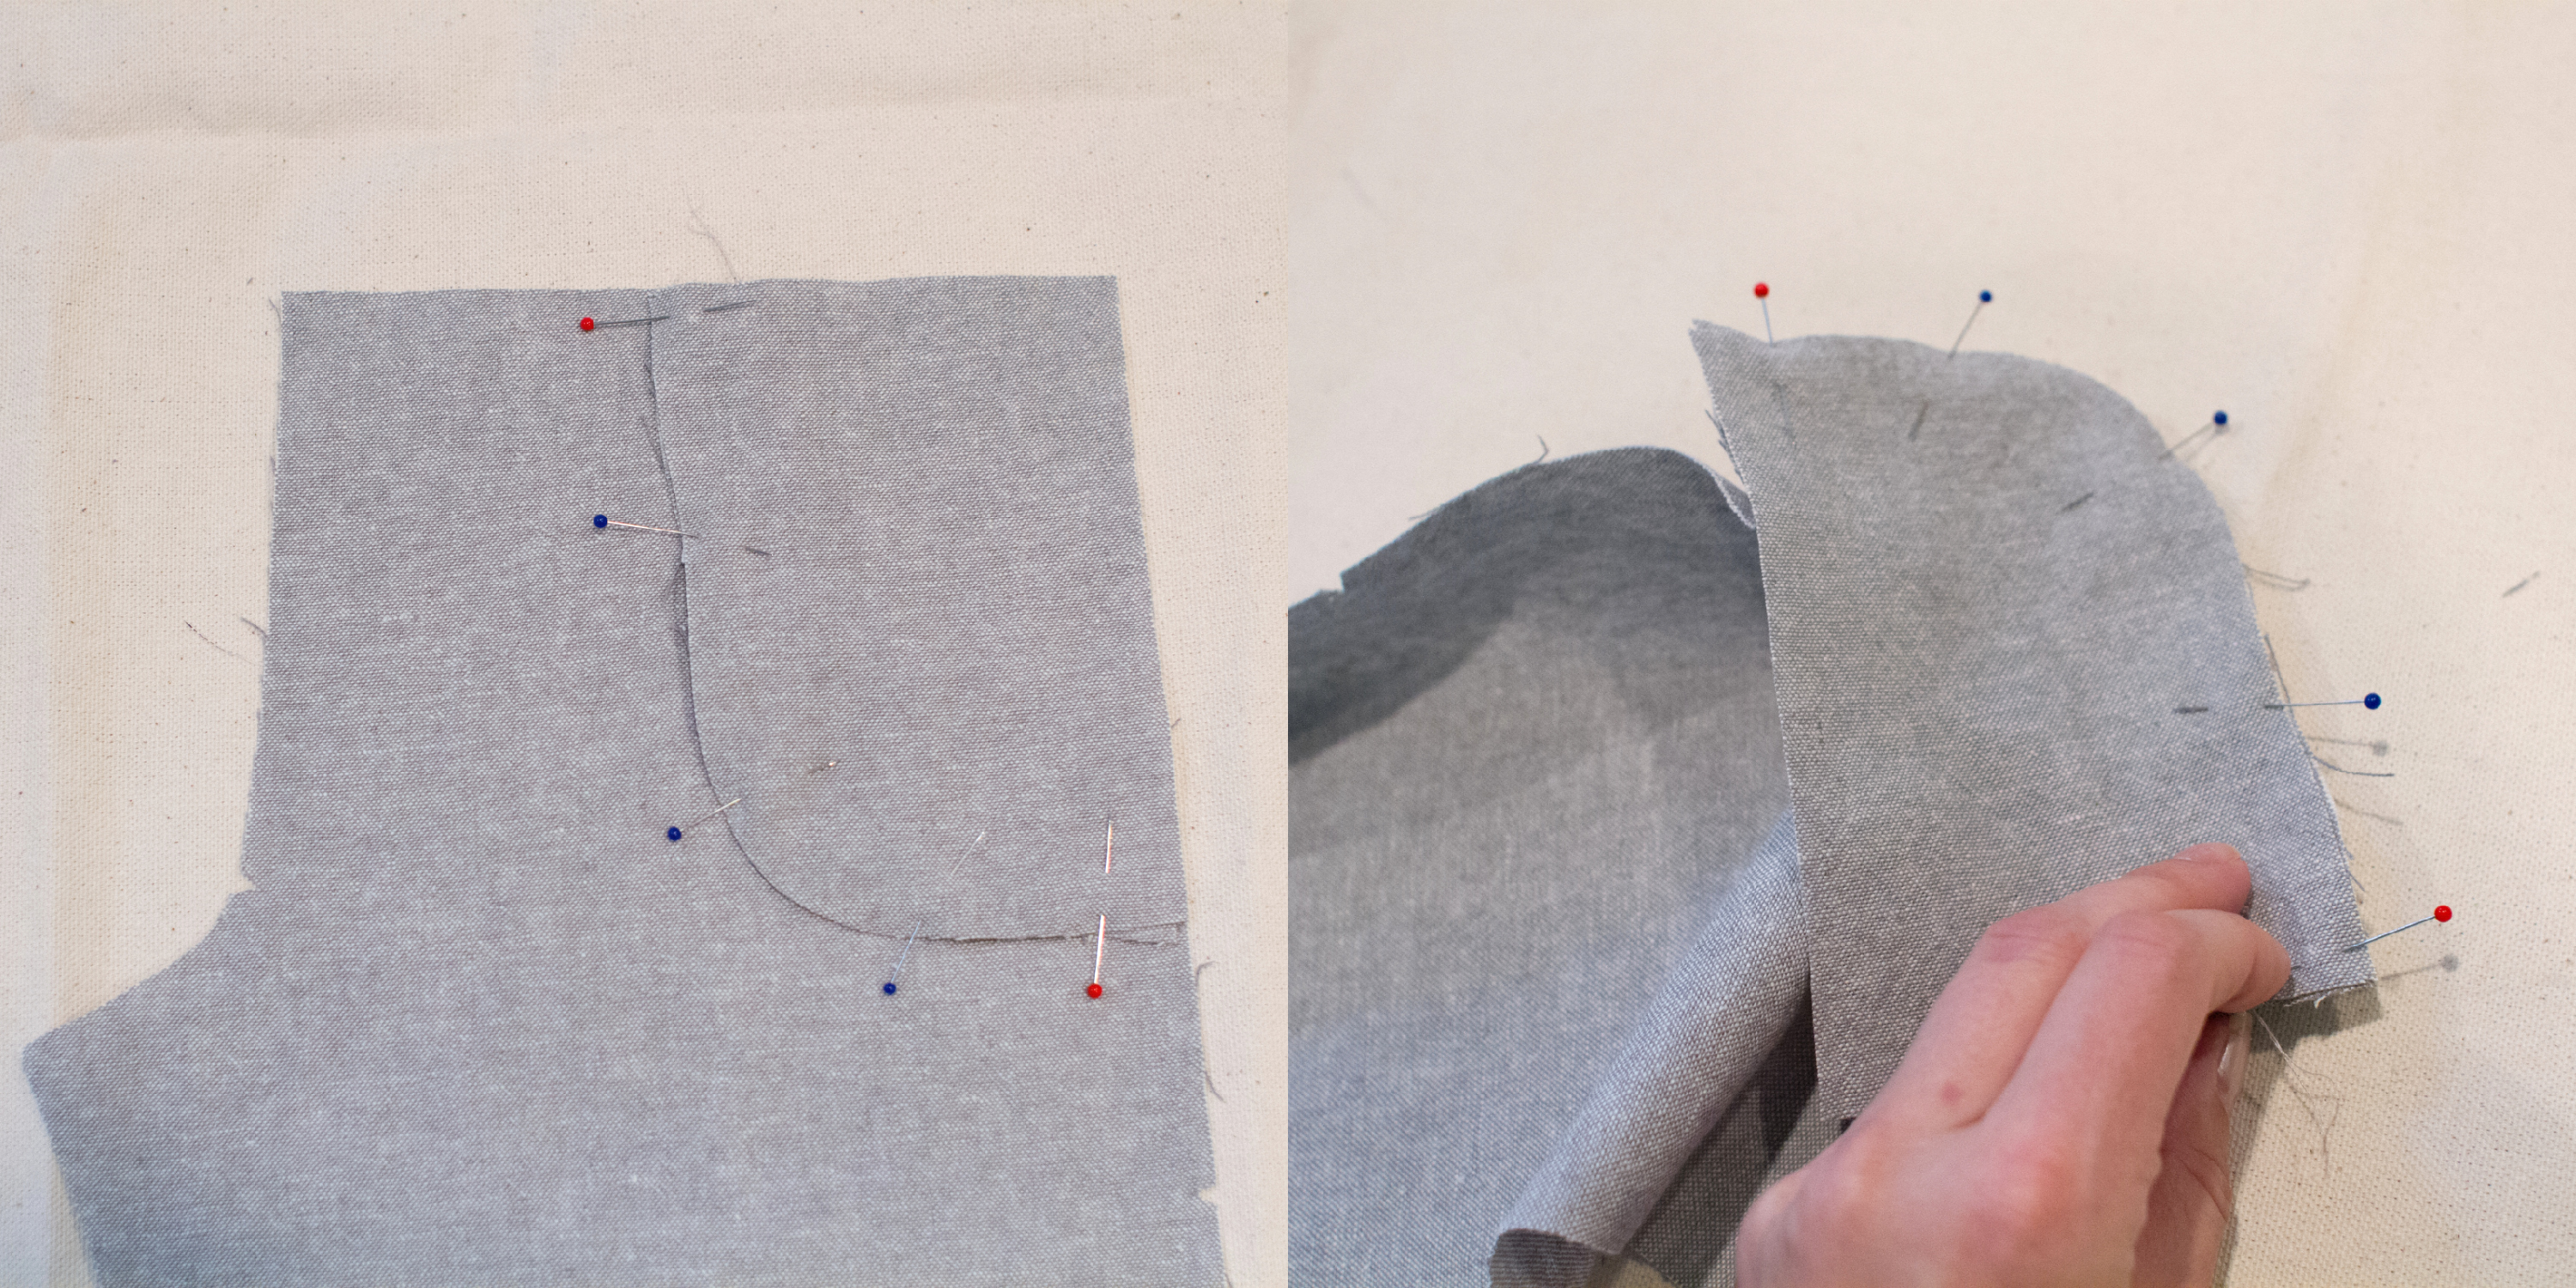
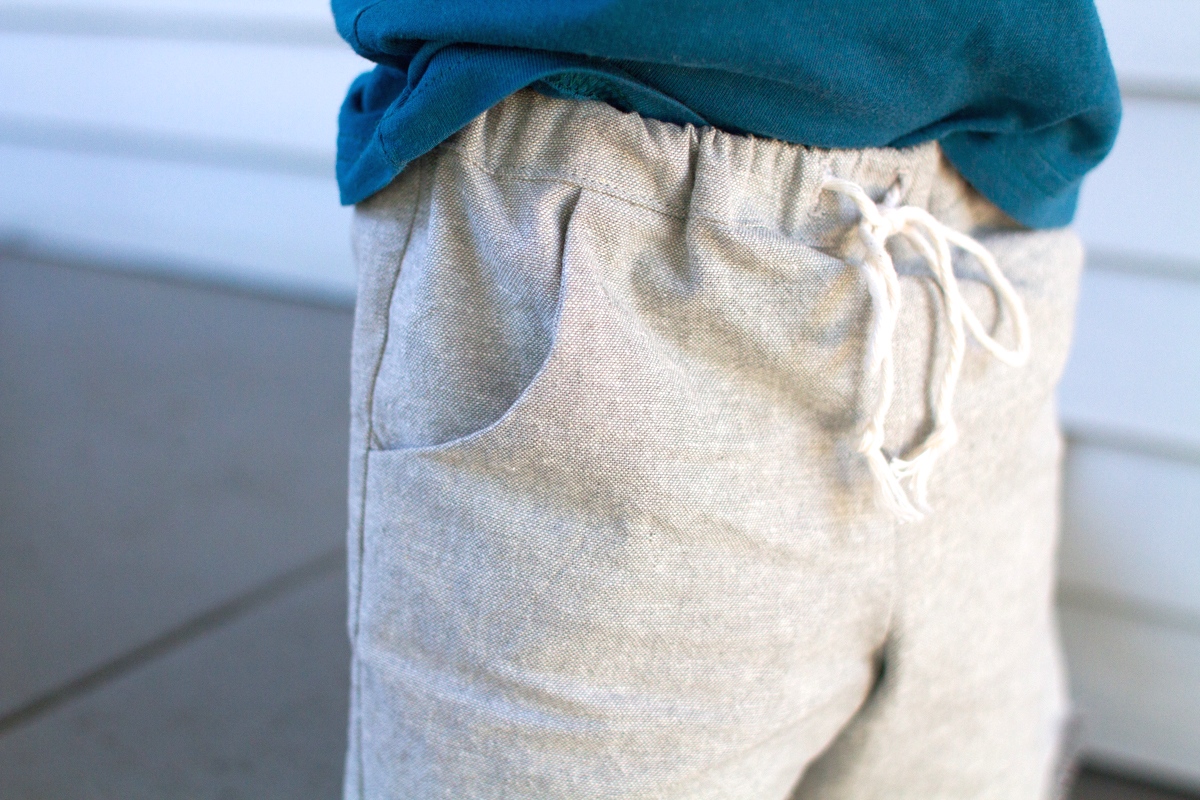
Line up the pocket pieces with the pocket facings on the inside of the shorts. Pin and sew along the curves, and finish using your preferred method.
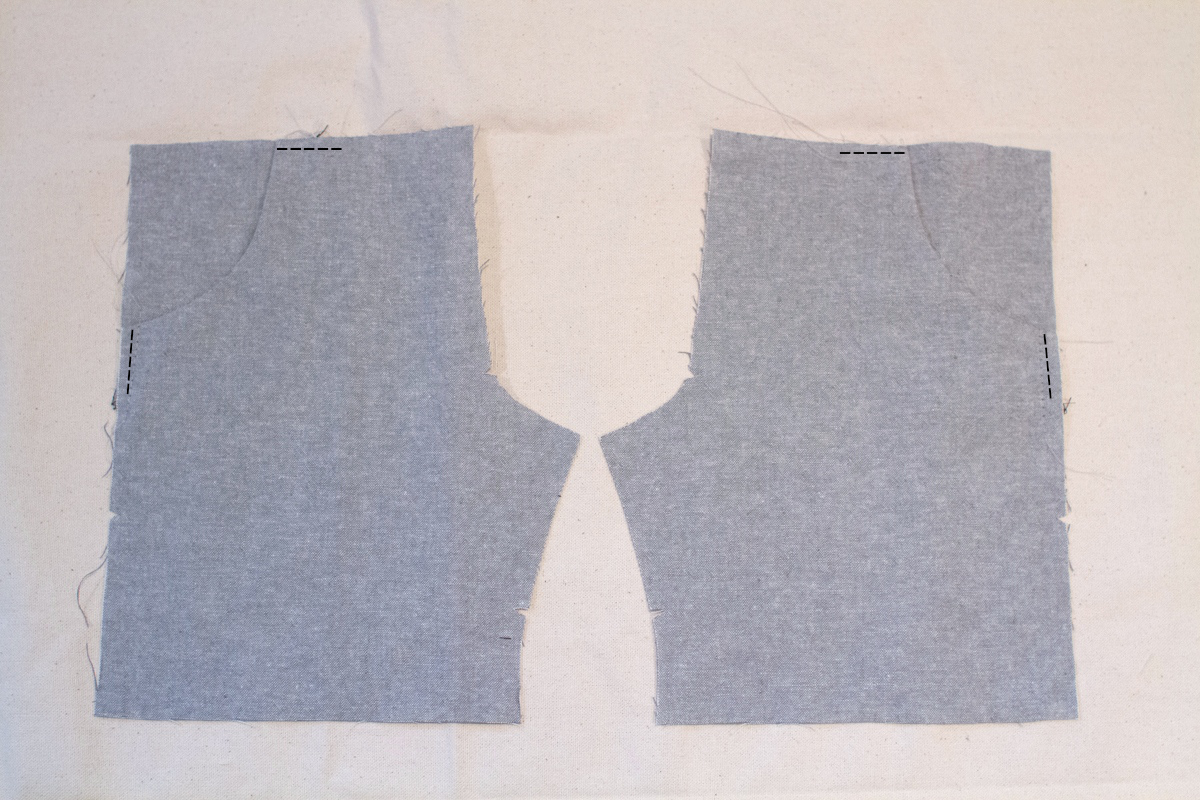
Baste the pockets in place along the top and side seams.
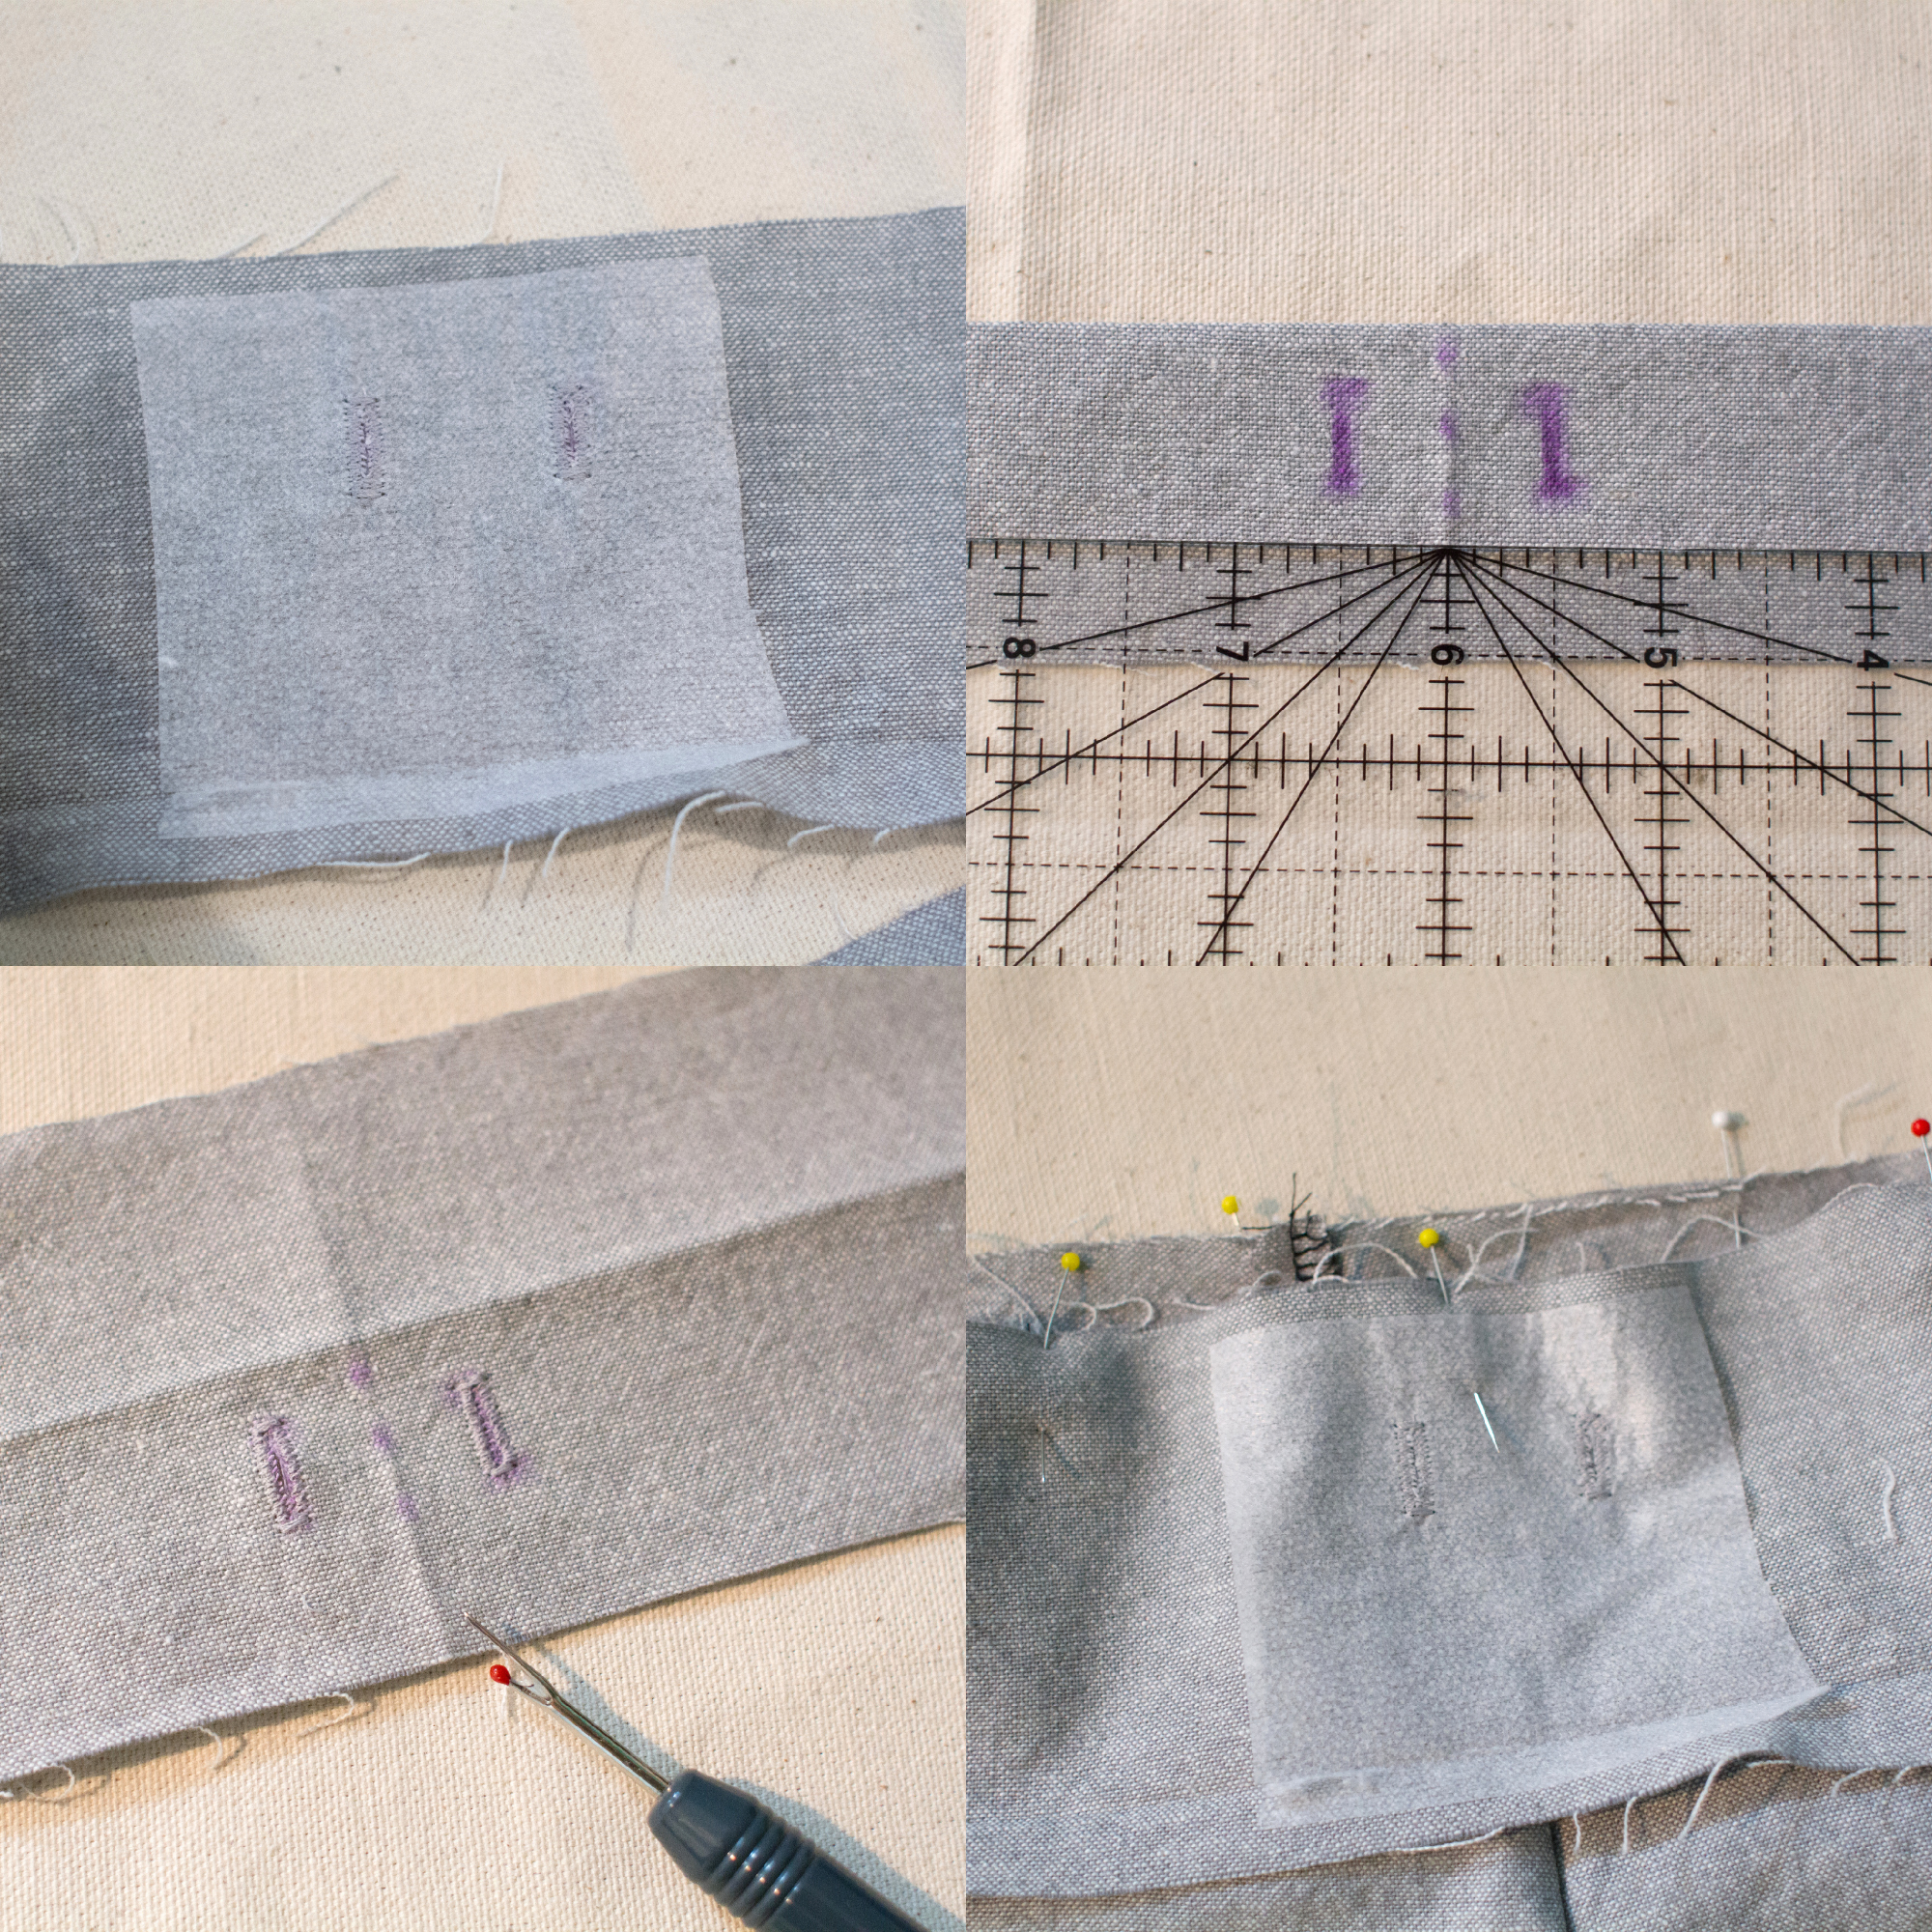
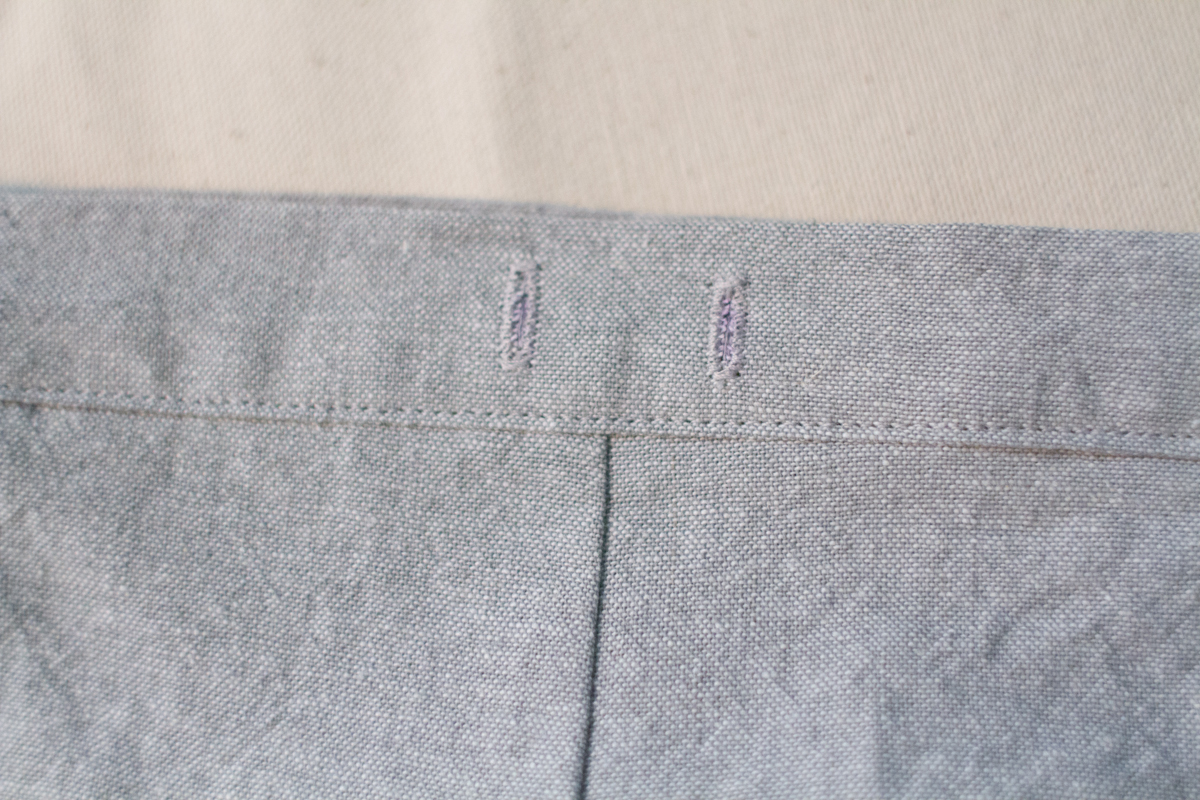
To create the drawstring openings, first fold the waistband in half wrong sides together along the long edge, then find the center front of the waistband (opposite the back seam). Use your ruler to mark where you will place 1/2″ long buttonholes, about halfway between the top and 1/2″ from the bottom (the seam allowance). Fuse interfacing to the wrong side, then sew your buttonholes. Open them with a seam ripper before attaching the waistband to the shorts.

Sew your shorts as instructed in the pattern. Instead of hemming, sew a 3/8″ straight stitch from the edge of the fabric. This will stop the fabric from fraying too far. Then use your seam ripper to pull out the horizontal (weft) threads and create a nice frayed edge. Note that the shorts will be a bit longer than intended due to the lack of hemming. I thought a longer length contributed to the beachy vibe of the shorts, so I didn’t shorten mine at all to compensate.
Your waistband will look like this once the shorts are sewn. You should have an opening at the back seam. Now it’s time to add the elastic and drawstring!
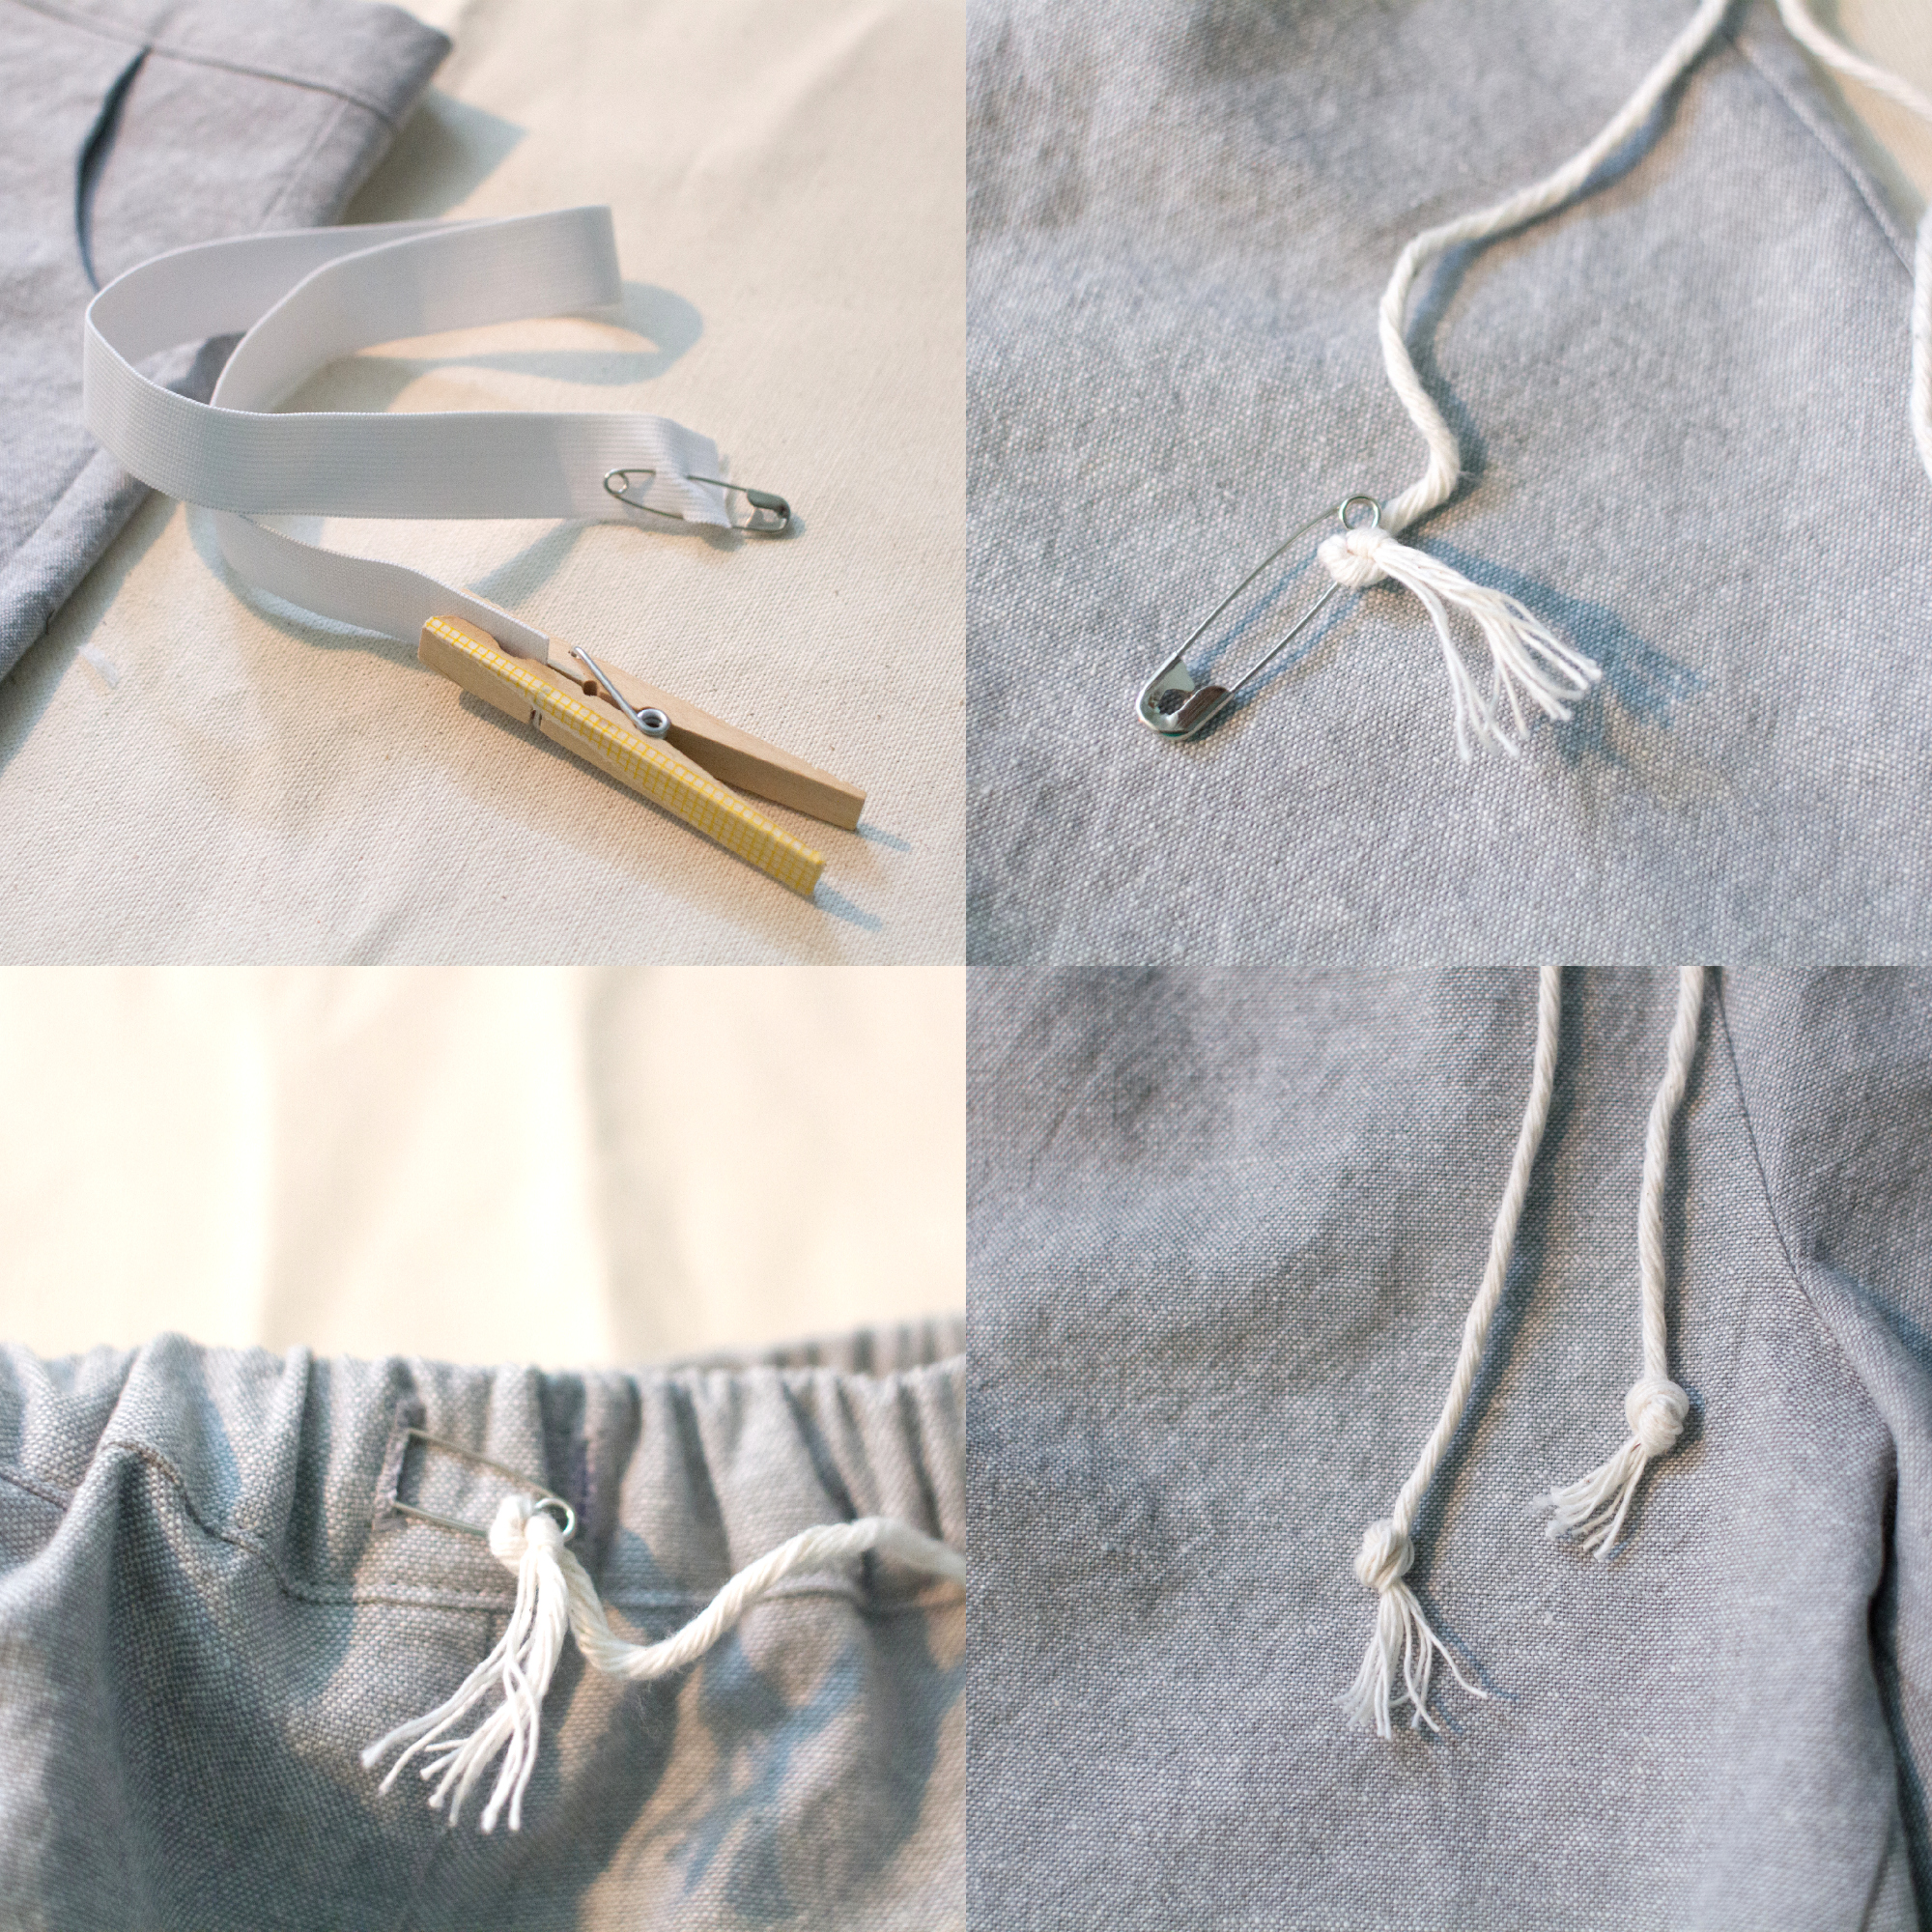
I use a safety pin in one side of the elastic and a clothespin on the other to make sure I don’t lose my tail. Thread the elastic through the waistband as instructed in the pattern. Sew the waistband opening closed. Then take your drawstring and tie a knot at the end; thread a safety pin through that knot. Insert it into one buttonhole and thread it through the waistband, pulling it out through the other buttonhole until even in length. Tie a knot at each end and trim the tassels. Tie in a bow.
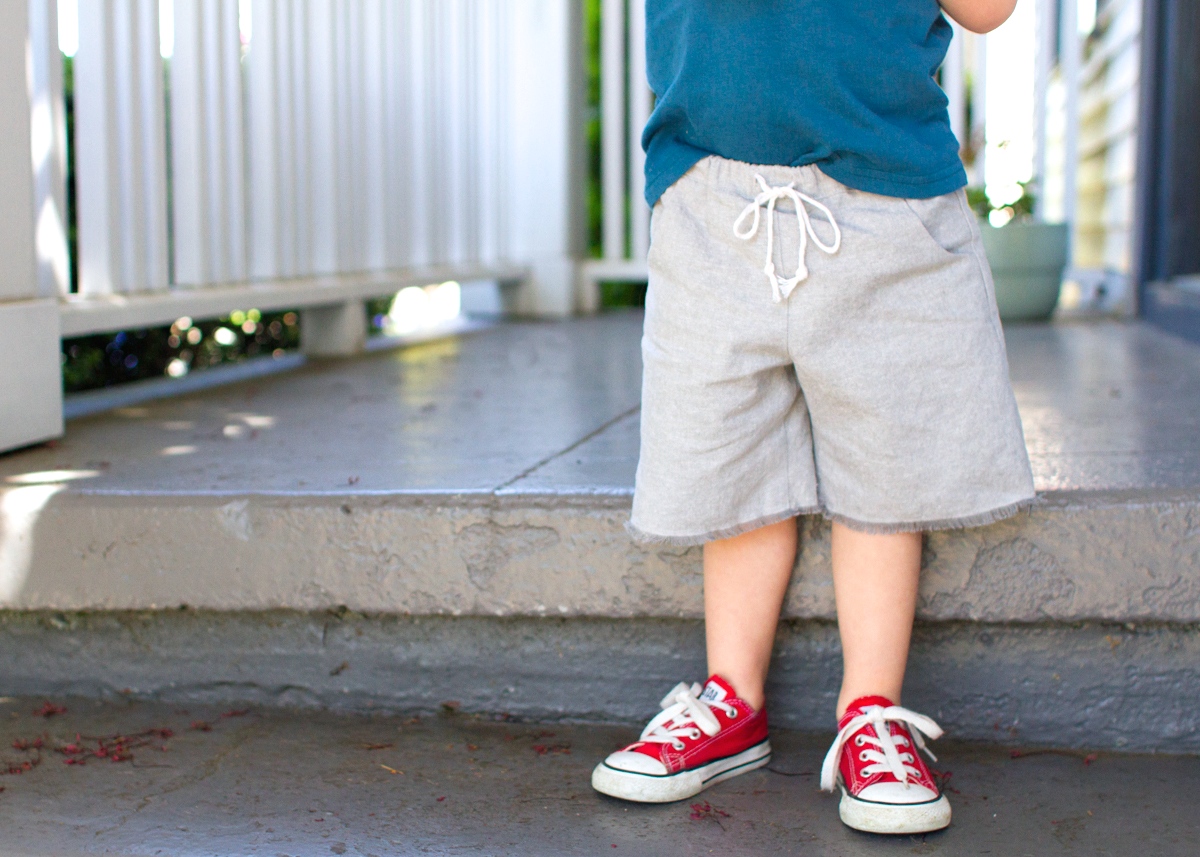
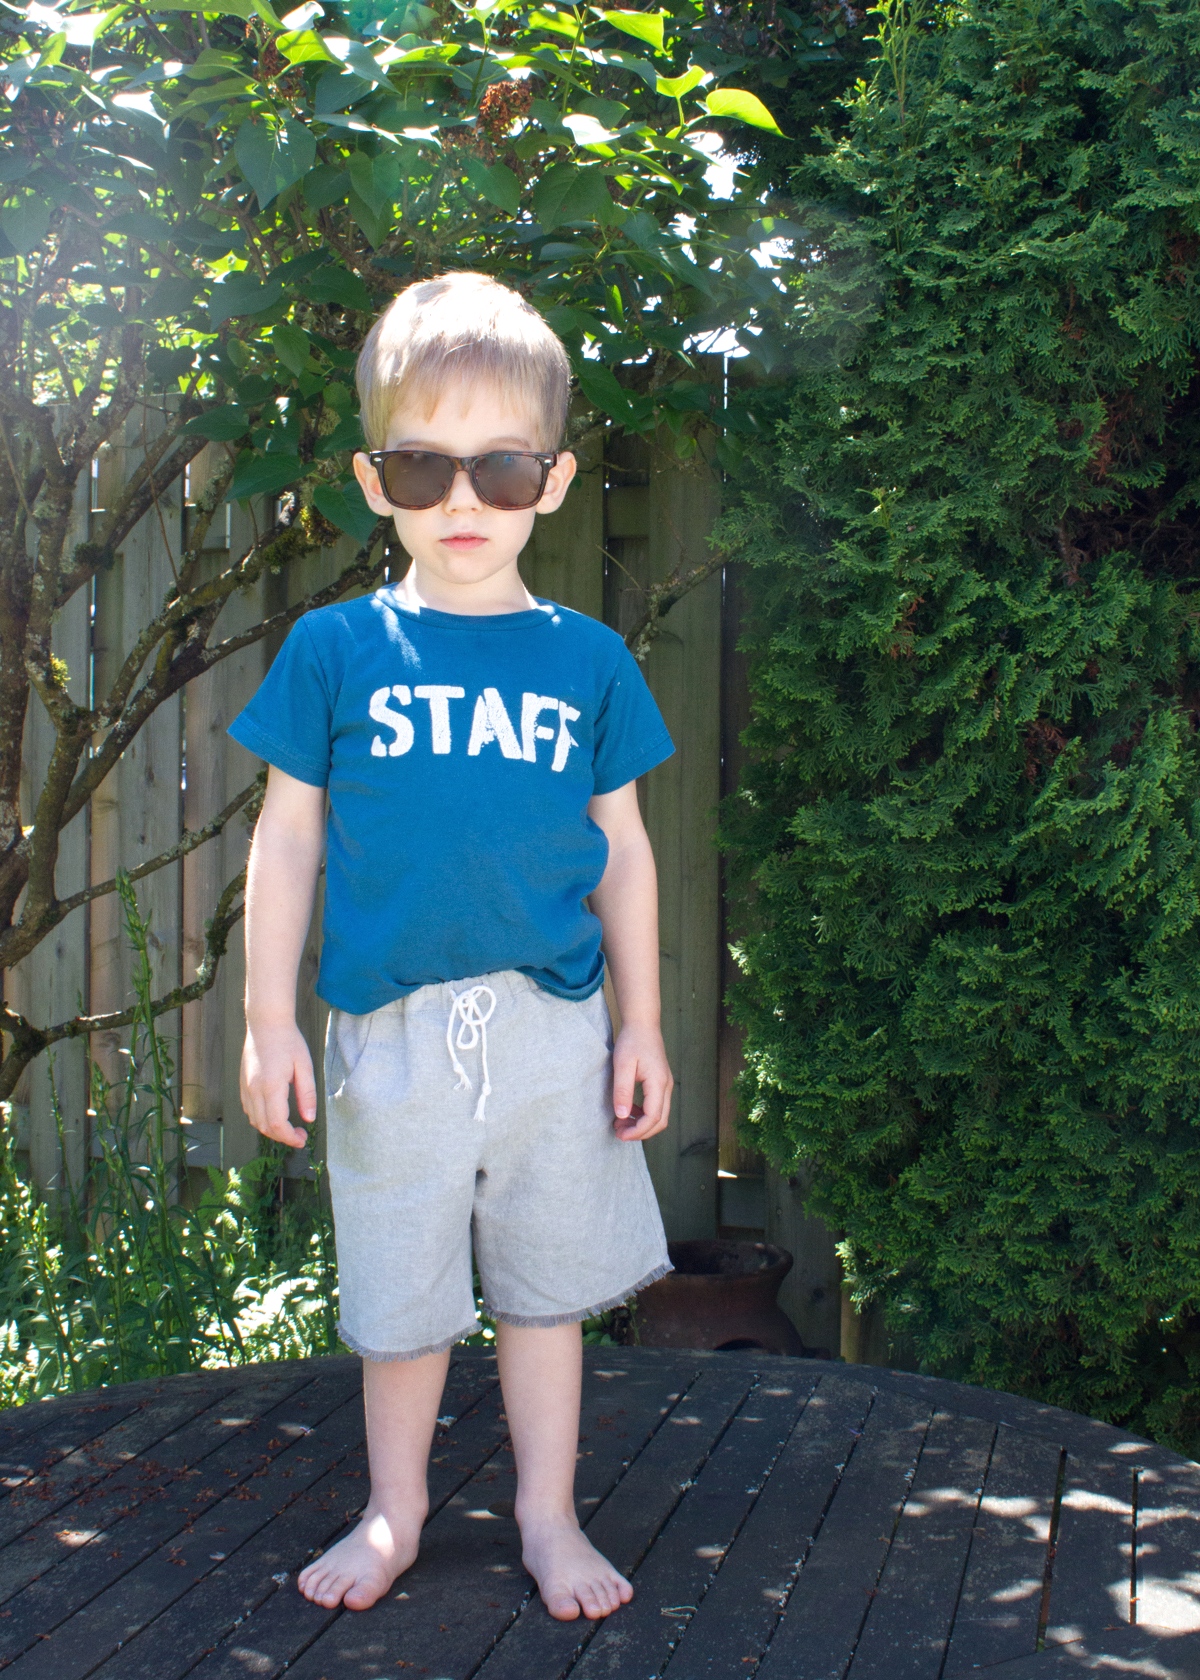
You’re done! Beachy casual shorts for your little guy. Mine are sewn in Essex Yarn Dyed Linen in Steel, from Drygoods Design, and they’re perfectly rumply and summery.
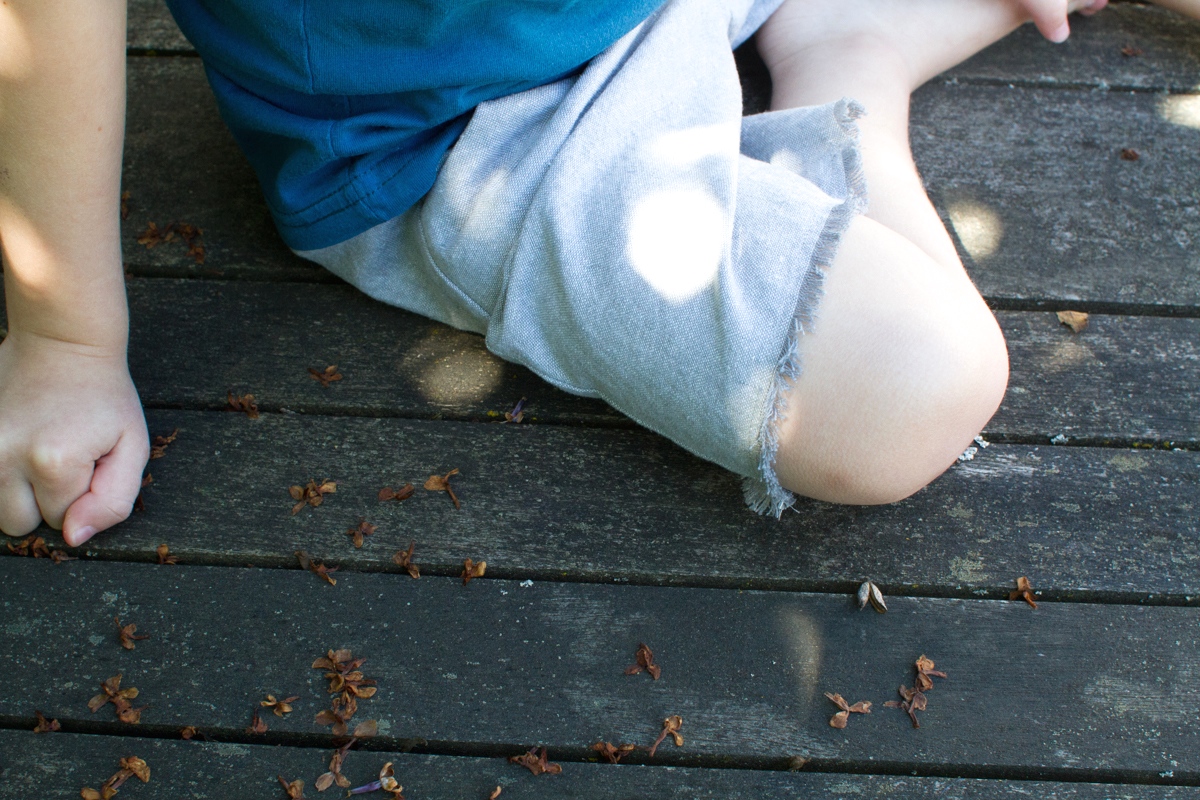
They frayed up nicely after a washing, and my little guy looks like a pretty cool cat in them, too.
If you use this tutorial to hack your Sunny Day Shorts, please add them to the Flickr group! Please let me know if you have any questions.
I love this tut, I already had big plans to figure out adding pockets! Thanks for the help!
I was contemplating adding pockets to some Sunny Day Shorts late last night, but decided I should wait until I was a little more alert. So glad I waited–thanks for the clear tutorial!
These tutorials are always so inspiring. Thank you!!! I’m downloading the pattern now!
Thank you for the clear instructions. My kids will be so happy and we will get more rocks etc home this summer. lol! Just one question, would it be same to add pockets to skirt/skort?
I have another tip to add. Cross your ties when they come out of the casing, so the tie on the left side comes out of the right buttonhole and vice Versa. This puts less stress on the buttonholes when you pull to tie the drawstring. Hope that makes sense.
I’m so glad you all like the tutorial! 🙂
Victoria – yes, this tutorial could apply to any shorts/pants/skirt pattern that has separate front, back, and waistband pattern pieces, and you could also easily change the pocket if you like – slanted, more scooped, piped…endless possibilities!
Very nice, Kristin! He’s so cool! As you are – obviously! xx
I’ve actually been trying to figure out how to add these kind of pockets to some chambray shorts I want to make for O. So glad you did all the thinking for me so I don’t have to waste any brain cells on it now 🙂 and I totally might copy the frayed look. Perfect for summer!
I’m almost done making up a pair of these. Wondering how one would make the pocket deeper…
I was going to make a pair of these shorts tomorrow and was hoping to add a drawstring. Hadn’t thought about pockets but will add them also. Thanks! Not sure I could have figured this out myself.