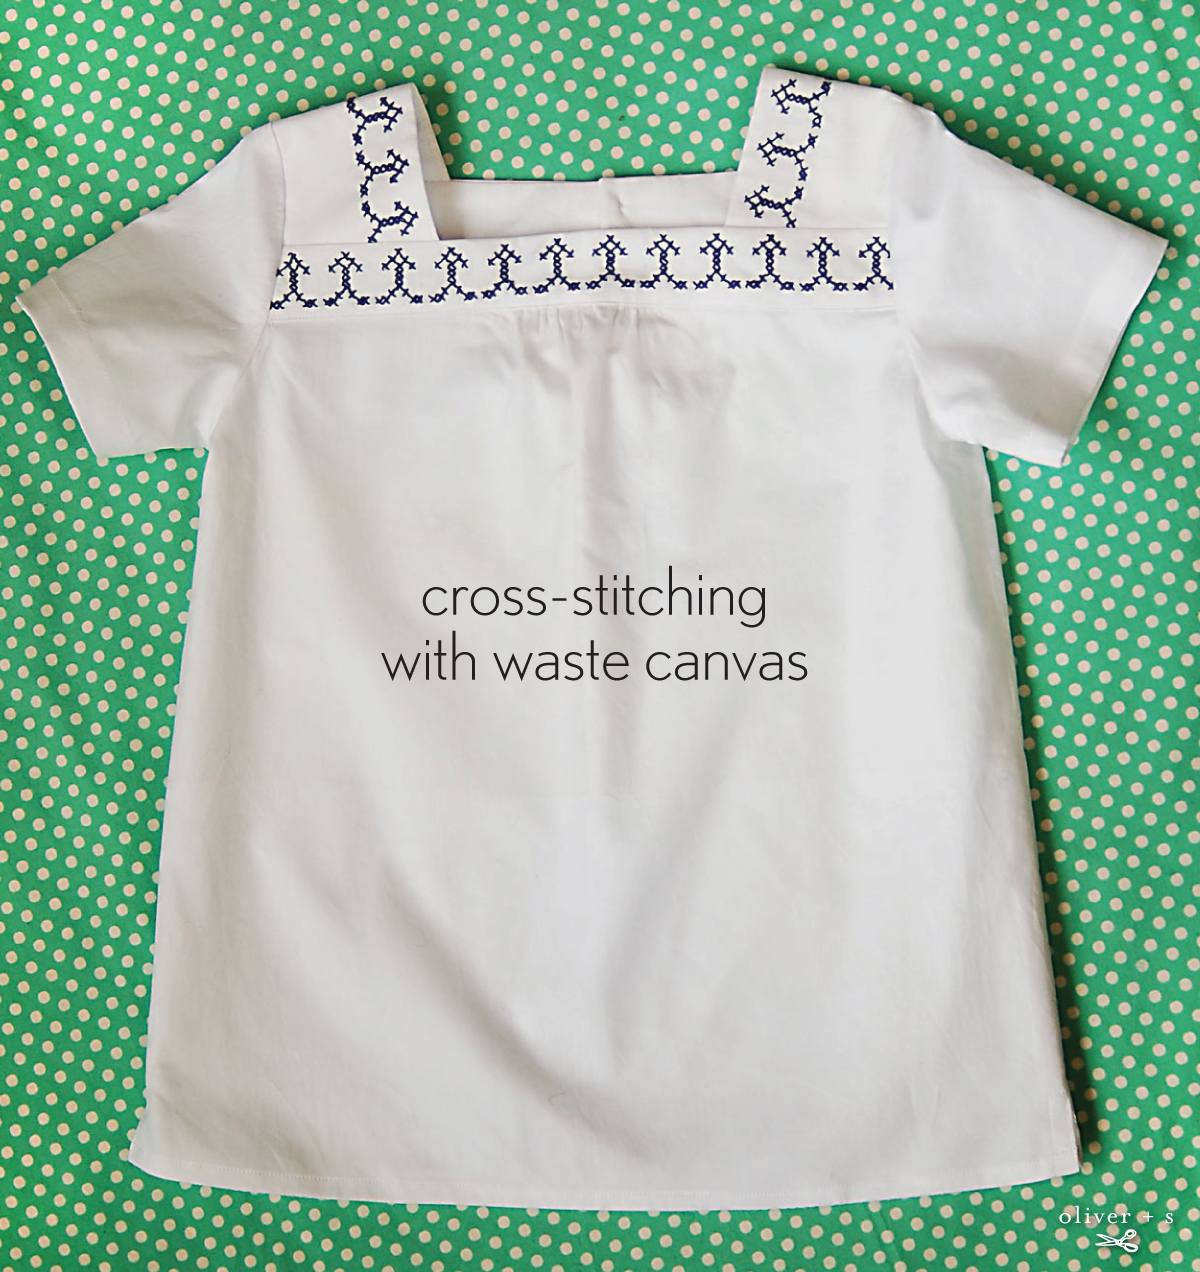
Do you remember cross-stitching? It was a huge crafting trend in the 1970s and 1980s. If you grew up during that time, like I did, chances are that you tried it too. I think a lot of people were introduced to embroidery through cross-stitch, and then many of us sort of abandoned it. Which is too bad, because it can be so pretty! And it’s a great way to customize a sewing project. Like this Croquet Dress (turned into a blouse) for S.
Most of the time for cross-stitch you need a special, very evenly woven base cloth that allows you to count the thread so you know where to stitch. But those base cloth options don’t really lend themselves to apparel. They’re often too coarsely woven and don’t have much drape. Lately I’ve been messing around with cross-stitching onto checked fabrics like gingham and the checked border print from Ladies’ Stitching Club. I’m adding cross-stitch to a quilt that I’ve been working on for quite a while now. (It’s a good movie-watching project.) It’s easy to cross-stitch on checks because the squares of the fabric lend themselves nicely to making an even cross-stitch pattern. But what if you’re using a fabric that doesn’t allow you to easily count threads or give you an easy reference for cross-stitch?
Waste canvas allows you to embroider onto almost anything, even if the threads are too fine or uneven to count (which includes most apparel fabrics). You can use waste canvas to stitch onto a garment that you’ve purchased or sewn (including knits!), or you can embroider fabric before you sew it. We just started carrying waste canvas (see that link, above), and I’ve got a few projects to get you started with the technique and get your creative ideas flowing. You can take this technique in all sorts of directions once you understand the basics. And it’s really easy to design your own cross-stitch patterns, too!
So what is waste canvas? Basically, it’s a heavily starched fabric that you baste to the fabric onto which you want to cross-stitch. You stitch through both the canvas and your “real” fabric, then wet the canvas to relax the fibers, and pull out the threads of the waste canvas, leaving your stitching on the cloth. It’s easy to do, and the result looks terrific!
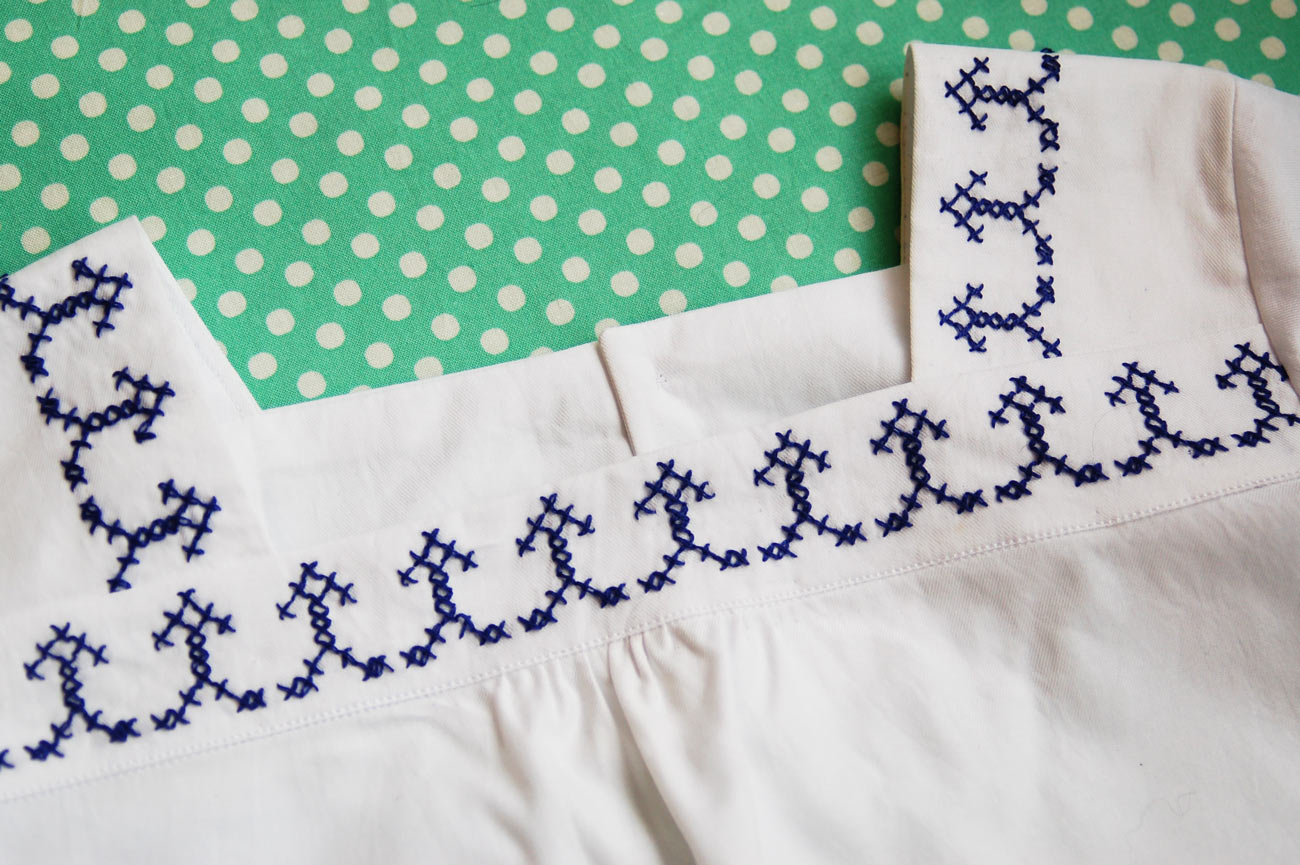
I worked up this really simple border that I stitched onto white cotton before I sewed up View B of the Croquet Dress, which I converted into a blouse for S to wear to school. (School dress code is white, light blue, khaki, and navy, and I try to play by the rules. I hate to get into trouble.) I used waste canvas to cross-stitch onto the front yoke and shoulders before I cut out the pattern and sewed it up. It didn’t take very long, and I think it makes the blouse look really special with it. Want to try? Let’s do it!
What You’ll Need
Pick a garment or a fabric that you want to sew into a garment. I used a white shirting cotton, but you could use almost anything: linen, quilting cotton, corduroy, denim, jersey, chambray. Pick whatever catches your fancy. You’ll also need a sharp embroidery needle, waste canvas, and embroidery floss or perle cotton. Most cross-stitch patterns call for two strands of embroidery floss, which comes in skeins of six strands, but because this waste canvas has about eight squares to the inch, it’s large enough that you could also use perle cotton and get great results, too. I used two strands of floss for my stitching, so feel free to try either type and see what you prefer.
And you’ll need a cross-stitch pattern, which you can design yourself on graph paper or you can use the one I designed, which can be found here.
How to Cross-Stitch with Waste Canvas
1. To get started, cut a piece of waste canvas, keeping in mind that you’ll need at least the same number of squares on your waste canvas as you have on your cross-stitch pattern, and it’s always a good idea to cut the waste canvas a bit larger than the pattern itself. If you’re planning to sew the dress or garment after you’ve embroidered it, cut your base fabric larger than the pattern piece itself. You’ll finish cutting it to match the pattern piece after you’ve embroidered it.
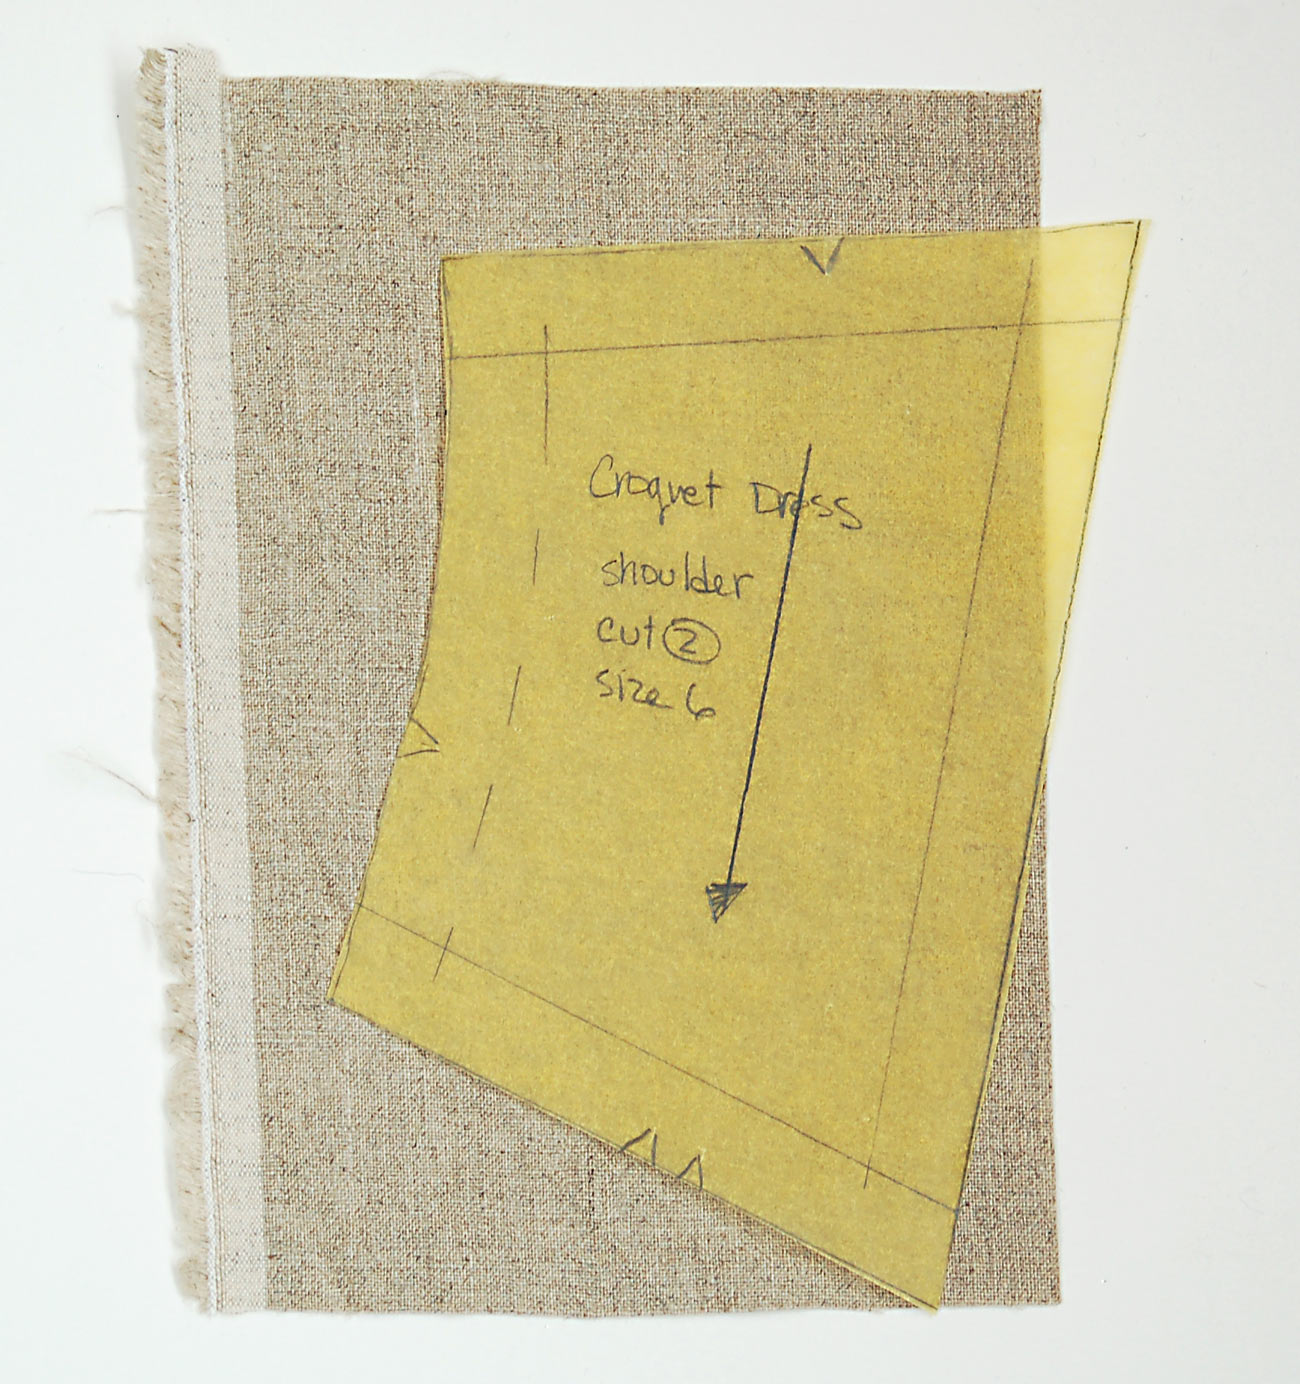
I like to trace any sewing pattern pieces I’ll be using onto sheer tracing paper, and I mark the seam allowances so I can easily line up the pattern piece and still see my stitching through the paper. That way I can be sure I stitch enough to cover the area that will show when the pattern is sewn. Also, it helps me to center the pattern when I’m finished stitching and ready to cut out the pattern piece.
I should also point out that it’s sometimes a good idea to fuse a lightweight interfacing to the wrong side of fabrics where you plan to embroider. This is especially a good idea if you’re working with knits, since they stretch, as well as any other fabric that can’t easily support embroidery: silk, gauze, etc.
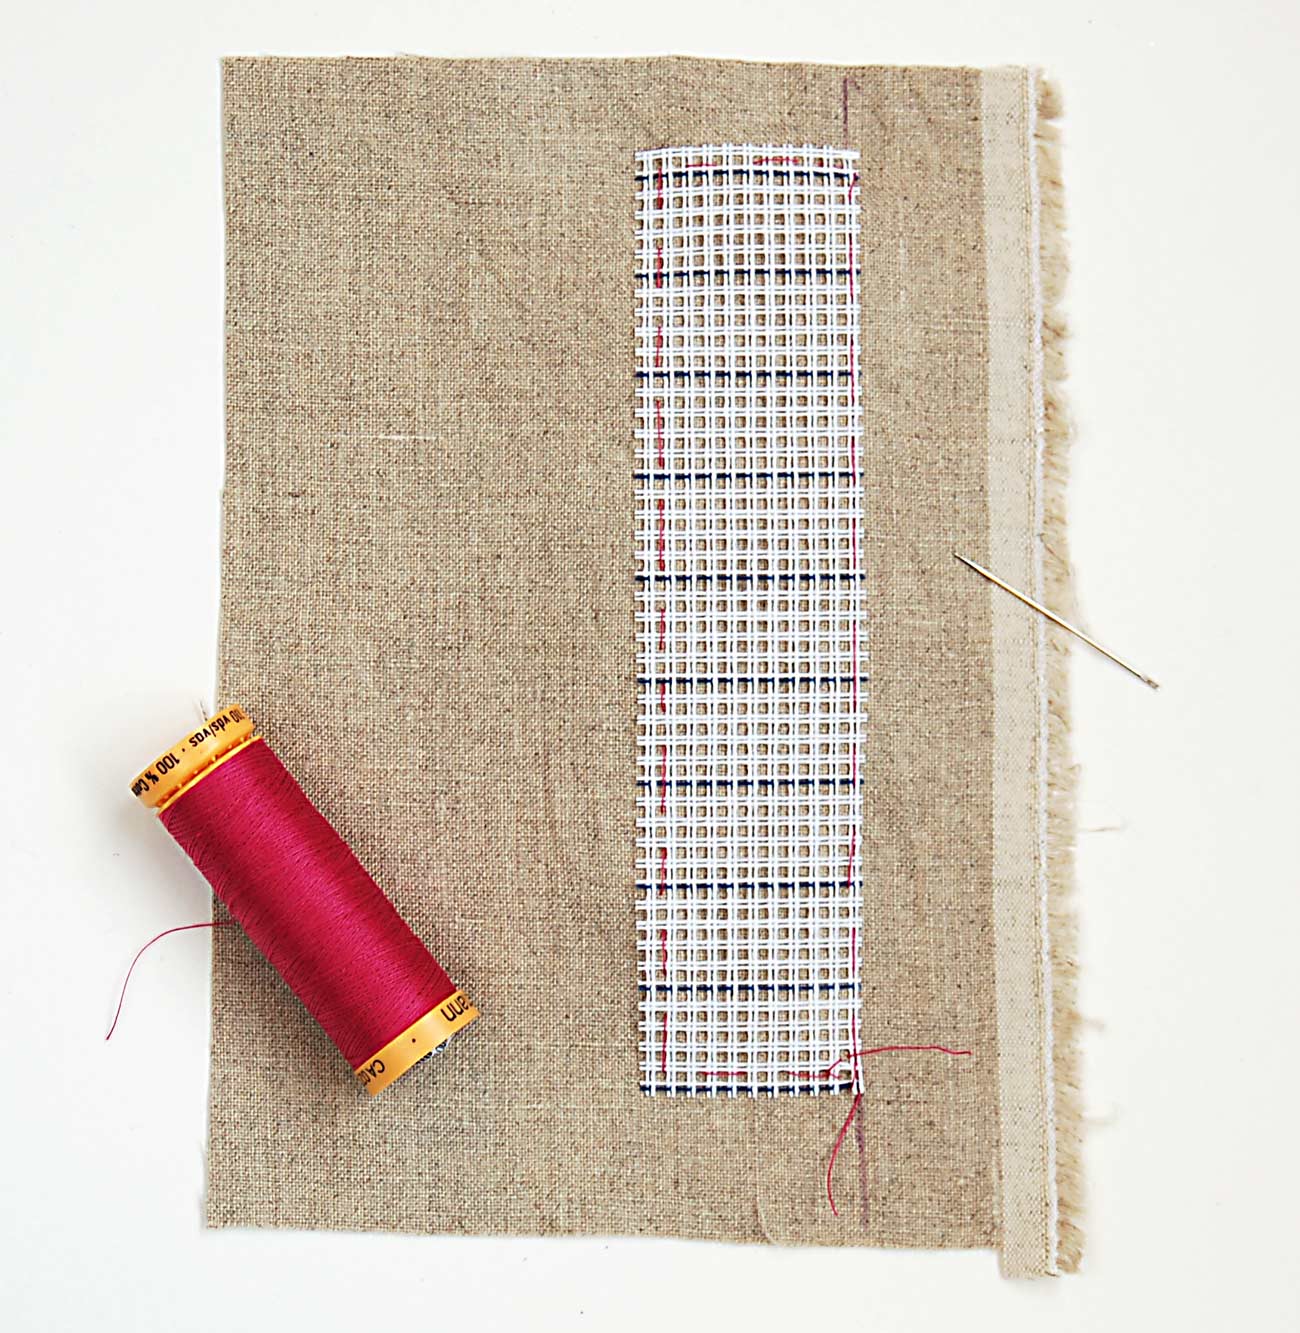
2. Determine approximately where you’ll want your stitching to go on the fabric. Then find the grain on the fabric and mark it with chalk or a fabric pen so you can baste the waste canvas in place. You can see two grain lines drawn in water-soluble fabric pen at the top of this photo, with waste canvas basted to the fabric along one of the grain lines.
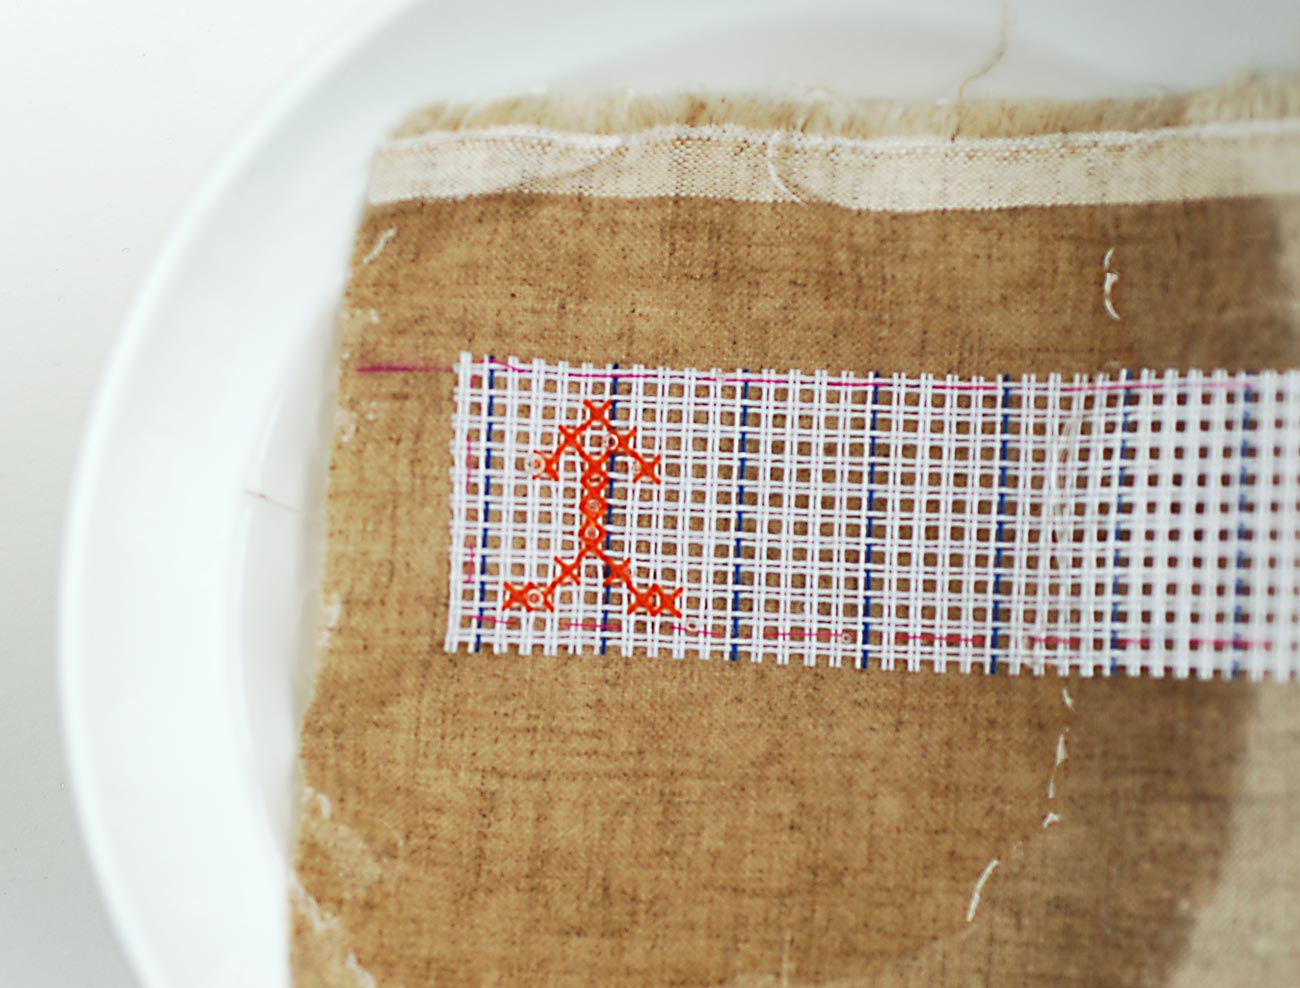
With waste canvas, the “holes” for stitching are the points where four canvas thread intersect, as shown here where I’m stitching the first X to show you.
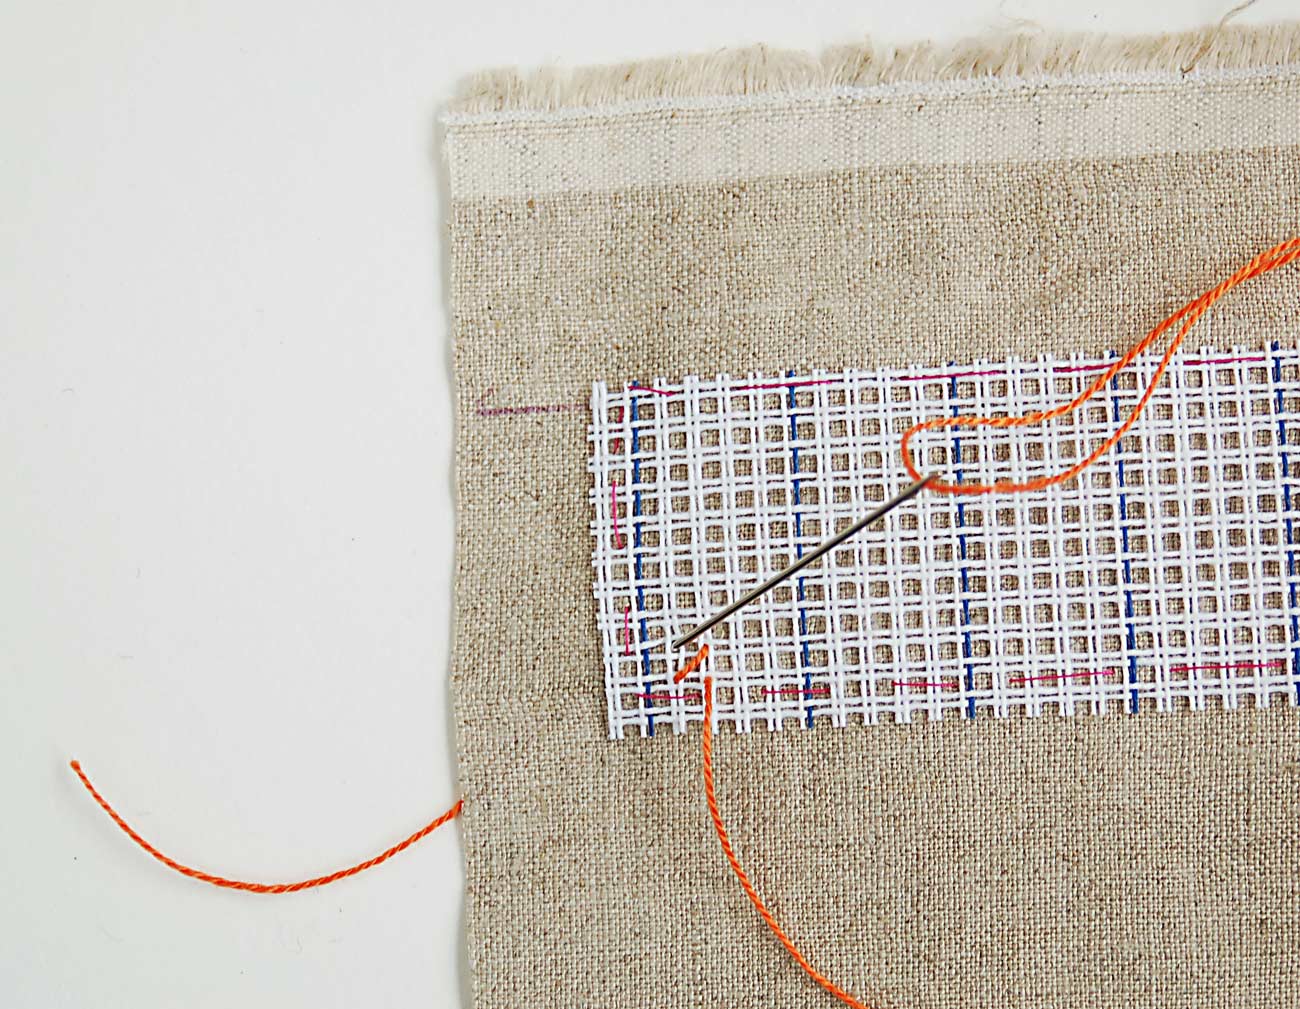
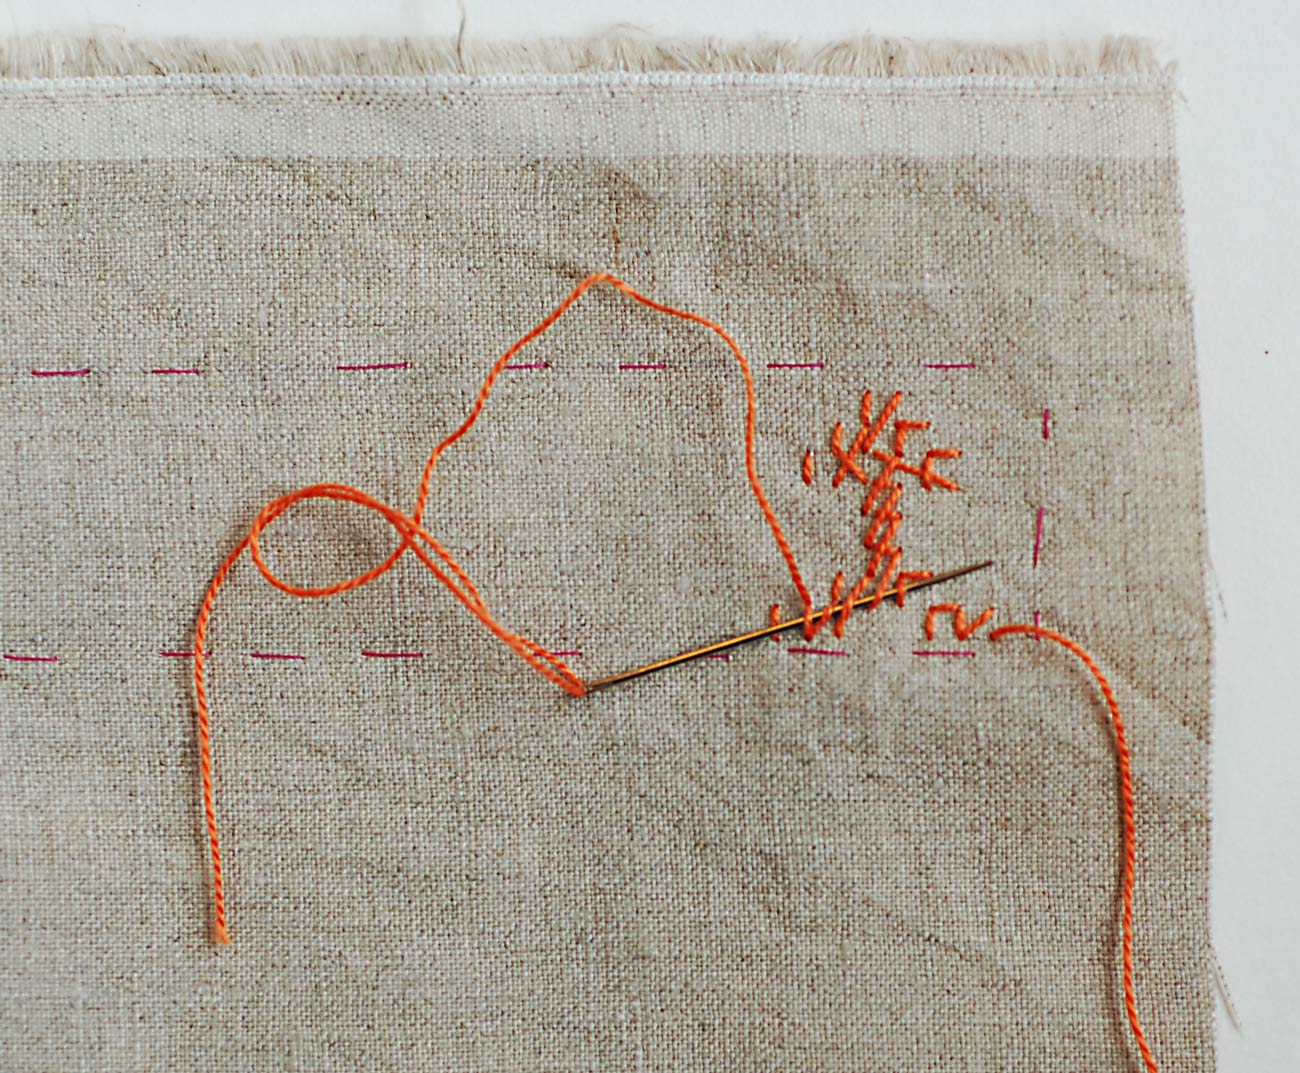
Don’t make a knot at the end of your embroidery thread when you start stitching. Instead, leave a tail several inches long. We’ll go back and weave the tails into the back of the stitching when it’s finished.
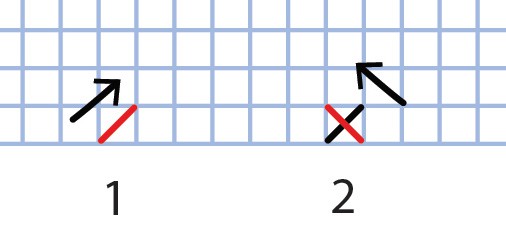
3. Cross-stitch always starts by stitching the first section of the X from the bottom left to the top right. Then you stitch the other side, starting at the bottom right and moving to the top left. If you’re stitching just one or two stitches in a row, you can stitch each X individually, but sometimes you’ll stitch only the first half of the X and then come back to finish it later. Here are some illustrations I worked up to show you what I mean. This is how I stitched the border on the blouse.
Here are some diagrams, so it’s clear:
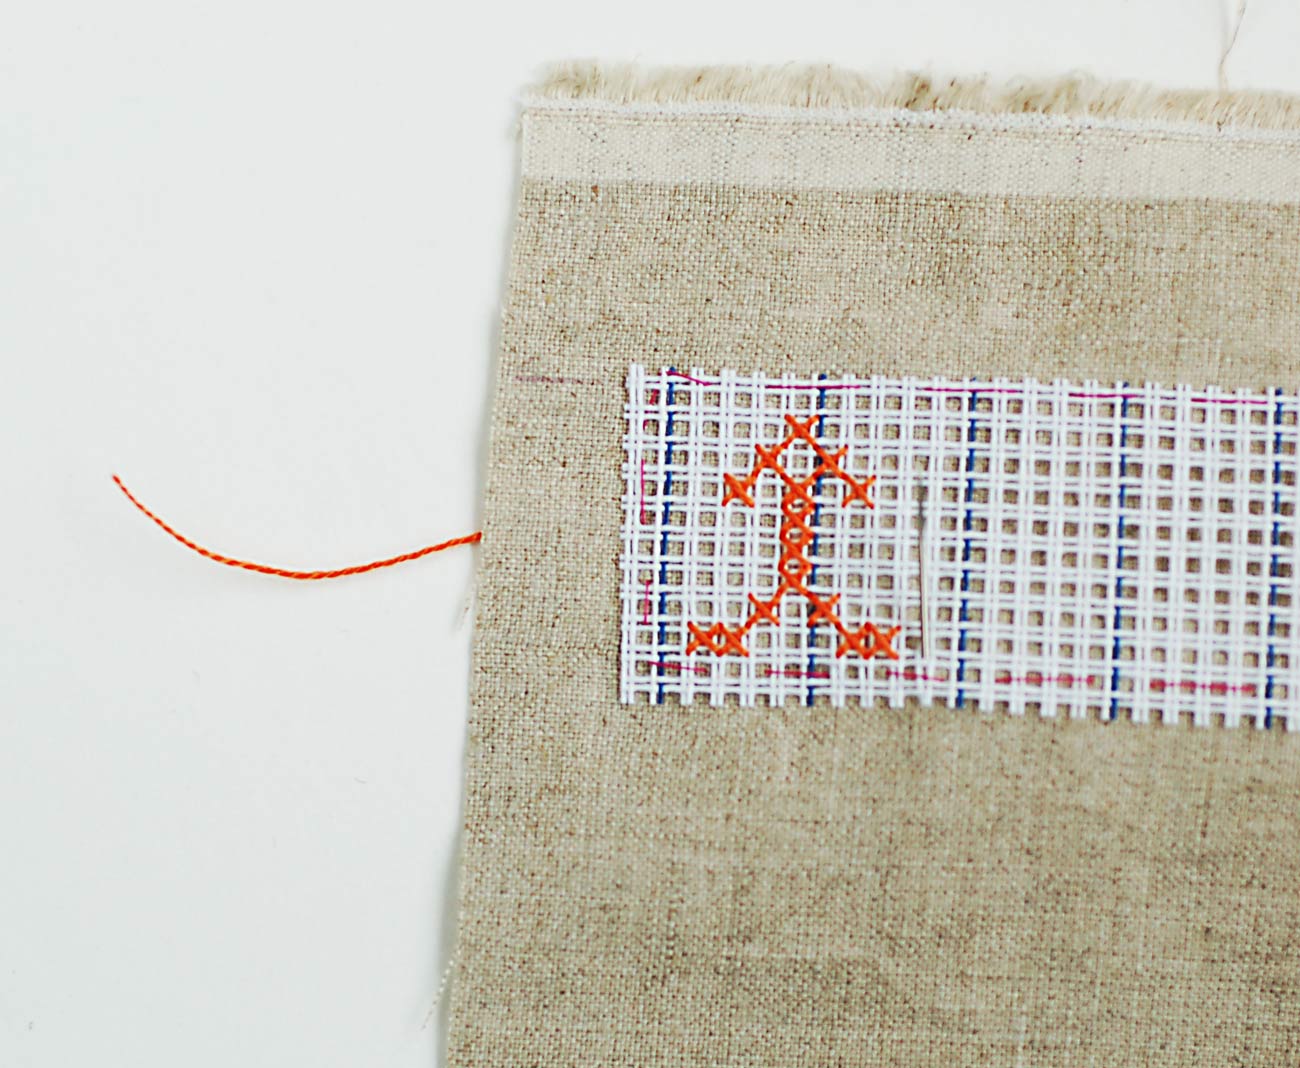
Here is one repeat of the border pattern stitched on the waste canvas:
Here are some illustrations I worked up to show you how to stitch this border.


And here are a few photos, just so you can see it in action:
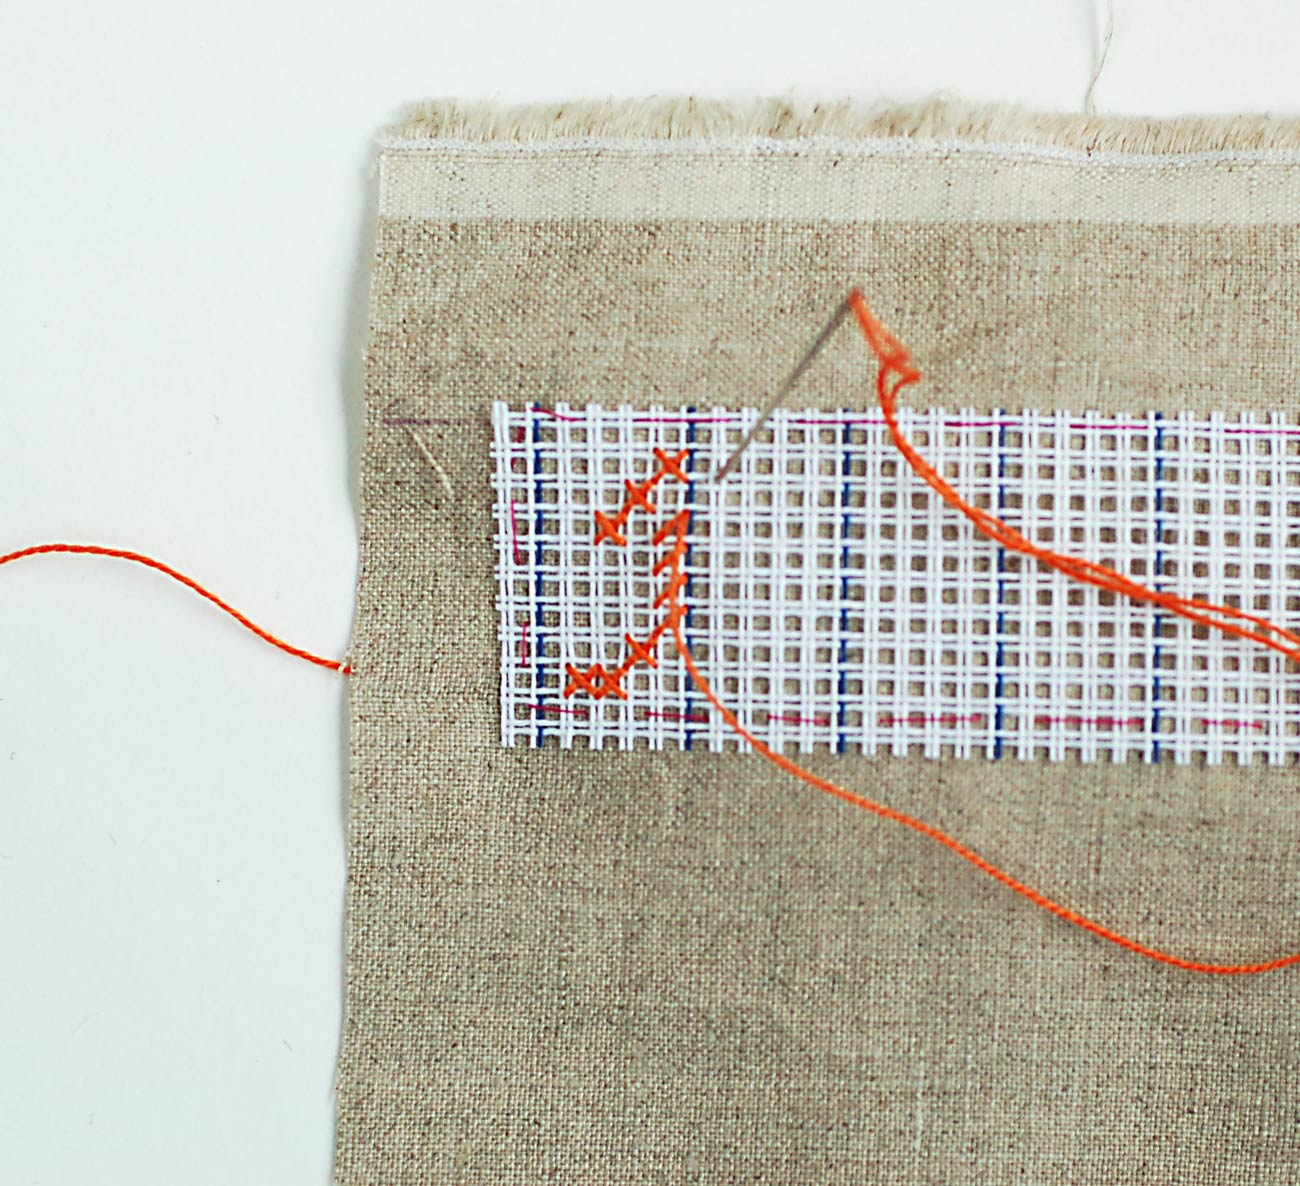
So you can see that some of the X’s remain un-crossed for part of the pattern, and you’ll cross them on your way back down to the bottom row of stitching. You’ll work your way up the chart on one side, and then come back down on the other, crossing the X’s at the center on your way back. If you crossed those X’s on the way up, you’d be coming back out the same spots you just entered, which wouldn’t work very well. (Try it and it will make sense.) But feel free to experiment and do whatever works best for you, too.
Repeat the border as many times as needed. It’s OK if your stitching is a little longer than the area that you need, as long as the stitches are within the cut line on the pattern piece.
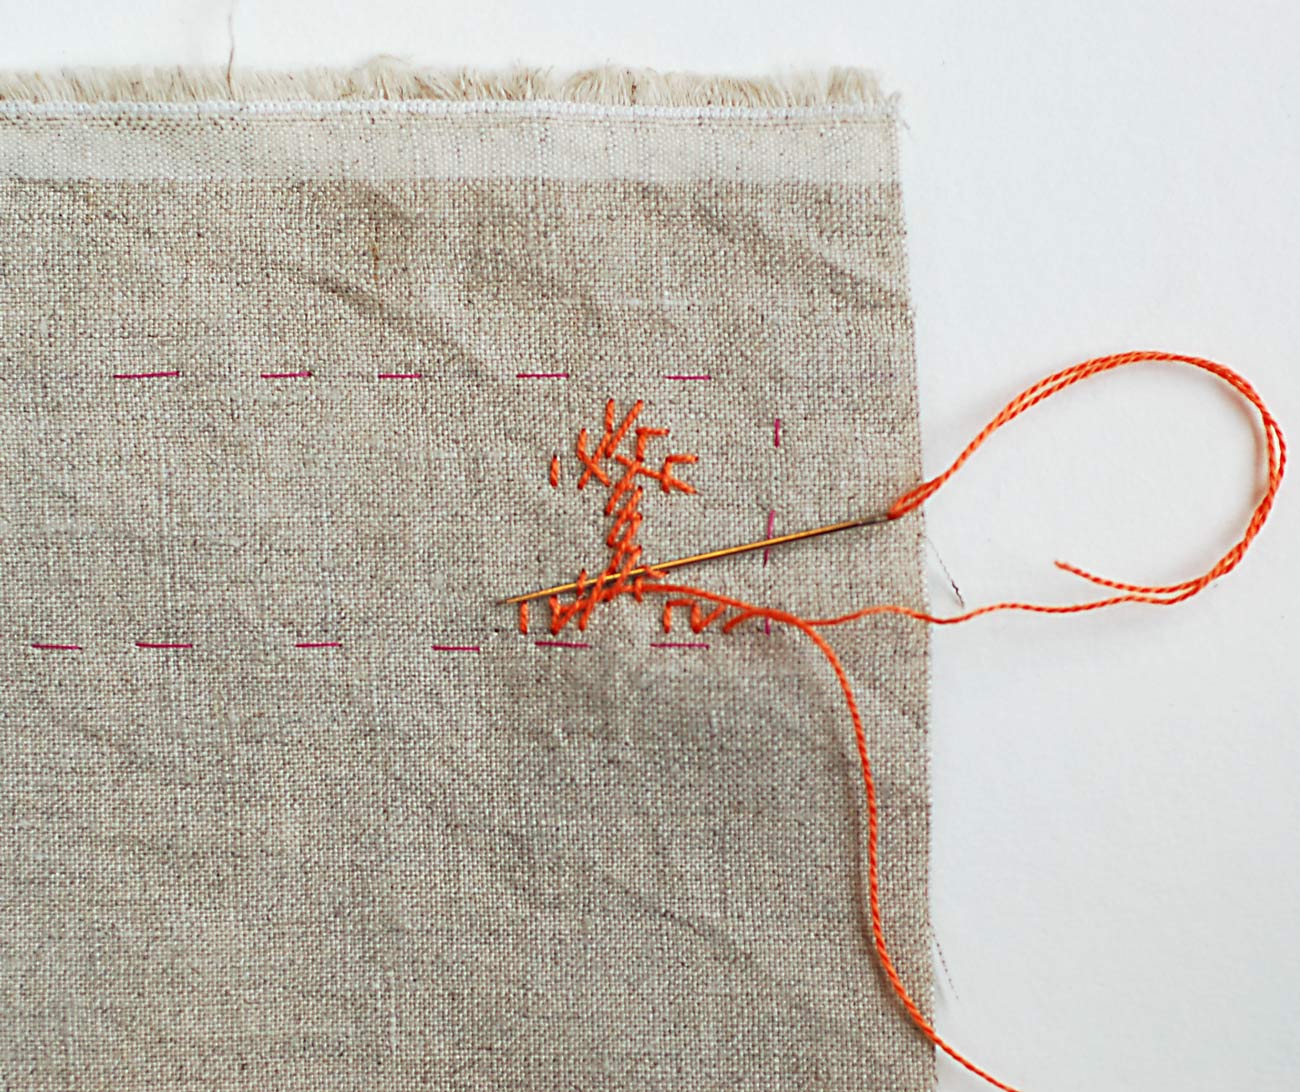
4. When you’re finished stitching the border or you run out of thread, use your needle to weave the thread tails into the back of the stitches. The back will look sort of like this:
Weave the ends in, changing direction at least once to help hold the tail in place. Start a new thread if you need it, weaving the thread tails into the back of the stitching when you’re finished.
Then trim off the extra tails, and you’re finished.
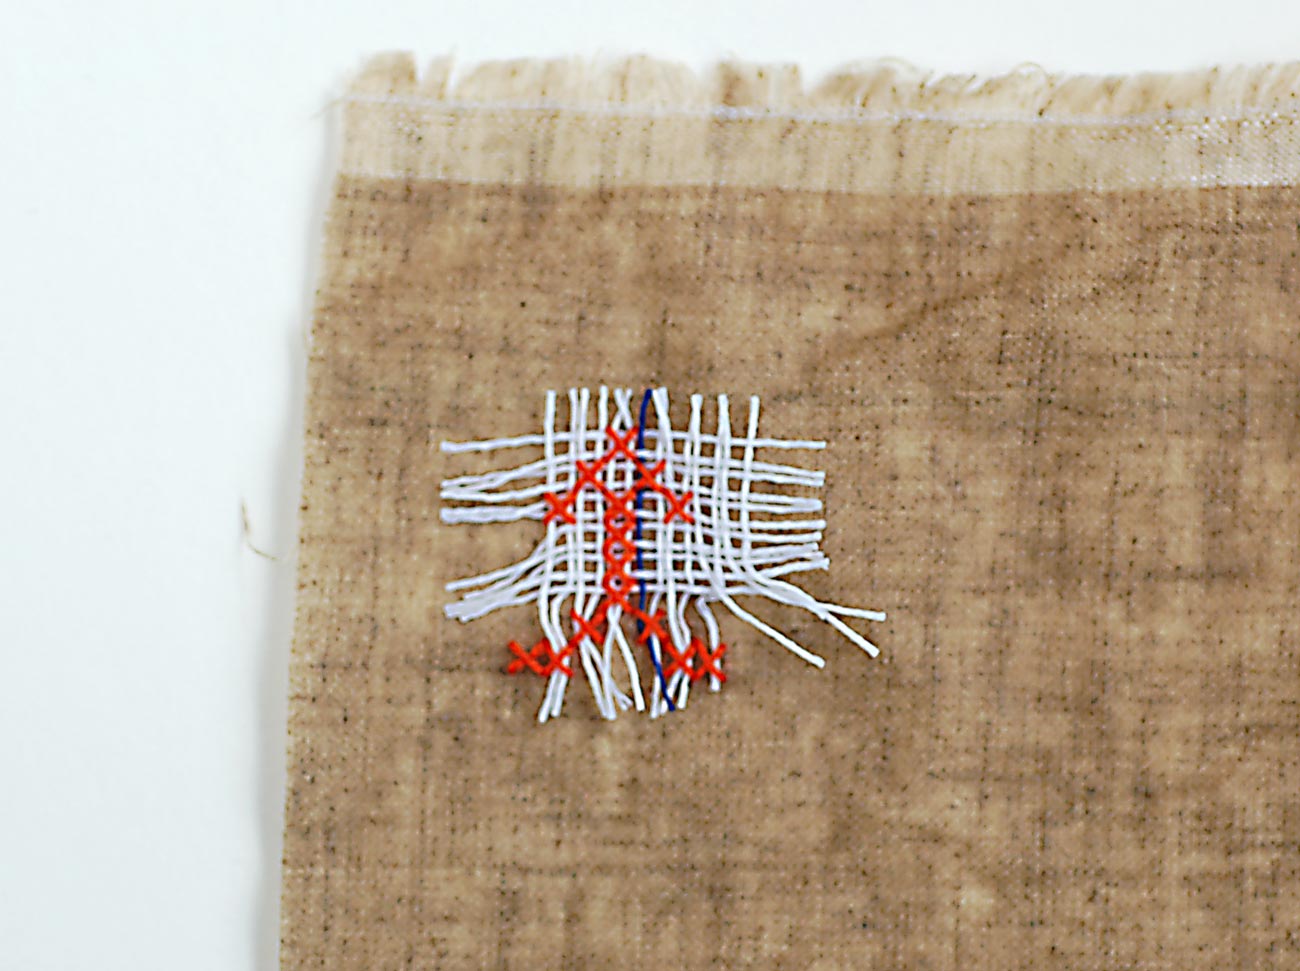
5. Then you can immerse the entire piece in cool water. I like to add a little vinegar to the water, just in case the embroidery thread colors bleed. The vinegar will prevent colors from running and ruining your stitching and your fabric. And the starch in the canvas will soften in the water.
6. Blot the fabric a bit, remove the basing stitching, and you can gently and carefully pull the threads of the waste canvas out of the stitches. If you’ve accidentally stitched through any canvas threads (it happens to everyone!), clip the canvas thread near the stitched spot and that will make it easier to remove.
7. When you’re all finished, let the fabric dry and then you can line up your pattern piece over the cross stitching to center it and cut it out. It’s nice to see the embroidery through the pattern piece so you can get it lined up just so. And don’t forget to keep your seam allowances in mind! You can see mine marked here.

Then you can sew the pattern the way you normally would.
Easy, right? If you’re like me, your brain is already going all sorts of directions with this. Embroidered yoke on a Popover Sundress? Yes! Cross-stitching on pretty florals for an Easter dress? Of course! Embellishing a plain ribbon hem on a Lazy Days Skirt? Why not? You can do all sorts of great stuff with this.
And since I suspect you’re going to want to try designing your own border, I’ve added some extra graph paper to the downloadable border pattern so you can give it a try without digging out some graph paper from the back of the closet.
We’ll have more fun little stitchable patterns for you soon, too.
Oh, Liesl, you are reading in my mind! I have been looking for that kind of product for many years! Cross-stitching was one of my first experience with a needle! I used to cross-stitch everything! And even if it was not the trend in 2008, I embroided my baby daughter’s duvet cover (http://autempsautomne.canalblog.com/archives/2011/02/14/20391584.html). Cross-stitching was a peacefull activity during my pregnancy!
Your duvet cover is simply amazing !
Perfect!
I remember cross-stitching from my childhood – my aunts and mother used to do this a lot. Then it become “old-fashioned” (so they said it) and (sadly) I never managed to learn it. I’ll definitely give a try it now – I can envision quite a few ways to add cross-stitching to O+S patterns 🙂
So pretty.
I remember when my son was a baby and Peter Rabbit clothing was all the rage. I couldn’t afford it so I made a tiny wee linen coat and cross stitched Tom Kitten on to it.
I adore the Croquet blouse with the stitching,you are so clever.
Fabulous! Love it! The last cross stitching effort I did was a Jemima Puddleduck picture times about ten and made into a cot quilt for my daughter. That was ten years go and I have never tried cross stitch on clothing!
That looks really pretty. I learnt to cross stitch as a child but I’ve always been a bit afraid of it ending up wonky to give it a go on clothes. Time to grasp the nettle/needle and give it a go.
How interesting I have never heard of waste canvas before but I have seen this technique done with water soluable canvas. Once you have cross stitched your design you simply immerse the fabric and your design in warm water and the canvas dissolves leaving only your stitches.
Gracias, muy bonito y se ve como facil de hacer , intentare hacerlo para los cositas infantiles.
working on a small cross stitch project on 14 count aida, finished size 3 7/8″ x 5 1/3″. how do I choose waste canvas size? is it going to on the same size as the aida count or different? thank you.
wow i use to do cross stitch as my first sewing …love it …never have heard of the canvas that dissolves ..but again haven’t done any for ever now i bet you know what i will be looking for so i can get back into it…wow…just love this…you always come up with all the things the rest of us want to do….thank you very much…
I don’t think the canvas dissolves, just the starch in it so you can pull out the threads.
Years (and YEARS) ago I used waste canvas to decorate sweatshirts for my niece for her birthday each year. When she aged out of those I stopped. I love to make childrens’ wear and have done hand embroidery on many. But I never thought to combine waste canvas embroidered repetitious designs on standard cotton fabrics. Touché! By the way, I’ve used your patterns many times but just decovered you online. Goody!